
VIDEO: Easy LED Light-Up Card
Hello crafty friends, It’s Julia here and today I am back with a new video for Heffy Doodle! This time I made a super fun light-up card and I also tried trapped inking for the first time!
![]()
![]()
![]()
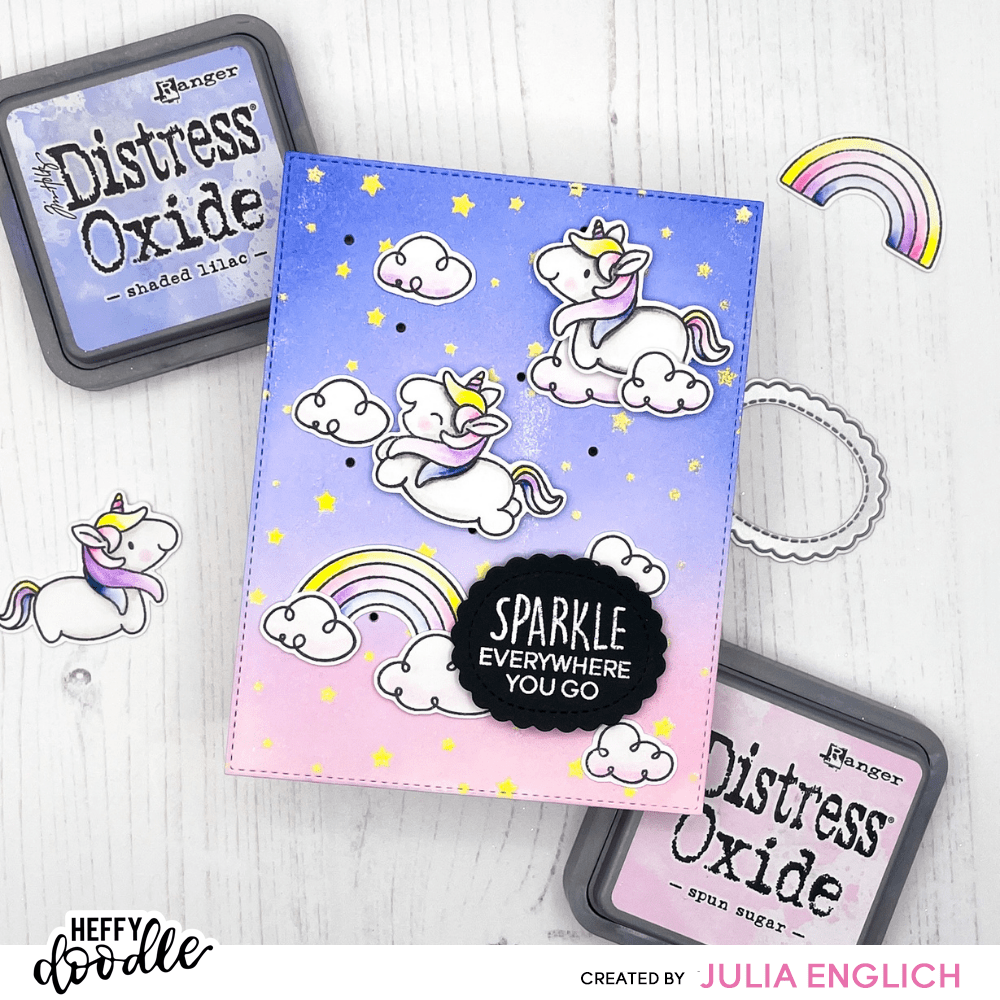
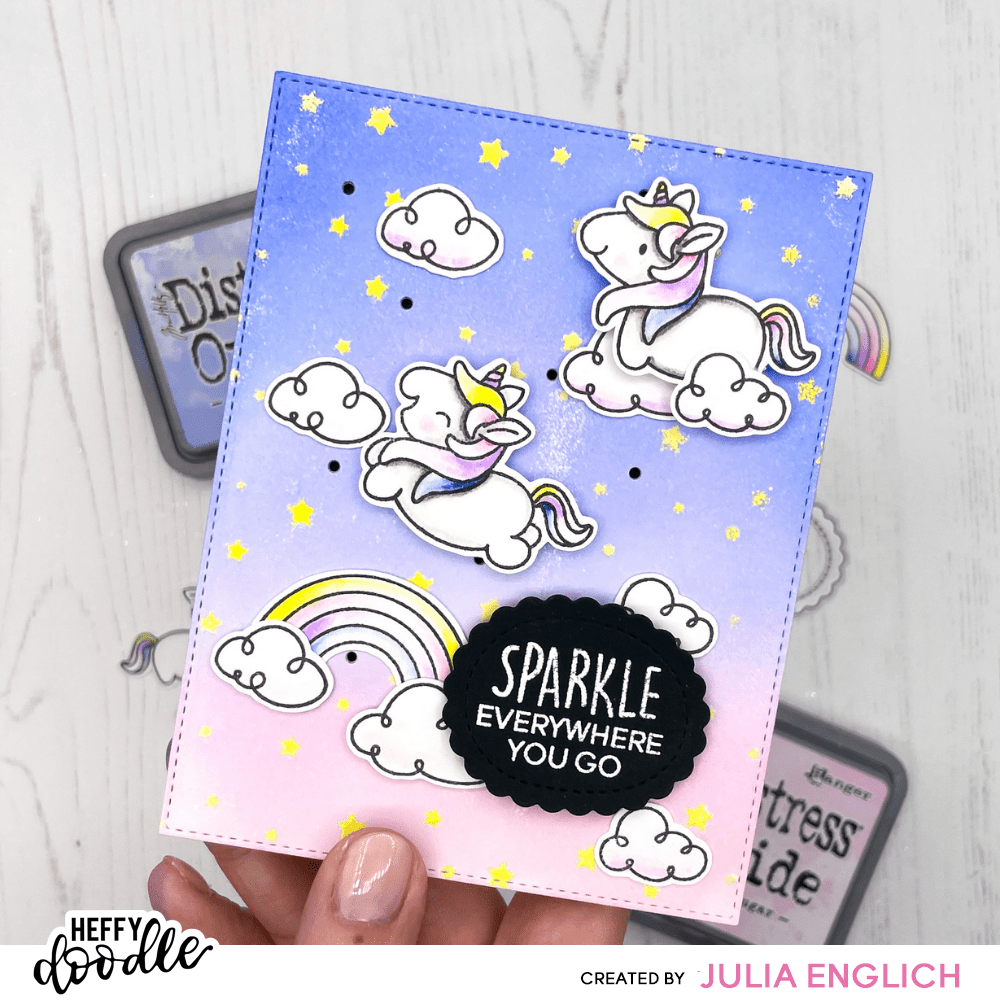
First, I die cut a panel of Bristol Smooth cardstock using the largest of the Imperial Stitched Rectangle dies and I added the Starfall Stencil overtop and ink-blended the stars with Scattered Straw and Squeezed Lemonade Distress Oxide. After that, I cleaned off the stencil with a paper towel without moving it and then I pressed a Versamark ink pad onto the stencil. I removed the stencil carefully, sprinkled the panel with clear embossing powder, and melted it with my heat gun. I cleaned off my stencil really well to remove the Versamark. Then, I ink blended the entire panel with Spun Sugar, Kitsch Flamingo, Shaded Lilac, and Blueprint Sketch Distress Oxide. I wiped the excess ink away from the stars using a paper towel and they stayed nice and shiny!! This technique really is so much fun!!
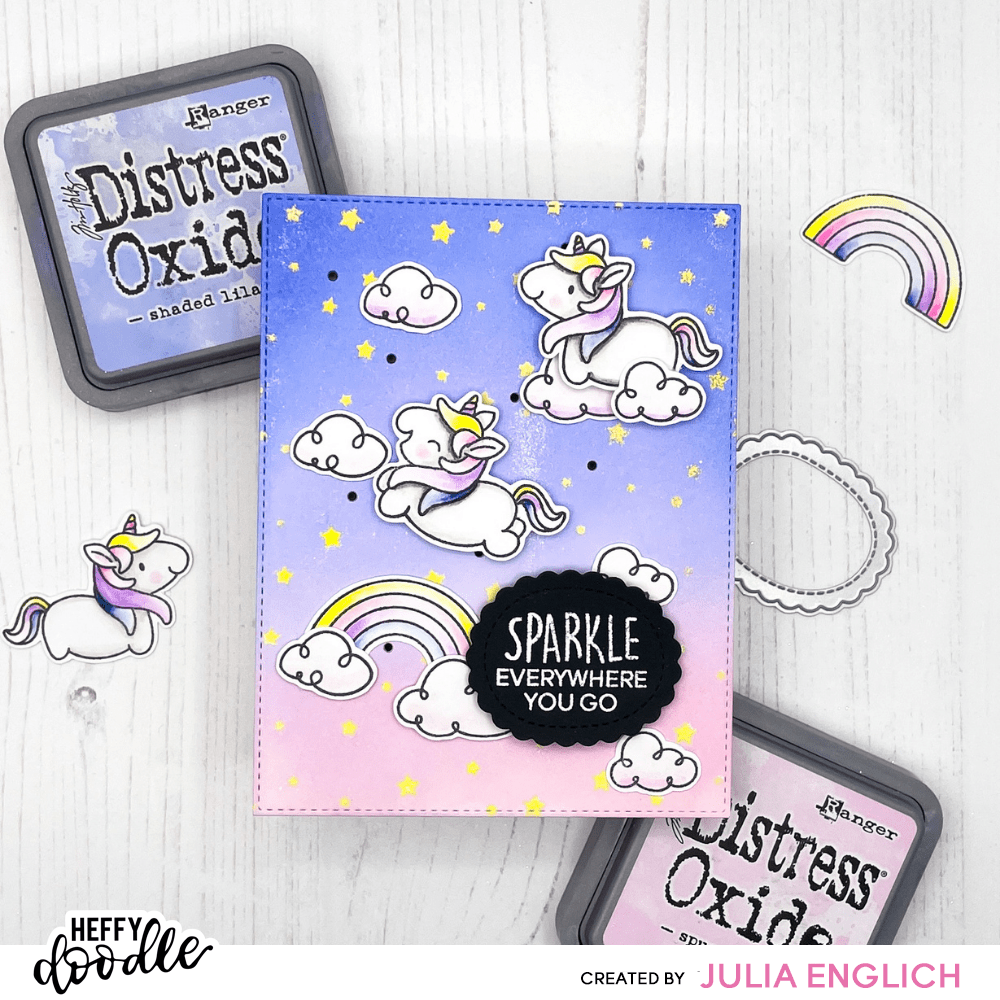
After that, I stamped out the images from Fluffy Puffy Unicorns onto Strathmore Bristol Smooth cardstock and I colored them in using Zig Clean Color Real Brush markers.
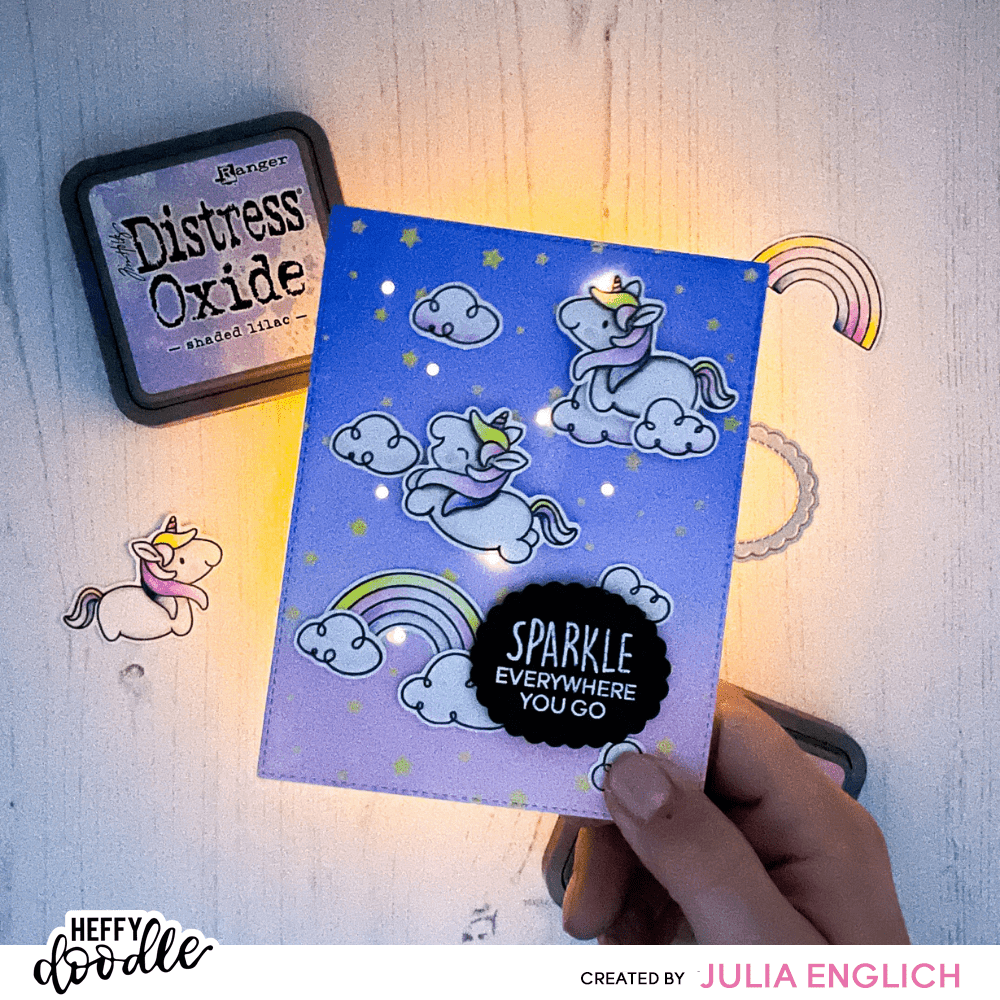
Then it was time for my light-up mechanism! I cut a panel of black cardstock to the same size as my background to black out any areas I didn’t want to light up. I lined up both panels and held them in place with a bit of tape. I used a single 1,5 mm hole punch to create my little star cutouts. I using liquid glue to add the panels together and then added foam tape on the back around the edge. I inserted the battery that comes with the Pearblossom Press EZ-Lights and I adhered it to the back of my card. Then I just lined up the three LEDs using regular tape. I removed the backing of the foam tape and added an A2-sized card base to close the mechanism. And that was it! Just add a battery, adhere, and the light-up part is done. I was just amazed at how easy it was!
For my sentiment I used one of the Greetings from Fluffy Puffy Unicorns and heat embossed it on black cardstock. I die cut the sentiment out using the Pebble Sentiment Add-On dies to add the pretty scalloped border! Now it was time to add all my adorable little images. I used Glubert and foam squares to adhere them.
If you want to see all the steps you can click on the YouTube video below:
I had sooo much fun making this fun light-up card!
Thank you so much for visiting the Heffy Doodle blog! I really hope you enjoyed it and I will see you again soon! Have an amazing day!