
Tooth Fairy Sliding Window Card

Hello again! This is Megan and I am back with another interactive card design to share with you. Without further ado, let’s get started!
I simply cannot get enough of the adorable fairies in Absotoothly Awesome! Add in the sweet tooth image from the same set and I could not resist making this Tooth Fairy Sliding Window Card. Believe it or not, I only used three stamp sets for the card today. (I know! Haha!)
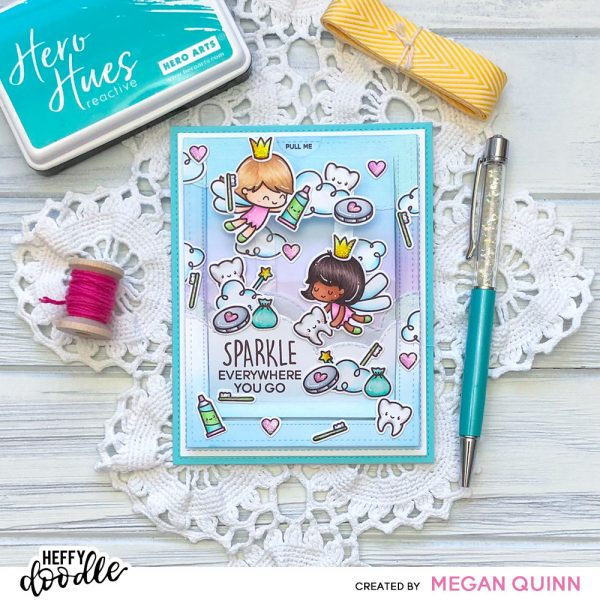
To begin, I stamped images from Absotoothly Awesome, You Go, Gull, and Fluffy Puffy Unicorn Stamp Sets onto Alcohol Marker Friendly Cardstock using a dark brown hybrid ink. I then colored the images using Copics and die cut them with the coordinating dies.
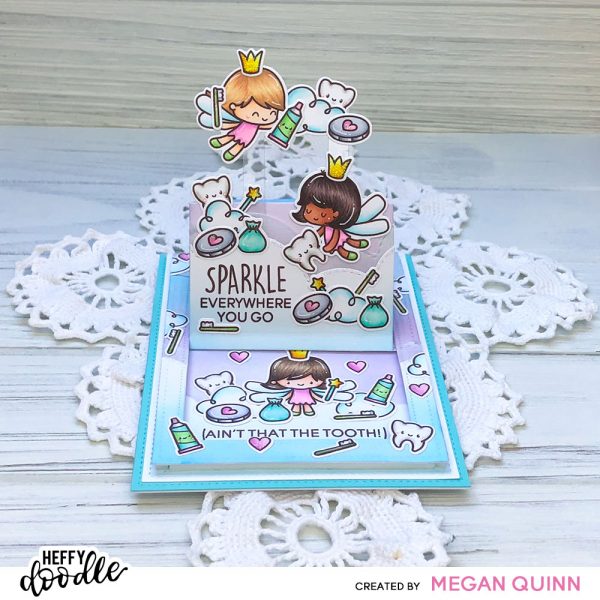
For the sliding mechanism, I used the Sliding Window Die from Sunny Studios to die cut a piece of Bristol Smooth Cardstock and a piece of White Cardstock. I then die cut the regular white panel using the Silver Linings Cloud Border Dies to create the cloud bank at the bottom of the card.
Next, I die cut two pieces of White Cardstock using the largest and second largest rectangles from the Imperial Stitched Rectangle Dies. I masked the edges of the larger rectangle using Memo Tape and ink blended all three panels with Salty Ocean, Picked Raspberry, and Wilted Violet Distress Inks moving from the top to the bottom. I ink blended Salty Ocean and Tumbled Glass Distress Inks onto the cloud die cut also. (To achieve a soft blend, I used blending brushes and a very light hand.)
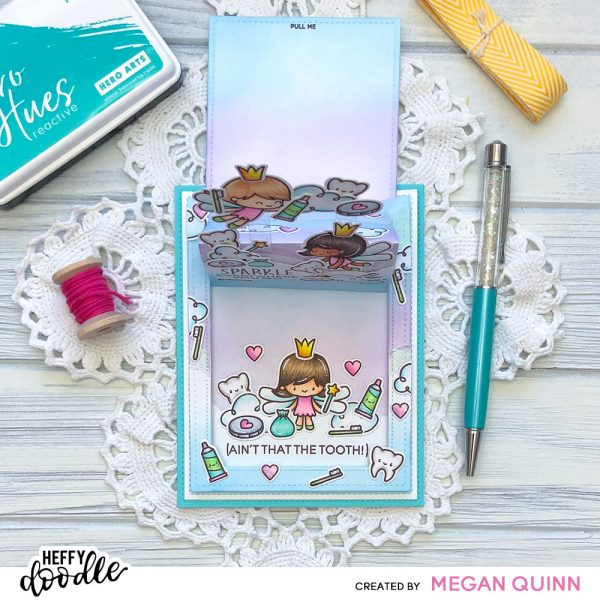
Once I had constructed the sliding window, I attached it to the larger rectangle panel using 3mm Deep Foam Tape. (Since the foam is deep, I only needed one layer of it to allow the sliding window to move freely. Such a time saver!) I then adhered the clouds onto the front panel using double sided tape. To adhere the images, I used glue dots and liquid adhesive. I wanted the uppermost fairy to appear to be flying, even when the sliding window was moving. To do this, I trimmed down two small pieces of acetate using my paper trimmer and adhered her to them using glue dots. So fun!
I just love how this card turned out and I hope that you do as well! Thank you so much for stopping by the Heffy Doodle Blog and spending time with me today! Bye!
Megan