
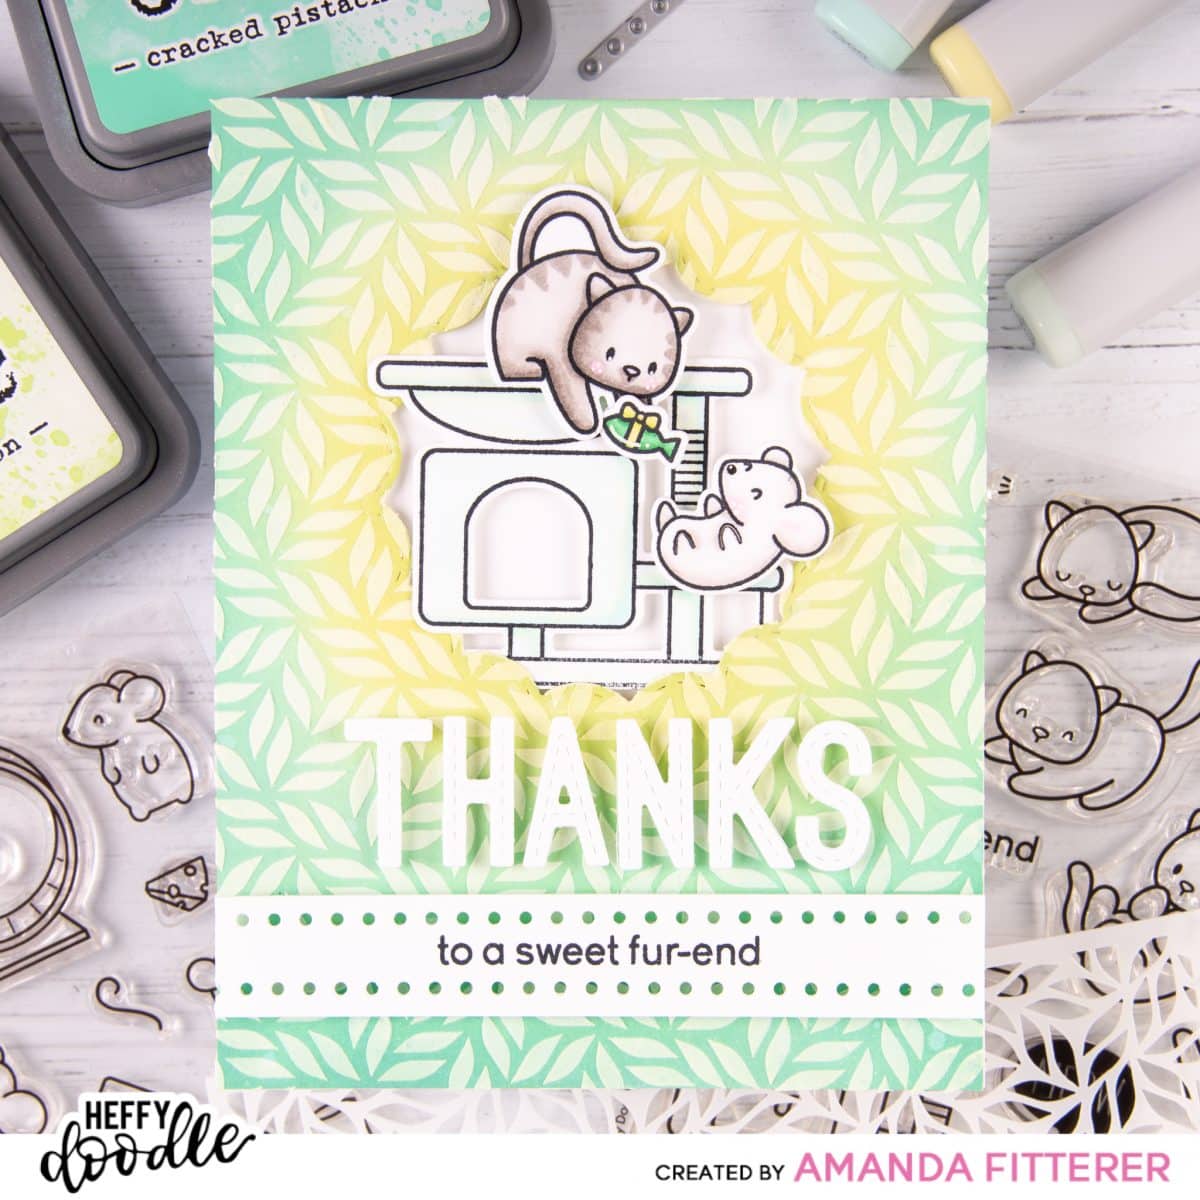
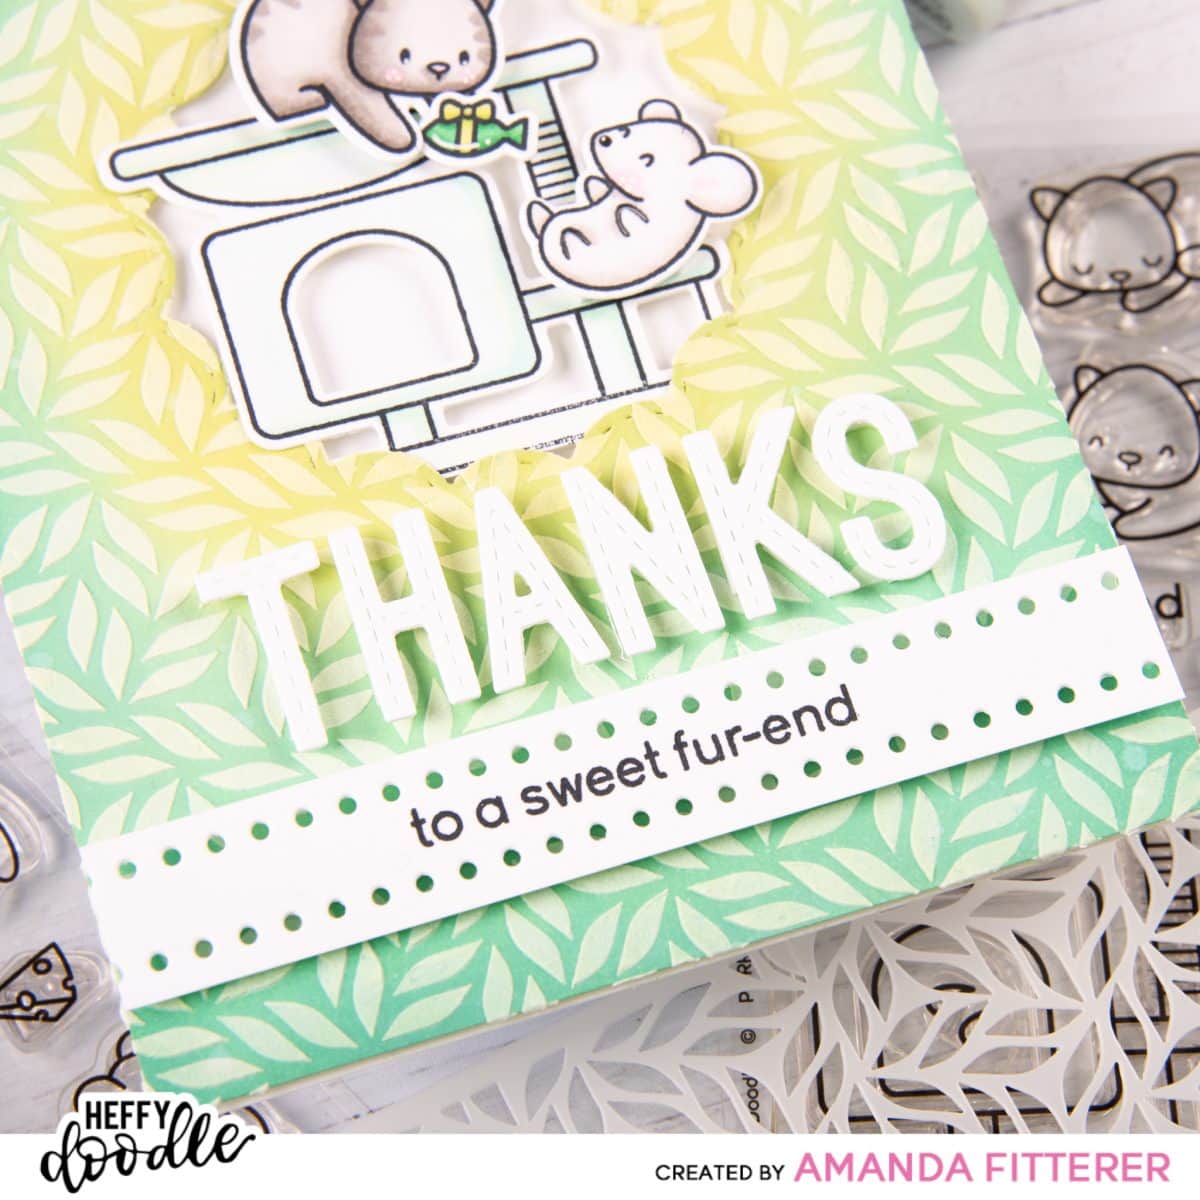
Thanks to a Sweet Fur-end!

Hello crafty friends!! Happy Wednesday and Cardmaking 101 day!!
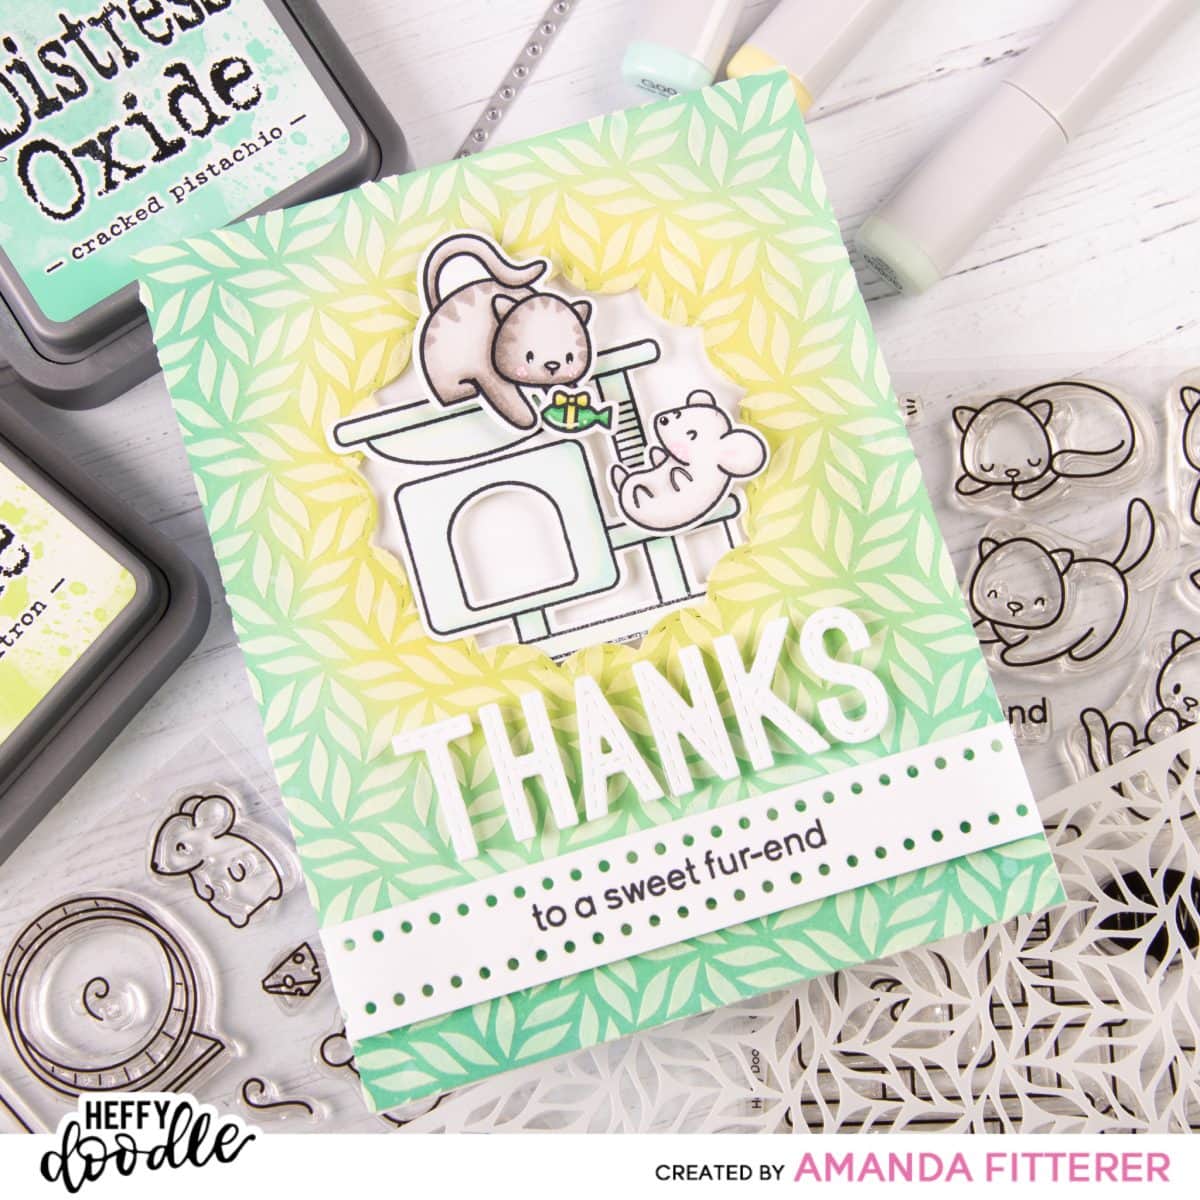
I’m going to share some step-by-step process photos of this adorable Thank You card!
Quick Links: My Instagram | Purrfect Day Stamp Set | Hello Squeakheart Stamp Set | Stitched Alphabetters Dies | Lovely Little Borders Dies | Fancy Foliage Stencil | Fancy Nancy Frames Die
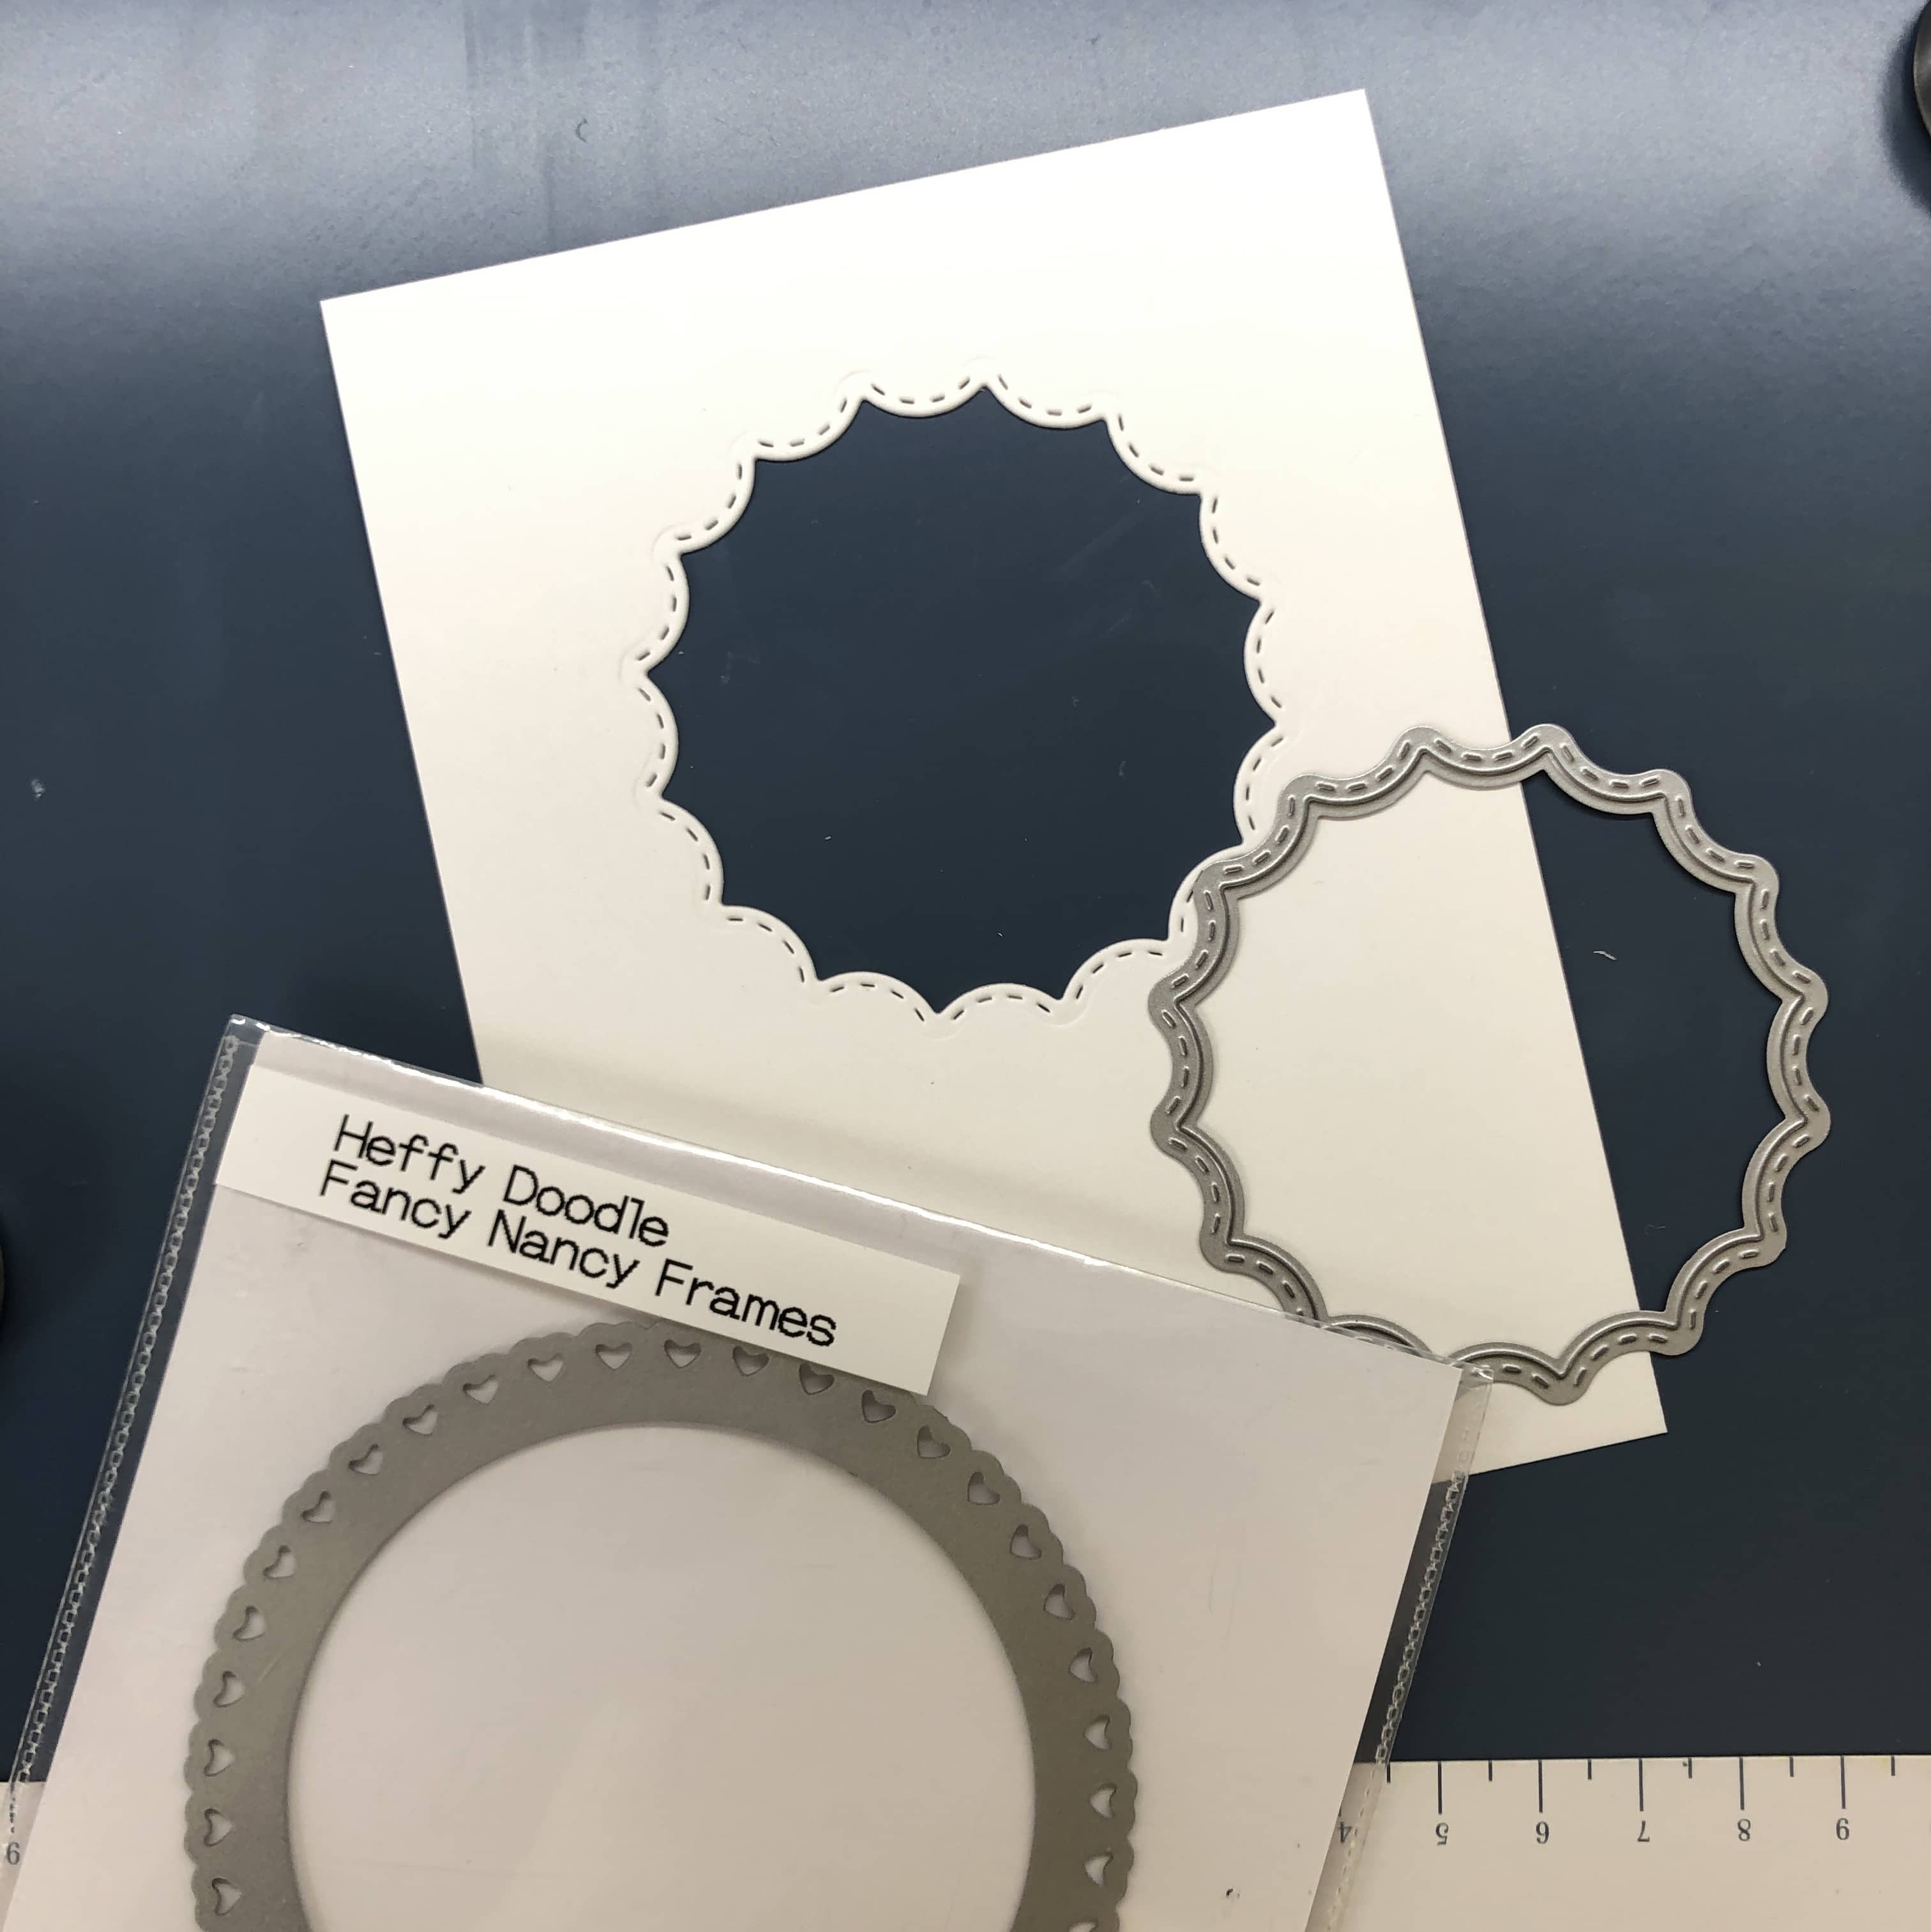
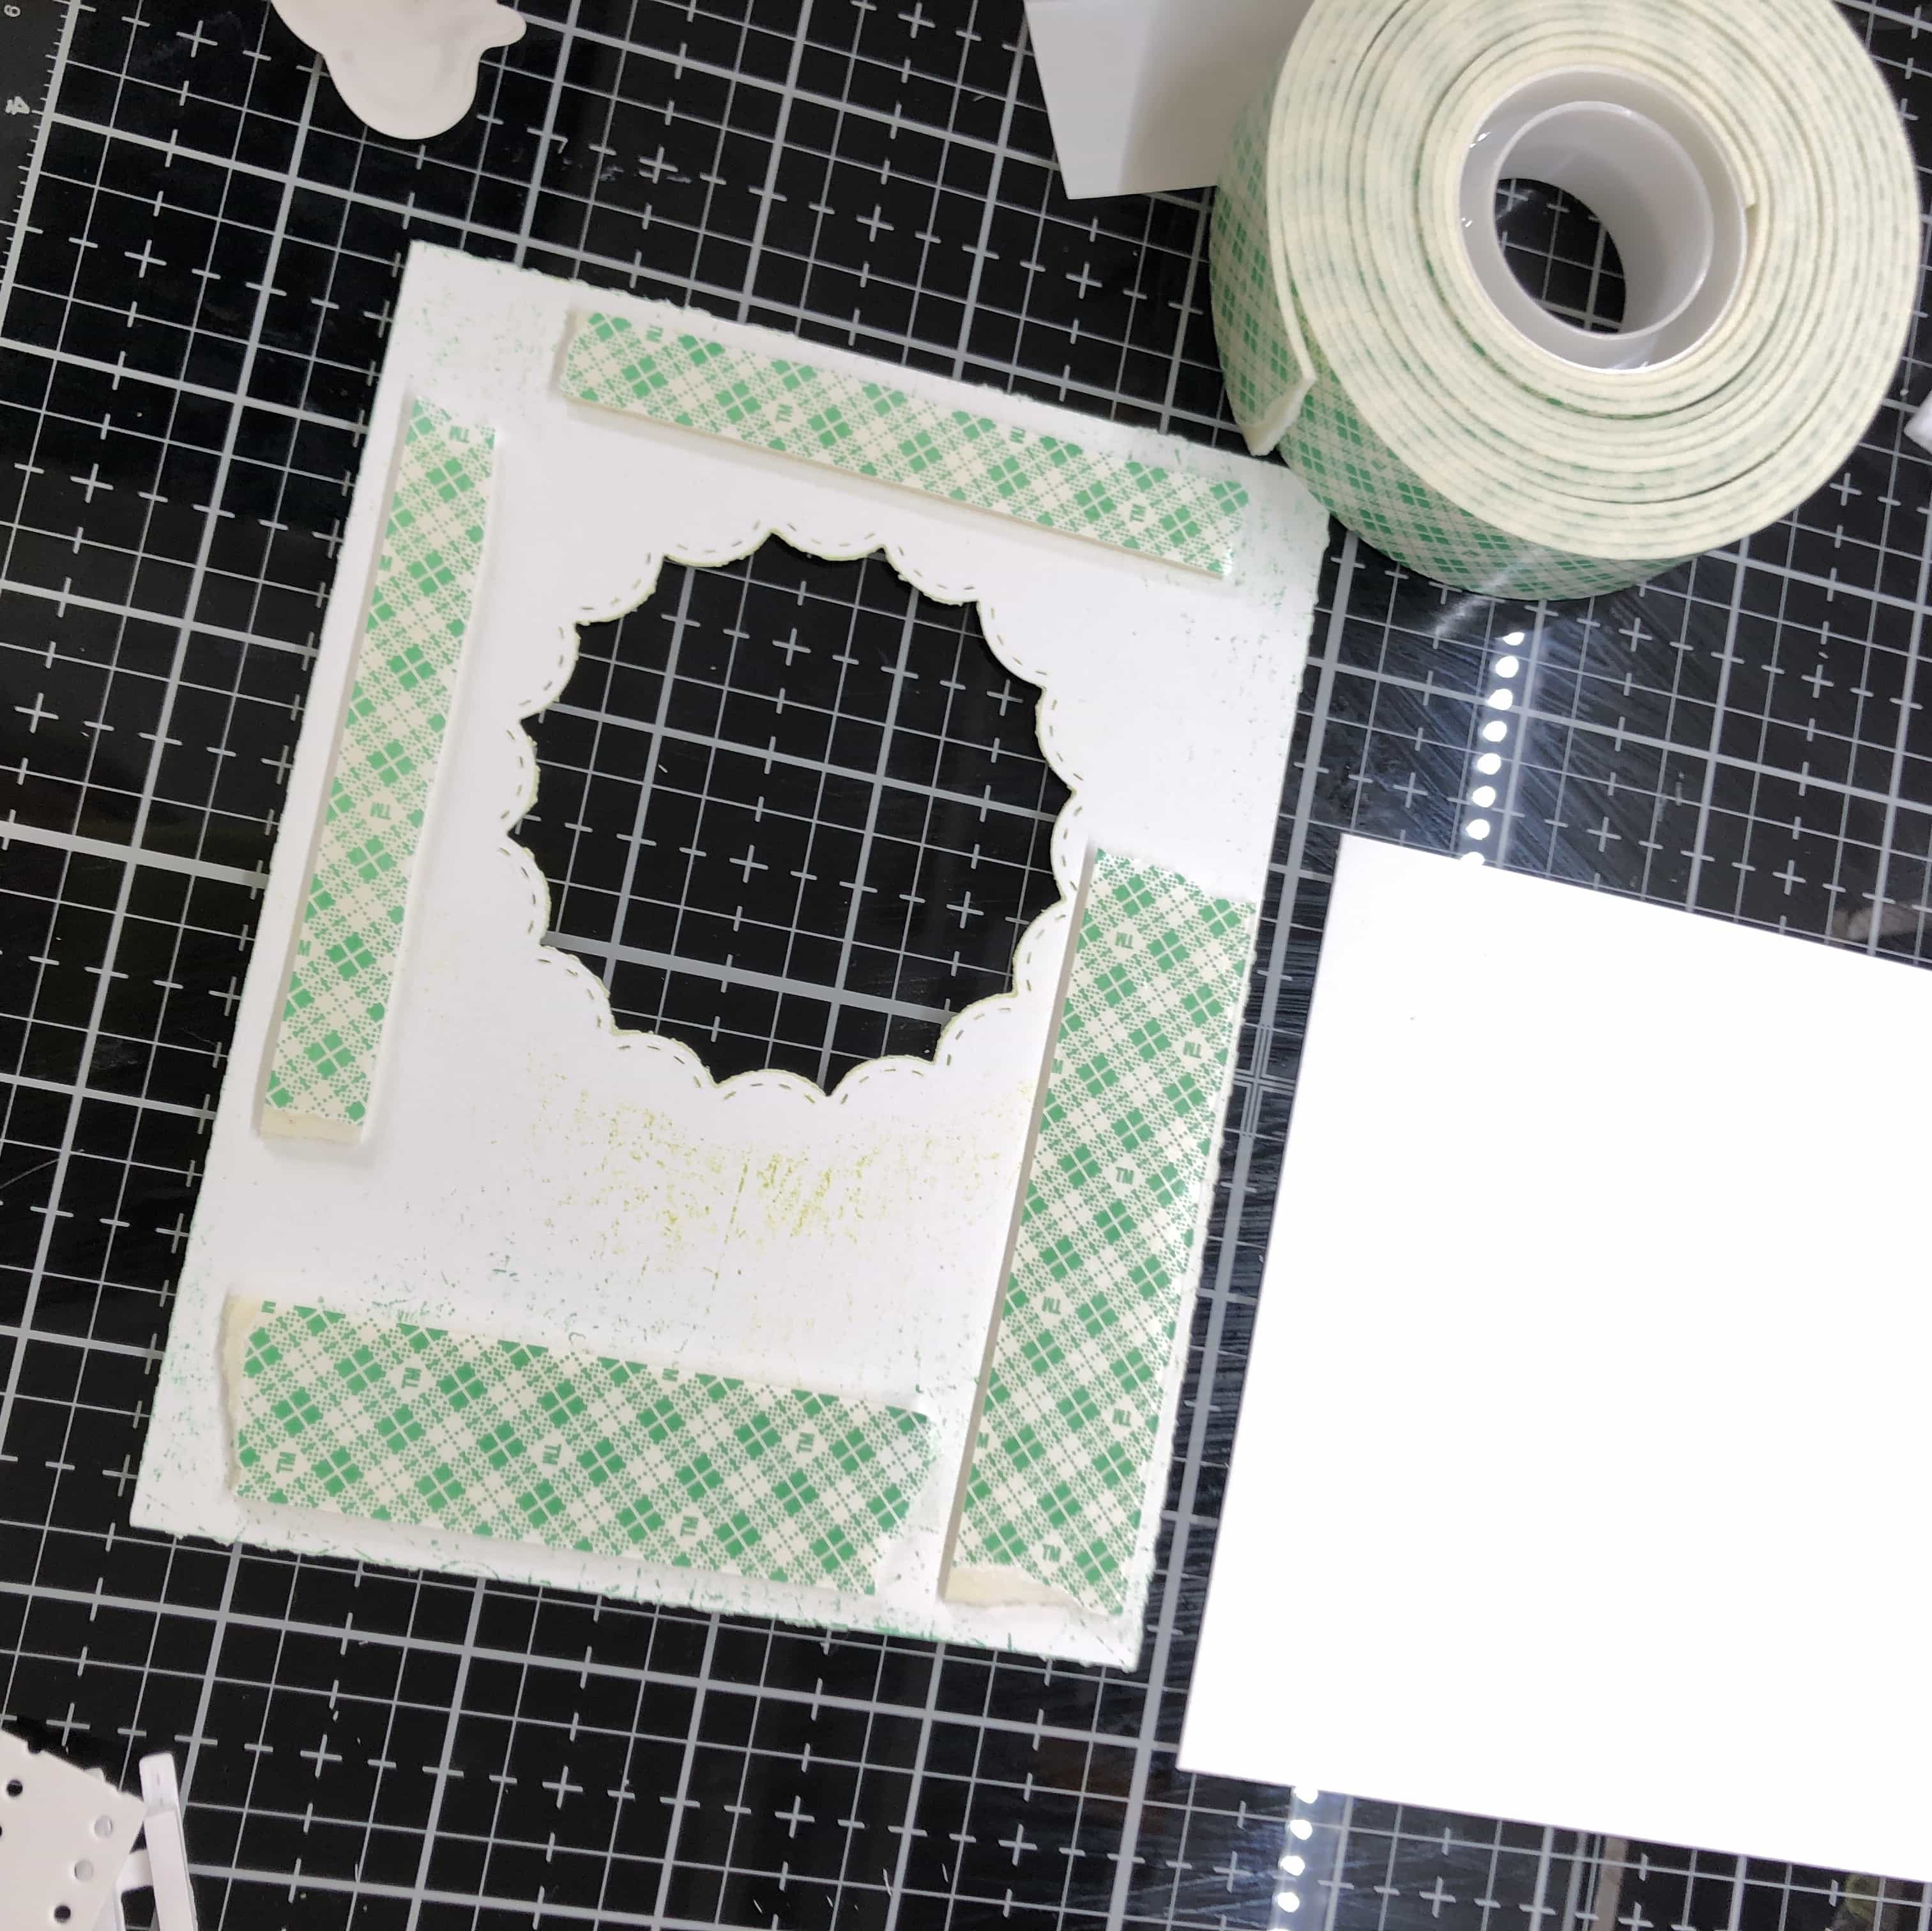
For the background, I’m starting with a piece of A2 (4.25″x5.5″) white Neenah 110 lb. cardstock. A thick cardstock like this is better for the use of embossing paste. I’m going to use my Fancy Nancy Frames Die to create a cut-out in the upper center portion of my card. I use a die cutting machine and some purple tape to hold my die in place.
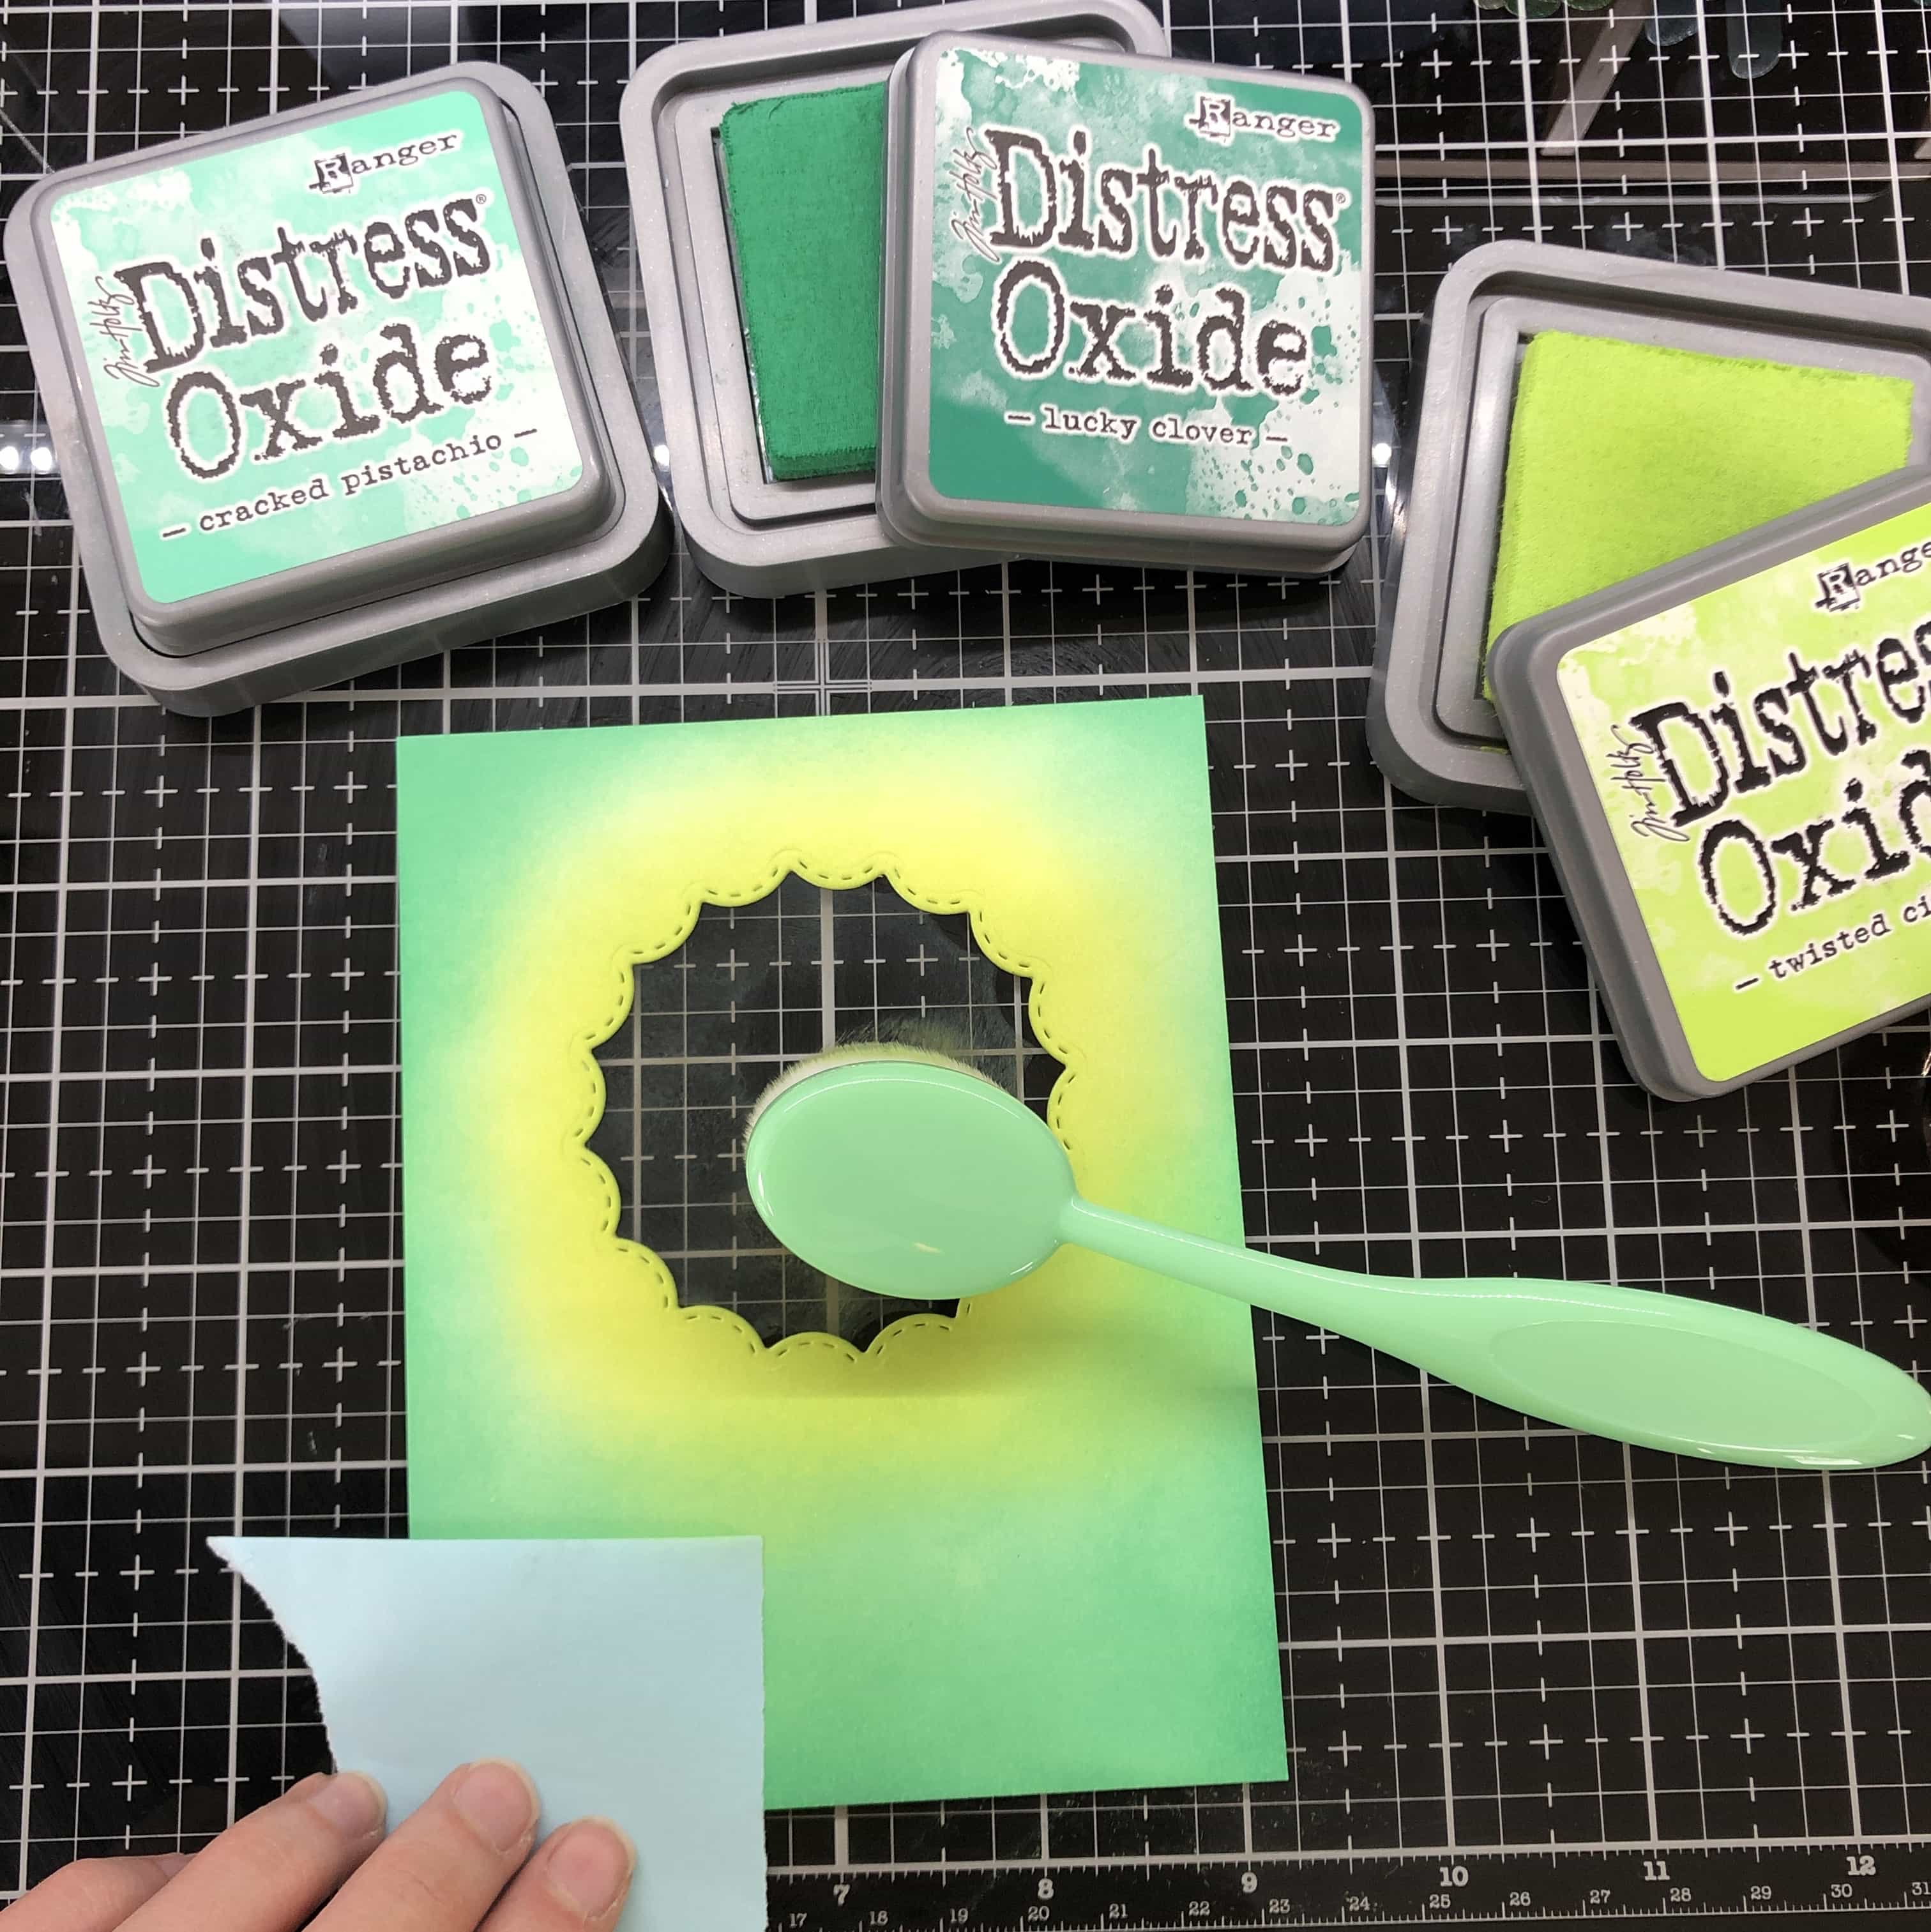
Using Cracked Pistachio, Lucky Clover, and Twisted Citron distress oxides, I am blending an ombre background that starts lighter in the center and gets darker towards the edges.
Once I’m finished blending, I am spritzing a little bit of water on it to create a fun little messy effect.
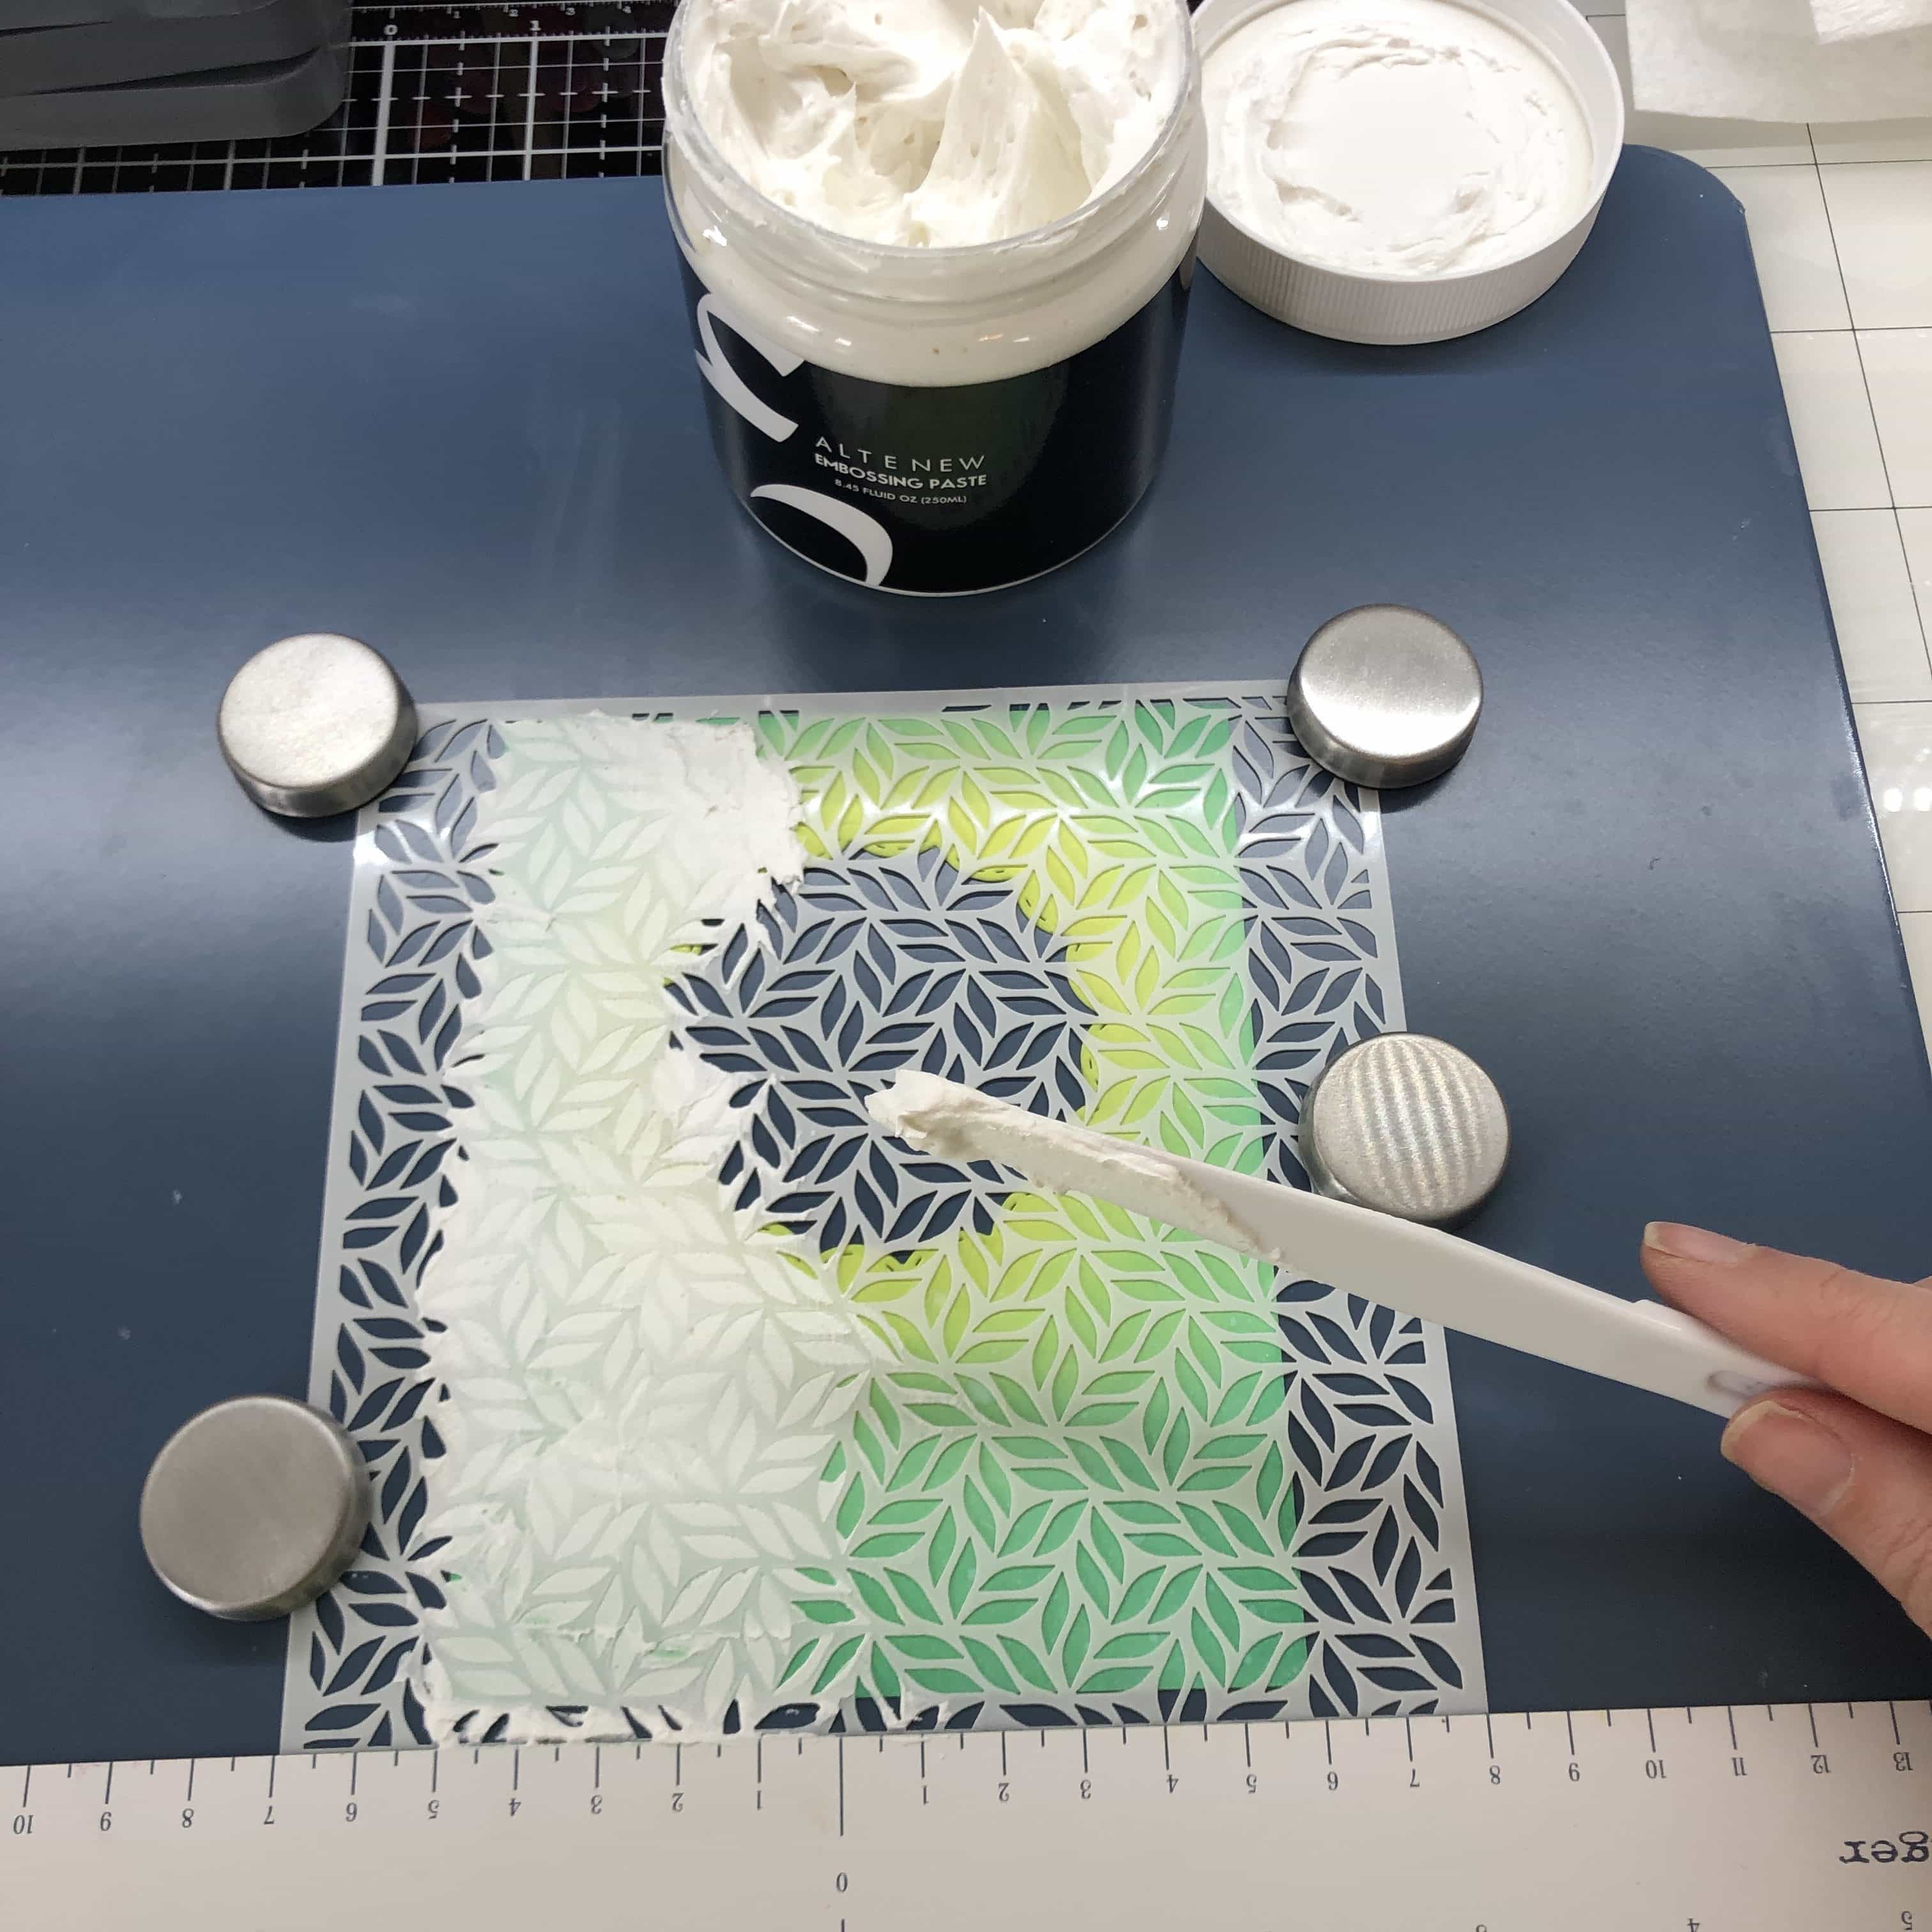
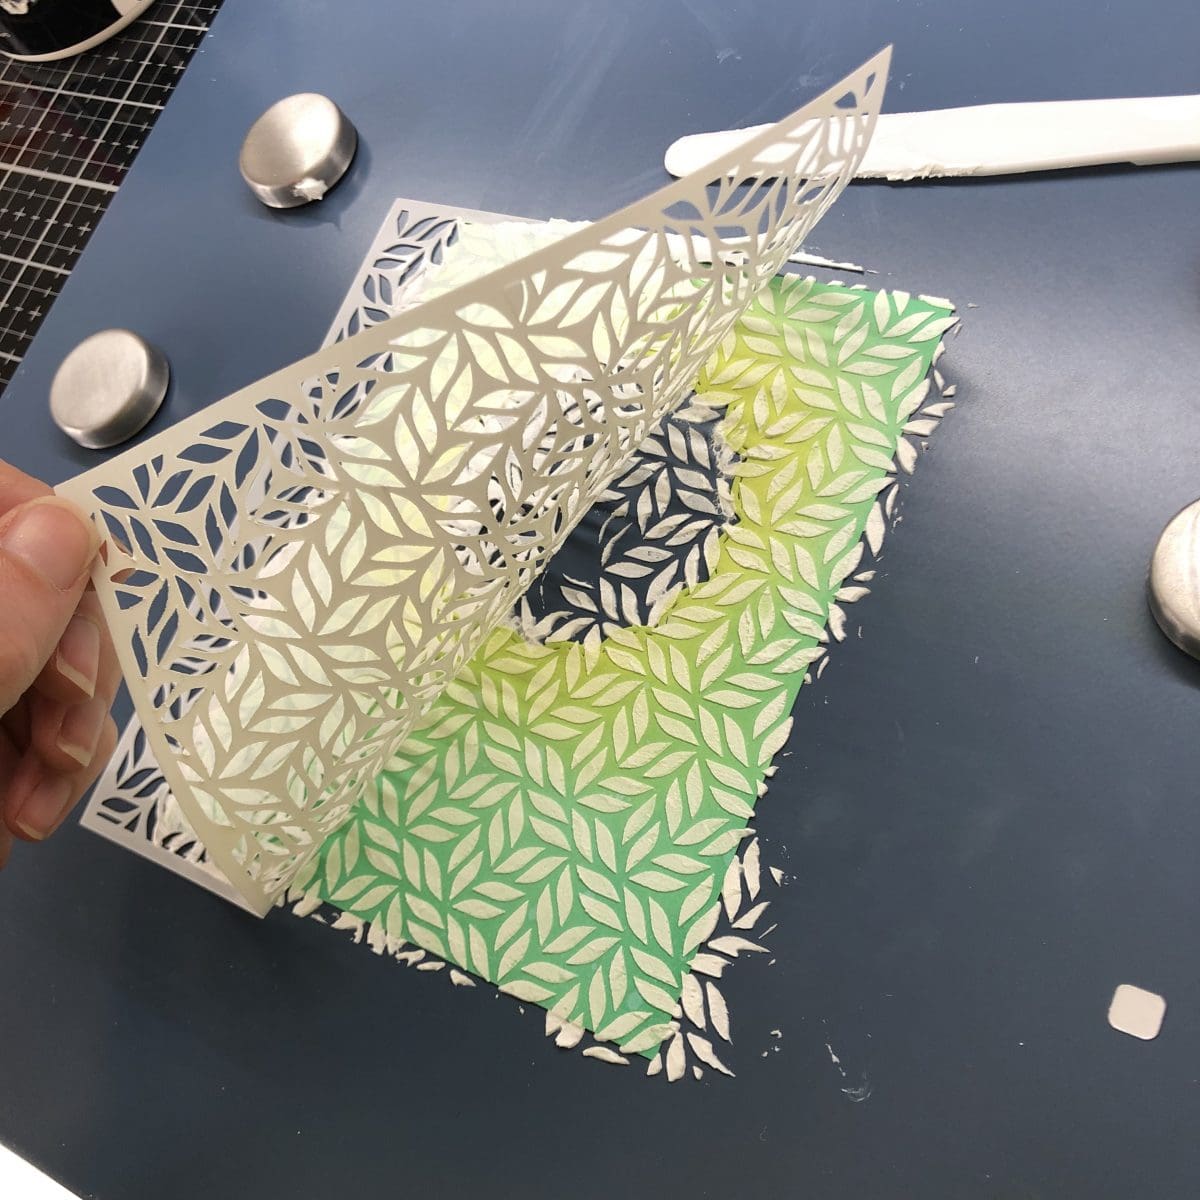
Next, I’m grabbing my Fancy Foliage Stencil and my embossing paste. Using a little plastic palette knife, I’m filling the stencil with the paste as light as I can, while still getting complete coverage. The thicker the paste is, the longer it will take to dry – and who has that kind of patience!? 🙂

Ahh! The reveal! 🙂 Make sure to clean your stencil NOW! You don’t want to ruin your stencil!
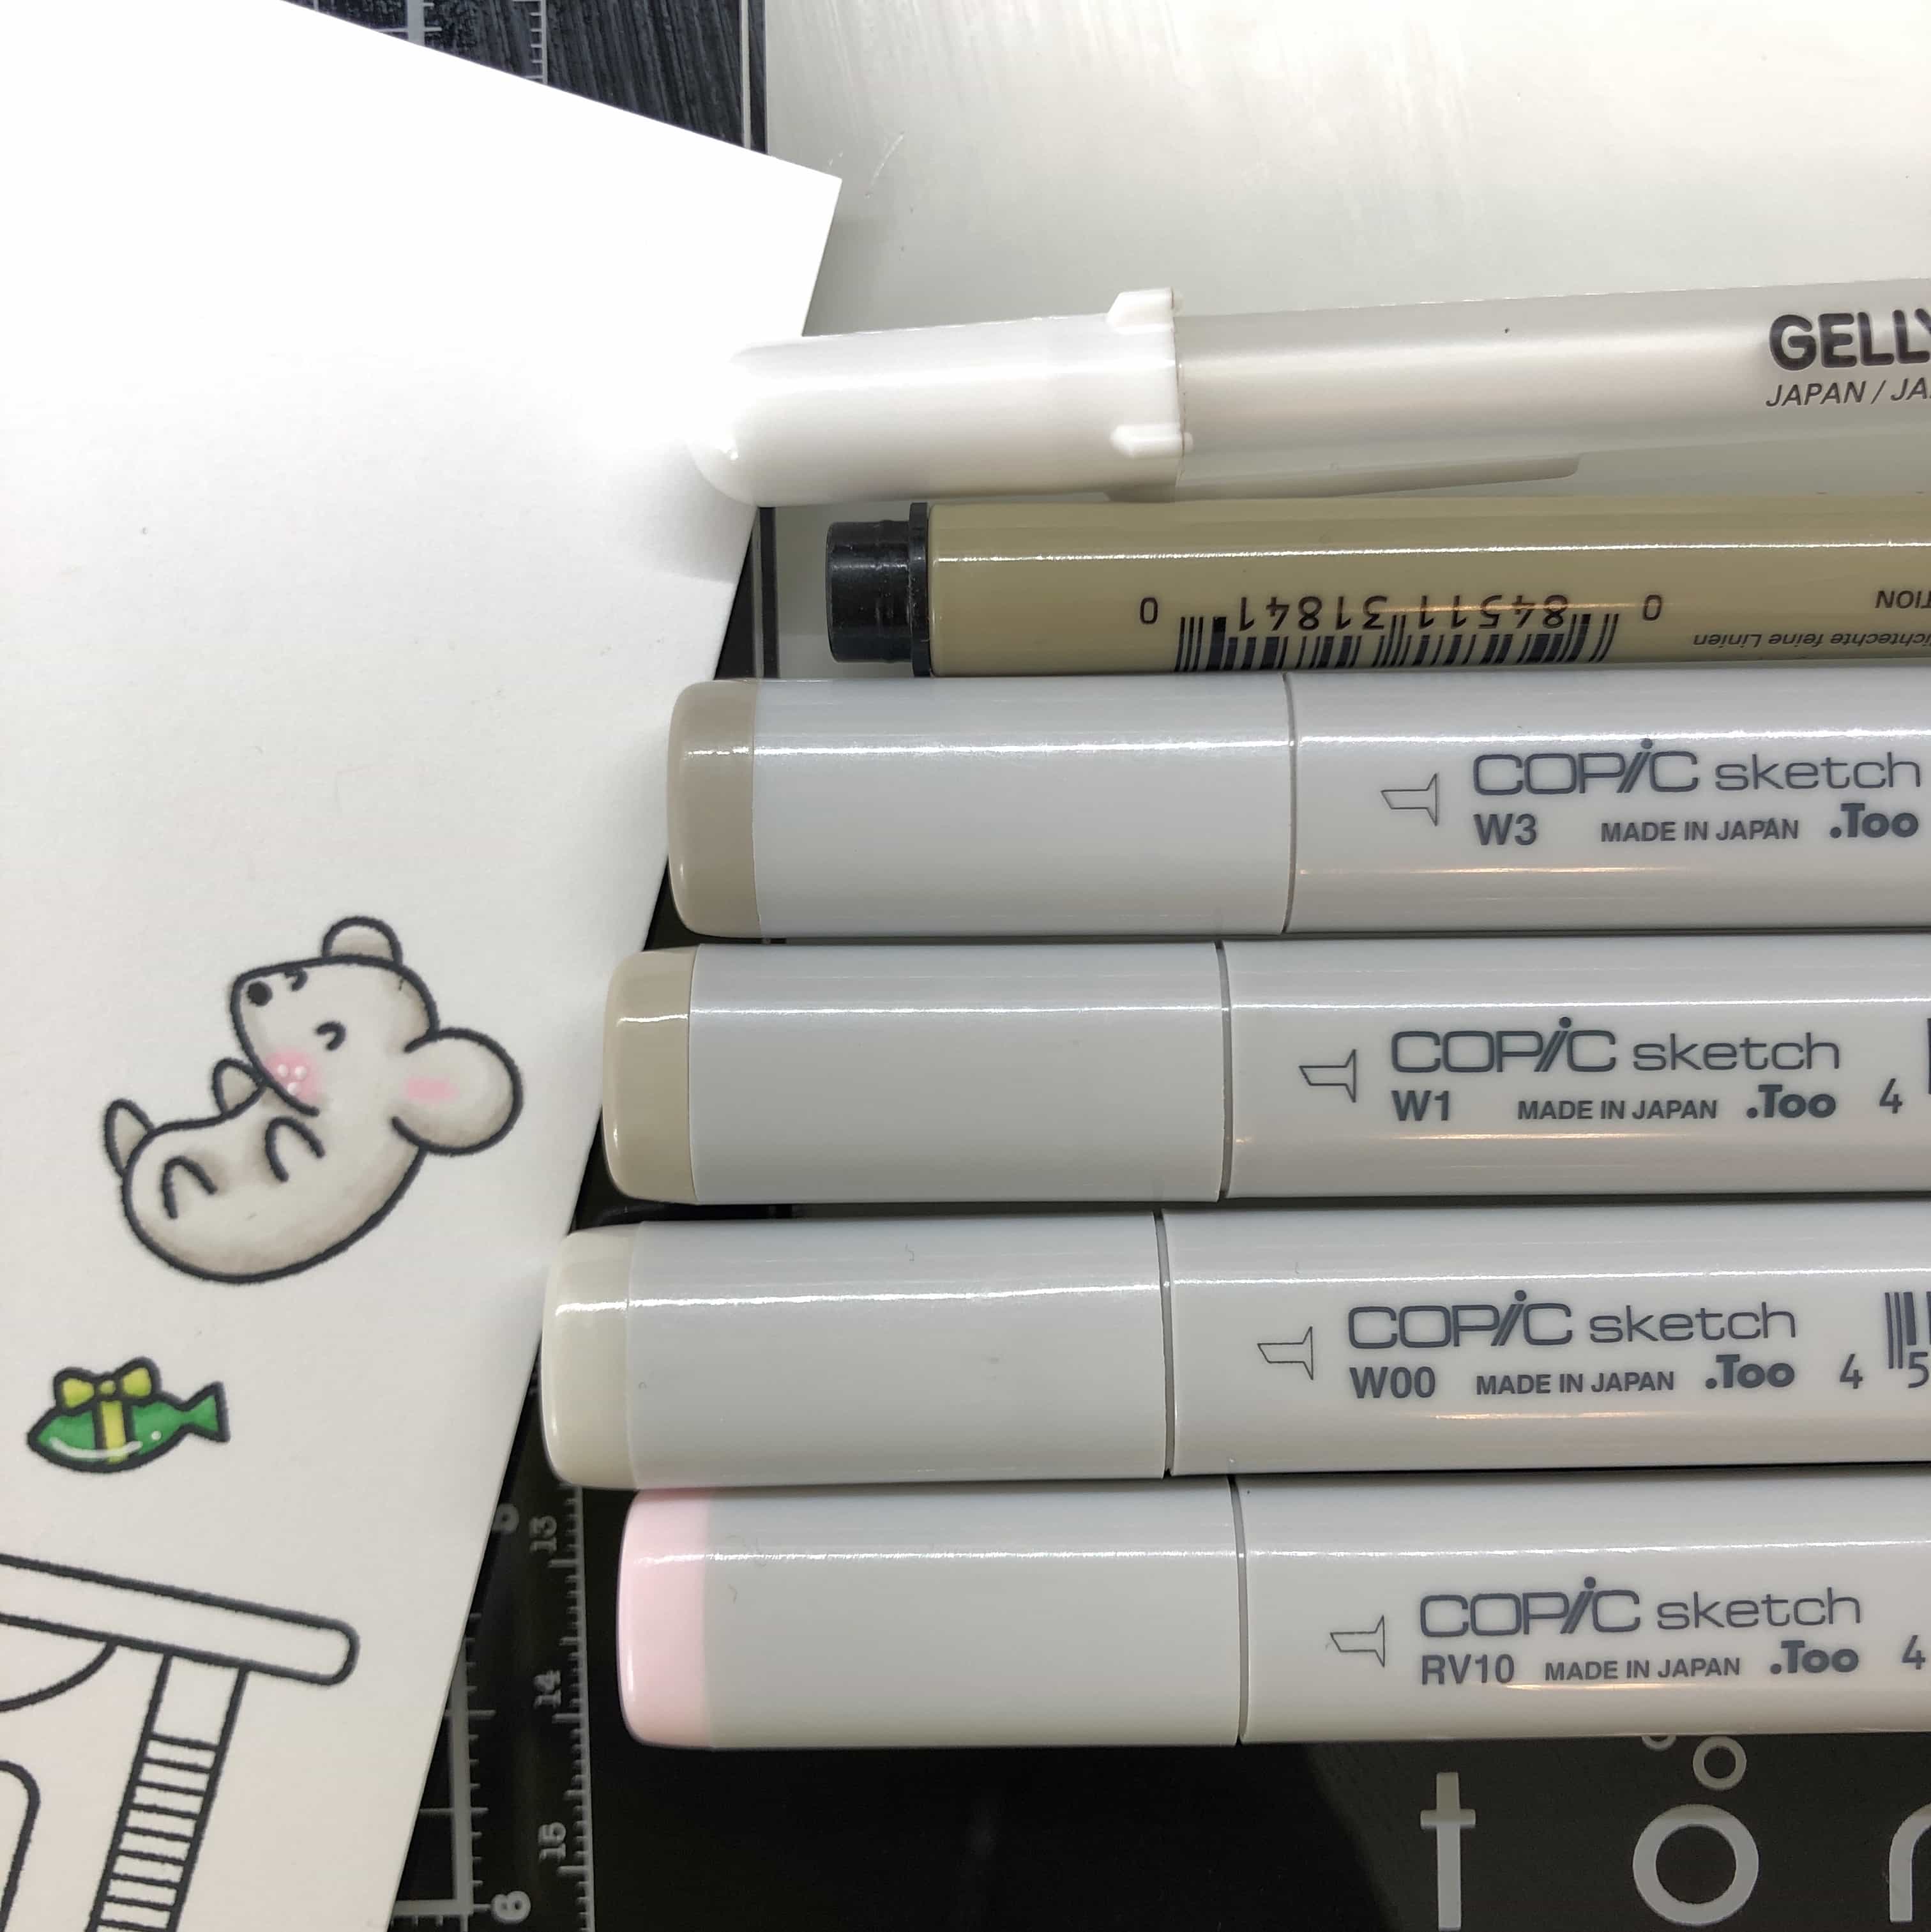
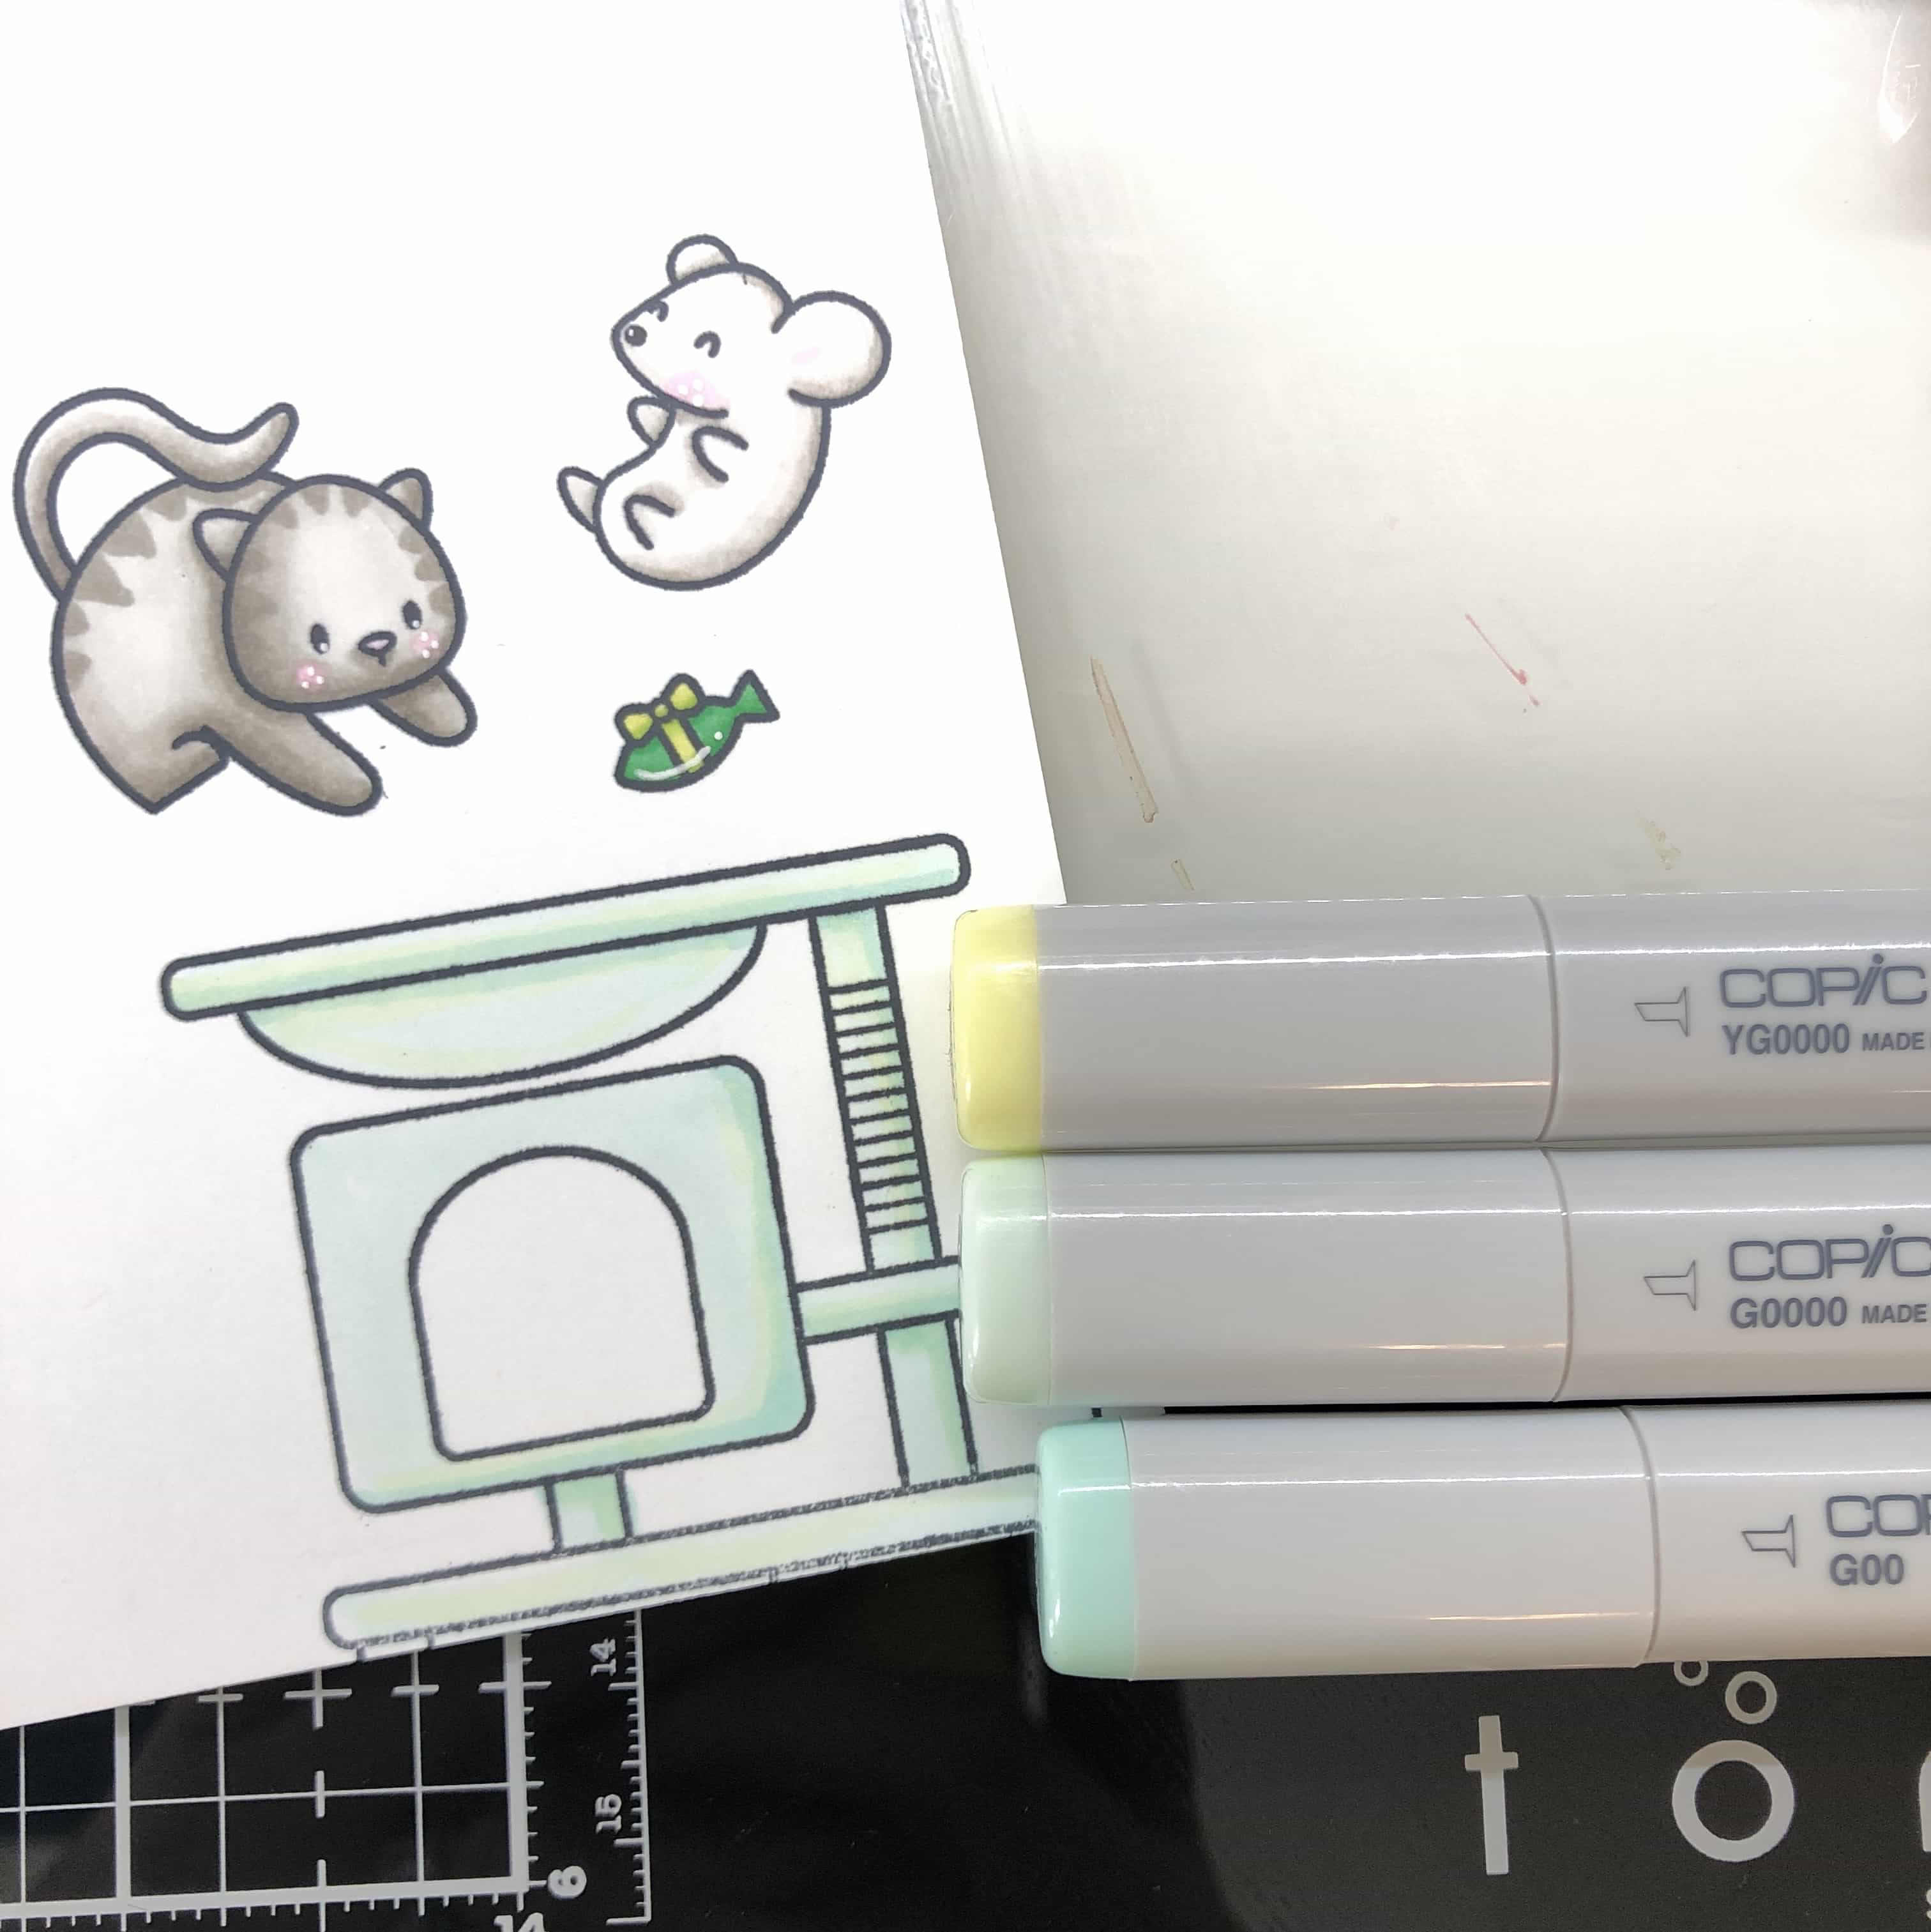
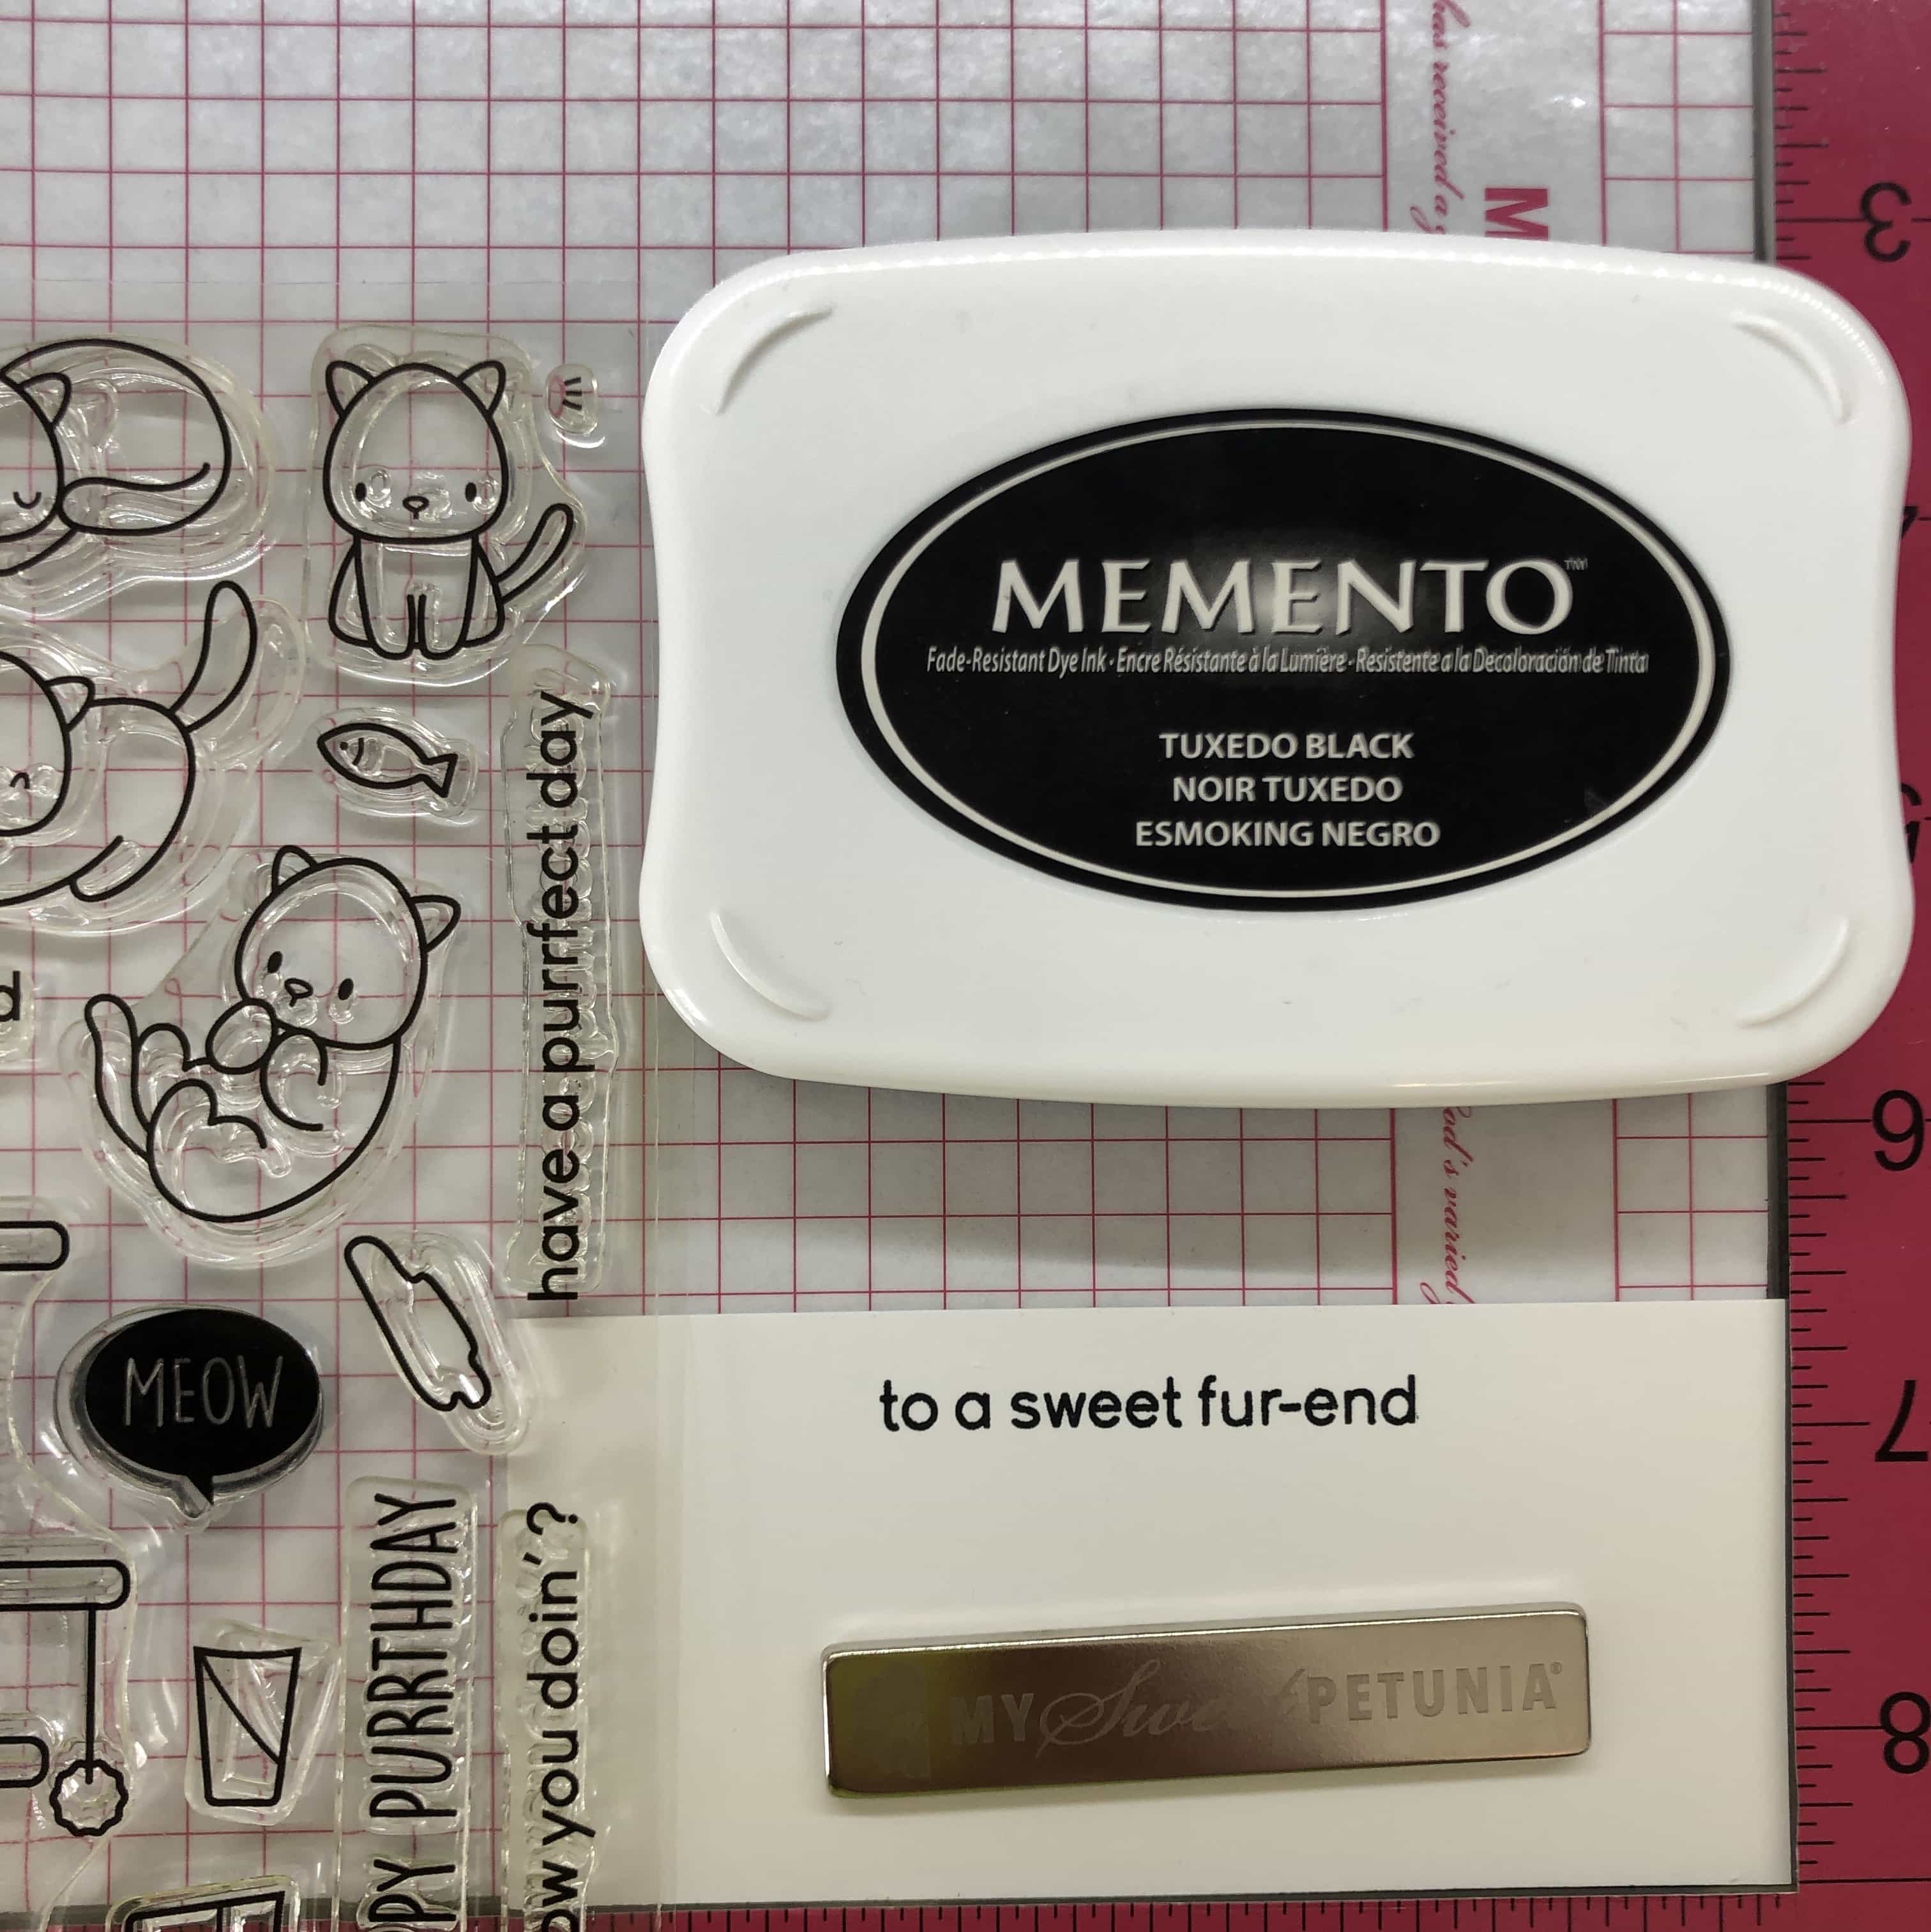
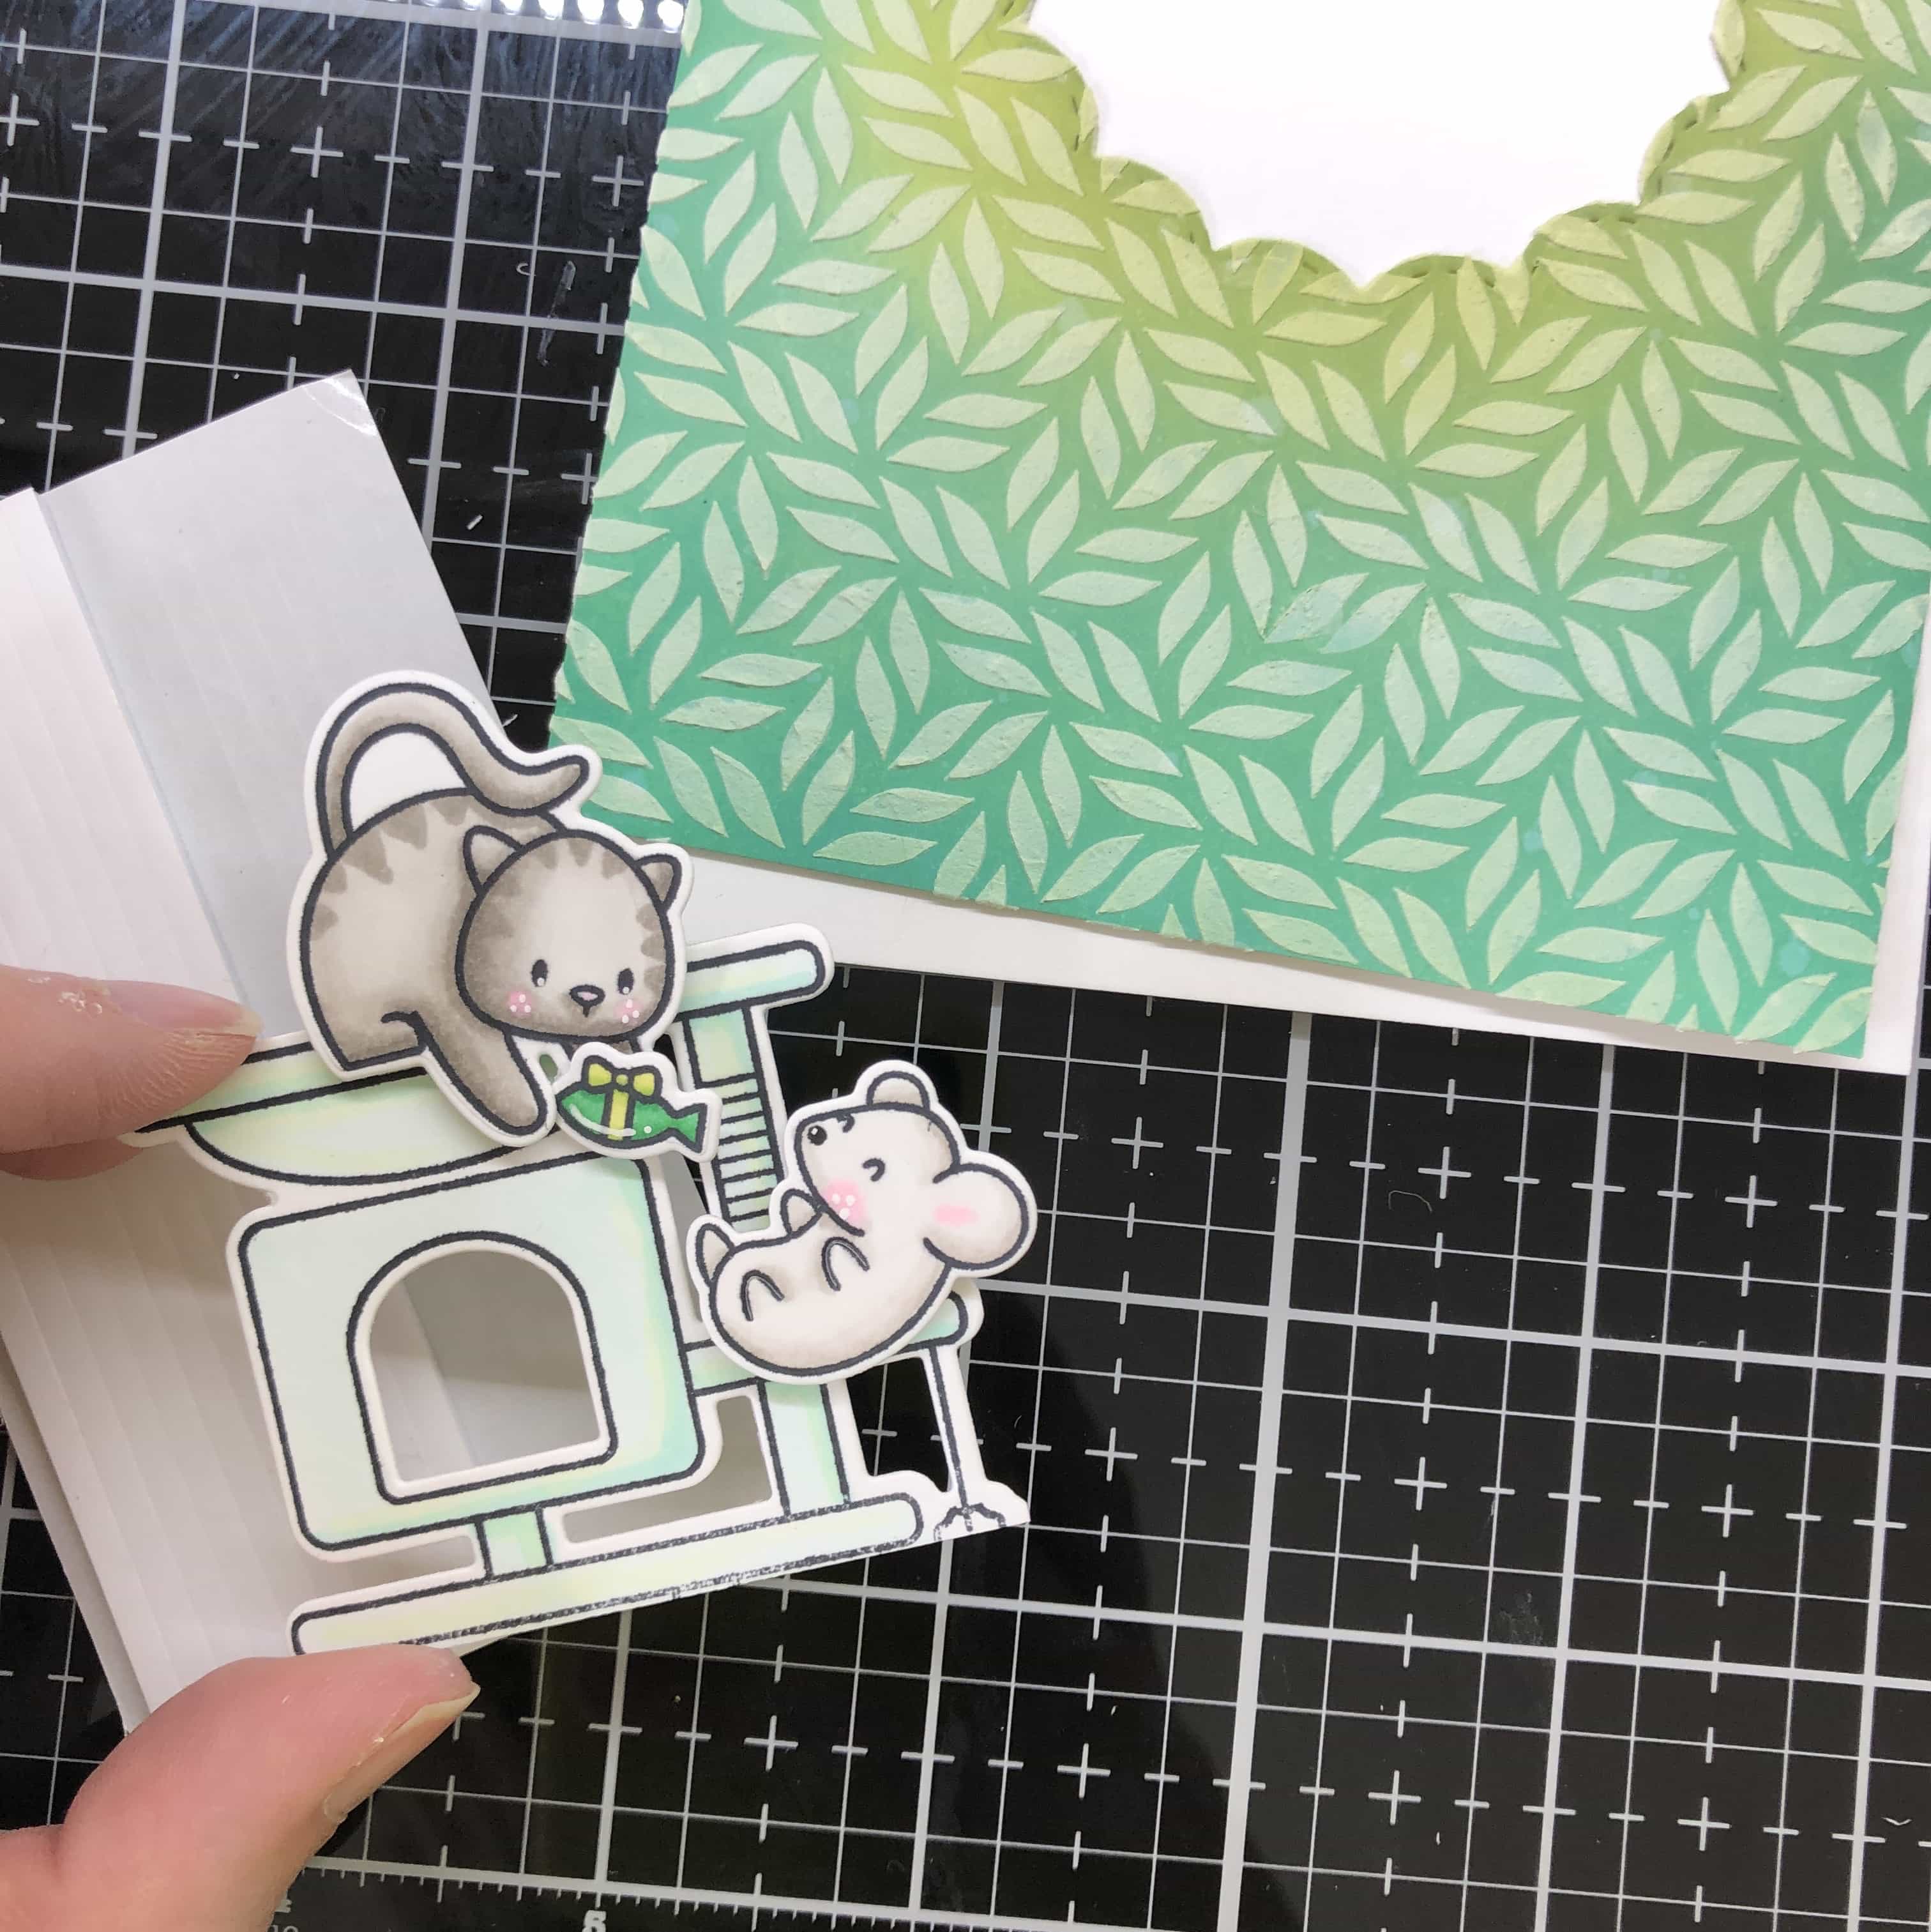
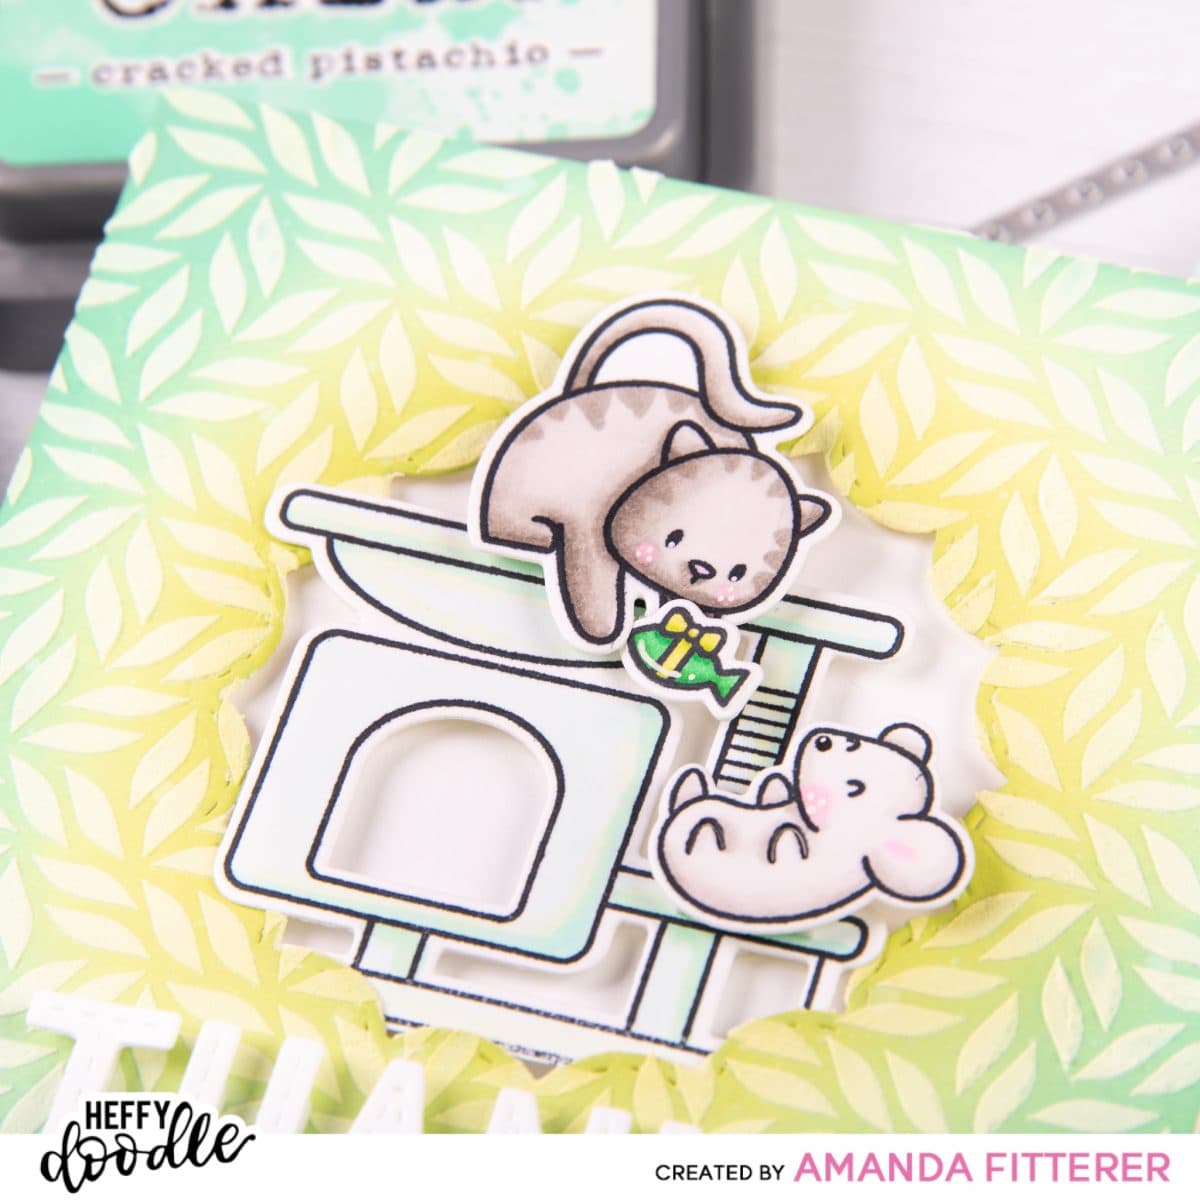
Now, let’s stamp our little cuties! Using Purrfect Day Stamp Set and Hello Squeakheart Stamp Set and a black ink pad that won’t bleed with alcohol markers, I’m stamping a few of the images. I’m using my Copic markers to color in my images. I use a Gelly Roll pen to create highlights and dots on their little cheeks.
Copic Markers used: Fishy Gift – YG21, YG25, G03, G05, G09 | Cat – W00, W1, W2, W4, W5, RV10 | Mouse – W00, W1, W3, RV10 | Cat House – G0000, G00, YG0000
I am using the coordinating dies to cut out the stamped images.


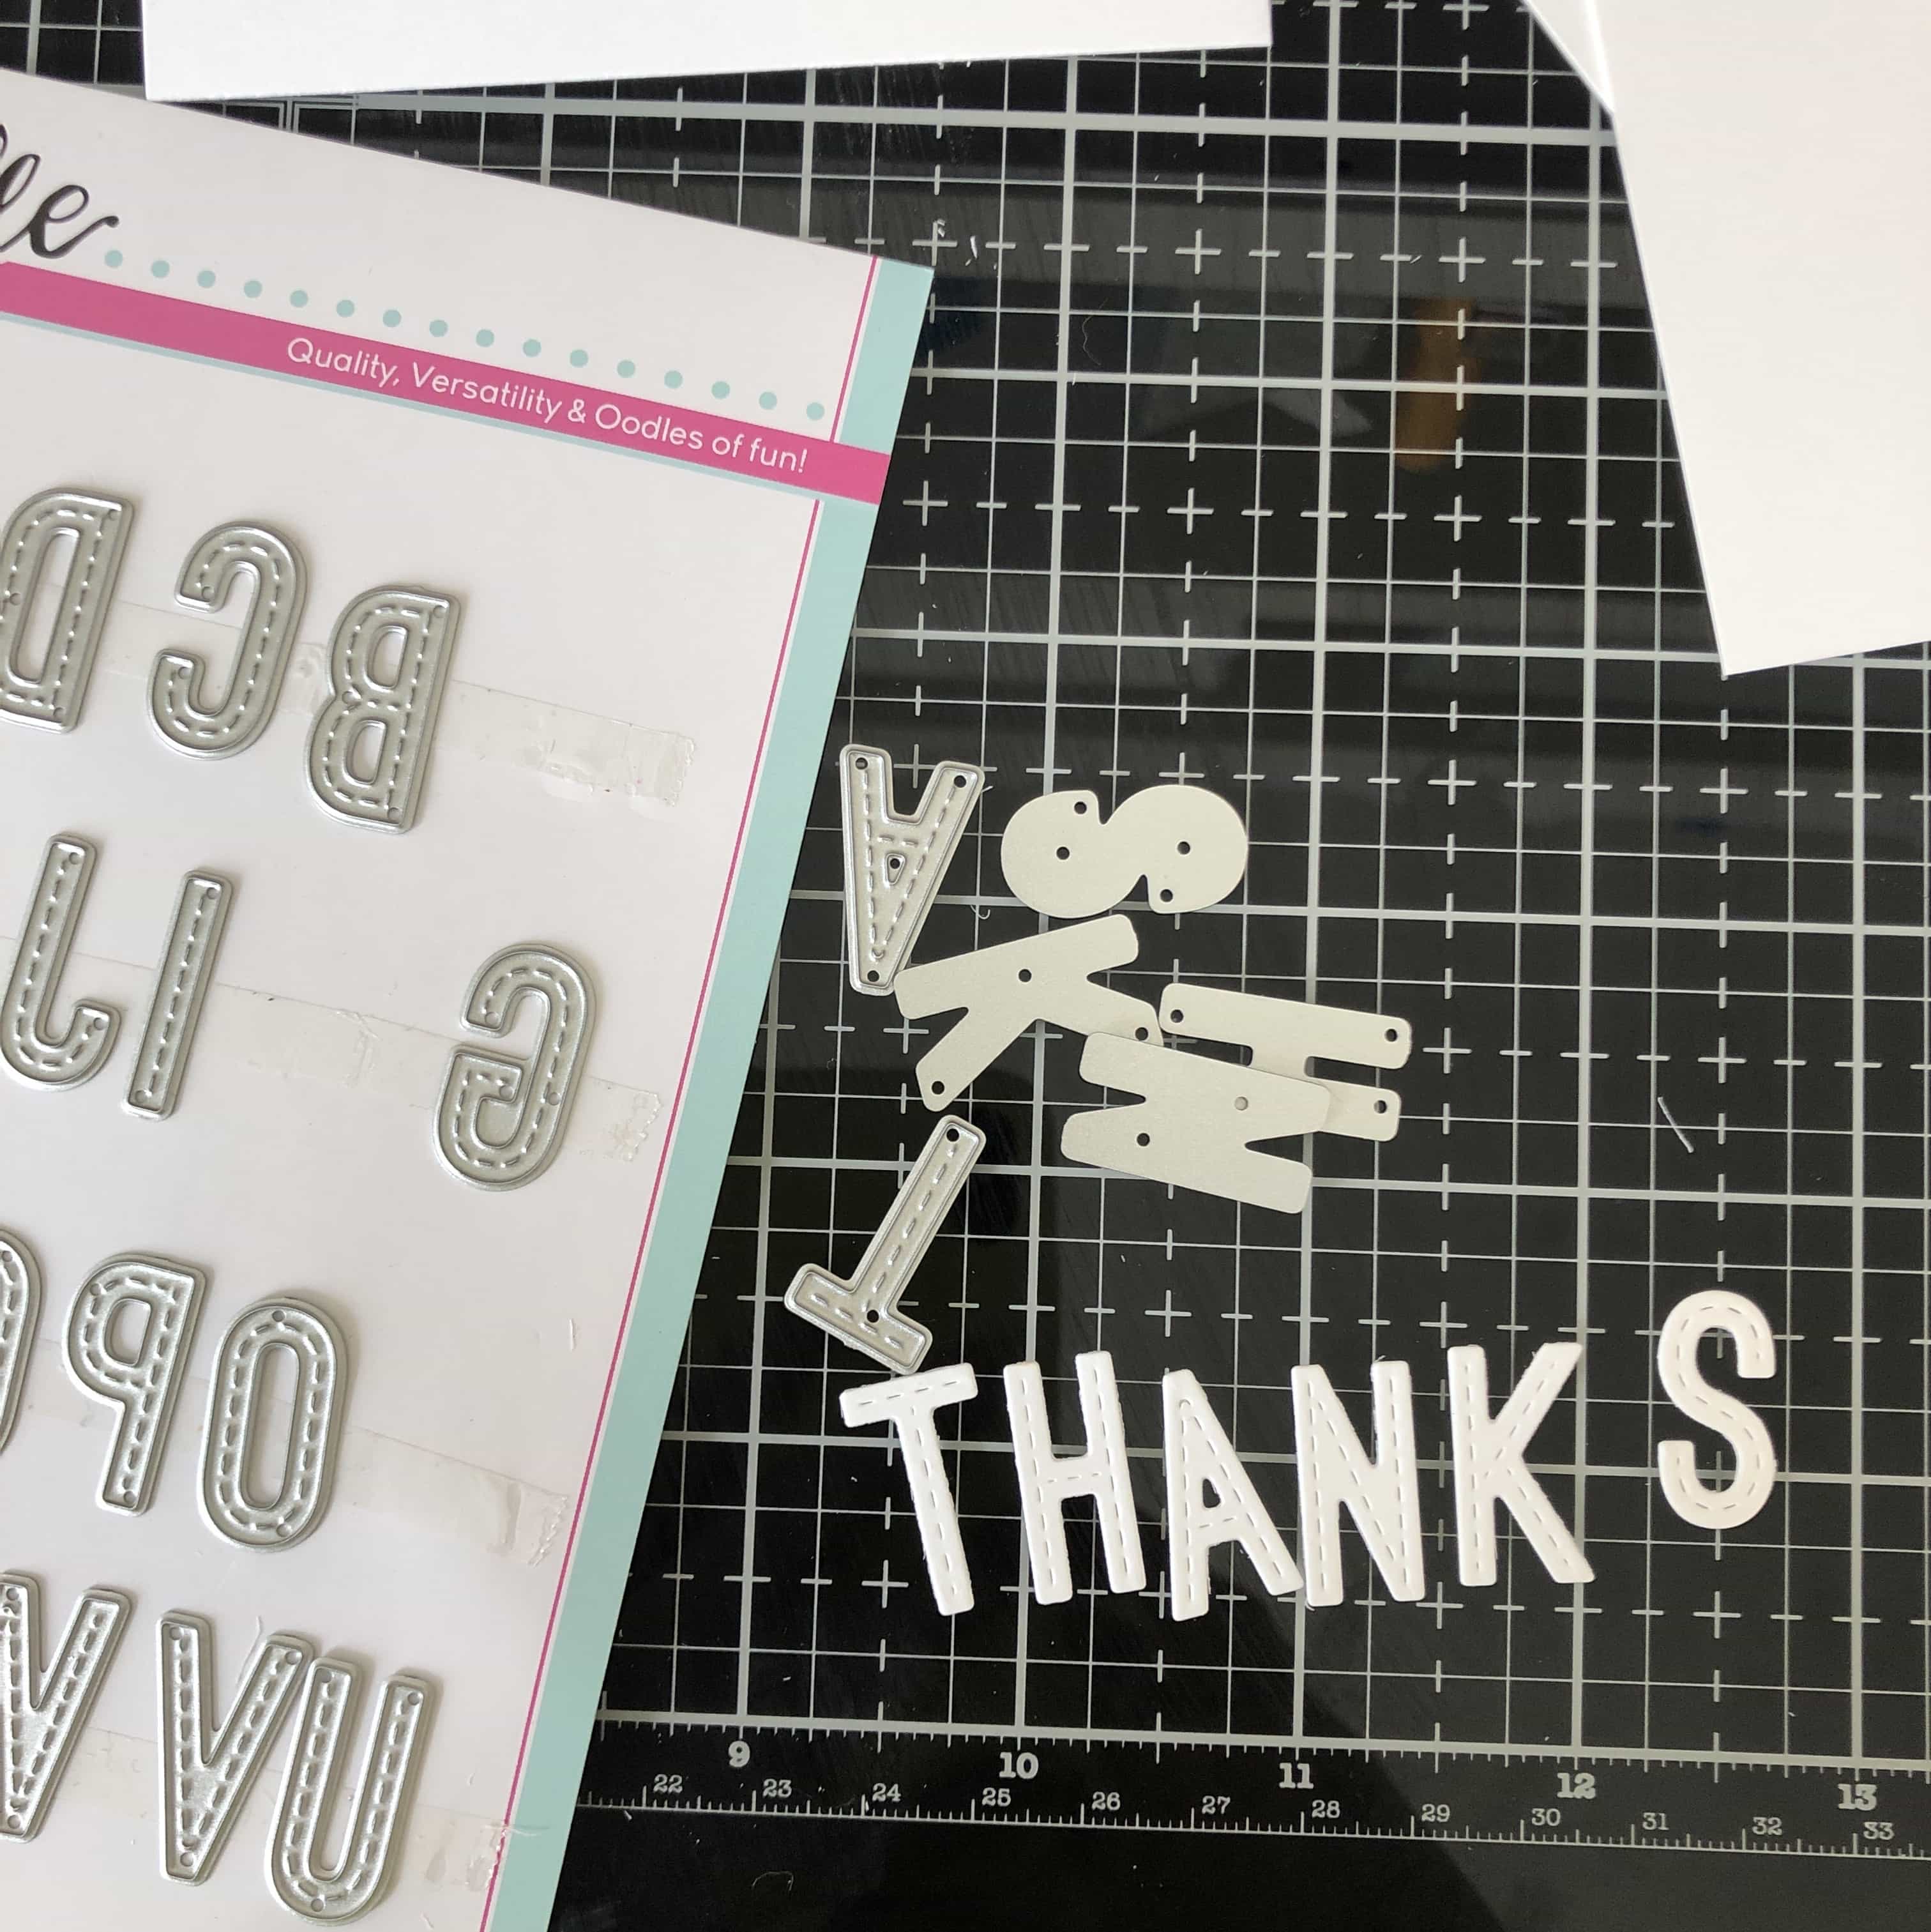
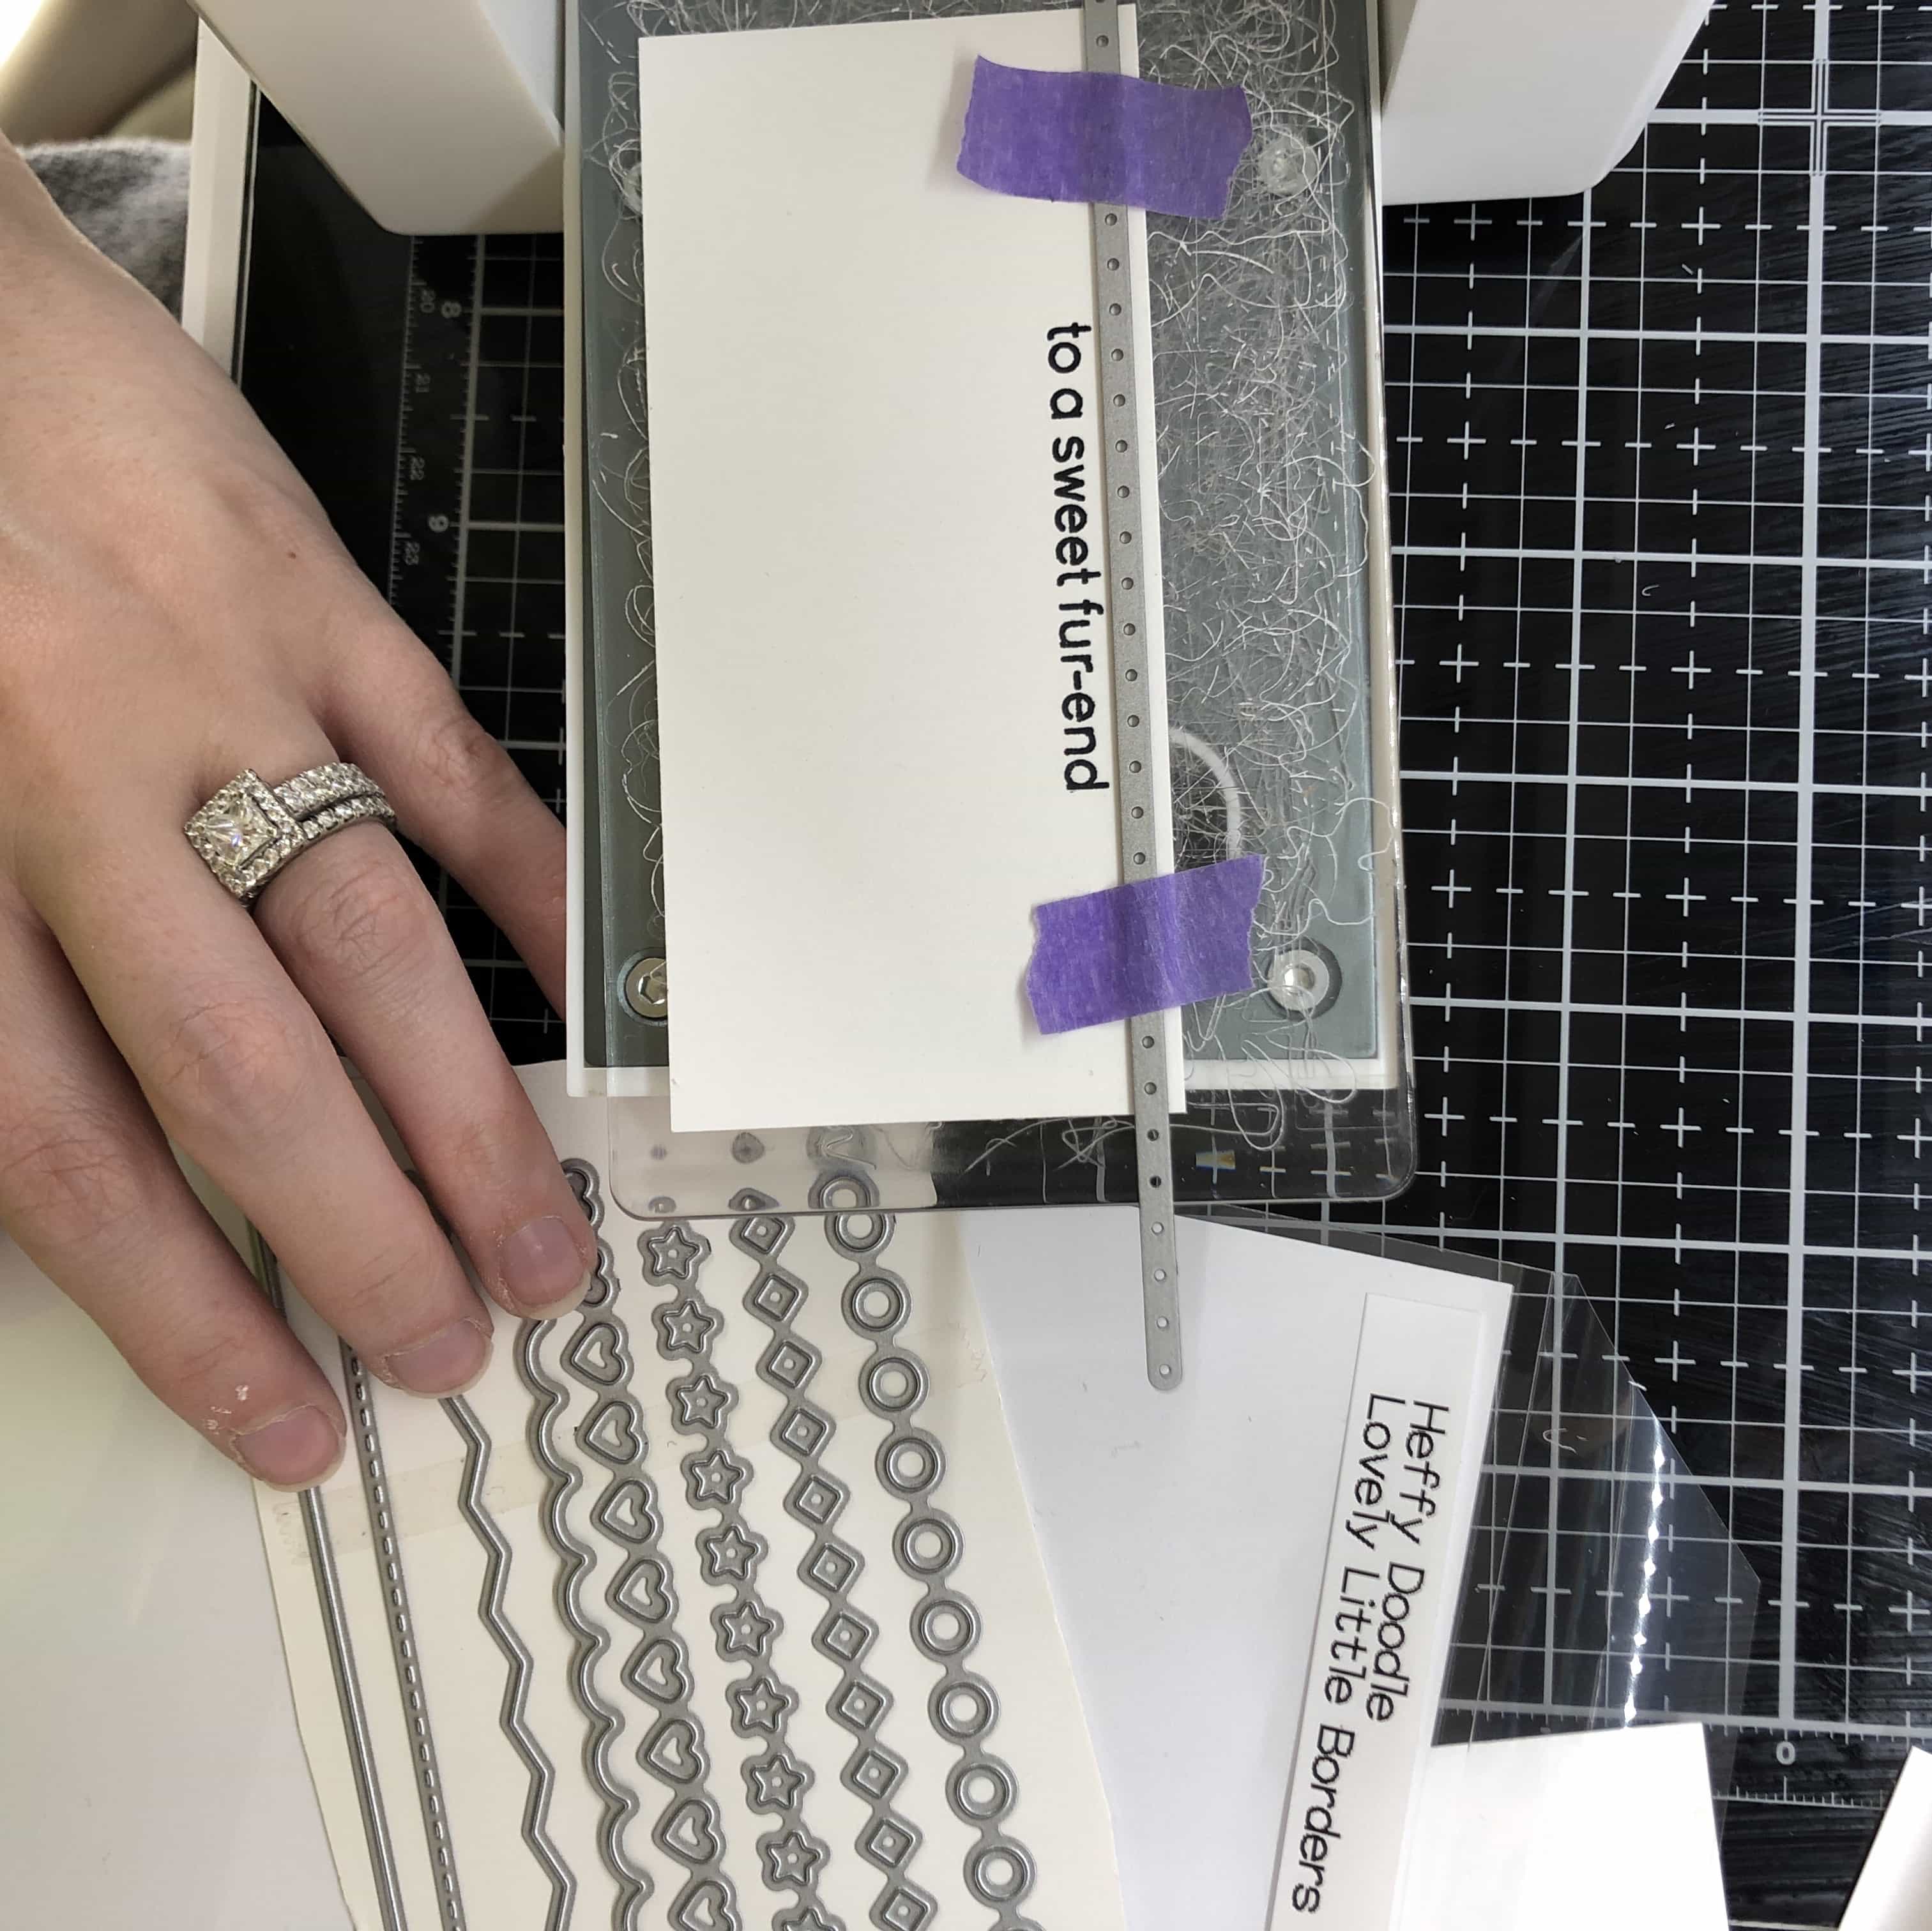
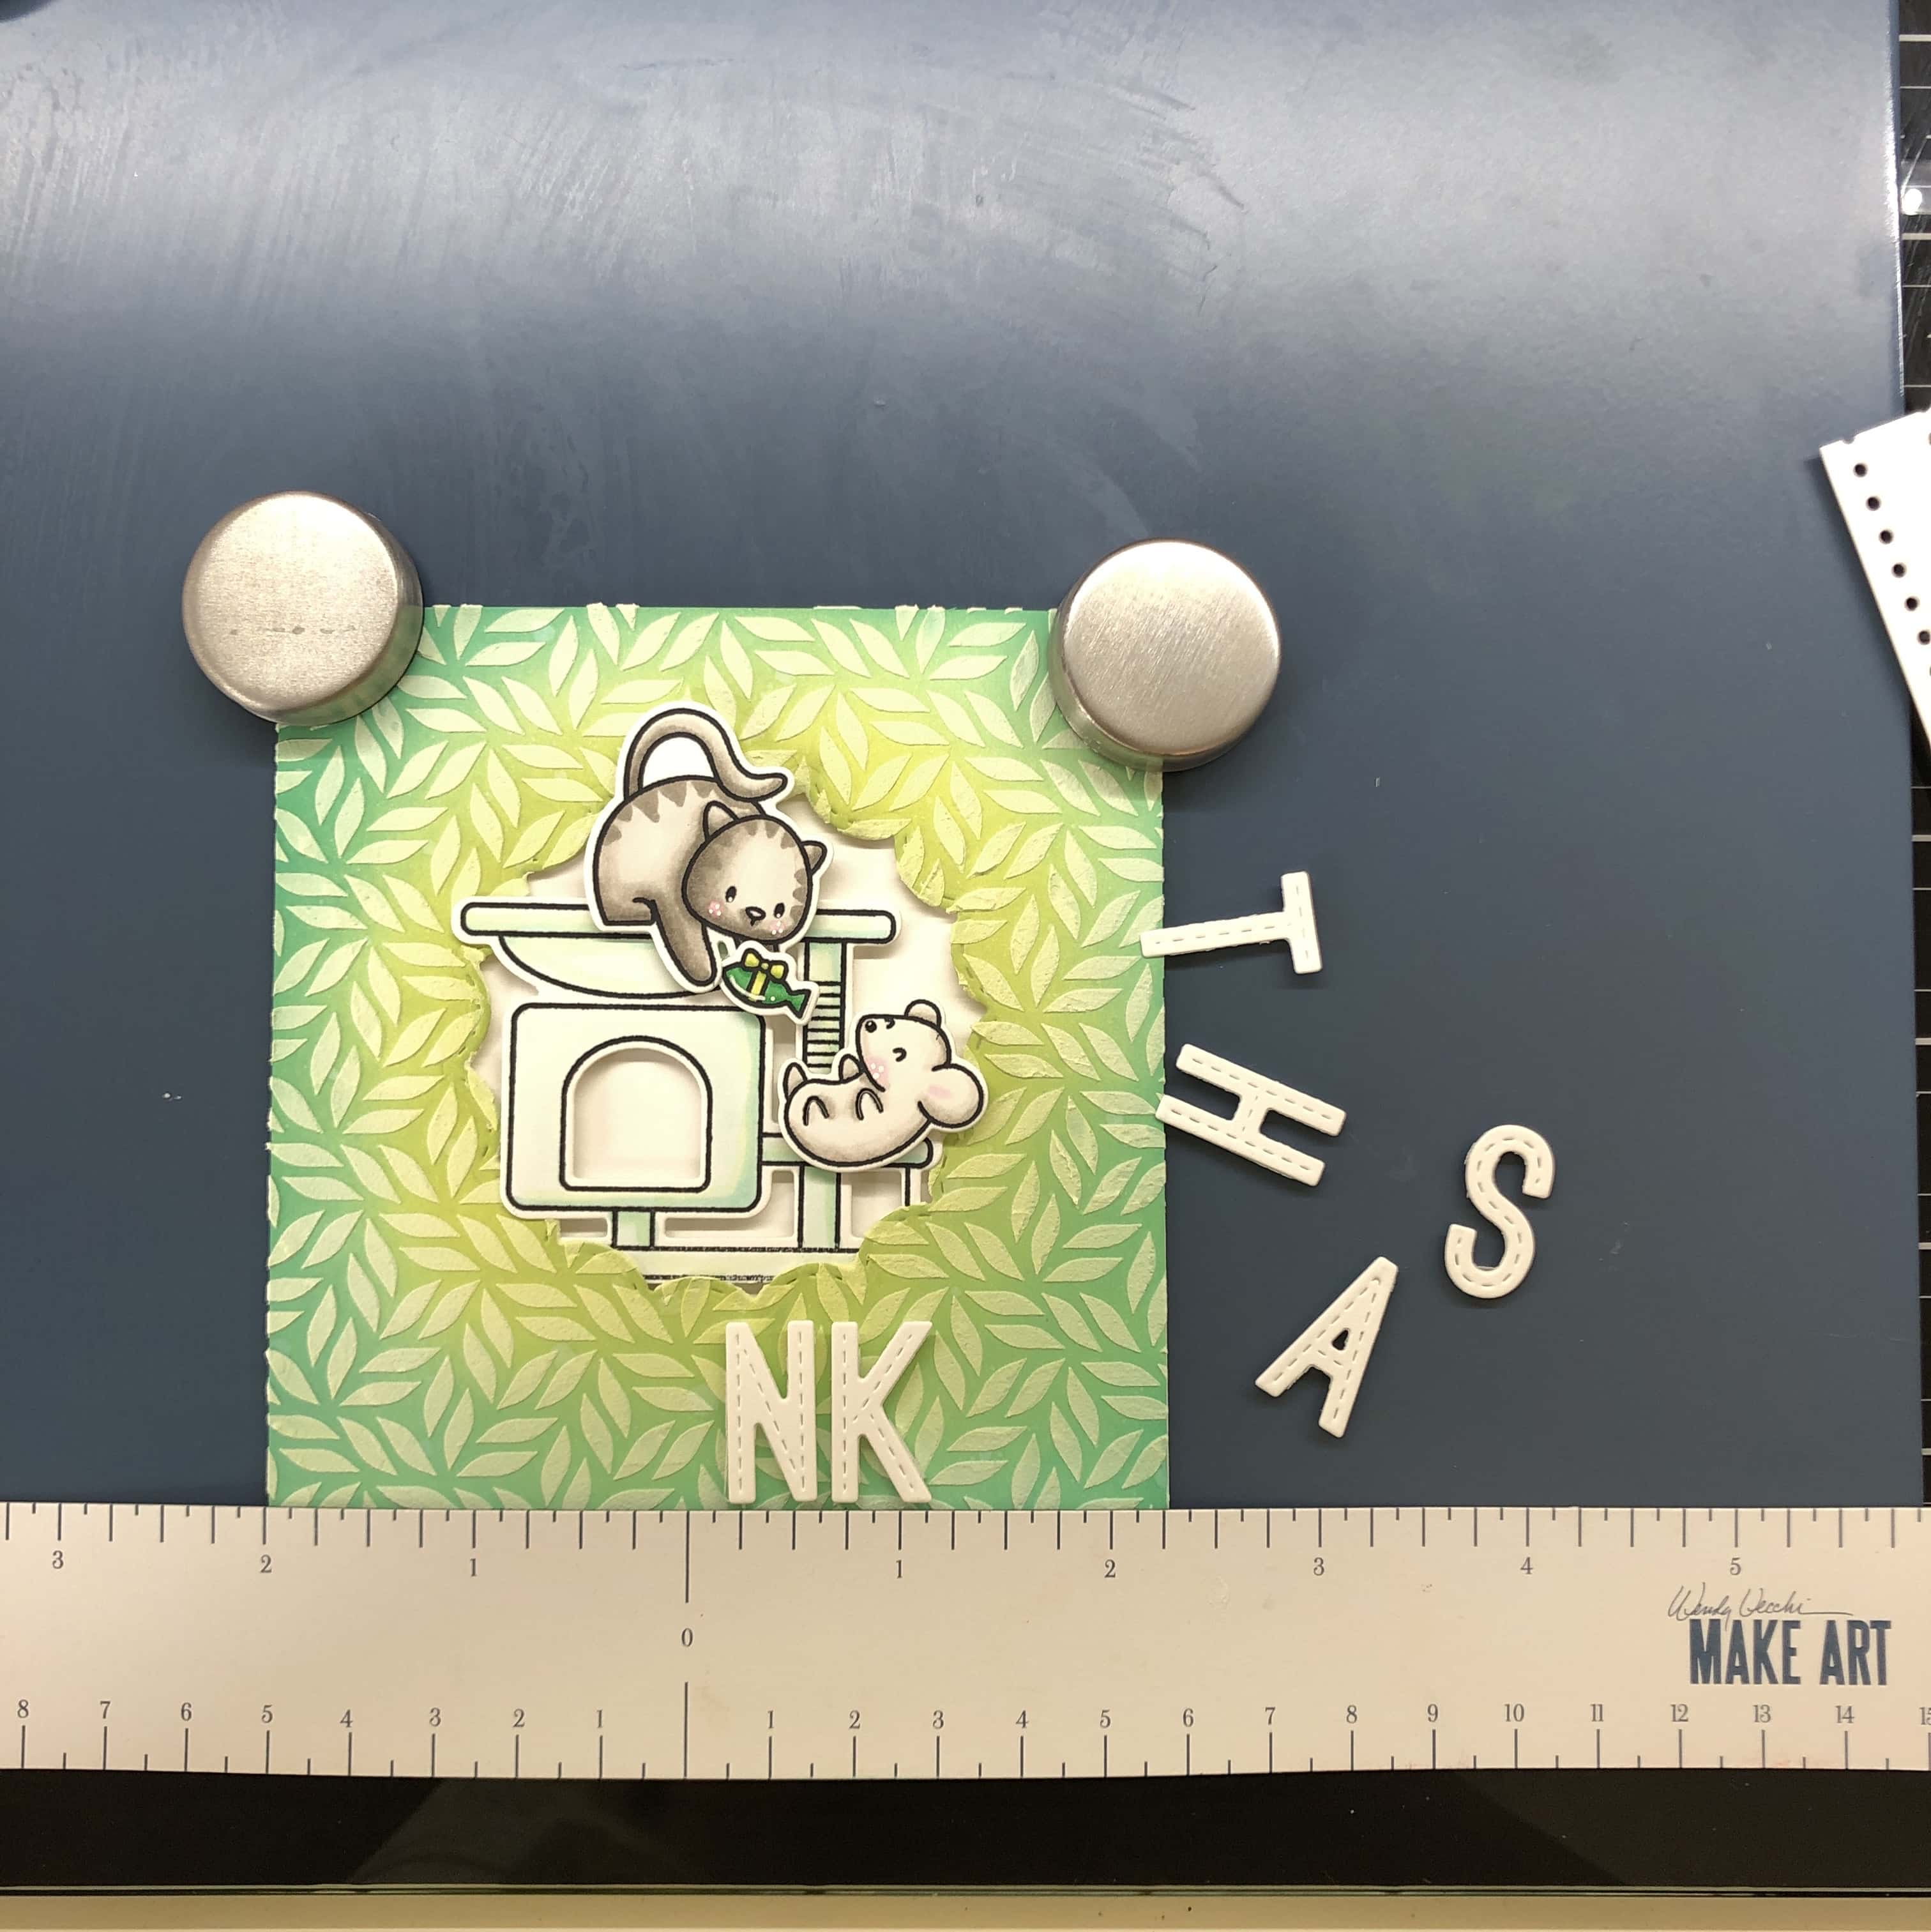
For my sentiment, I’m going to use Stitched Alphabetters Dies and a sentiment from the Purrfect Day stamp set. I’m using the Lovely Little Borders Dies to create little circle borders on the sentiment strip.
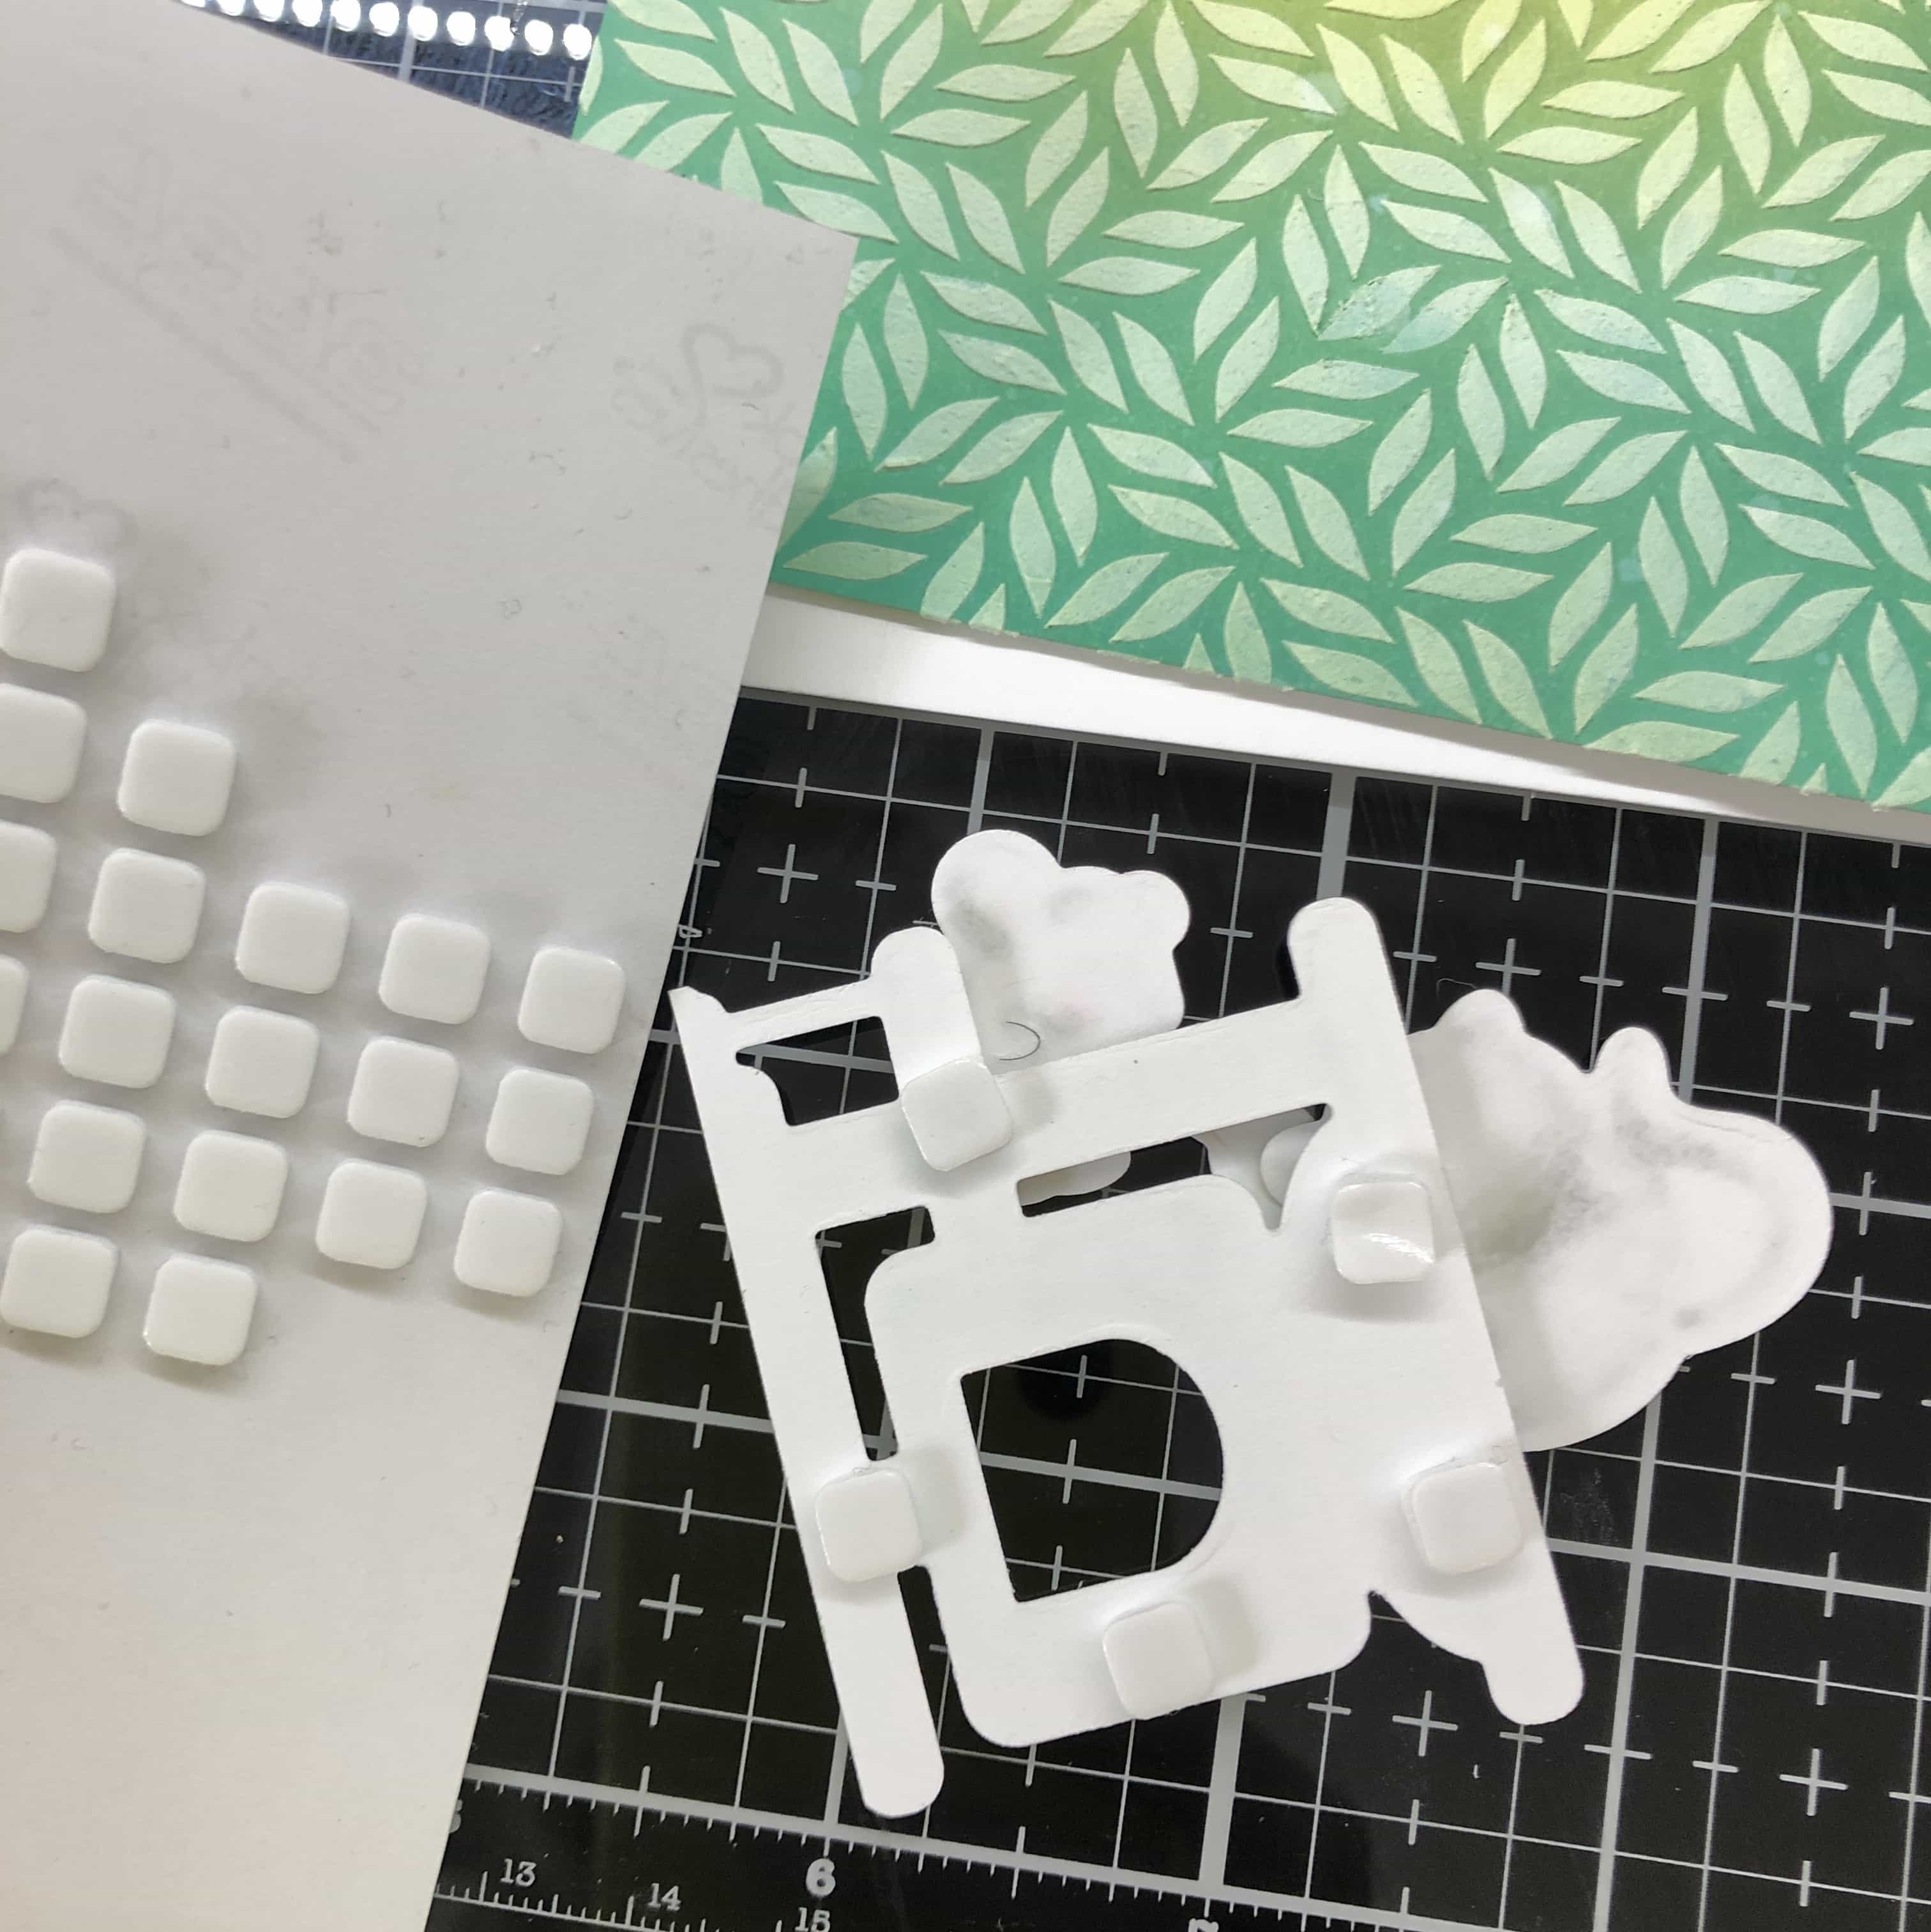
I am using 3D foam tape to adhere my stamped images together. I am going to just use glue to attach the fishy gift to the cat’s paws. I also am putting some 3D foam squares on the back of the cat house. I am using thick 3D foam tape for the back of the card front. First, I’m adhering the card front and then I am going to adhere the stamped images. Finally, I’m using the Stay-tion to hold my card in place while I adhere the sentiments that also have 3D foam tape on their backs. I’m using the ruler to help line up my stitcher letters.

Here are some more photos of the finished card!
Thank you so much for scrolling through! I hope it helped inspire you!
Xoxo, Amanda