
Stenciling & Pandtastic Painters In Action
Hi friends!
I am here with another card in my Sweet Scenes series for Heffy Doodle! I also wanted to let you guys know that this is my final card in this series. I will be stepping away from the blog team. I won’t be leaving the Heffy Doodle family though. (Of course not!) You will still see cards from me as a special contributor. Heffy Doodle, Lesley, the design team members and all the Heffy Doodlers have a special place in my heart.

So let me start by showing you the card I made! I stenciled my background and made a cute ‘oval shaped’ little scene.

I started with an 12 sized rectangle piece of Bristol Smooth cardstock. I put down the Unbeleafable stencil on top and with Key Lime ink (Pinkfresh) I stenciled on all of the leaves. When that was done, I removed the stencil and went over the whole panel with a slightly lighter ink (Grassy Knoll). Then I added some white and black splatters, just to give it more interest. I went all out with the splatters, I know. But I really love the effect! I set this panel aside to dry for a bit.
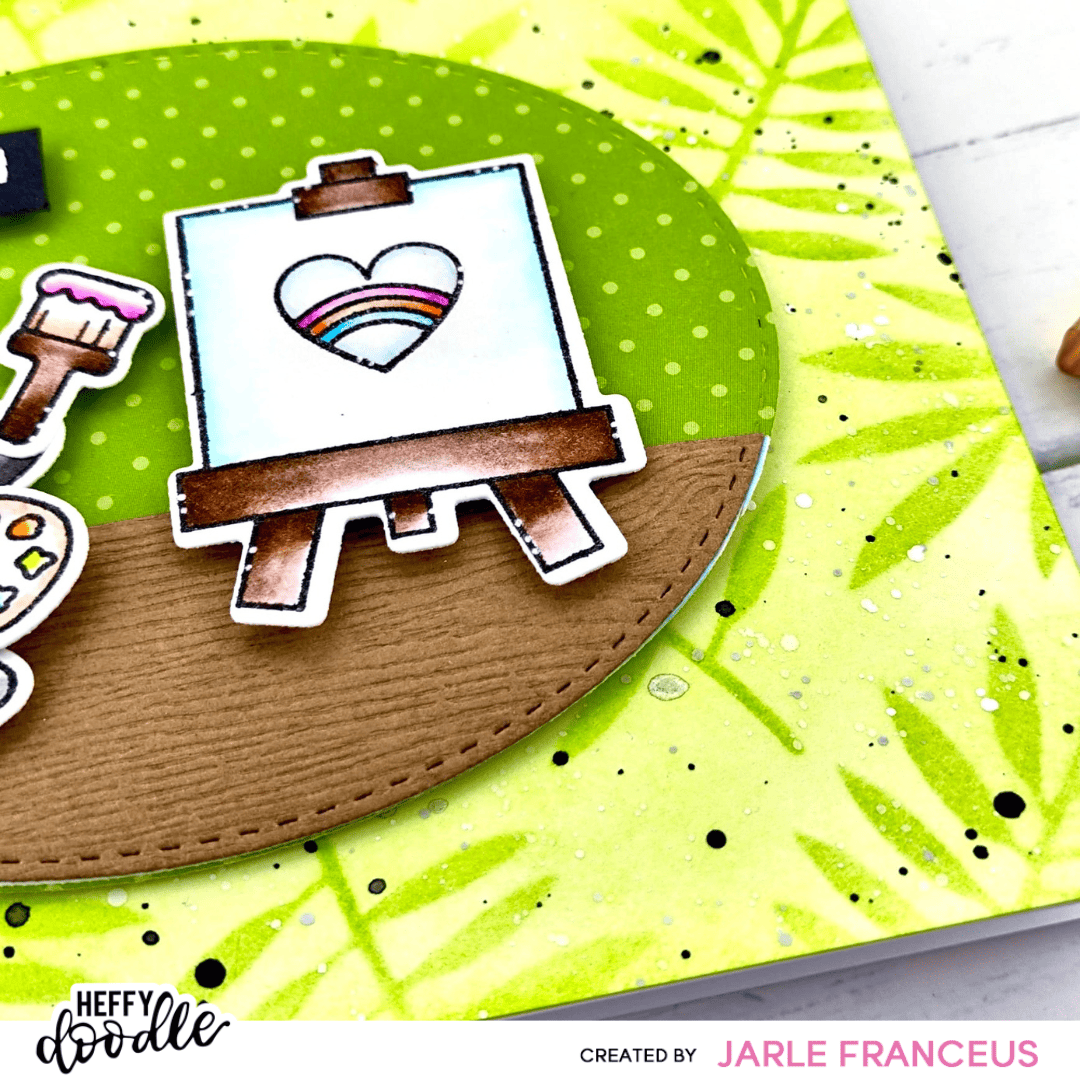
In the meantime, I die cut an oval with the Ovally Excited dies. First I wanted to ink blend this panel, but I decided to use a green patterned paper from the Tinsel Town paper pack. Then I die cut another oval out of woodgrain cardstock. With a border die from the Freshly Cut Grass die set, I cut the bottom piece to be my ground. I glued that border to the patterned paper.
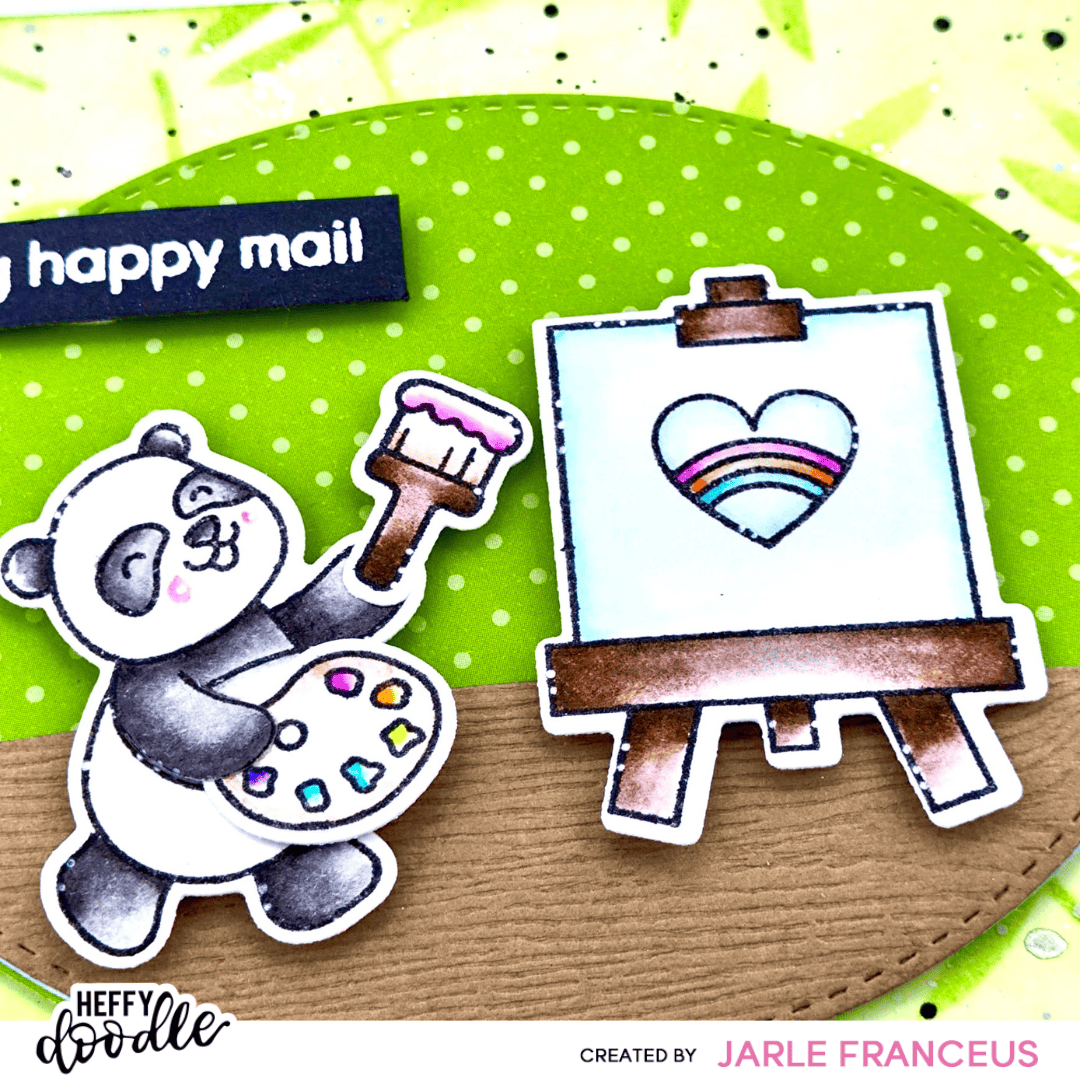
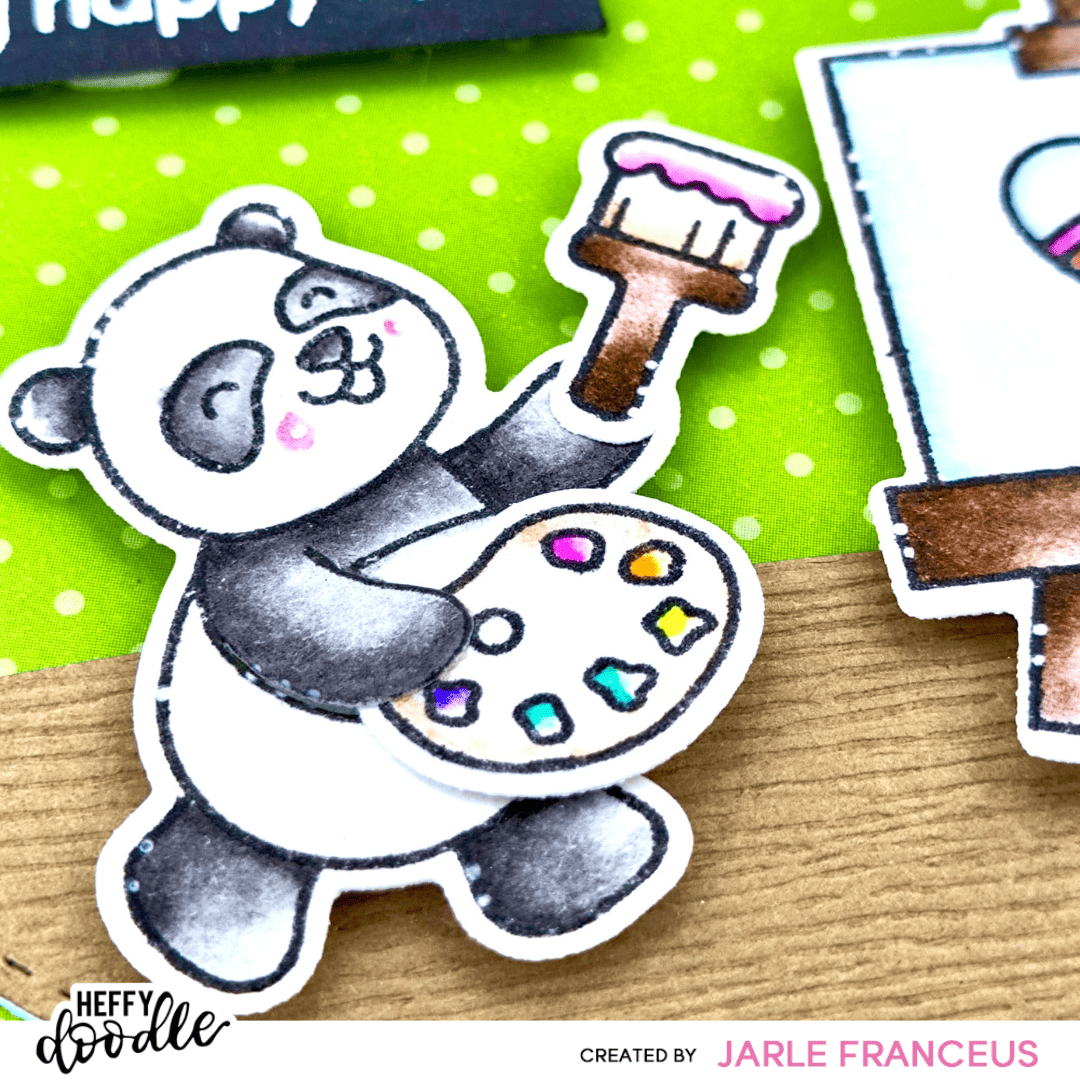
I stamped the images from Pandtastic Painters onto Bristol Smooth cardstock with Versafine Onyx Black ink. I colored them in with my Zig markers and the blender. I used the colors:
- Black – Natural Gray – Warm Grey (for the panda)
- Deep Brown – Mid Brown (for the wood on the easel and the brush)
- Light Blue (for the canvas)
- Beige – Oatmeal (for the color palette and the bristles of the brush)
- Violet / Pink / Yellow Orange / Yellow / Cobalt Blue
I added some white gel pen details to the images and die cut them with the coordinating dies and the mini die cutting machine from Heffy Doodle.
Then I placed down the images on the oval shaped piece with foam tape. I adhered the whole oval on the stenciled background with foam tape as well.
For my sentiment, I used the More Classic Sentiments set. I prepped my black cardstock with an antistatic powder tool and stamped the sentiment in Versamark ink. I sprinkled on white embossing powder and heat set it with my heat tool. I used my Heffy Doodle paper trimmer to trim the sentiment down. I adhered it to the panel with foam squares.
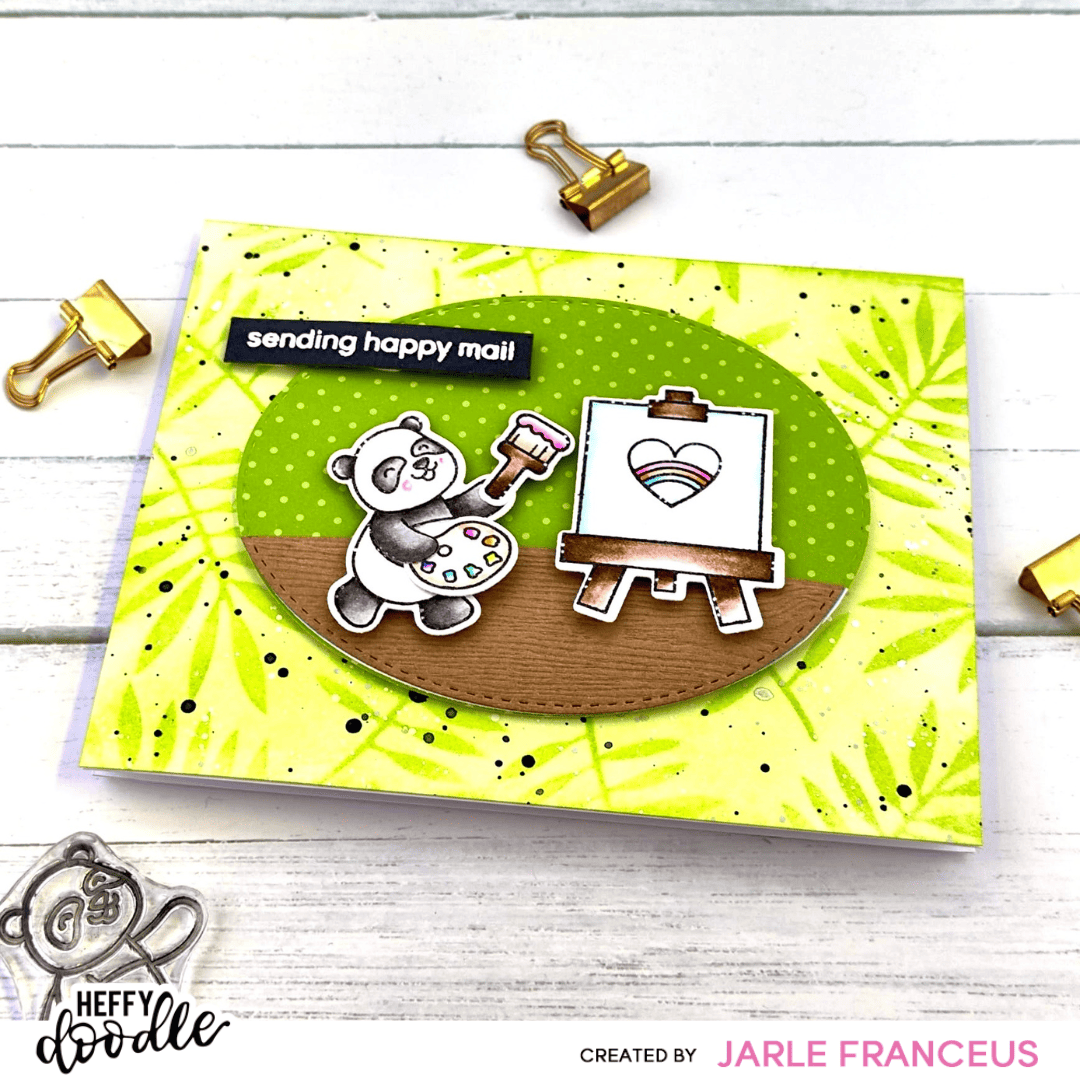
I adhered my whole card panel on a white top fold cardbase and this finished off my card. I really hope my project inspires you to create.
Thank you so much for all your support. I really appreciate it! Have a great day!
Love, Jarle x