
Sending Yappy Happy Mail

Hi Heffy Doodle friends!
I’m so happy to be back on the blog today with a new card in my Sweet Scenes Series!
Let’s dive right in and see how this card came together!

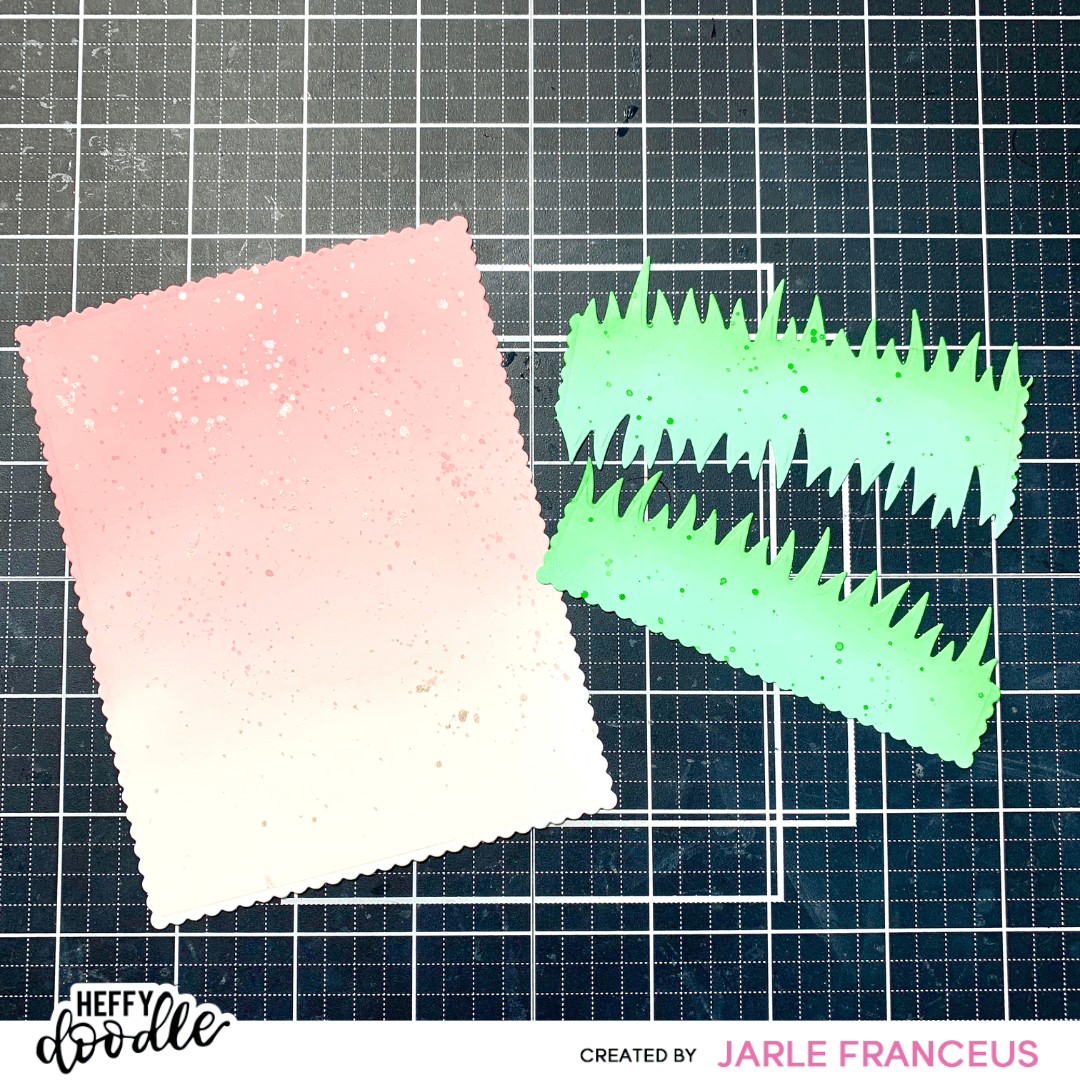
I started by die cutting the largest of the Mini Scalloped Imperial Rectangle dies out of Bristol Smooth cardstock since I was going to be doing some ink blending (yes, I know, I LOVE ink blending!). Then I die cut that same Mini Scalloped Rectangle out of Hint of Mint cardstock. This is such a pretty green color! To create my grass, I cut the scalloped green piece with the Freshly Cut Grass dies. I made sure I had 2 pieces of grass.
Then I started my ink blending. I used Spun Sugar and Victorian Velvet Oxide inks for the main card panel. For the grassy borders, I put on a little bit of Distress Mowed Lawn on the edges.
I splattered on some Victorian Velvet, diluted with water on that main panel. I also added a little bit of sparkle with Lawn Fawn Liquid Stardust. On the grass, I splattered on Mowed Lawn.
You can see the pieces in the picture below. I love that color combination of Spun Sugar and Victorian Velvet!
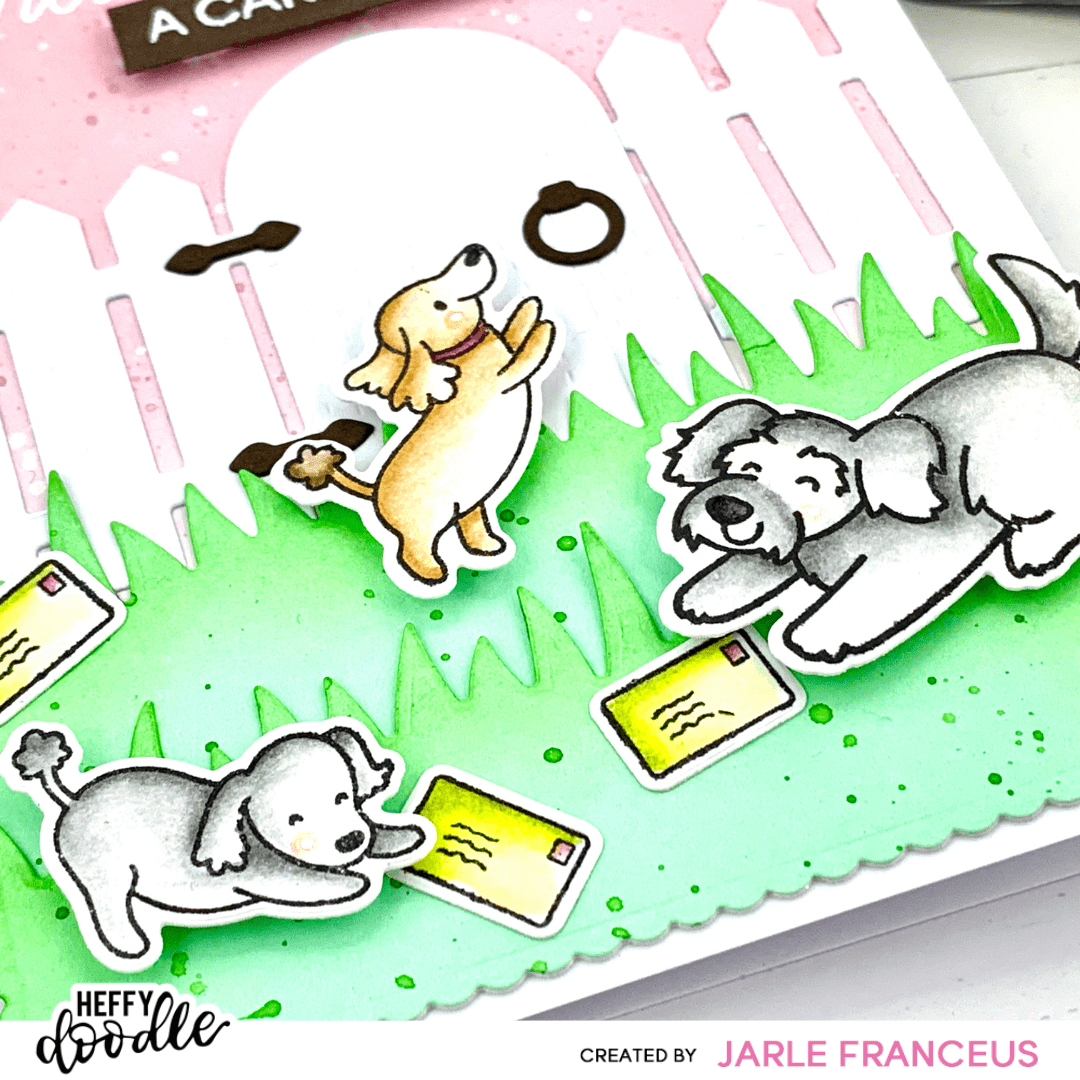
I decided I wanted to add the fun Close The Gate die. So I die cut this out of regular white cardstock. I love that the die already has that fun wooden detail in it. The details were cut out of brown cardstock.
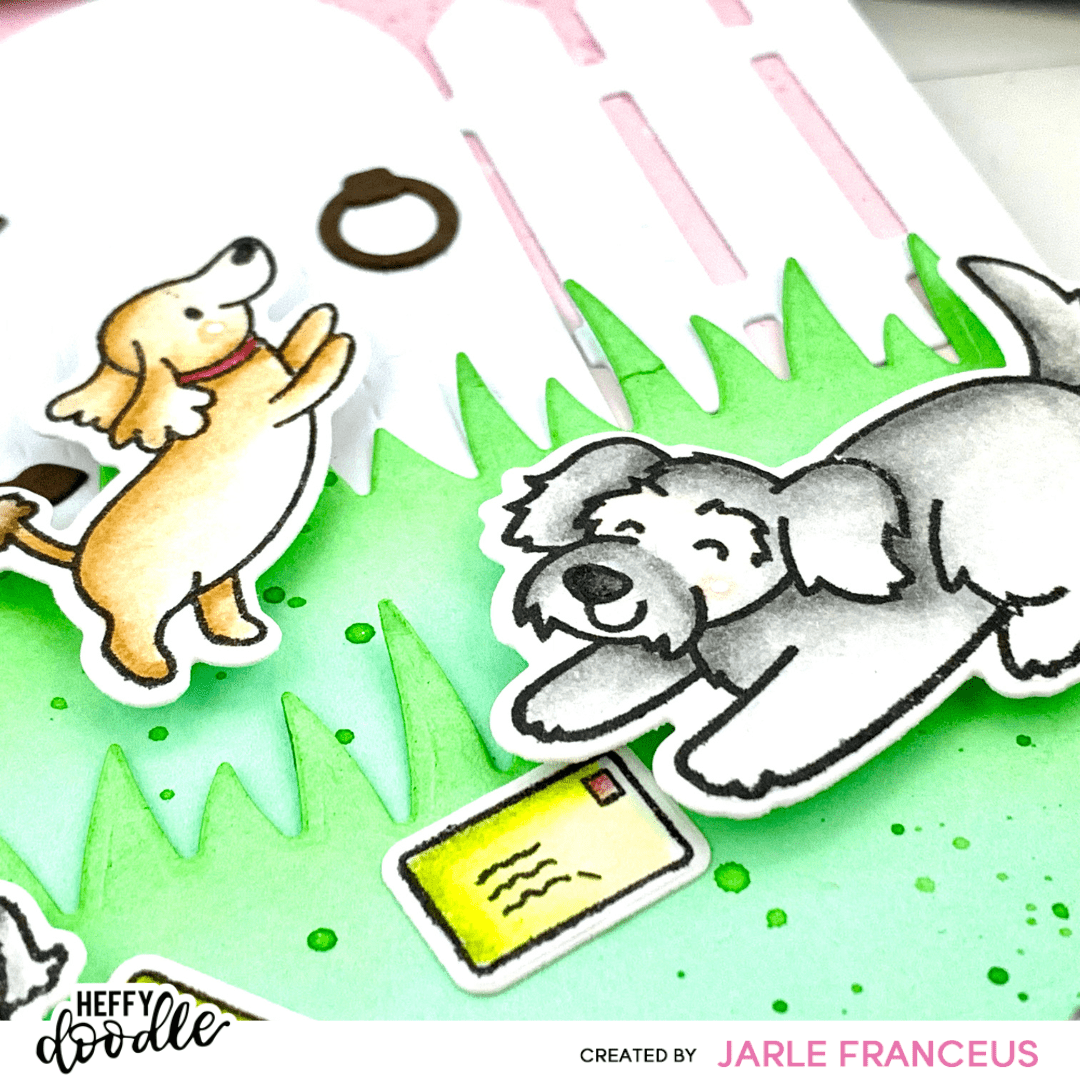
Time to stamp those lovely images. I used the Yappy Happy Mail and Who Let The Dogs Out stamp sets. I stamped the images on Bristol Smooth cardstock with Versafine Onyx Black ink. I colored them with my Zig markers. I really like switching my coloring medium now and then. It keeps things interesting and fun!
I used these markers:
- Lemon Yellow / Yellow Green
- Pale Rose
- Tea Rose (blushy cheeks)
- Light Gray / Gray Brown
- Oatmeal / Beige
When all the coloring was done, I die cut everything with the coordinating dies and the lovely mini die cutting machine.
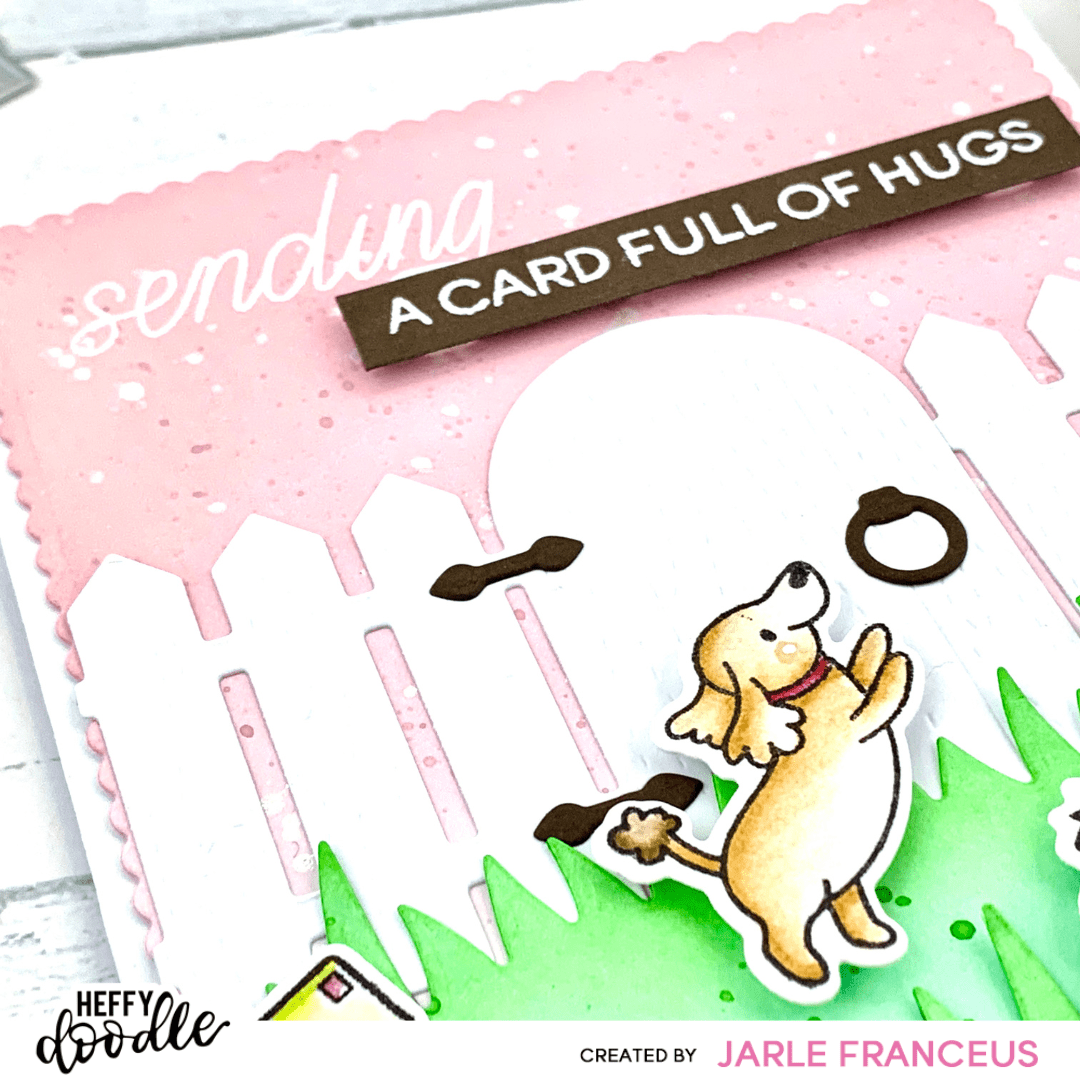
I put my grassy borders on the card panel with liquid glue. I glued the gate right above. Before adhering my images, I wanted to heat emboss the first part of the sentiment directly onto the panel. So after prepping the panel with my antistatic powder tool, I stamped the ‘sending’ with Versamark ink and sprinkled on white embossing powder. I heat set it with my heat tool.
The second part of the sentiment was heat embossed on the same brown cardstock as the little gate details. I trimmed it down with the mini paper trimmer and popped it up with foam squares.
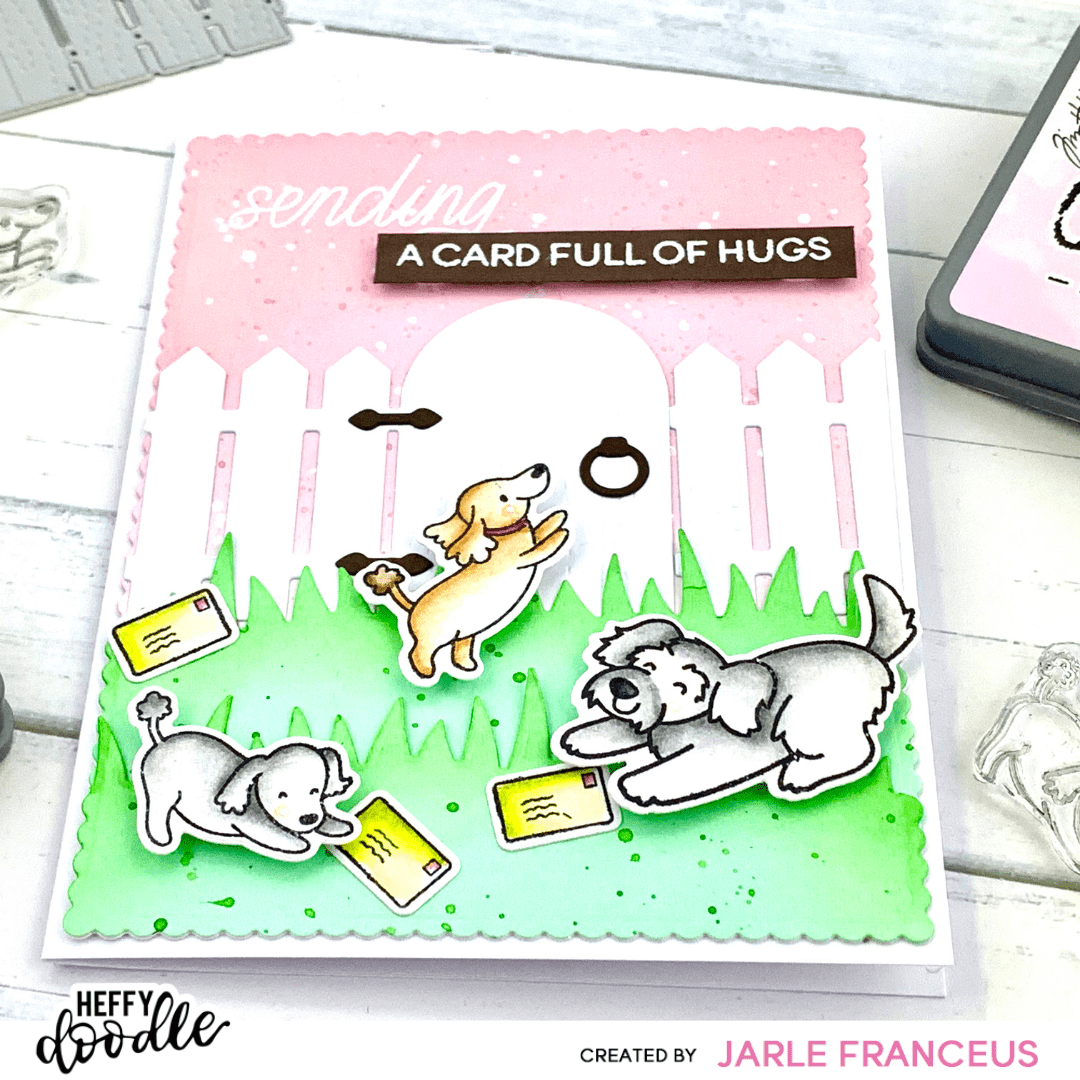
Finally, I could adhere my images. The dogs were put on with foam tape, the envelopes with regular liquid glue. I put the card panel on a white card base and this card was all done. This was definitely not difficult to make. A little bit of die cutting, ink blending and coloring. I love how it all came together and I hope you like this inspiration.
Thank you so much for stopping by and have an awesome weekend!
Love, Jarle x