
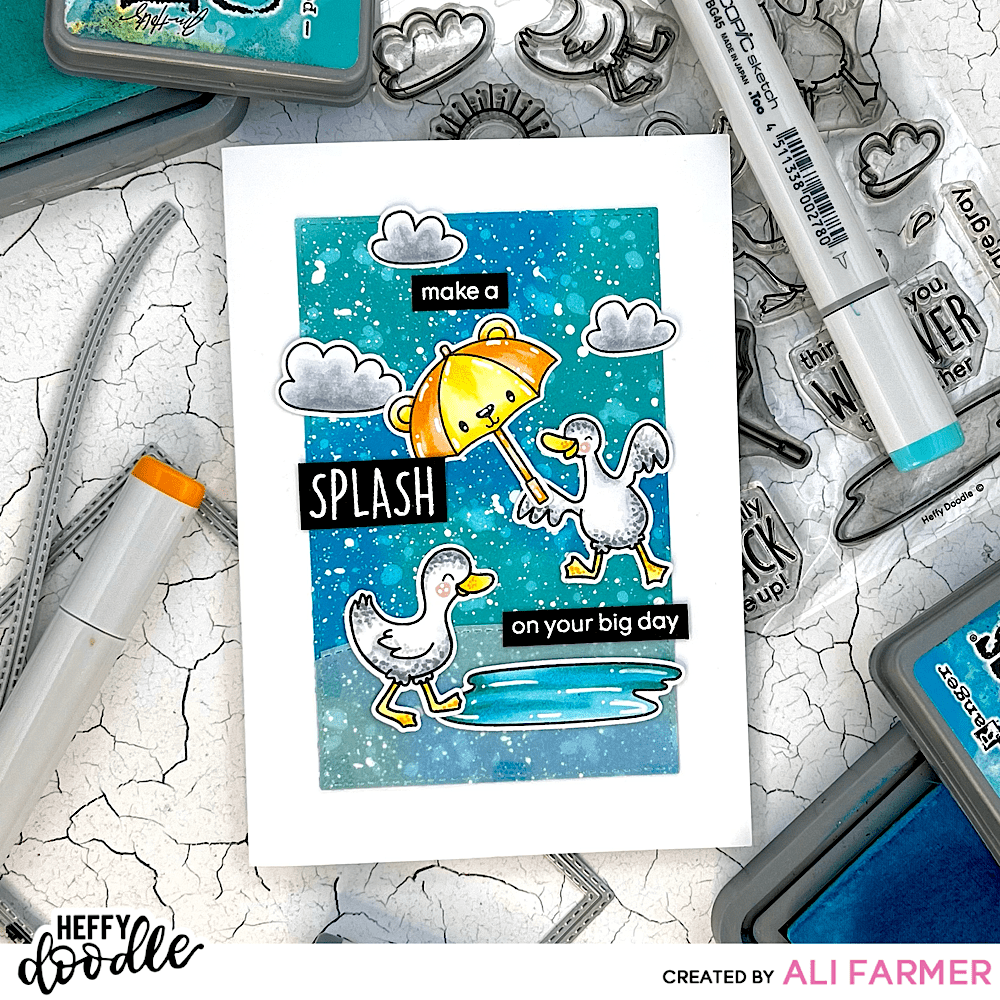
Make a Splash with Your Backgrounds
Hello Crafters, Ali here with a background inspiration blog post that will help you take your backgrounds from woe to wow! Today’s card uses the wonderful Quack Me Up Stamp and Dies Sets, as well as the Stitched Rectangles and Slopey Joes dies. Today’s post includes a background tutorial – I used this technique a little while ago to create a background for my underwater card (with Sealy Friends stamp set) and also to create a galaxy background – so I thought I would give a detailed tutorial of how to do the same in a blkog post. The result is a bright, fun card with lots of interest and texture.
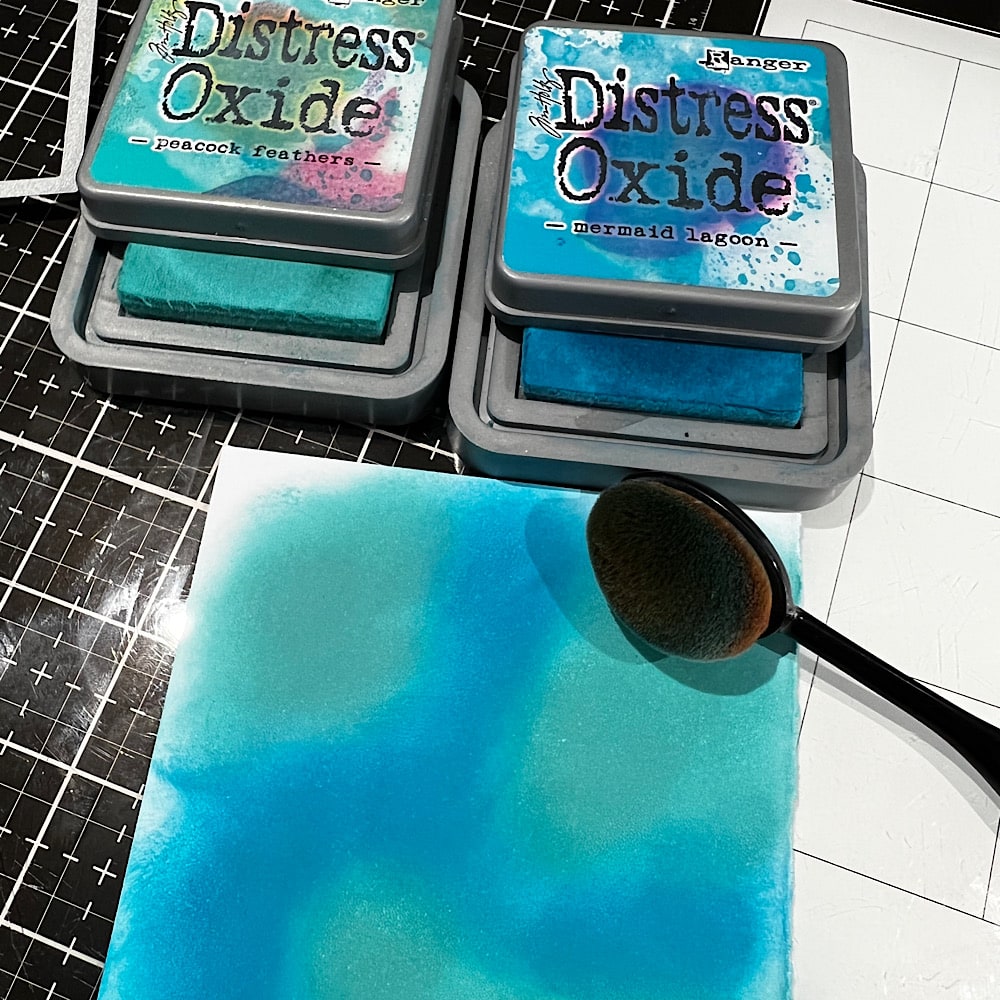
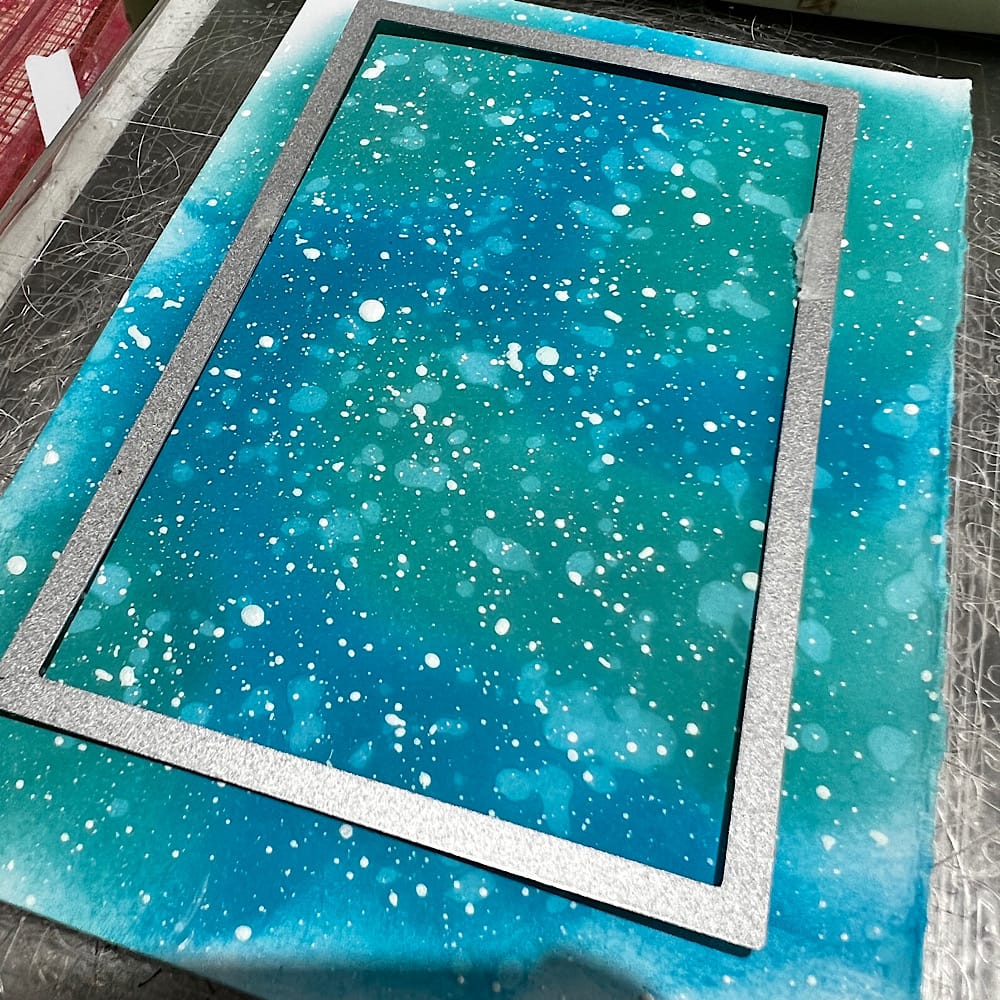
To begin my background, I used Peacock Feathers and Mermaid Lagoon Distress Oxide Inks and a brush, applying the inks liberally to a piece of white cardstock.
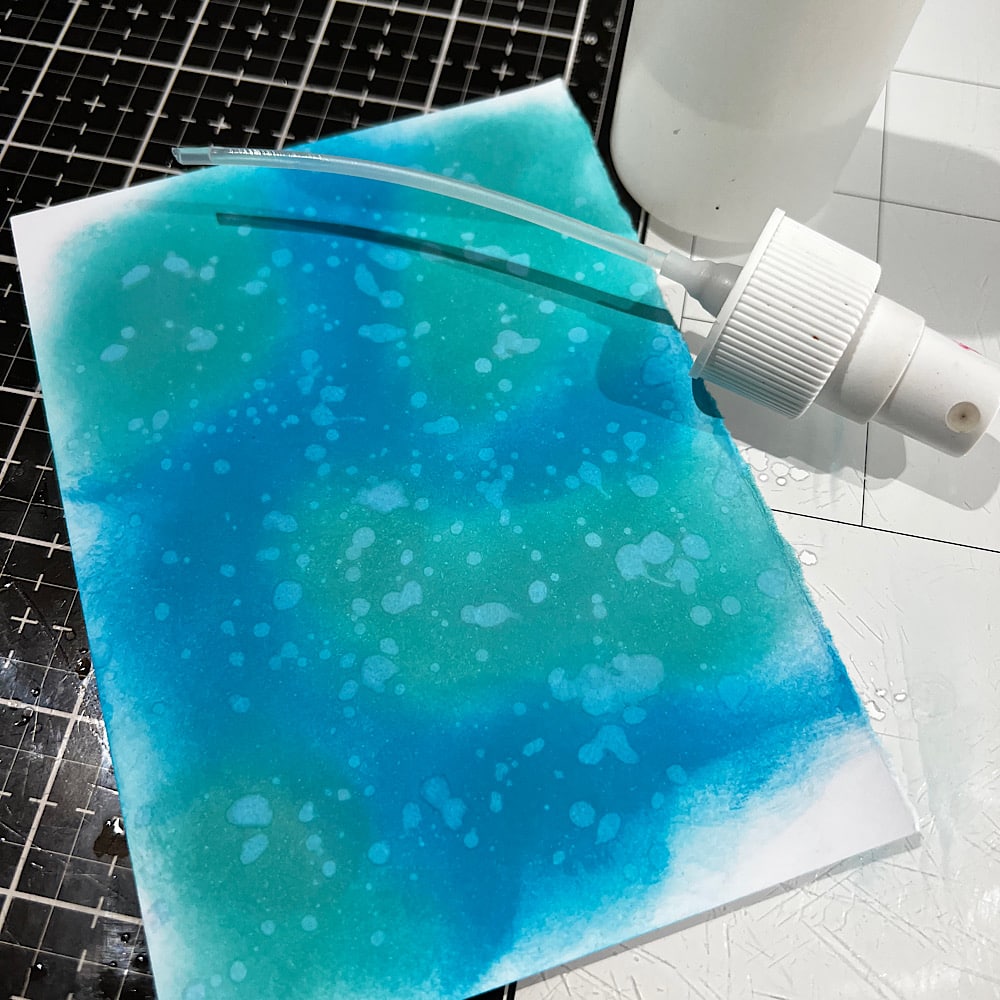
I then used the top from my water spritzer to sprinkle/flick droplets of water over the cardstock. You can dab with a papertowel or allow the droplets to dry on their own. Using a paper towel will remove slightly more colour from the cardstock where the droplets have settled.
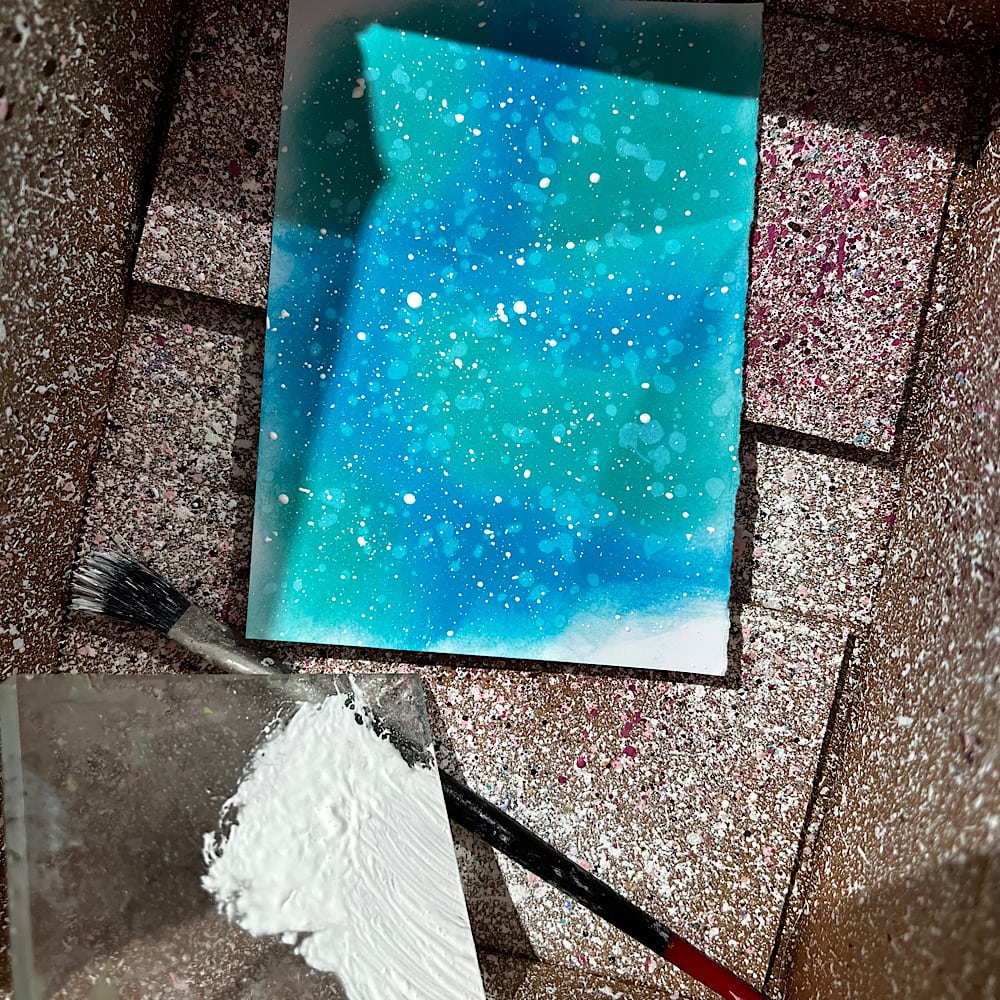
I then use a splodge of white Gesso paint on an acrylic block, spritz with some water, mix together and use a stiff bristled brush to flick specks of paint off the edge of the block onto the cardstock piece. I use an old box to place my piece in while flicking to save on clean-up!
When fully dry (I put mine aside while I do the stamping of images and colouring), use the Stitched Rectangle Die to Cut your background piece from the cardstock. Also use this die to cut a small piece of vellum and trim top edge using one of the Slopey Joes dies.
Attach this completed piece to a white cardbase. Stamp, Colour and die cut your images. Stamp and white emboss the sentiment on black cardstock and trim to form sentiment strips. Adhere images and sentiment strips to the front of the card and add white shine detail with a White Posca Pen.
I hope this inspires you to try a watery background soon – or try some other combos and colours! Thanks for joining me here on the Heffy Blog and see you again soon! Ali x