
Let’s Seal-ebrate… I’m Nuts About You!
Hello everyone! My name is Randy and I am a fellow cardmaker and a guest designer for Heffy Doodle for the month of January. I am super excited to guest design for this amazing company as I absolutely adore the stamp and die sets. I have two projects to share today. The first card is to welcome in the new year/seal-ebrate a birthday and the second is to get ready for Valentine’s Day!
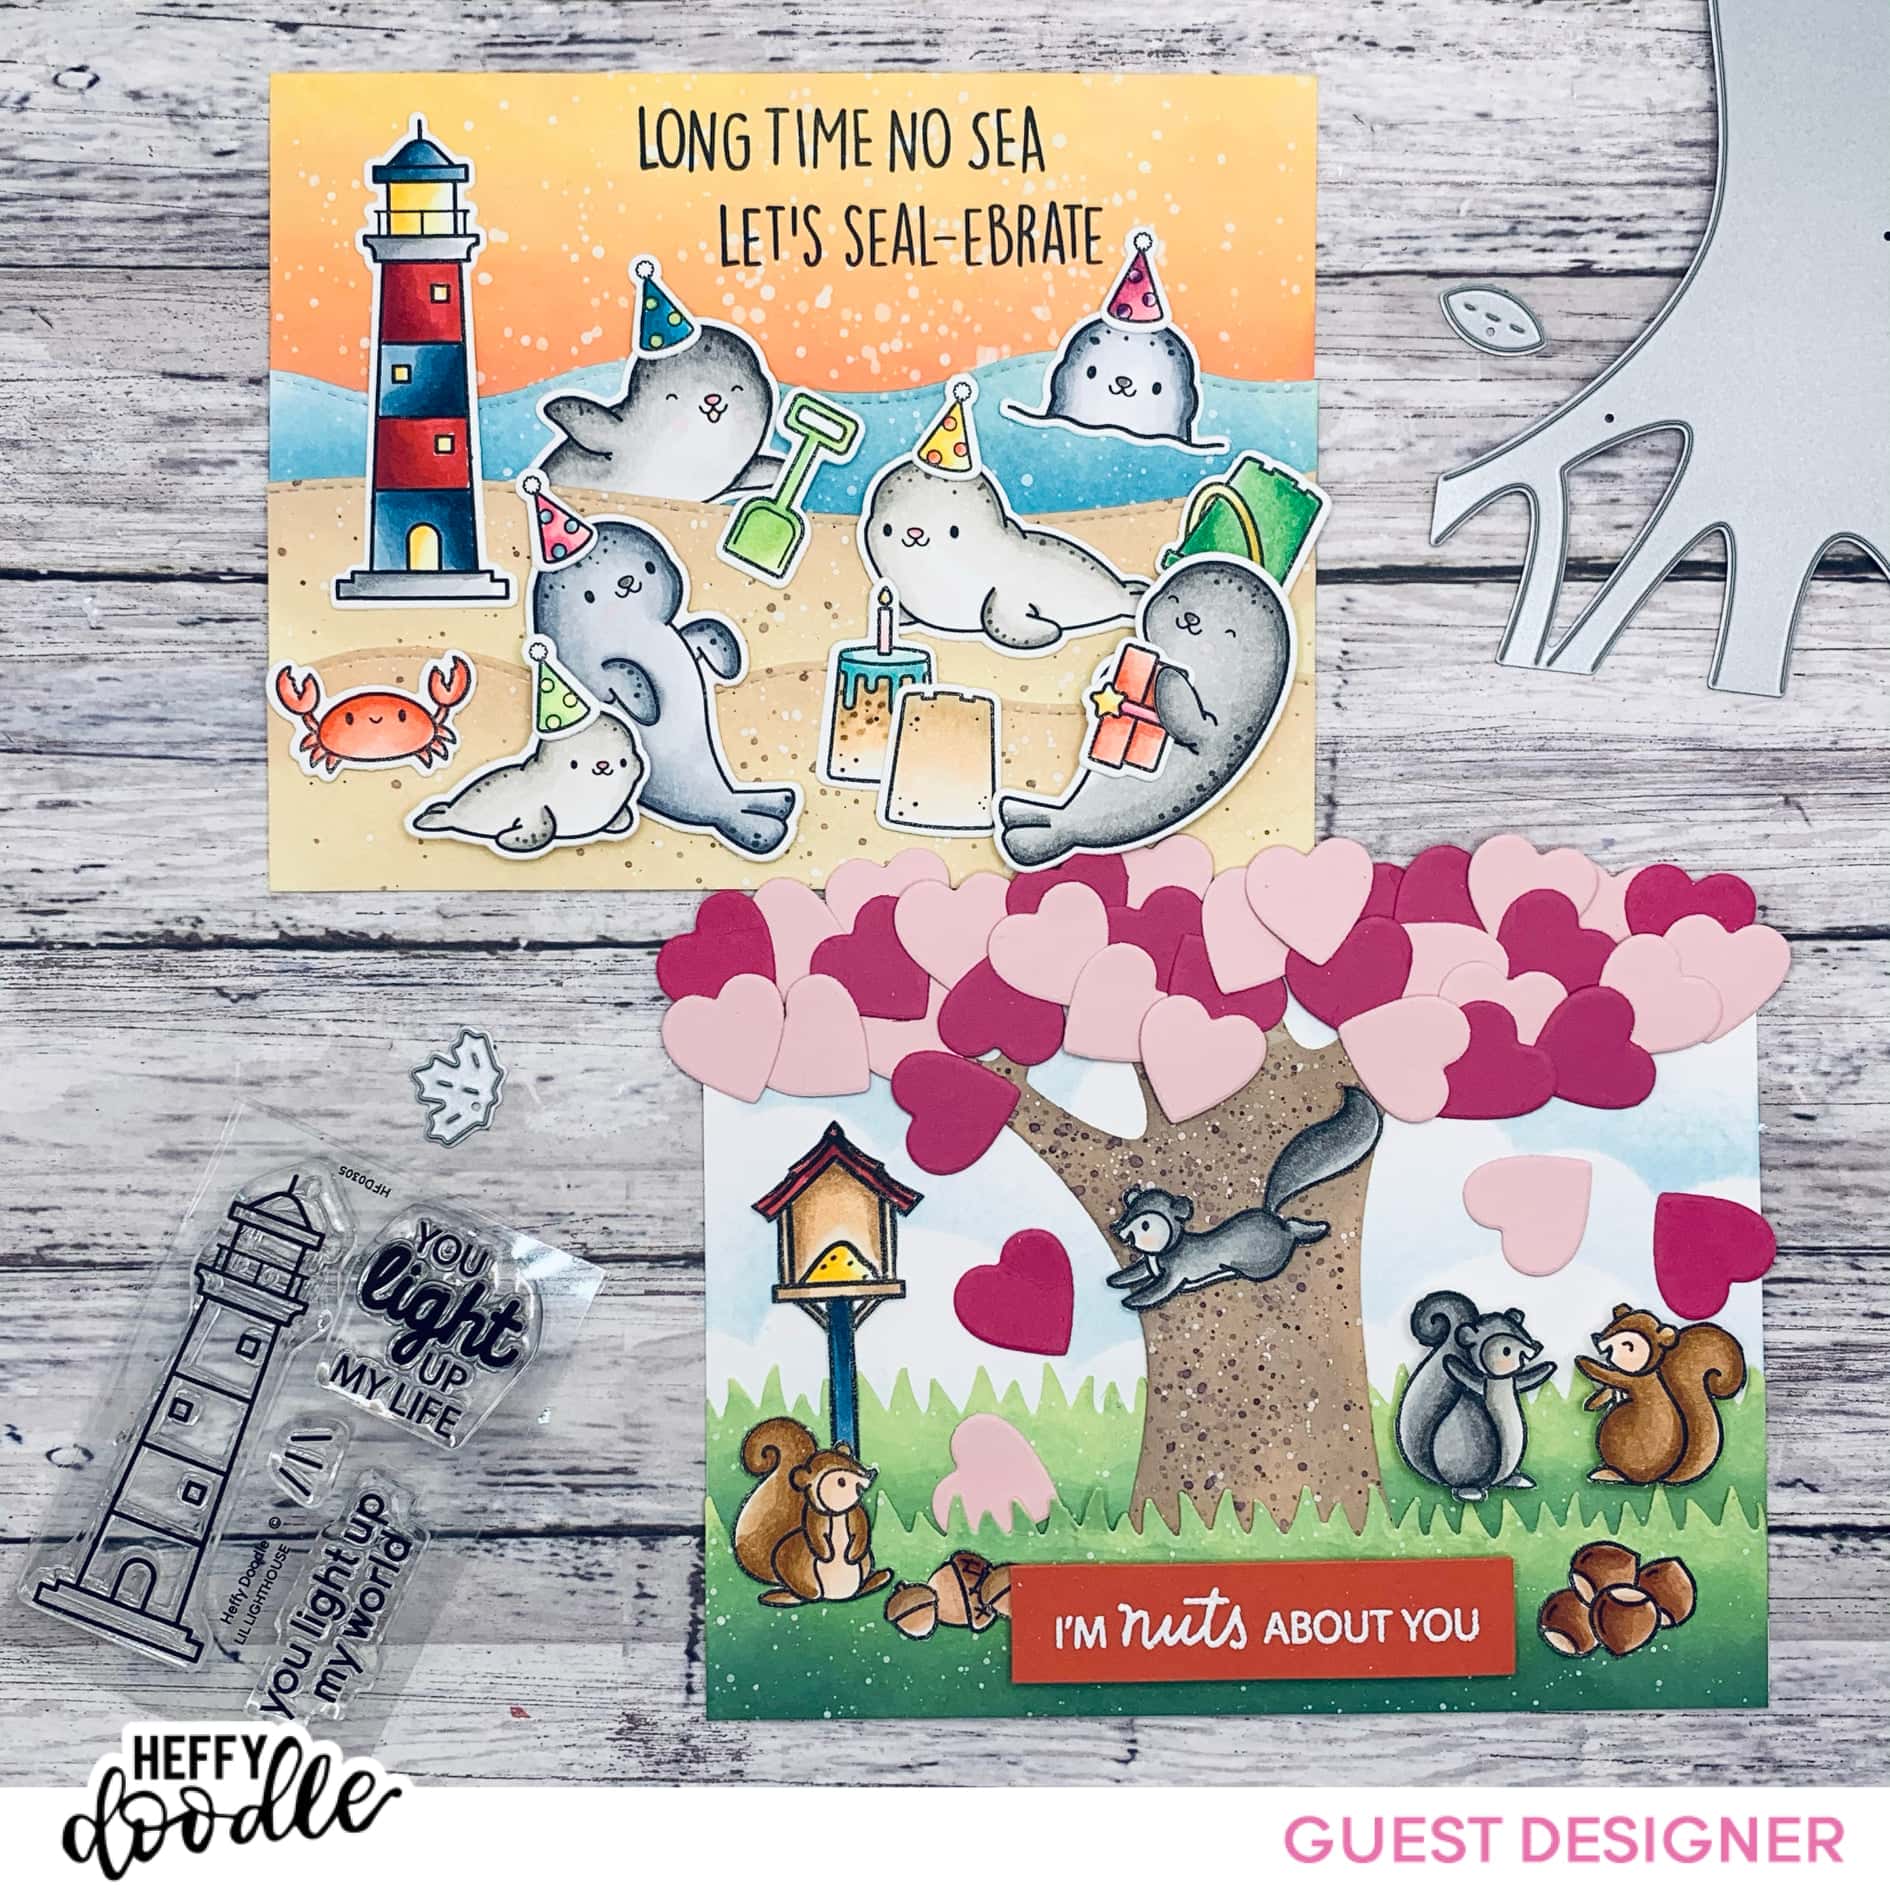
For my first card, I used the following sets: Sealy Friends Stamps and Dies, A Little Shellfish Stamps and Dies, Lil Lighthouse Stamps and Dies, and the Slimline Scenery Dies.

I first stamped out all the images I wanted to used on cardstock and used the following Copic Markers:
- Seals: C0, C2, C4, C6, C8, T0, T2, T4, T6, T7, W00, W1, W3, W5, W7
- Lighthouse: R20, R22, R24,
- Crab: R20, R22
- Sandcake: E31, E33, E35, BG13, BG15
- Pail and Shovel: YG01, YG09, YG13, YG17
I then diecut all the images out using the coordinating dies and set them to the side.
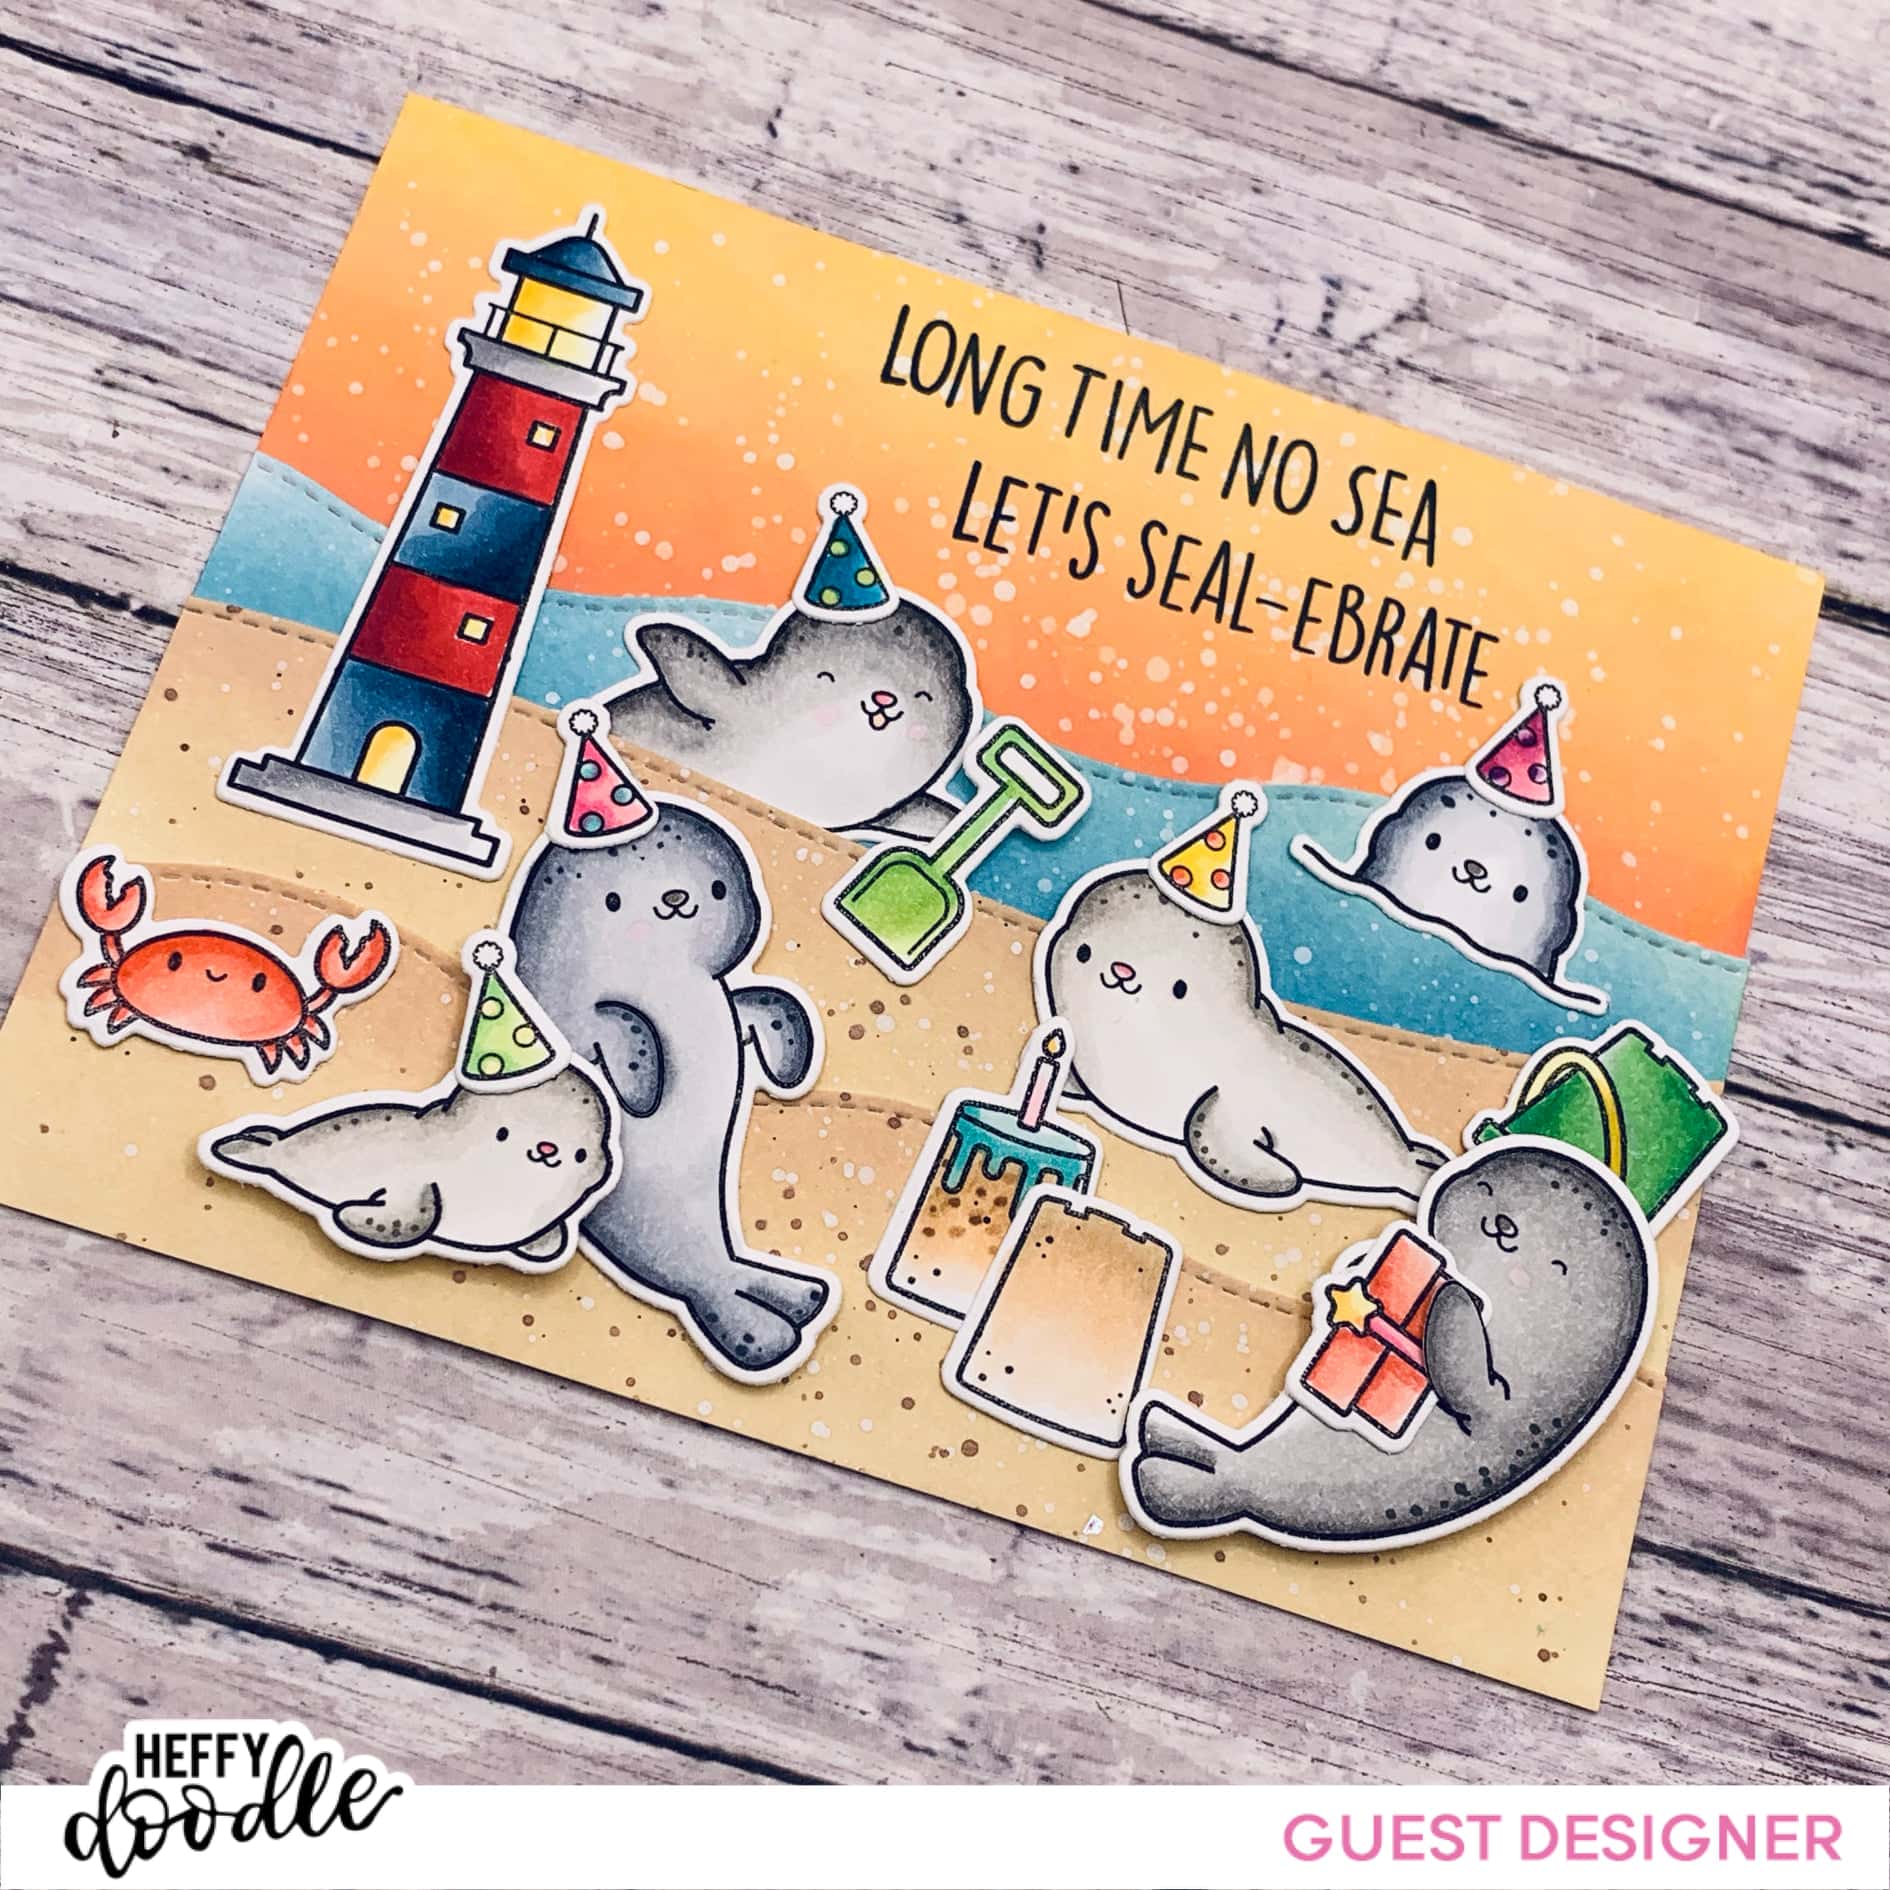
I cut down cardstock to four 5.5×4.25 inch panels. With 1 panel, I used the Hill and Wavy dies from the Slimline Scenery set to cut out my landscape pieces. For the sand pieces, I blended Tattered Rose and Antique Linen Distress Oxides. For the sea piece, I blended Peacock Feathers, Tumbled Glass and Mermaid Lagoon. I took a second panel and blended Abandoned Coral, Dried Marigold and Scattered Straw for the sunny sky. On all of the blended pieces, I splattered white water color using a paint brush. For the sand pieces, I used brown watercolor and splattered it with a paint brush.
I then stamped the sentiments directly onto the card panel and assembled all the images to complete my card.
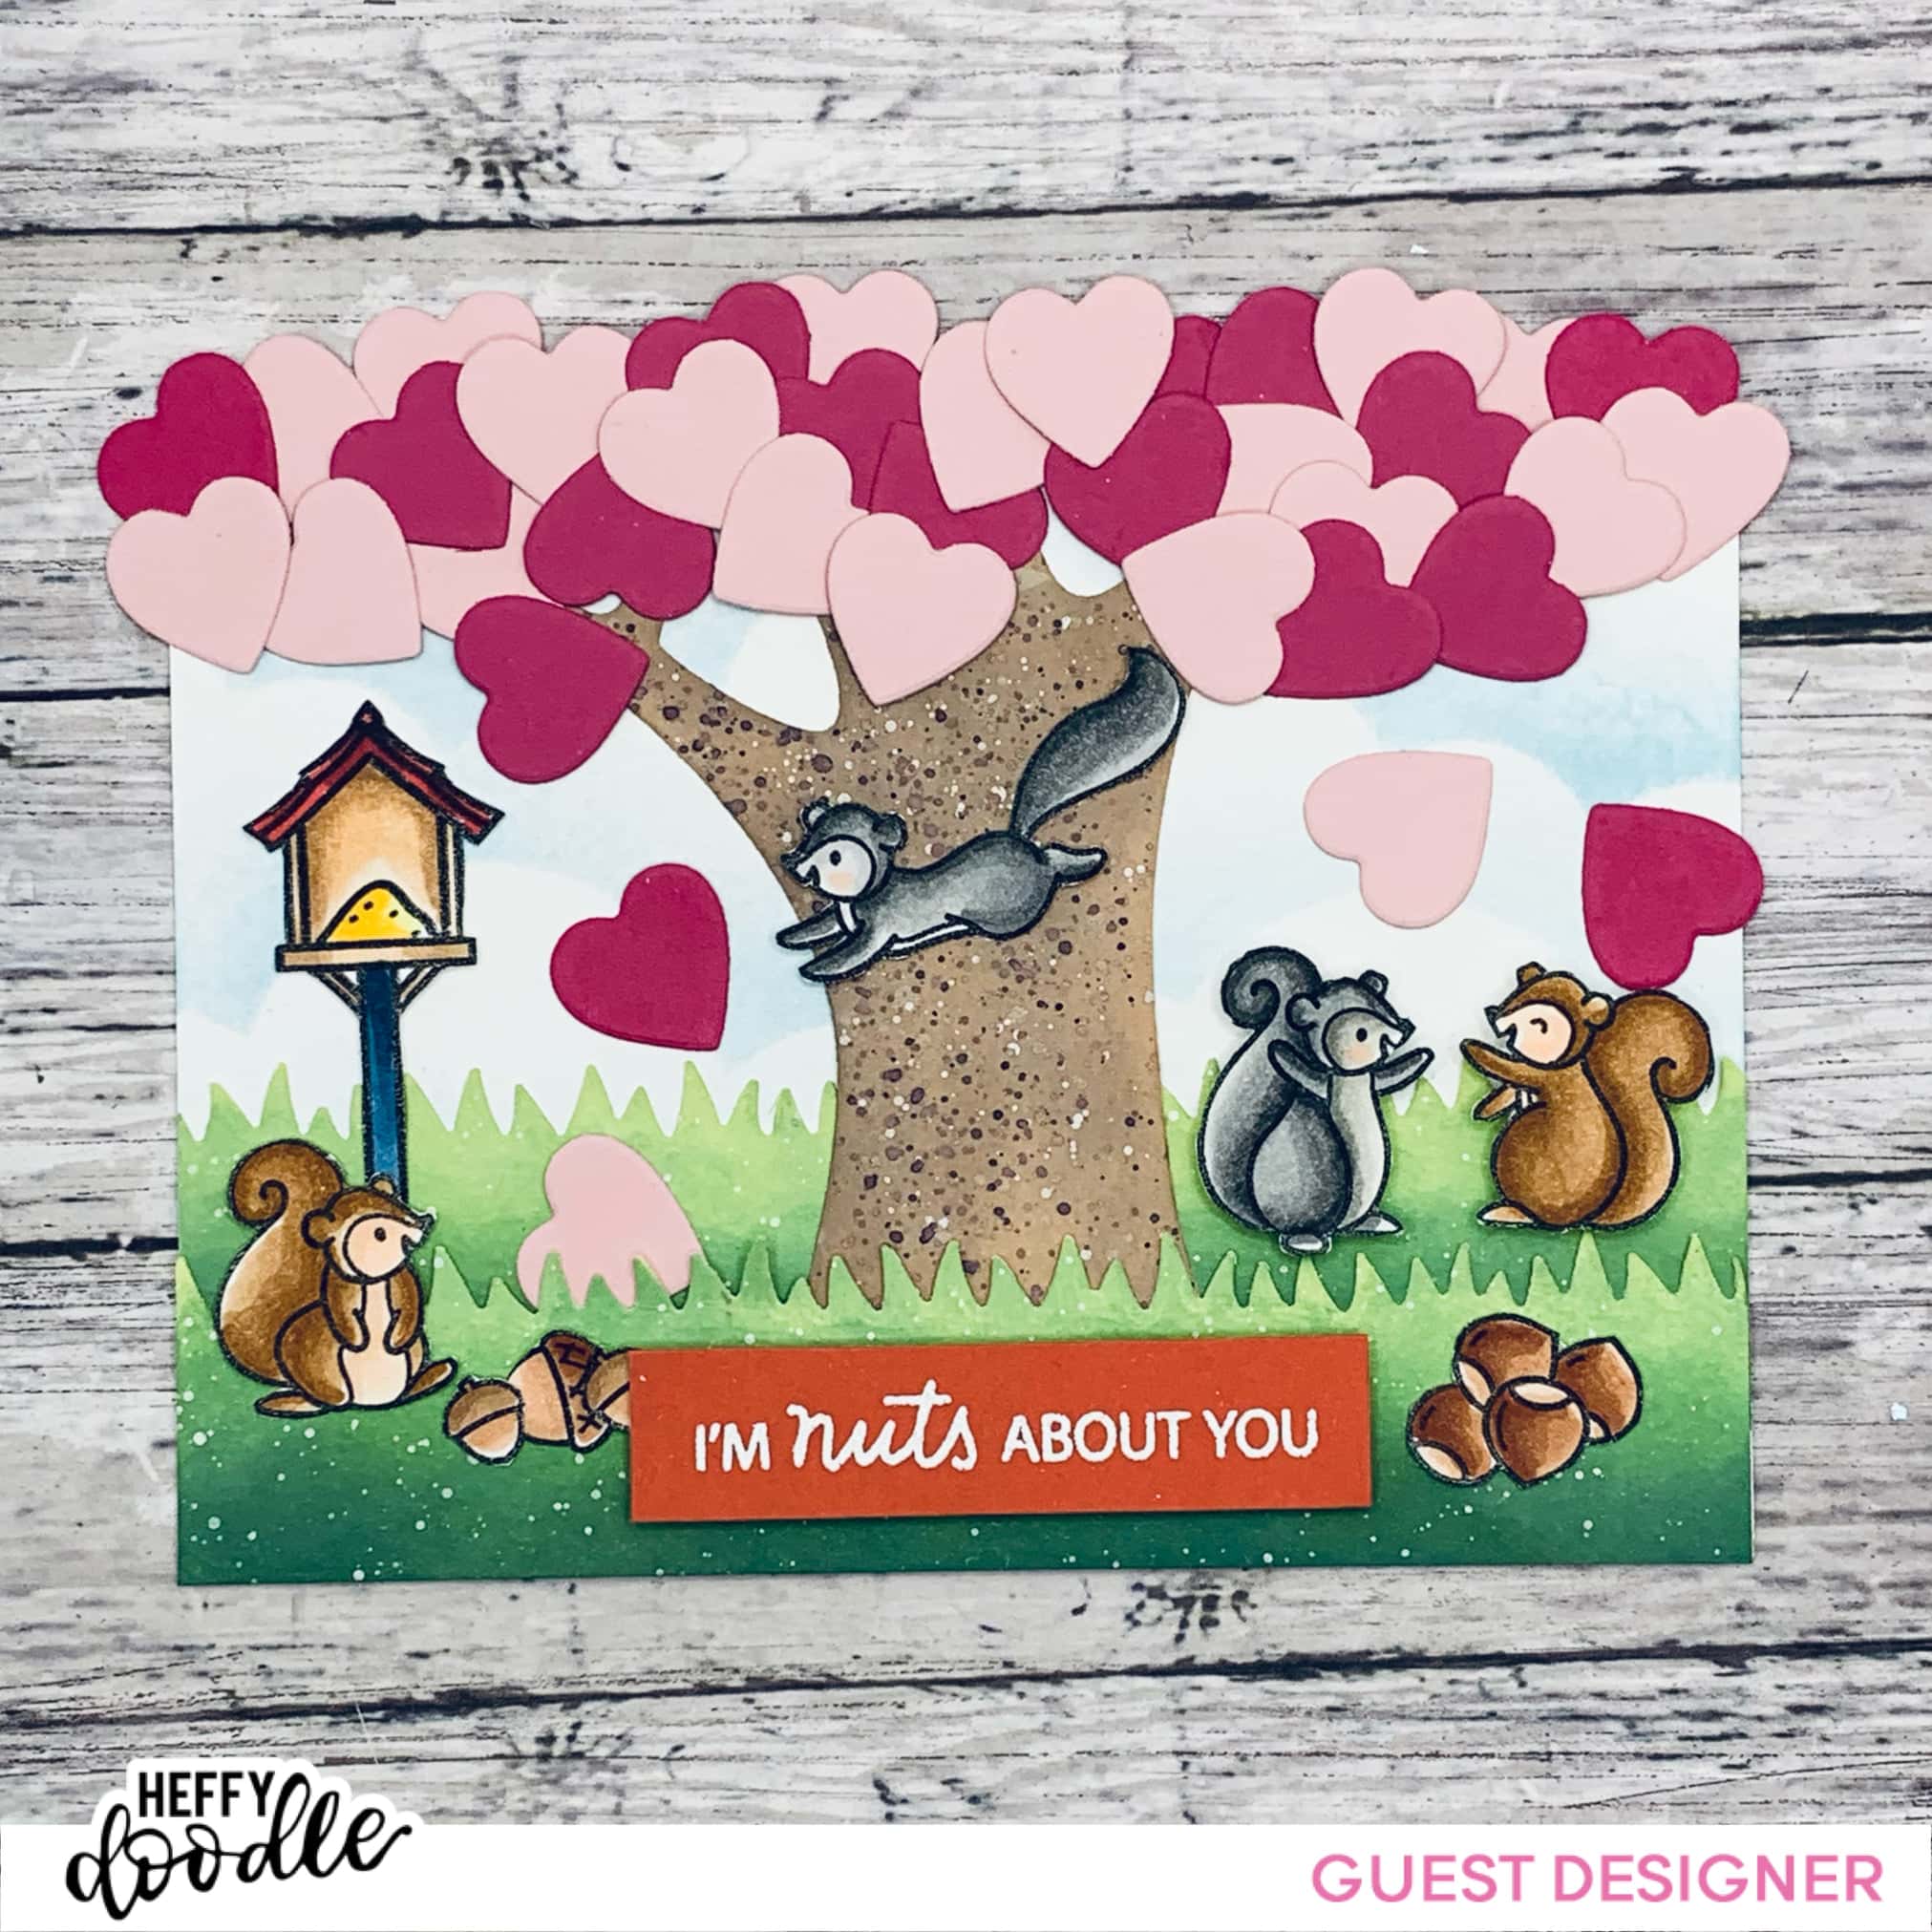 For my second card, I used the following sets: Nuts About You Stamps and Dies, Tree-mendous Peekaboo Tree Die, and the Slimline Scenery dies.
I stamped out the images I wanted to include and used the following Copic Markers:
- Squirrels/Chipmunks: E01, E11, E13, E23, E25, E27, N02, N04, N06
- Acorns: E11, E13, E21, E23, E25
- Birdhouse: B93, B95, B97, B99, R20, R22, Y11, Y17, E11, E13
I fussy cut all the images out and set them to the side. The Nuts About You stamp set does have coordinating dies available. I then cut down another piece of card stock to four 5.5×4.25 inch panels.

For the first panel, I cut out the tree and blended Walnut Stain, Gathered Twigs and Vintage Photo distress oxide inks. I used brown and white watercolor to splatter across the tree trunk. I took another panel and cut out the grass and blended Rustic Wilderness, Mowed Lawn and Twisted Citron and splattered white watercolor across it as well. I then took the cloud die and cut out the edge from a piece of cardstock. I used this as a makeshift stencil and blended Tumbled Glass to create my cloudy skies.
I had a tiny heart die as part of my stash and decided to cut out heart shapes in a magenta and pink card stock as the leaves for the leaves of the tree, to give the feel that love is in the air! I adhered all of the components using liquid glue. To finish off the card, I heat embossed the sentiment onto red card stock, trimmed it down and adhered it with foam tape.
I hope you enjoyed my post and my projects. If you would like to see more of my projects, you can visit my Instagram page or my Blog. Happy crafting!