
How to use the Present Shaker Dies to create a focal point
Hi everyone, Jordanna here and I’m so excited to be sharing my first ever project as part of the Heffy Doodle Design Team! Today I’m showing you how I use the Present Shaker Dies to create a focal point on a fun and colorful card. You can watch the entire process on YouTube here and be sure to scroll down to my supplies list at the bottom of this post!
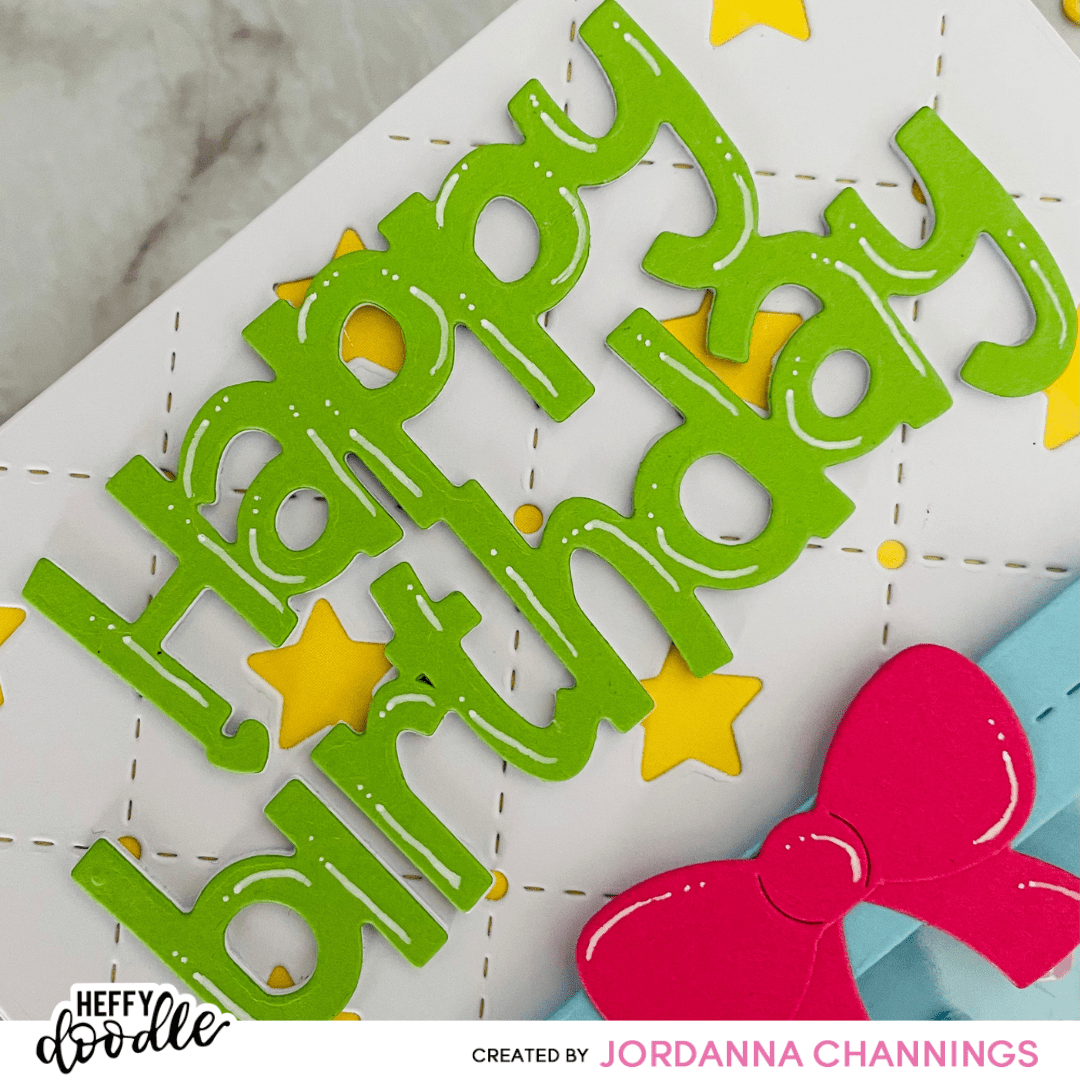
I started out by layering the Carnival Star Backdrop Die over some colorful patterned paper with some liquid glue. Next, I cut the Happy Birthday Jumbo Sentiment Die (just the words, not the shadow piece) three times from some white Heffy Doodle cardstock and once from the gorgeous Heffy Doodle Kiwi Crush cardstock. I layered the white die cuts one on top of the other with some liquid glue and finished off with the green cardstock to create a lovely dimensional sentiment.
Next, it was time to assemble the Presentr Shaker Dies. I chose to make mine from some Ice Blast cardstock and to top it with a bow cut from Razzleberry for a nice bright pop of colour. The shaker is so easy to assemble. Just cut one backing piece and one frame piece from cardstock and another backing piece from some Heffy Doodle Extra Thick Clear Acetate. Attach the acetate to the frame – I used double sided tape for less mess – then add some Heffy Doodle Double Sided Adhesive Foam strips all the way around the back of the frame. This foam tape is the perfect height for shakers, so no need to double layer! I like to use a powder tool around the edges of the foam, before removing the backing strips, to ensure my shaker mix doesn’t get stuck.
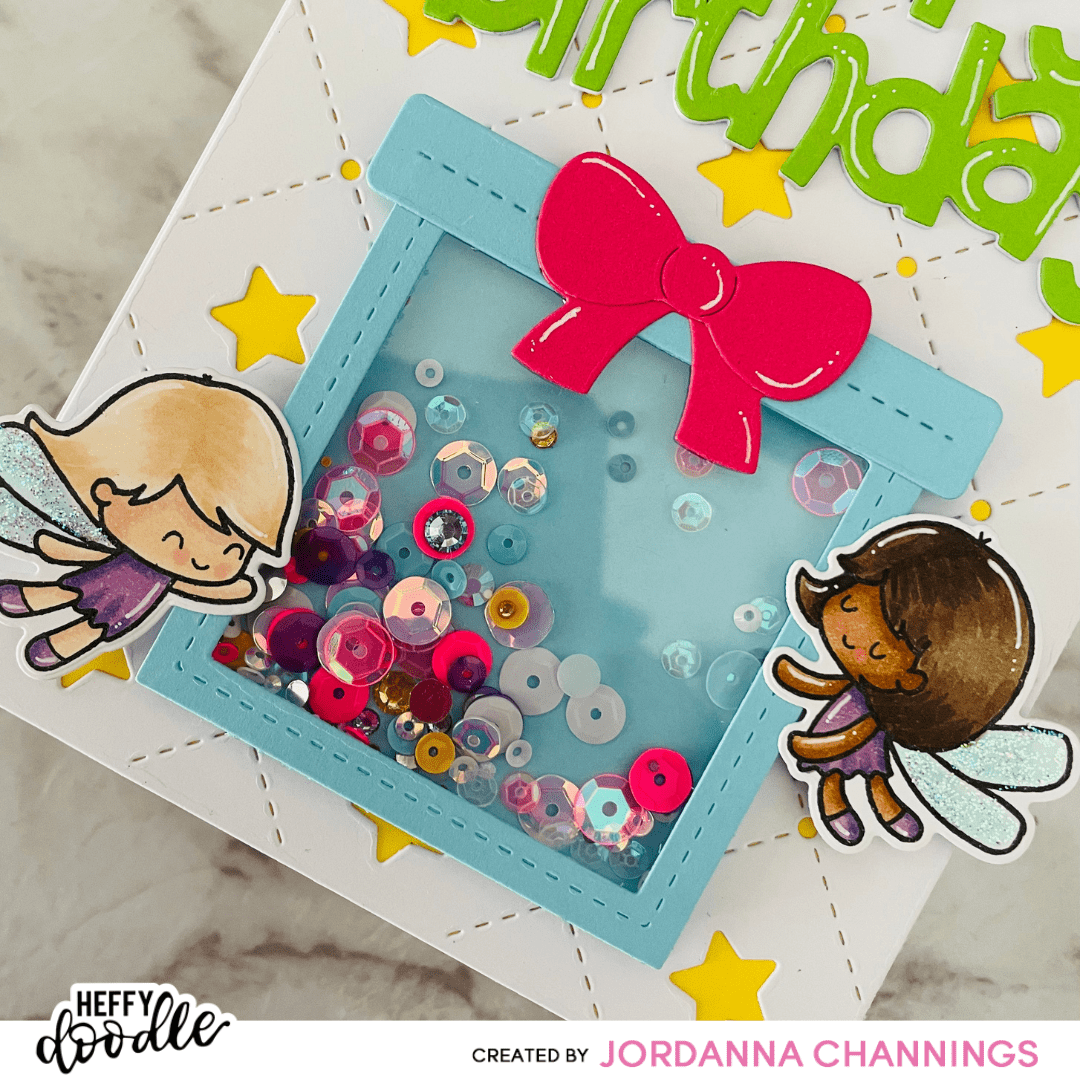
When you are ready, remove the backing from the foam tape, add a shaker mix of your choice (I used the Heffy Doodle Truly Outrageous Sparkle Mix for a pop of fun colour) and seal it all up with the backing piece of cardstock you previously cut. Now you are ready to decorate your present however you wish – there are a couple of different bow options, ribbons, a box lid and tag with different style strings for you to choose from. I kept mine simple with a box lid and a bow attached at the top of the present.
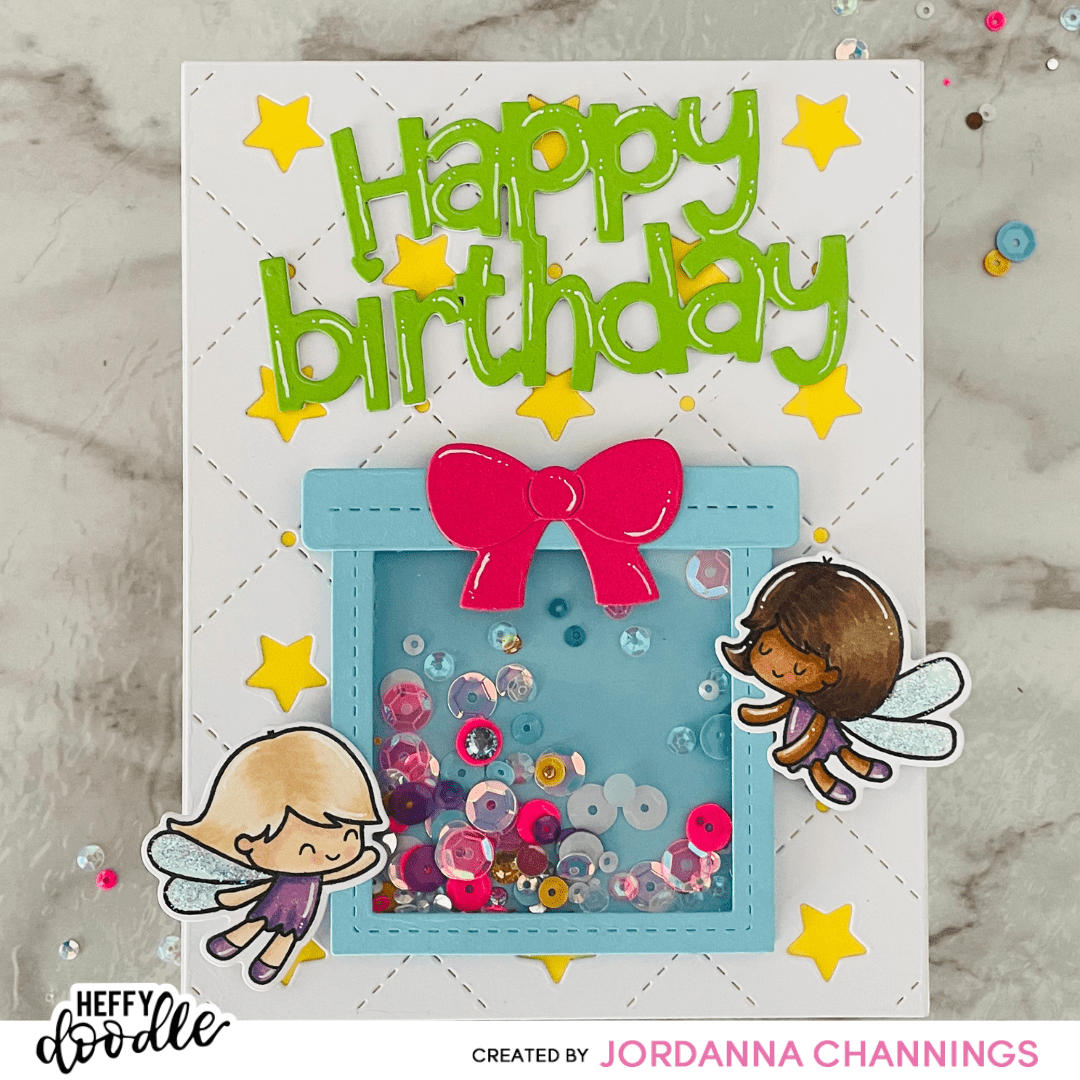
All that’s left to do is to assemble everything onto a card base. I added a couple of little fairies from the Absotoothly Awesome stamp set for a finishing touch and the card is complete – it’s so fun and colorful and sure to make someone smile! Don’t forget to add some white gel pen details for that extra pop.
Thank you so much for reading!
Jordanna (Follow me on Instagram here)
Supplies
Please see below information for the supplies used in this post.
- Heffy Doodle Carnival Star Backdrop Die (Heffy Doodle)
- Heffy Doodle Happy Birthday Jumbo Sentiment Dies (Heffy Doodle)
- Heffy Doodle Present Shaker Dies (Heffy Doodle)
- Heffy Doodle Absotoothly Awesome Stamps (Heffy Doodle)
- Heffy Doodle Absotoothly Awesome Dies (Heffy Doodle)
- Heffy Doodle Mini Die Cutting Machine (Heffy Doodle)
- Heffy Doodle 8.5″ x 11″ White Cardstock (Heffy Doodle)
- Heffy Doodle Kiwi Crush, Ice Blast and Razzleberry Cardstock (Heffy Doodle)
- Heffy Doodle Truly Outrageous Sparkle Mix (Heffy Doodle)
- Heffy Doodle Glubert Craft Glue (Heffy Doodle)
- Heffy Doodle Double Sided Adhesive Foam Strips (Heffy Doodle)