
Happy Ever After with Davina

Hello Crafty Friends, Davina here on the blog with another interactive card to share. A simple slider card was all I needed when it comes to this incredibly cute Heffy Doodle Stamp set called Happily Ever Crafter.
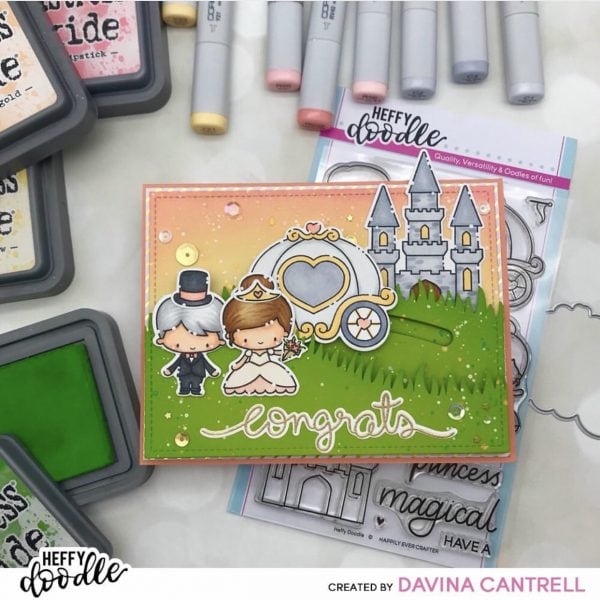
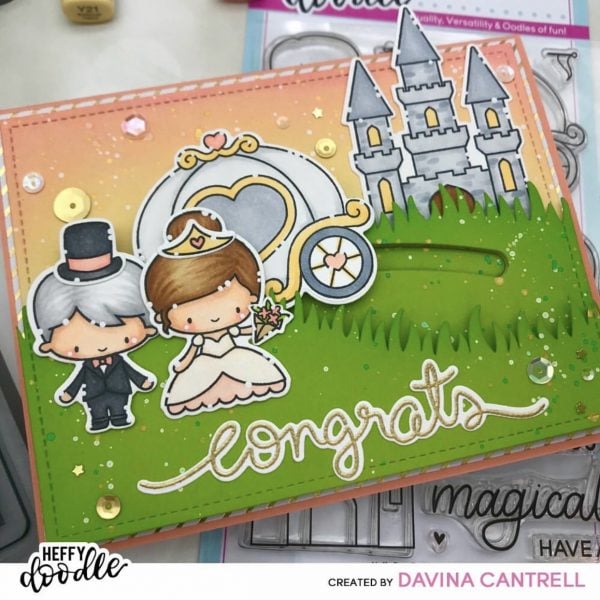
My father is getting married, so I wanted to make him a wedding card, but I hope he doesn’t mind that I made his hair silver. I really love the carriage and it’s size, it glides across the little scene as my happy couple waits to get in.
I stamped my images onto bright white Neenah Solar paper using my Stamp Platform, then colored them in with a simple Copic color pallet. I used cool grays, a little coral, and some yellow for the gold. Once everything was colored I used the Happily Ever Crafter Dies and my Big Shot Express to cut everything out, before highlighting my images with small white dots.
Next, I cut a white panel from Bristol Smooth cardstock, and two pieces from a bright green cardstock using a stitched die. I used Grassy Lass Border Dies to cut a sloped hill, and a rounder hill, from the green card pieces. I made sure the sloped hill was a little shorter than the rounded hill for layering purposes. I used a slider die to cut a channel in my taller hill, then temporarily secured it from behind with a piece of washi tape.
I used my blending brushes to ink Mowed Lawn Distress Oxide Ink onto the edges of my green cardstock hills. Then I created a coral sunset sky on my white card panel using Scattered Straw, Dried Marigold, and Worn Lipstick. I splattered them all with clean water, white ink, and gold ink and dried with my heat tool.
I glued a plastic sliding disc to the back of my carriage, and had a penny ready to attach to the other side of the slider disc. I flipped my hill over, removed the washi tape from the back and put on the front, then squeezed a thin line of glue onto the slider channel. I want to glue that green piece exactly where the slide will be so that it is visably green from the front once assembled. So I carefully turned it over and lined it up at the bottom, and gently rubbed the slide channel to secure the piece to the white paper. Then I removed the temporary washi tape and removed the hill. I framed out the back with foam tape, then placed the groove over the carriage disc, before glueing the penny to create a weighted carriage.
I realigned the hill and attached it with the foam adhesive. Then I tucked the castle behind the hill after I trimmed off any part that would be visable through the groove. Next, I adhered the second hill using more foam tape. I stamped, and heat embossed, a scripted “congrats” and carefully added some glue to the back. I held it down with an acrylic block so that it would be nice and flat. 
Finally, I secured my Bride and Groom to the left, and added a sprinkling of Lucy Abrams sequins to the card. I mounted the cardface onto some gold foiled striped paper, and again onto a coral cardbase. I dusted my little sliding channel with my powder tool to keep my carriage gliding smoothly and I love it. I will add a short video to my @popsiclesticks Instagram if you want to see it in action.
Thank you for stopping by, Davina