
Distress Oxide Rainbow Background by Mindy Baxter
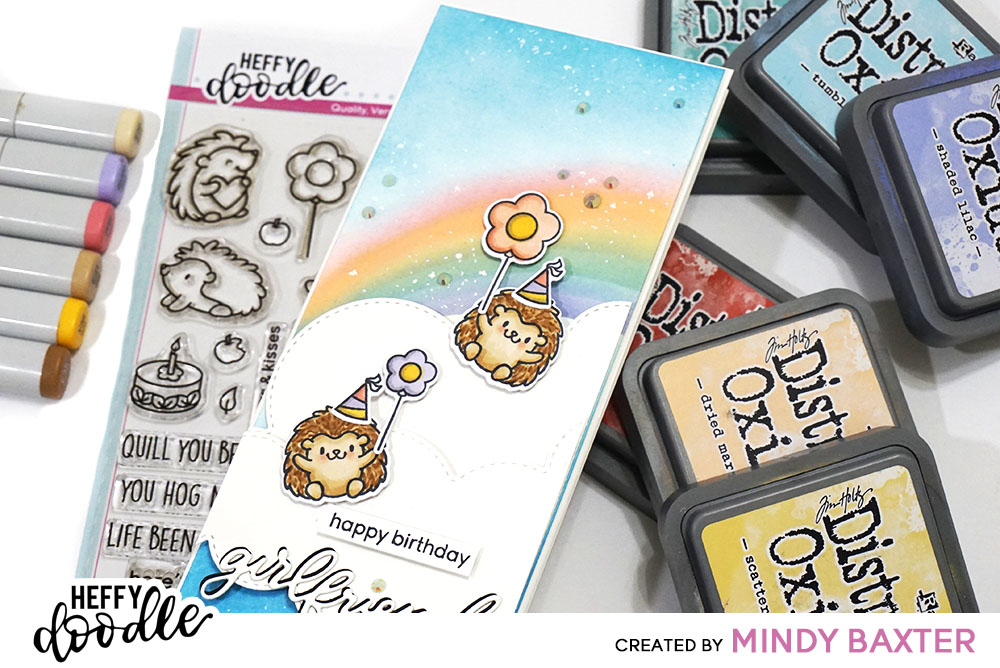
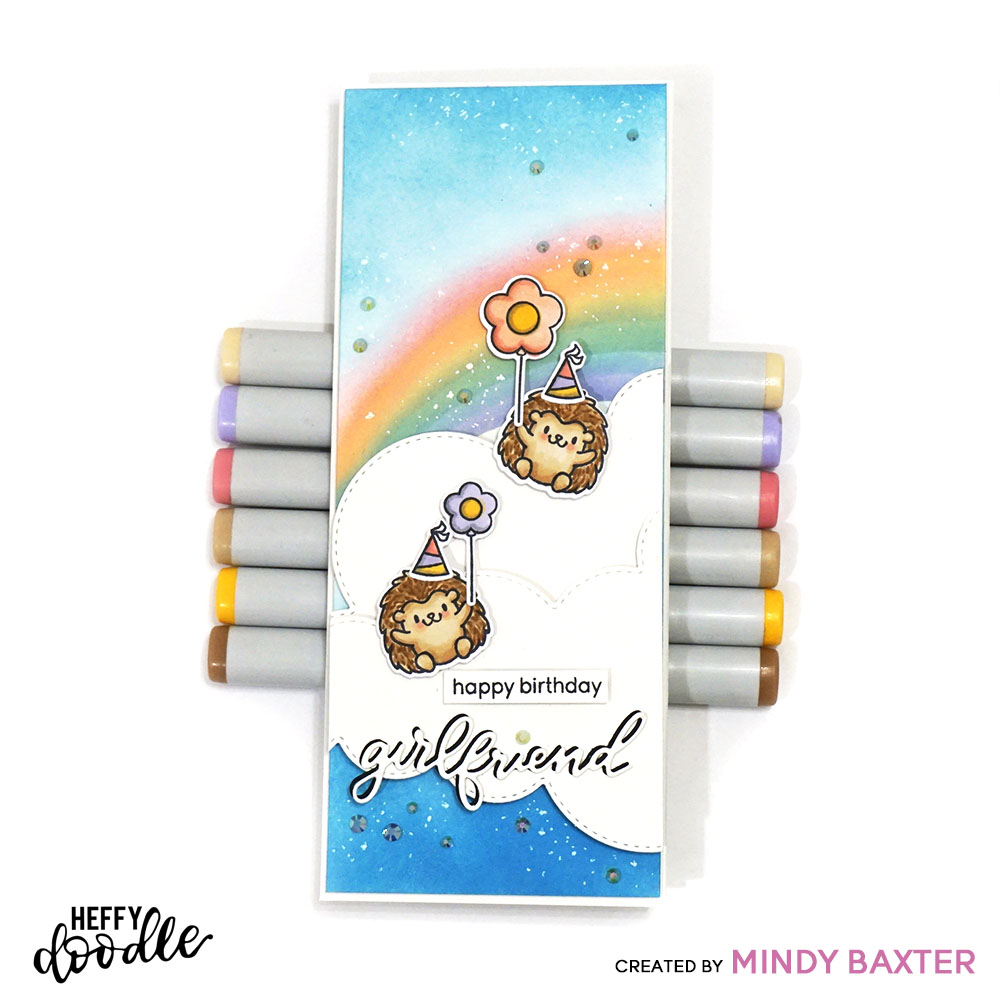
Hello! It’s Mindy from My Creative Scoop and today I’m sharing this fun and cheerful Happy Birthday Girlfriend, card. I’m using the new stamp set, Quill you Be Mine, along with the coordinating Dies. I’m also using the Stand Alone Girlfriend Die and Cloud Border Dies.
I stamped my images and sentiment with Memento Black Ink and Stamped onto my Copic Xpress it Blending Card using my Misti. Check out my Copic Marker Shopping Guide!
I used the following Copic Markers to color my images:
Hedgehogs: E30, E31, E33, E37, R32, R30
Balloons and Hats: BV000, BV00, Y35, R32, R30, N3
A few weeks ago I did a Copic Tutorial on How to color these adorable little Hedgehogs. You can watch the Video HERE!
I used Distress Oxide to create my background. Here’s the colors I used: Mermaid Lagoon, Worn Lipstick, Dried Marigold, Scattered Straw, Evergreen Bough, Tumbled Glass and Shaded Lilac.
Check out my simple step by step photos below so you can see how I made my Distress Oxide Rainbow Background.
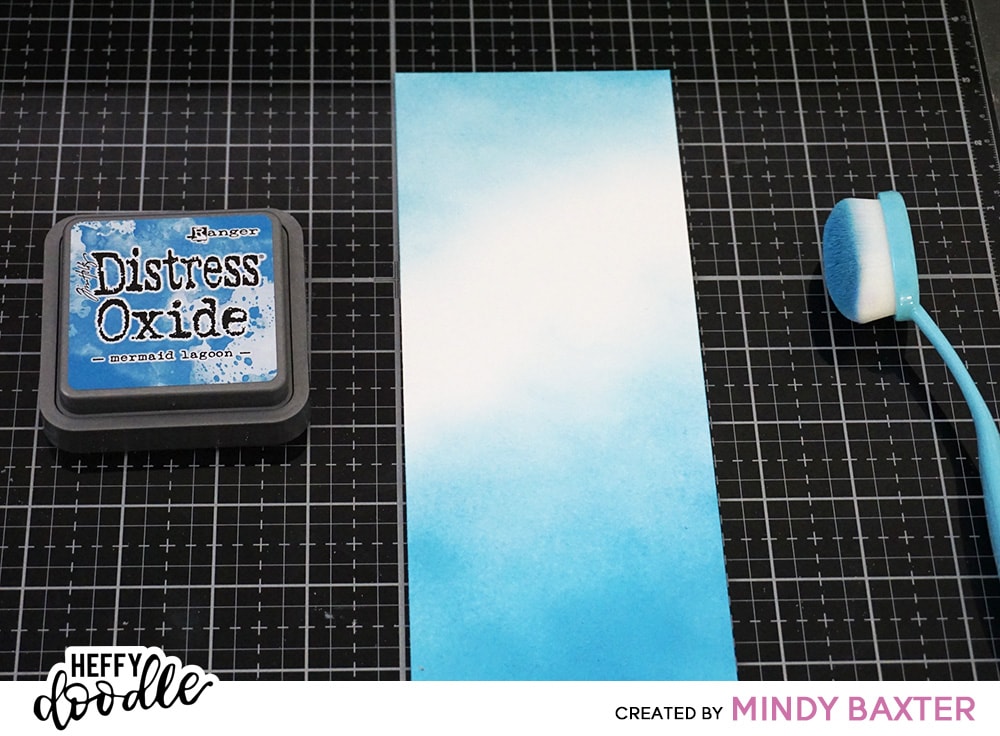
Step 1. I’m making a slimline card which is 8 1/2 x 7 and scored at 3 1/2. Then take a piece of cardstock cut at 3 3/8 x 8 3/8 and add your blue distress oxide ink like shown in the above photo.
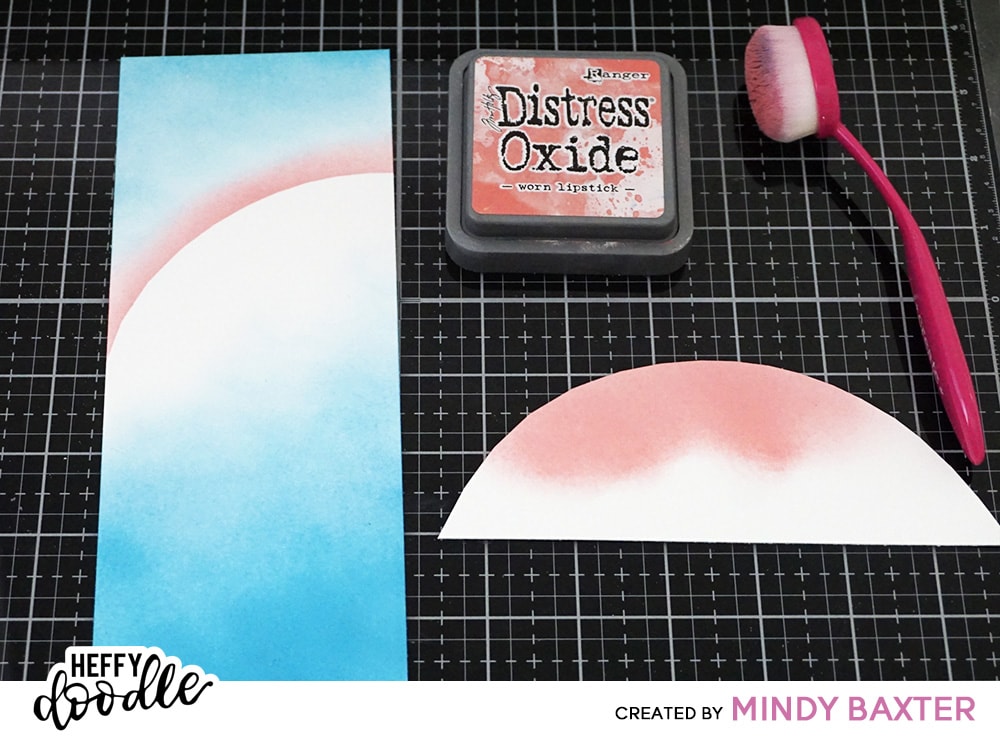
2. Then I took a scrap paper and cut this 1/2 of a circle/oval and I’m using that as a template to create my rainbow. Here’s I’ve done the Worn Lipstick.
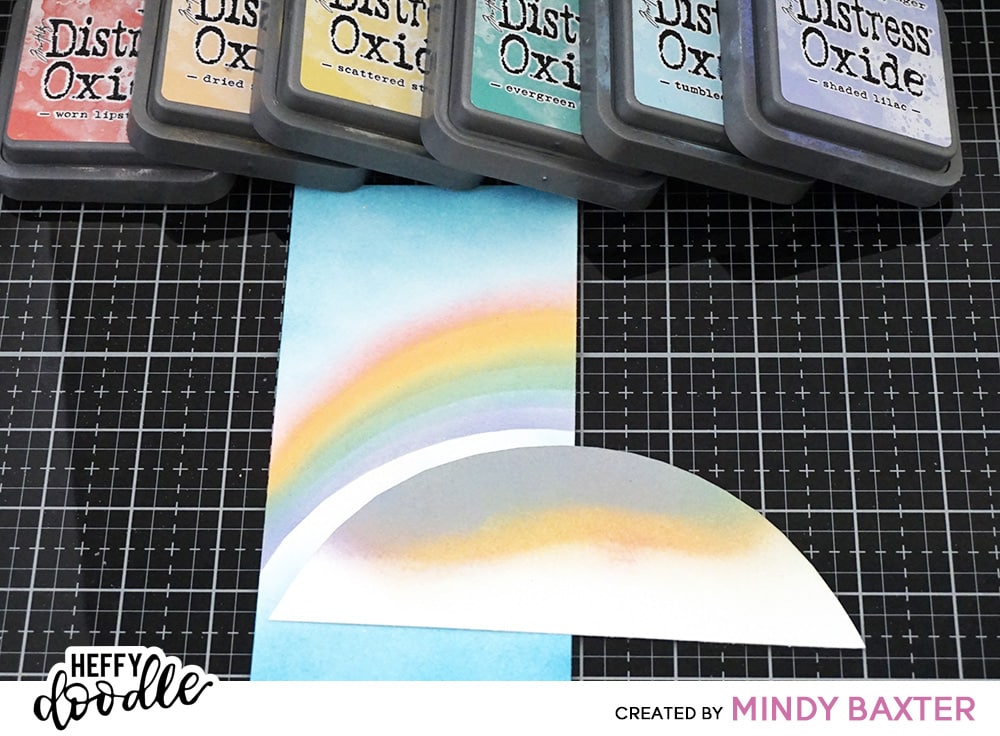
3. Continue down repeating all the colors of the rainbow.
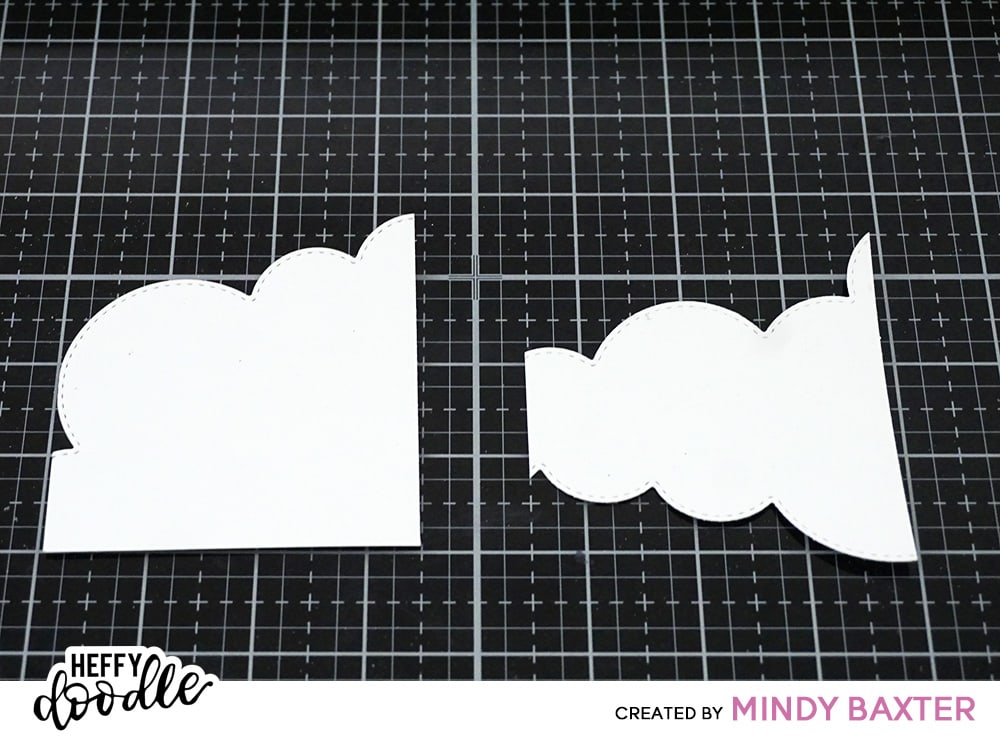
4. Then take another piece of cardstock cut at 3 3/8 x 8 3/8 and cut out 2 pieces with the cloud border dies. On one of them you will run the die again on the top and bottom so you have almost a full cloud.
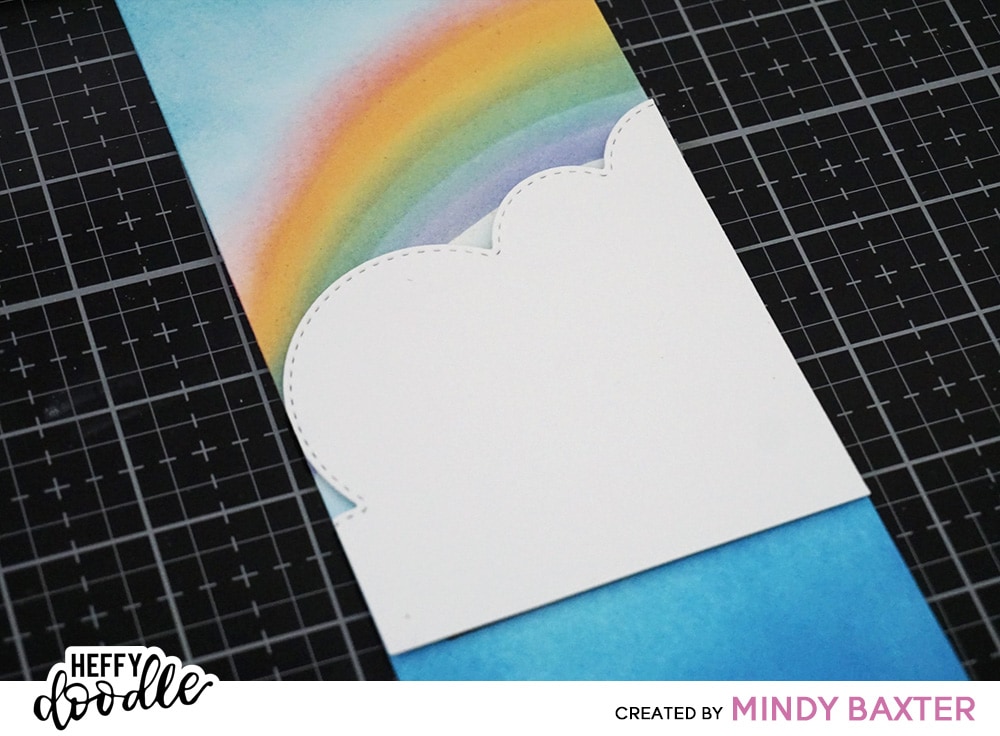
5. Attach the cloud with only one side of cloud onto you sponged cardstock like shown in the above photo. I used some foam tape for some extra dimension.
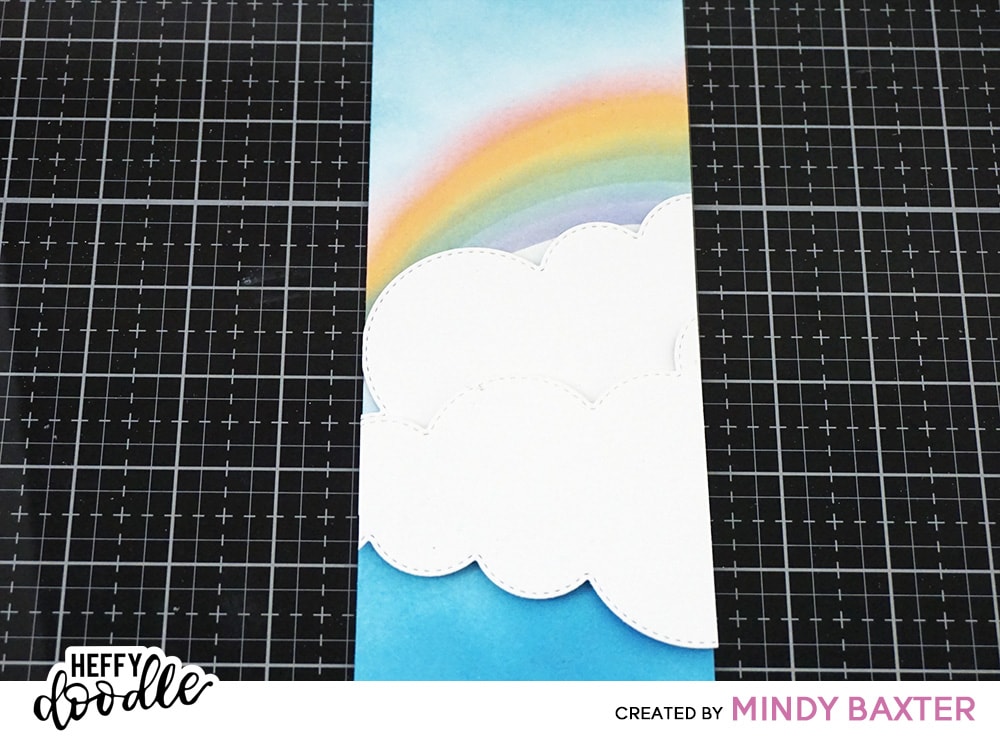
6. Then add your second cloud also on foam tape — covering the bottom of the first cloud so you can see the straight edge of that cloud just like in the photo above.
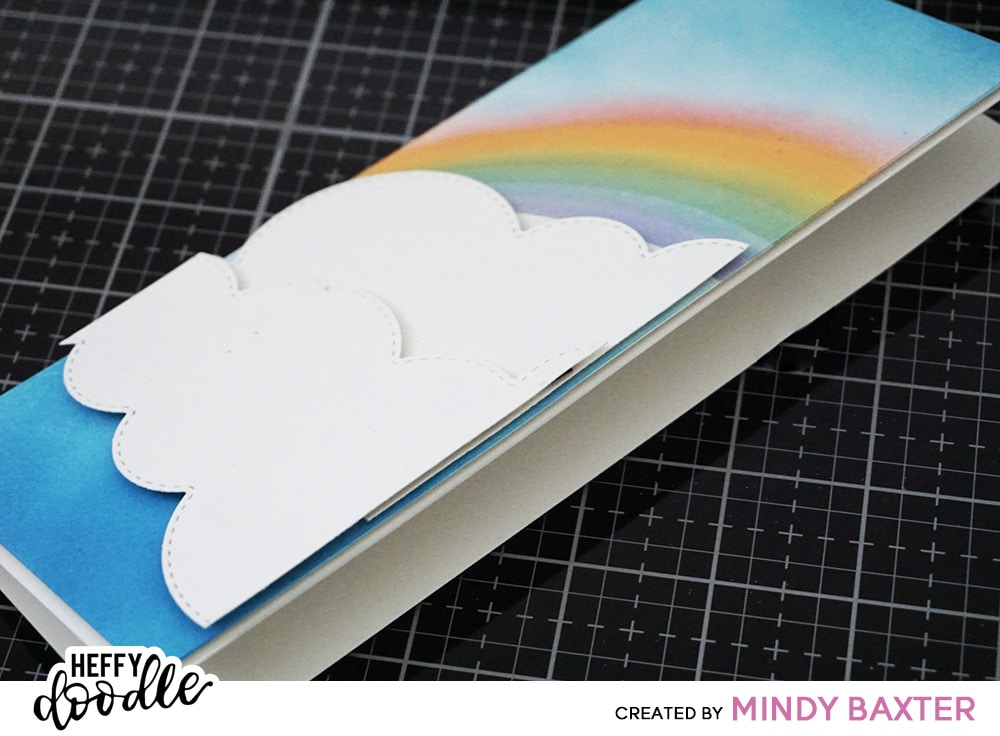
7. Attach the card front to the card base, also using foam tape.
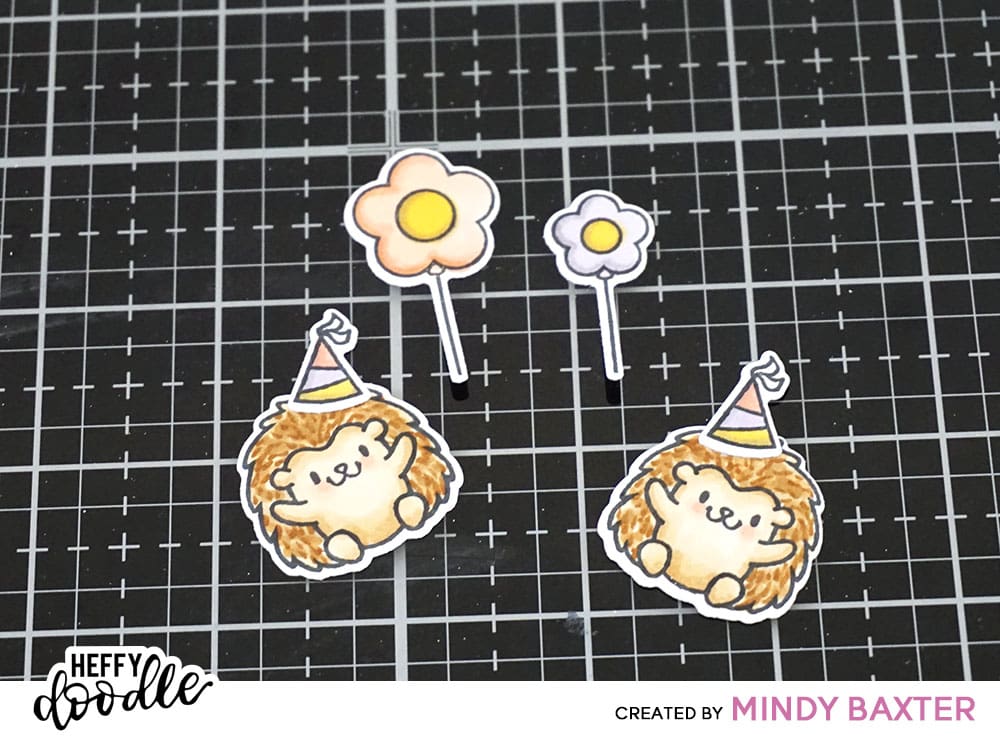
8. Color and die cut your little Hedgehogs. If you would like to check out a previous video tutorial on coloring these guys you can see it HERE!
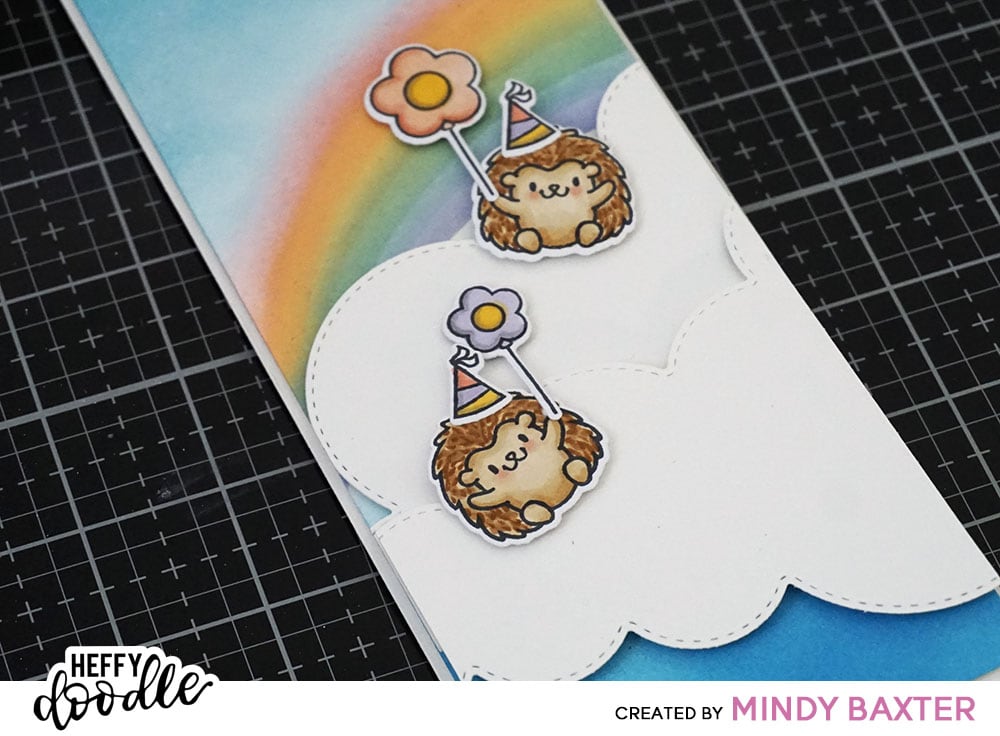
9. Attach the little Hedgehogs to your card, yes using foam tape/dots. 🙂

10. Die cut your girlfriend sentiment 2 times, one in black and one in white and adhere them slightly off so the black cardstock looks like a shadow.
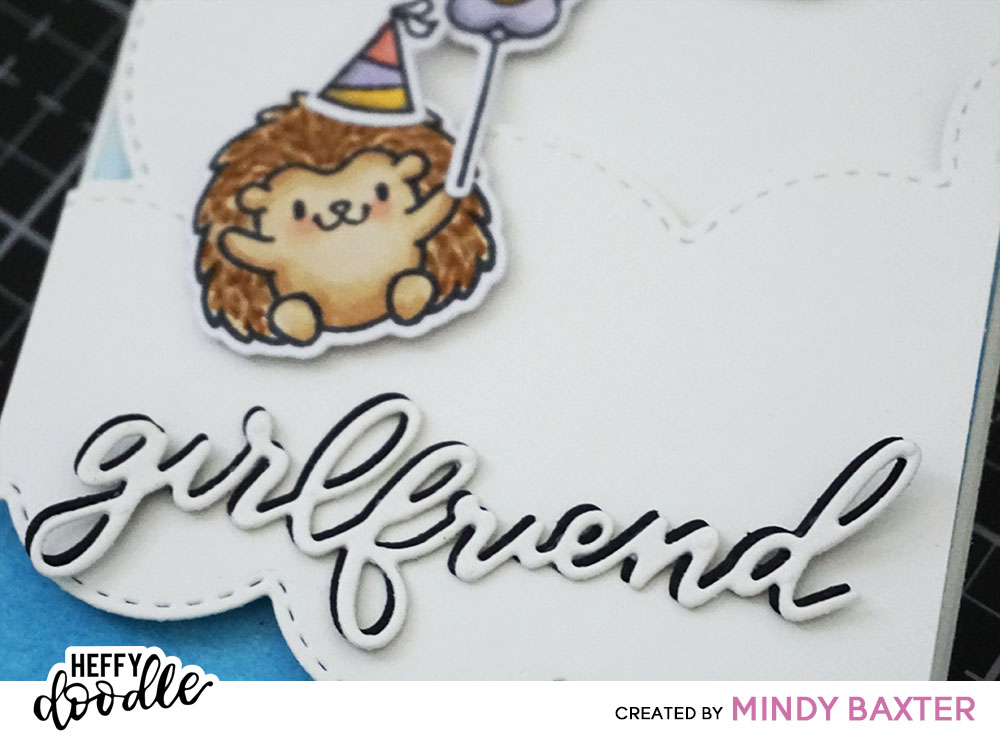
11. Attach sentiment and jewels to your card and voila!
I had so much fun creating this card — I hope you enjoyed my post and feel inspired to create!
Have a great day!
♥ Mindy
Let’s Connect on Social Media!
Facebook // Pinterest // Instagram // Twitter // YouTube