
Creating Custom Patterned Paper with Accent Stamps!

Hey crafty people ! It’s Tasha here for Heffy Doodle, and today I’m sharing another video tutorial. (Video to be live soon.)
The topic today is creating custom patterned paper with those accent stamps you get.
Plus I’m sharing a cool heat embossing idea using some of our pre made patterned paper.
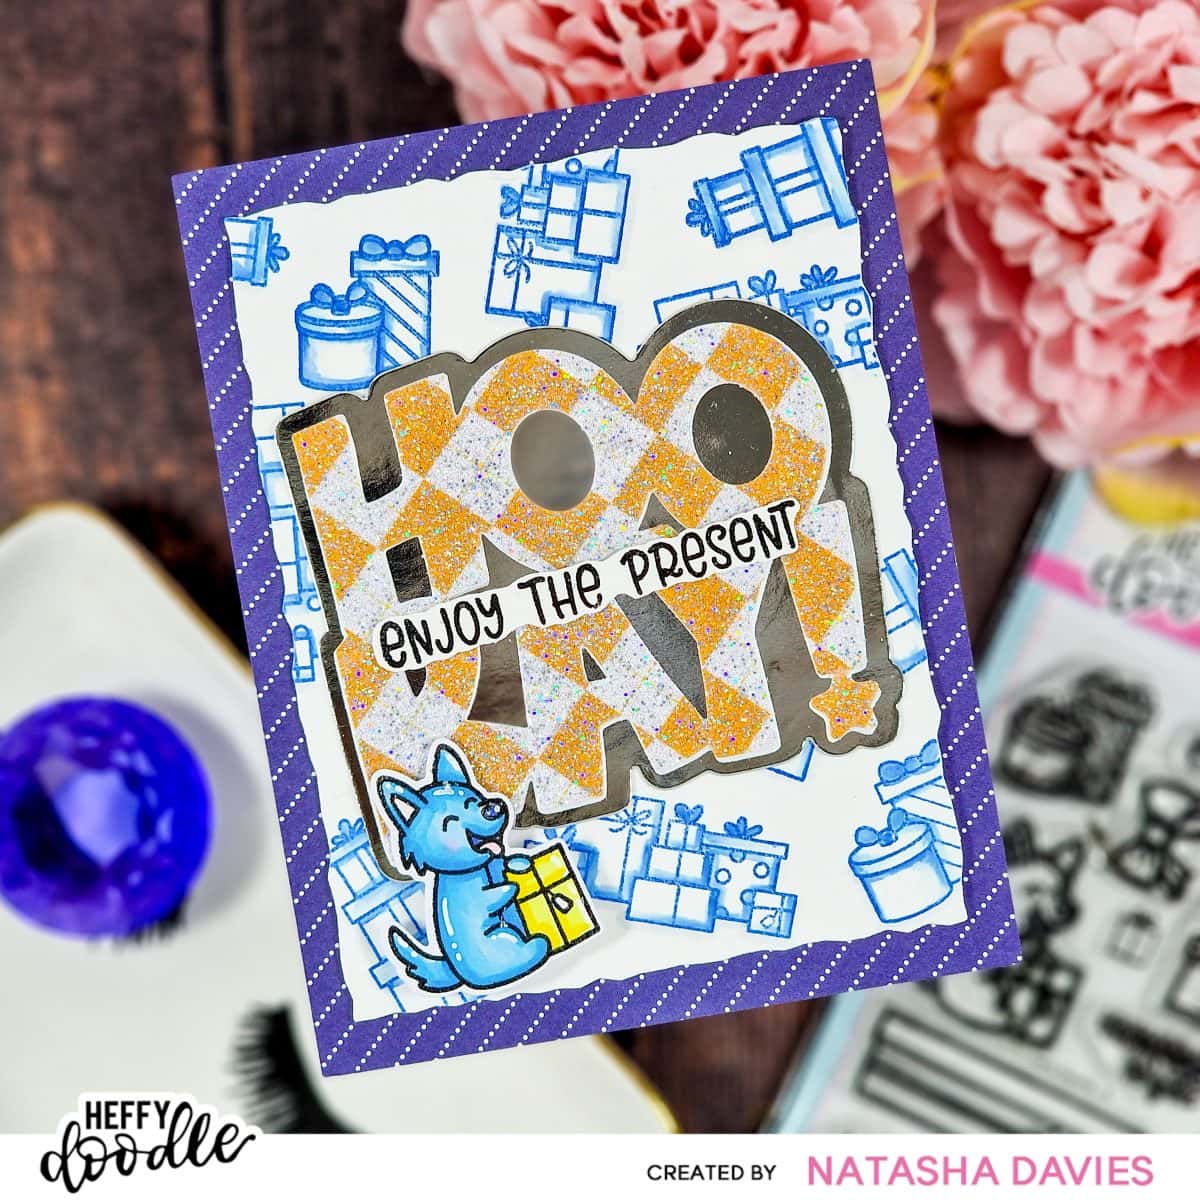
- Stamp a cute critter image from Wrapped with Love stamp set onto some Heffy Doodle Alcohol marker friendly cardstock in Versafine Onyx Black ink. Add clear Embossing Powder & heat set. Repeat the steps to stamp a sentiment onto Neenah Solar White 80lb.
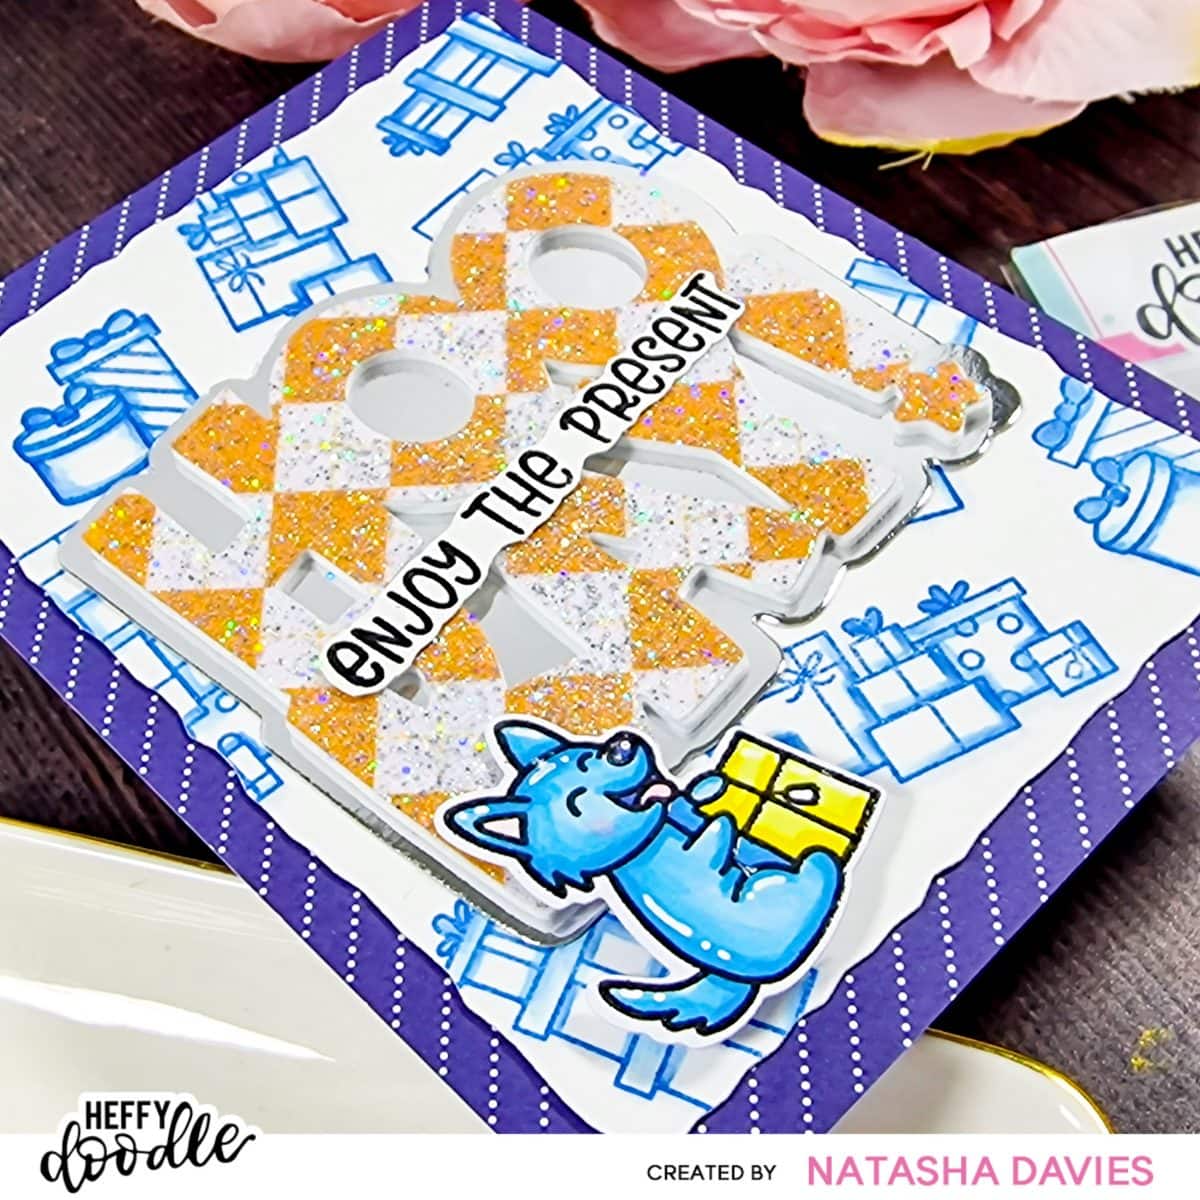
- Colour your critter with your chosen brand of alcohol markers. I used Copic B000, B00, B05, B24 for my Dog. Y00, Y02 for the present and R20 for the tongue/ears & blush. Die cut and set aside.
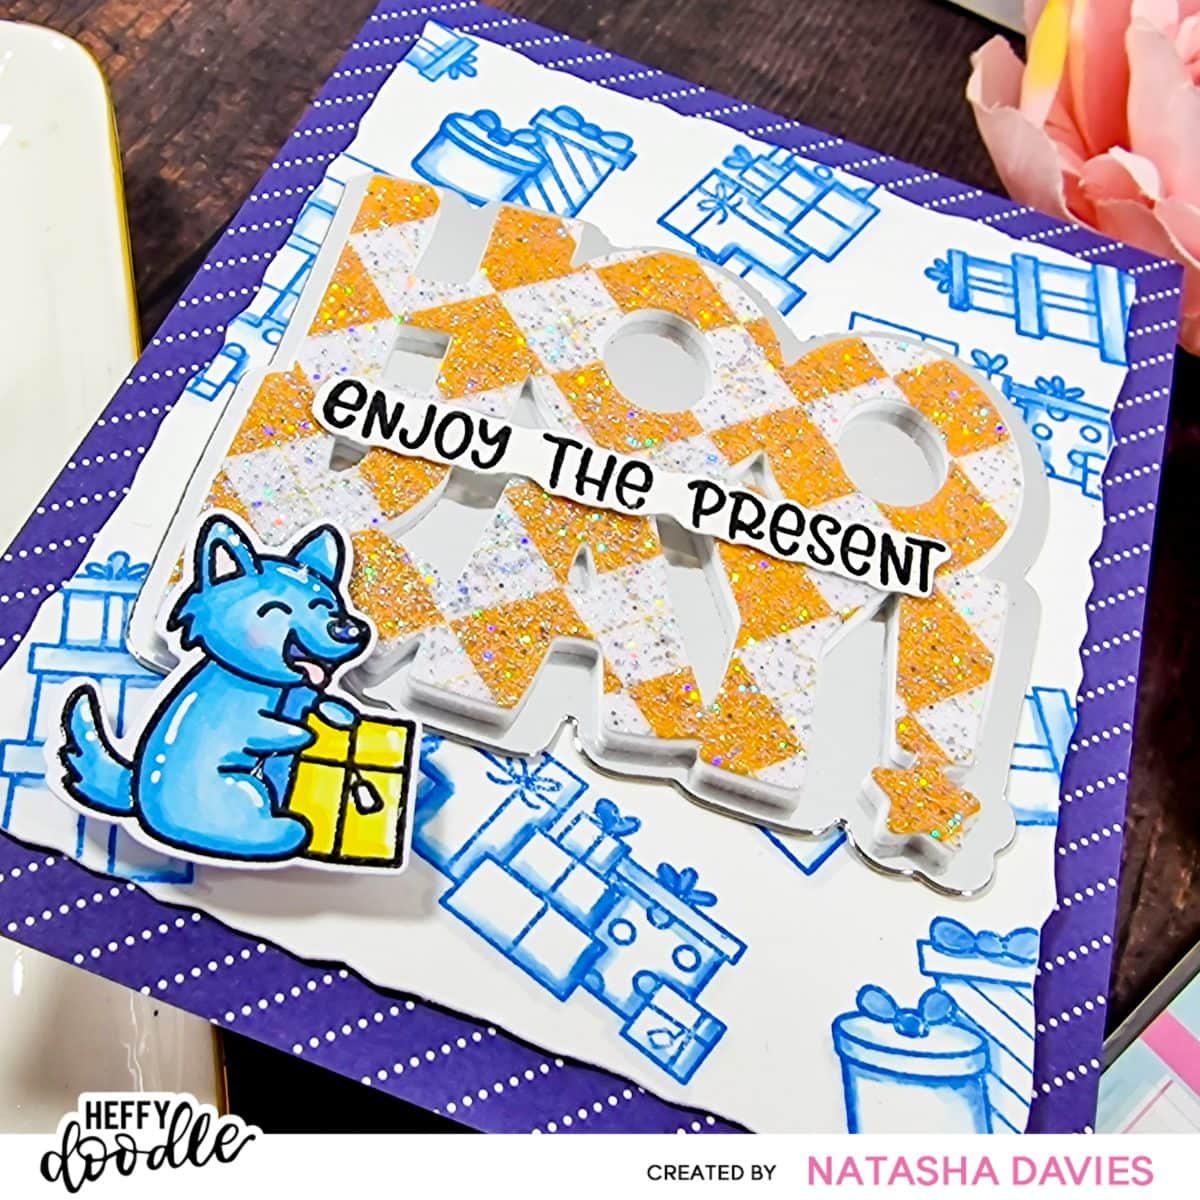
- Choose 3x present images from the same stamp set and repeatedly stamp them across a panel of Neenah Solar White in Blue Hawaii ink. Turn the stamps and mix them up to give a random look to the design. Don’t forget to stamp some images going off the edge for a more cohesive design that looks like it could have been cut from a larger piece of actual patterned paper.
- Using the same ink and a Tombow ABT Clear water based marker, add some soft shadow and colour to all of the images. (Don’t colour them all, just accents & shadows on each one.)
- Die cut with the Deckled Paper Hugs panel and use 2-3 pieces of scrap cardstock to adhere to the centre of an a2 panel of blue striped paper from The Greatest Show paper pad.
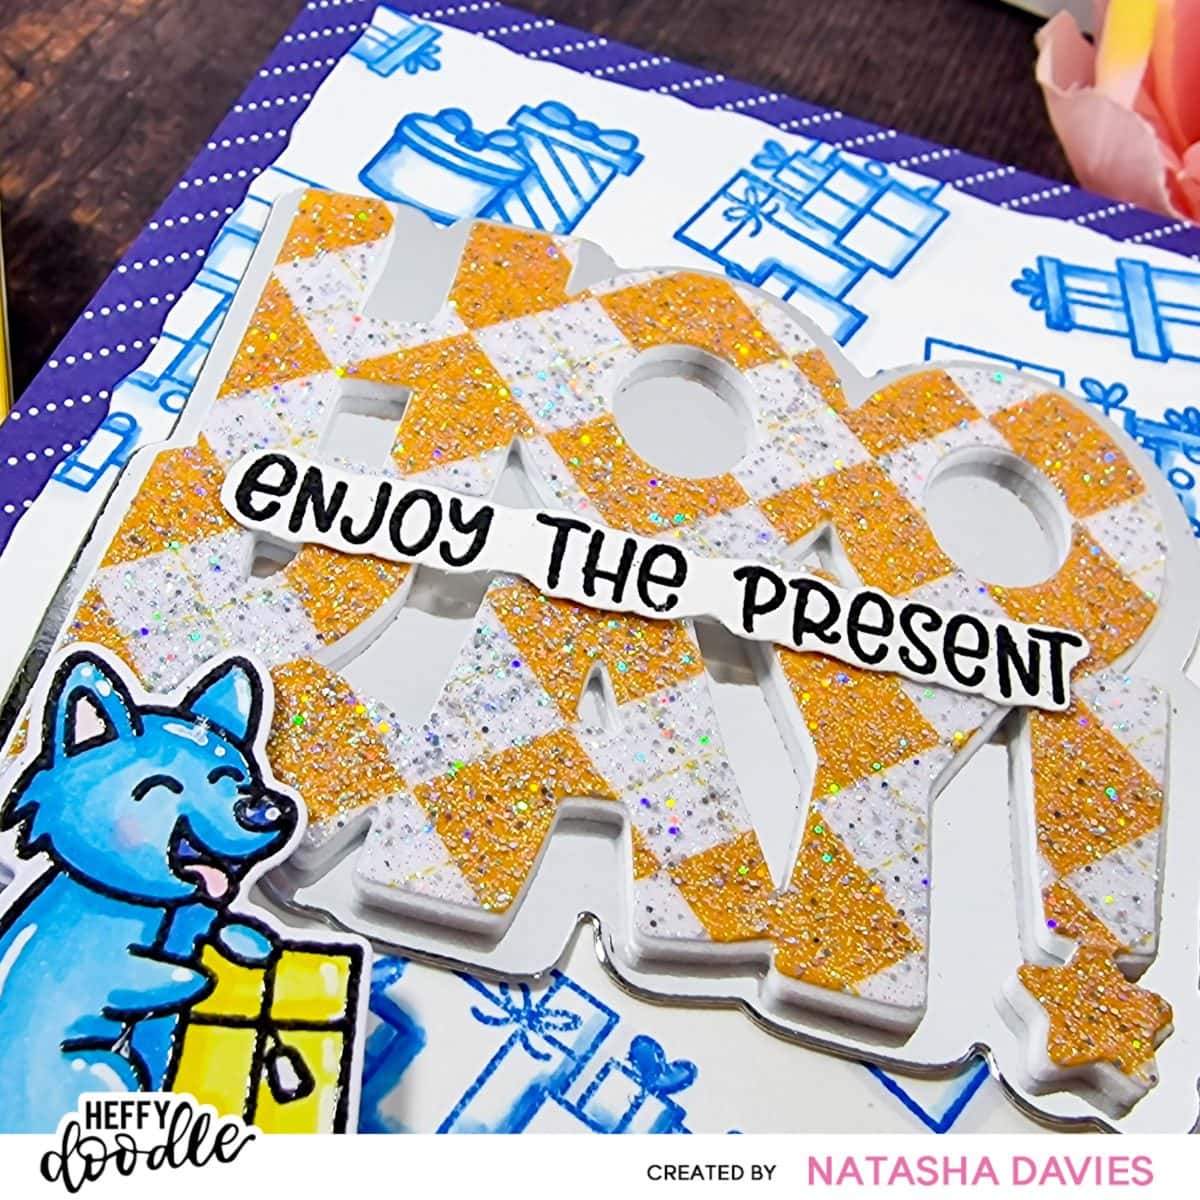
- For the large sentiment; die cut the word from the checquered yellow paper and some double sided adhesive foam. Cut the shadow from Silver metallic cardstock.
- Apply WOW Embossing ink to the patterned paper word using a small Brayer for smooth application. Cover in Disco Ball embossing sparkles and heat well from below. (The powder will go clear & shiny once heated.) Repeat this step for another layer to give even more sparkles!
- Add this embossed die cut to the foam one, then apply that to the shadow piece. Adhere to the centre of the panel.
- Carefully fussy cut the sentiment and adhere onto the large word die cut. (Leave a block on it whilst it dries to keep it in place.
- Add white gel pen accents to your critter and then adhere him in place with foam & liquid adhesive.
*** VIDEO TO BE ADDED SHORTLY ***
Thank you so much for spending this time with me, I hope you enjoyed the tutorial!
Stay Crafty!
Byeee!
Blog | Instagram | YouTube | TikTok
 Wrapped With Love Stamps Shop at: HD | SBC |
 Wrapped With Love Dies Shop at: HD | SBC |
 Greatest Show Patterned Paper Shop at: HD | SBC |
 Foam Adhesive Strips Shop at: HD |
 Alcohol Marker Cardstock Shop at: HD | SBC |
 Hooray Jumbo Sentiment Dies Shop at: HD |
 Double Sided Foam Adhesive Sheets Shop at: SBC |
 Clear Gloss – Regular Shop at: WOW USA | WOW UK |
 Disco Ball Shop at: WOW USA | WOW UK |
 Clear Ultra Slow Drying Embossing Pad Shop at: WOW USA | WOW UK |
 Dual Speed Heat Tool – **UK** Shop at: WOW UK |
 Dual Speed Heat Tool – **US** Shop at: WOW USA |
 Copic Y02 Shop at: SBP | AMZ |
 Copic Y00 Shop at: SBP | AMZ |
 Copic B05 Shop at: SBP | AMZ |
 B00 Shop at: SBP | AMZ | CPD |
 Copic B000 Shop at: SBP | AMZ |
 Copic R20 Shop at: SBP | AMZ |
 Tombow ABT Blender Shop at: Amaz UK |
 Blue Raspberry Reactive Ink Shop at: HA |
 Sea Reactive Ink Cubes Shop at: HA | SBC |