
Trim the Tree!
Hello everyone! It’s Elaine here from @pinkpeppermintcards and I am excited to be Guest Designing for Heffy Doodle this month. The reeeally exciting news is that I’ll be a regular on the design team from October so I’ll be sharing card making inspiration using Heffy Doodle products on a regular basis! Yippee!
So, you may have seen that Heffy Doodle had a big release this month and its available to purchase right now! I thought it would be a great idea to share a card featuring some of the new products that are now available. If you are a regular follower of mine on Instagram you will know that I love to make Christmas cards and the new release has lots of festive themed goodies that I couldn’t wait to play with. Throughout my post you will find links to the featured products.
Lets get started with the card making! I really wanted to make a repeat sentiment background so I placed the ‘Have Yourself a Merry Little Christmas’ stamp from Happy Holidays Sentiment Stamps on to an acrylic block and repeat stamped at an angle on a sheet of 300gsm heavyweight white cardstock. I didn’t use any fancy methods to line up the stamp each time, I just ‘eye-balled’ it and hoped for the best! Not every image was stamped perfectly or lined up but any sins can be disguised later. To create a softer background I used a grey ink instead of black.
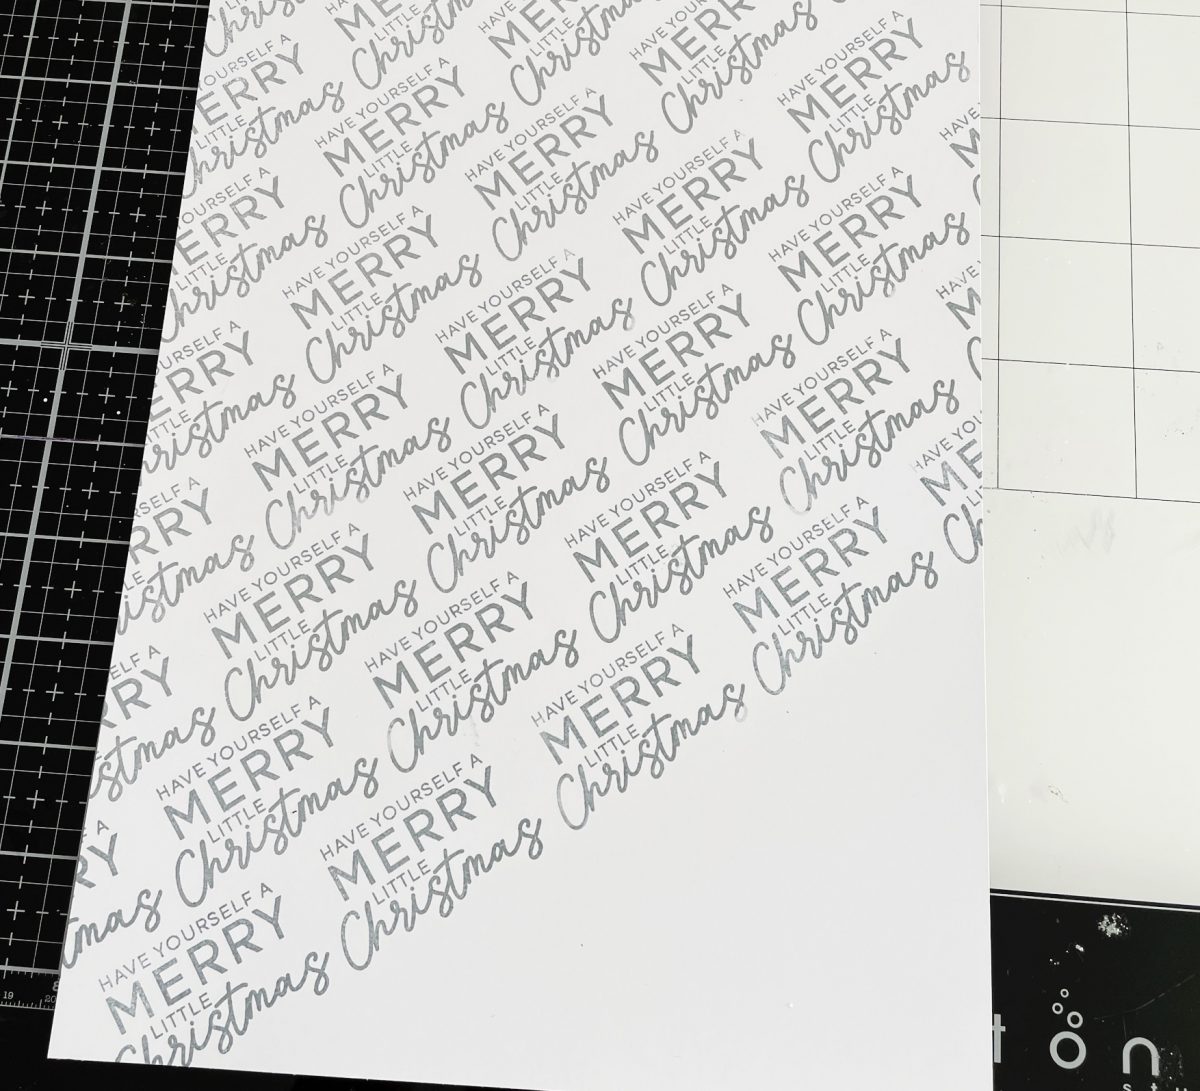
Once most of the cardstock was mostly covered I used a rectangle die to cut a panel out of the stamped sheet.
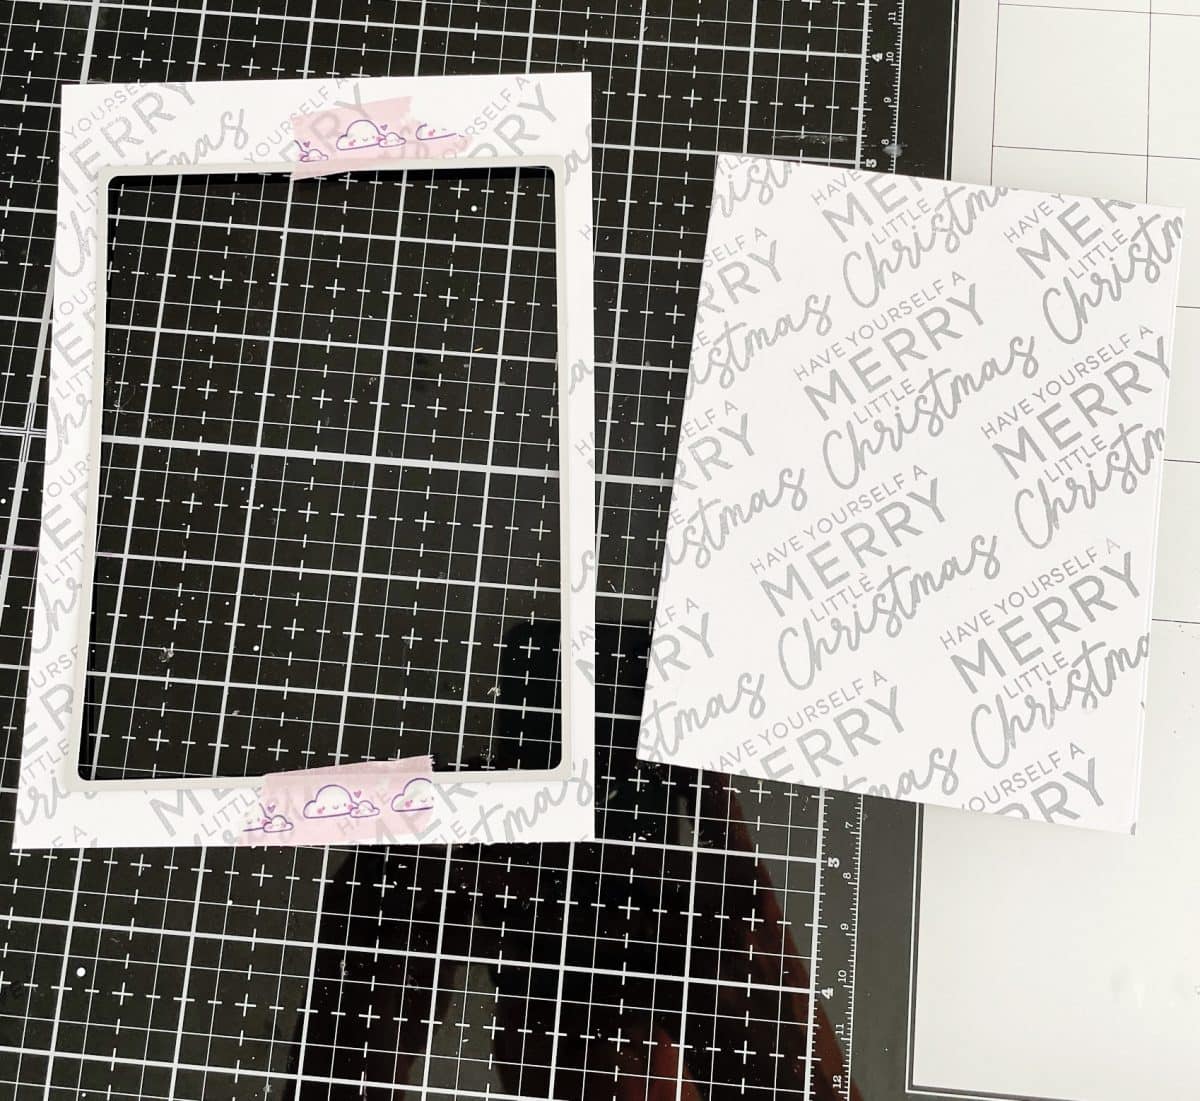
To add some more interest to the panel and soften the sentiment, I splattered a little watered down black ink all over the panel using a fan brush. I set the panel aside to dry and began working on my stamped images.
I used Trim the Tree stamps and stamped the images on to copic friendly cardstock with a copic friendly black ink. The copic markers I used were:
- Red (light bulbs) – R59, R39, R29
- Green (tree) – YG67, YG65, YG63
- Gold (light bulbs & star) – E57, Y26, Y23
- Brown (tree trunk & tub) – E27, E25, E23 & E47 E44
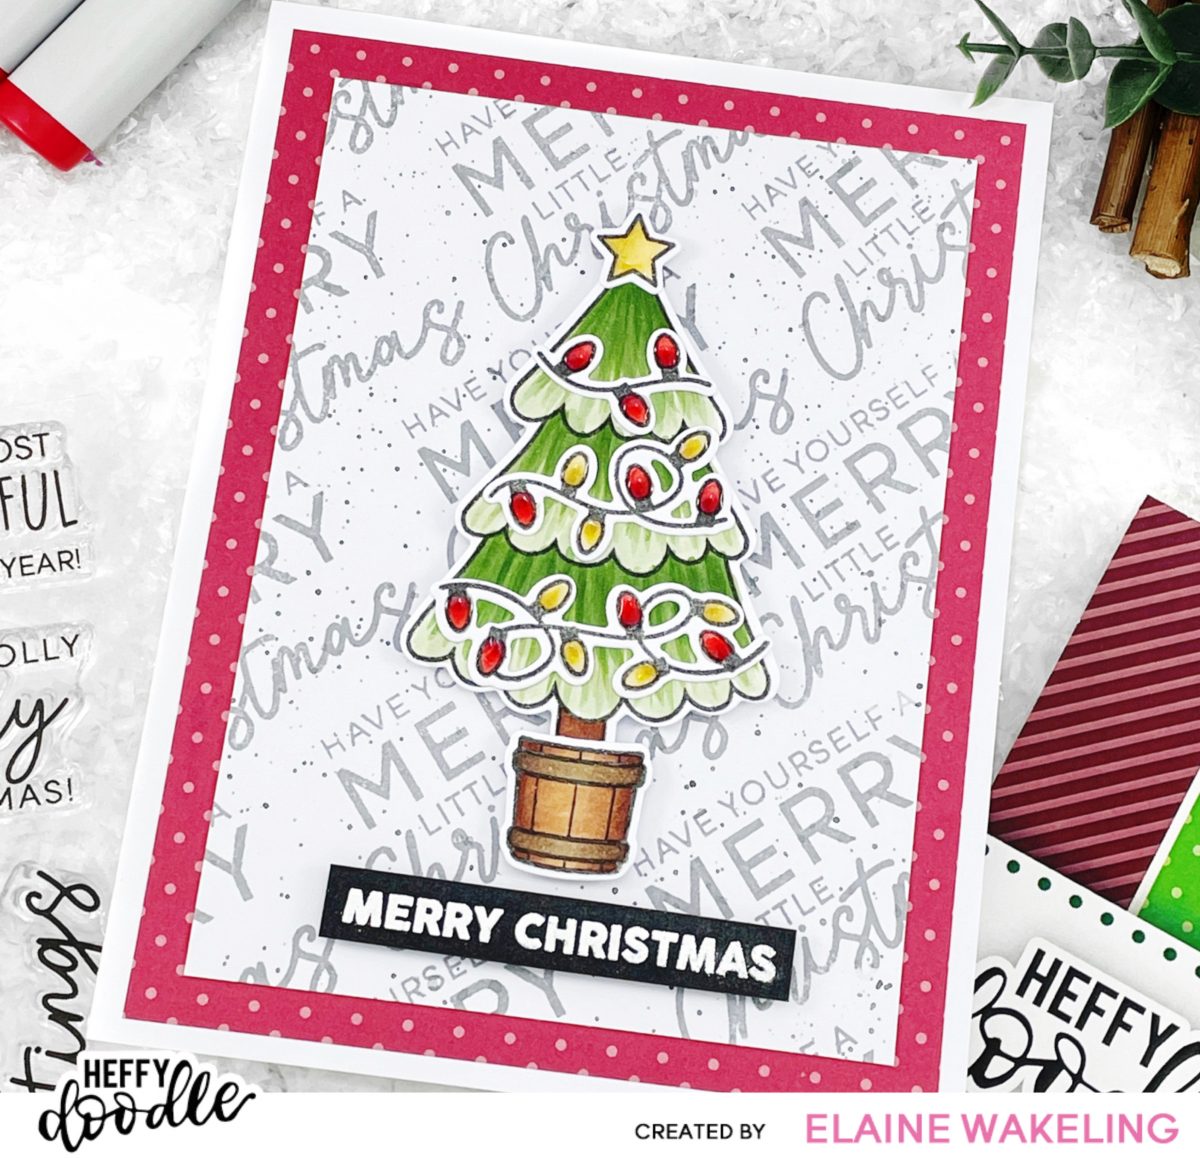
Once all the images were coloured I cut them out with the Trim the Tree co-ordinating dies. Before I could adhere them to the card I needed to finish creating the base layers of the card. Firstly, I trimmed a sheet of pattered paper from the new Tinsel Town 6×6 paper pad (you could also use a rectangle die for this) down to 4″ x 5.25″ and adhered it to a white A2 side folding notecard with liquid glue. Using more liquid adhesive, I secured the repeat stamped sentiment panel centrally on to the patterned paper. I placed sticky foam squares behind the tree and secured it to the card followed by the tree accessories…so cute!
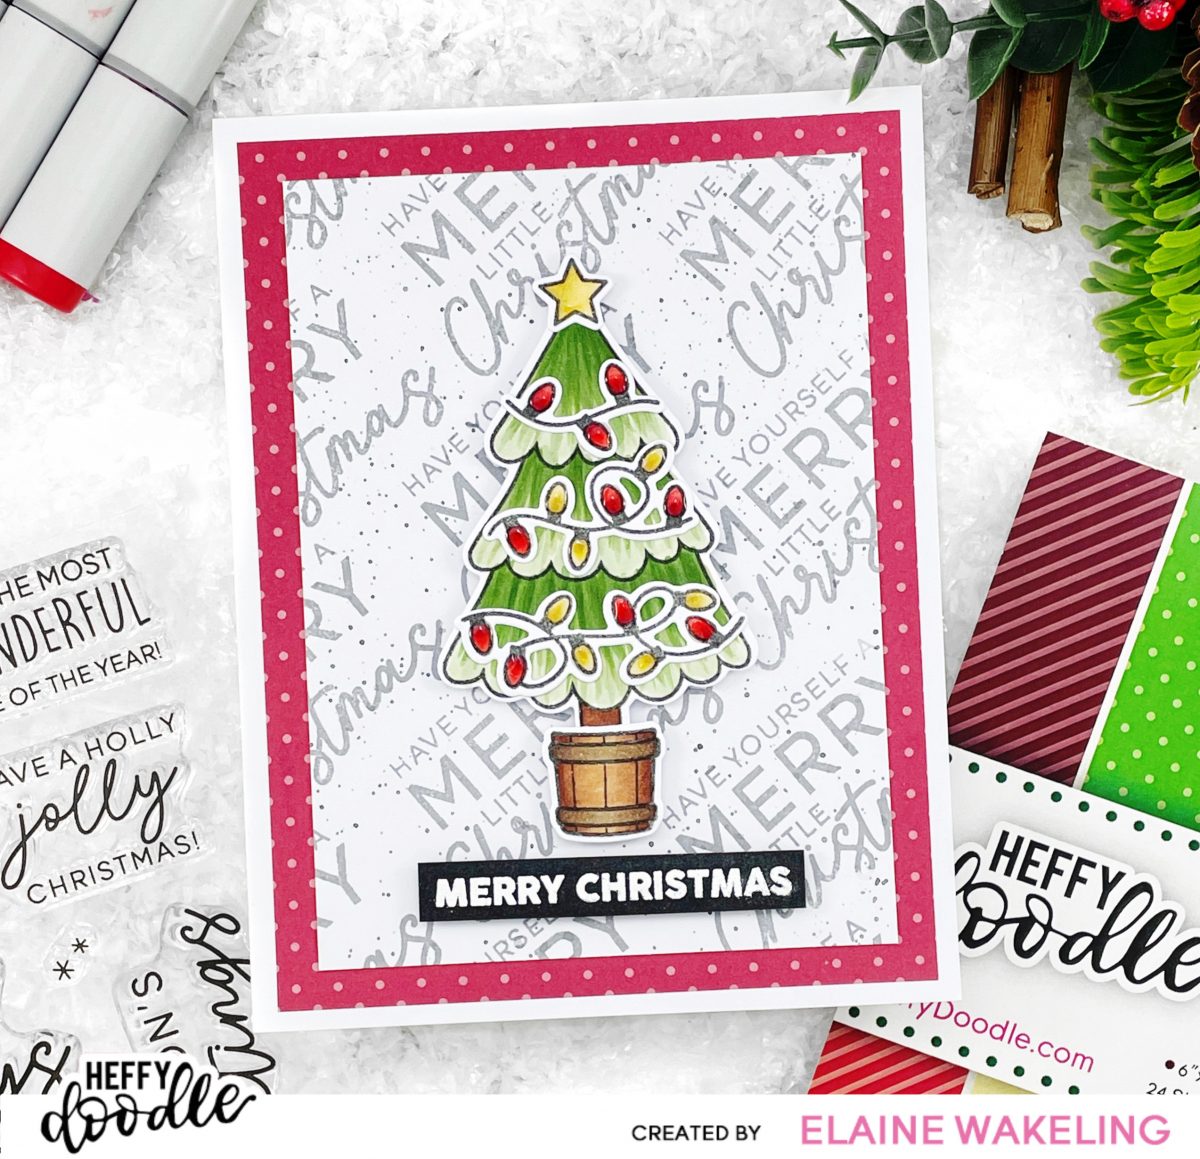
I felt the card needed another sentiment so I white heat embossed the MERRY CHRISTMAS stamp from the Little Label Stamp set on to black cardstock and trimmed it down to a skinny strip with the Mini Paper Trimmer. The set does come with co-ordinating dies but I felt there wasn’t enough room so needed to make the sentiment as thin as possible whilst still having a bit of a border.
To finish off the card I used a shimmer pen on all the light bulbs and star followed by a coating of Nuvo Crystal Glaze to really make them shine!
Thank you so much for joining me today! I hope this gave you some inspiration for your own holiday projects! Be sure to head over to the Heffy Doodle shop and check out all the amazing new products in the release! Love and crafty hugs, Elaine xx