
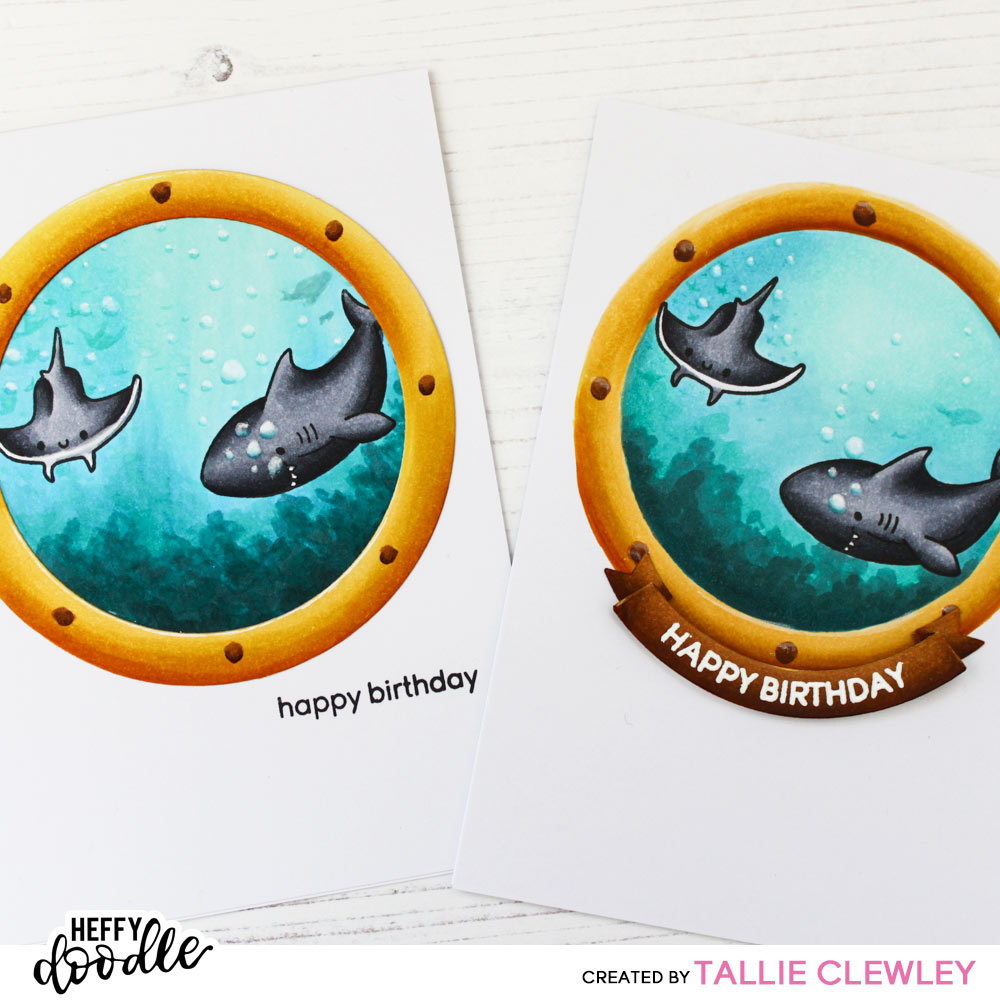
Through the Porthole with Oceans of Love
Hello, Tallie here. I’m back today with another design in my CAS series. Today’s cards feature the Oceans of Love set and I’m building a unique scene with the help of a few other Heffy Doodle products. There are two versions of this card with varying degrees of layers.
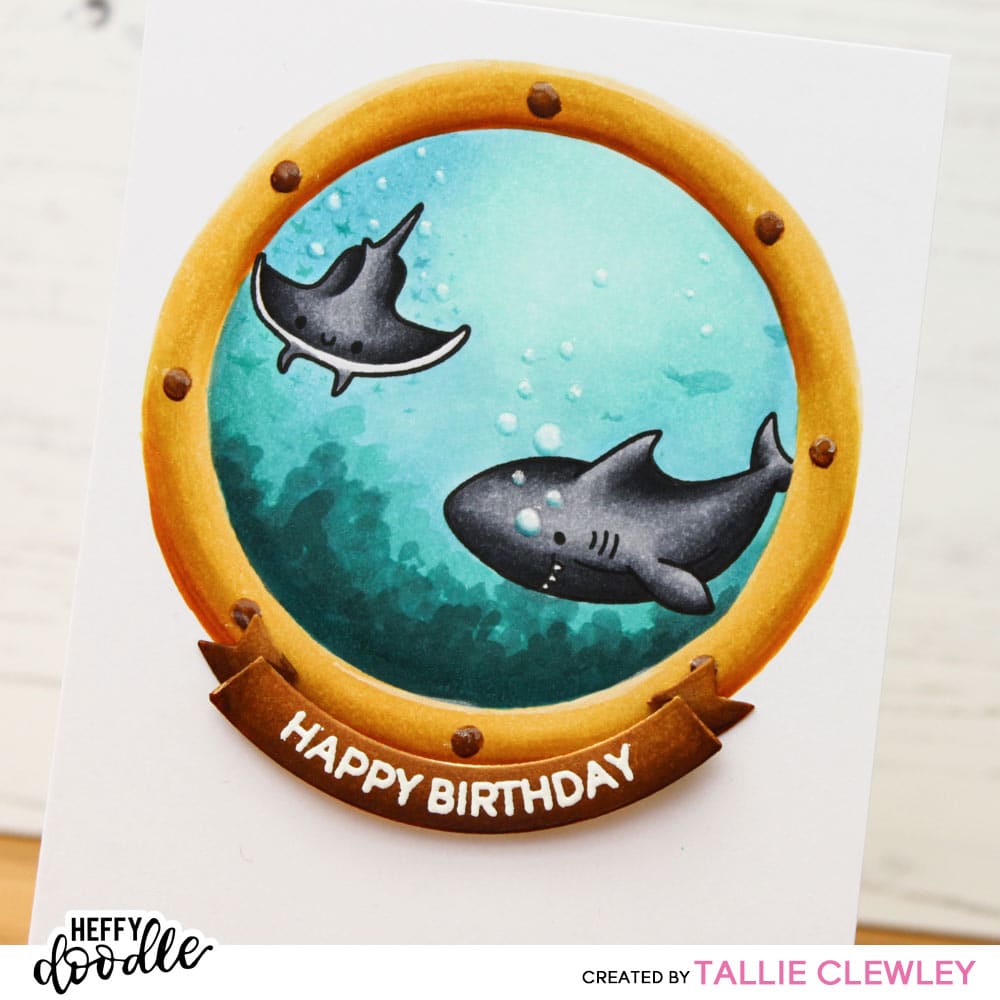
The first step was to stamp out the scene. I envisaged looking through a porthole and seeing am underwater scene with a shark and some rays. I used the Circle Masquerade Stencil to mask off the basic porthole shape, lightly pencilling in the circle and stamping out the shark and ray from the Oceans of Love stamp set. I used some alcohol blending cardstock and some marker friendly ink.
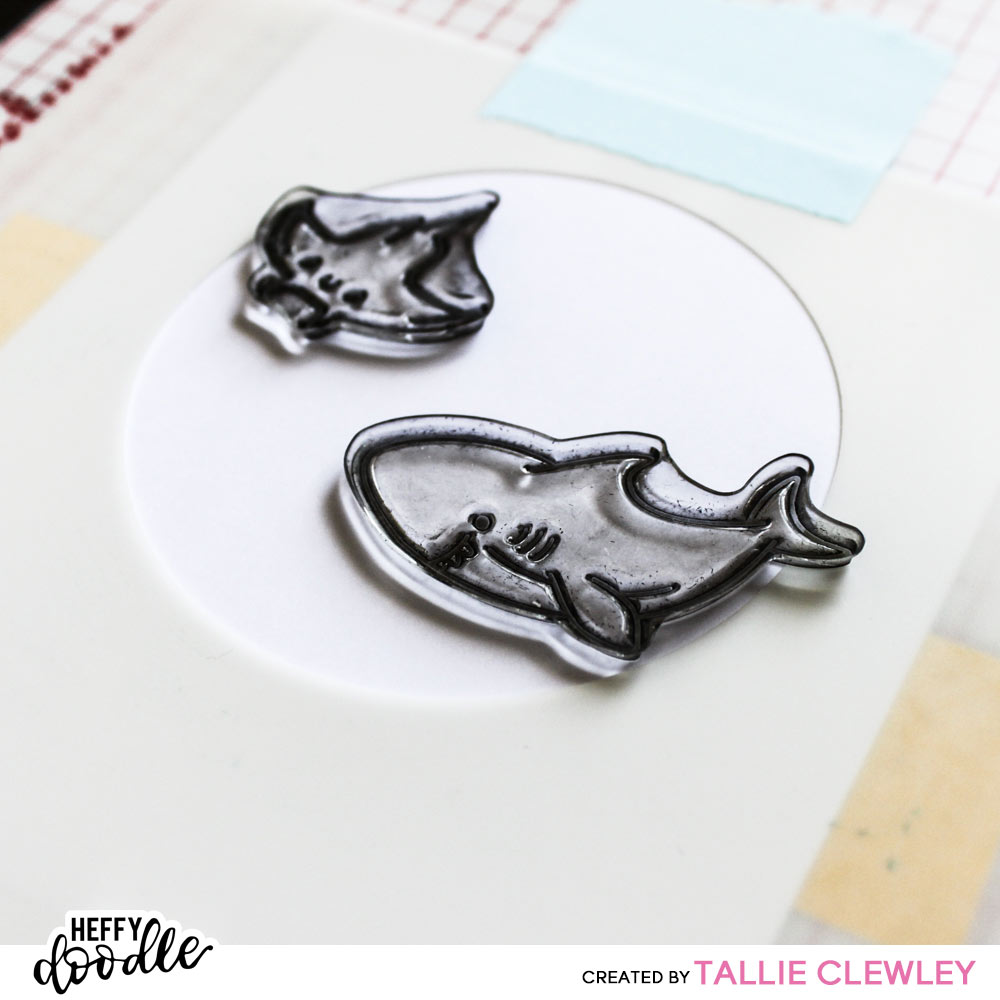
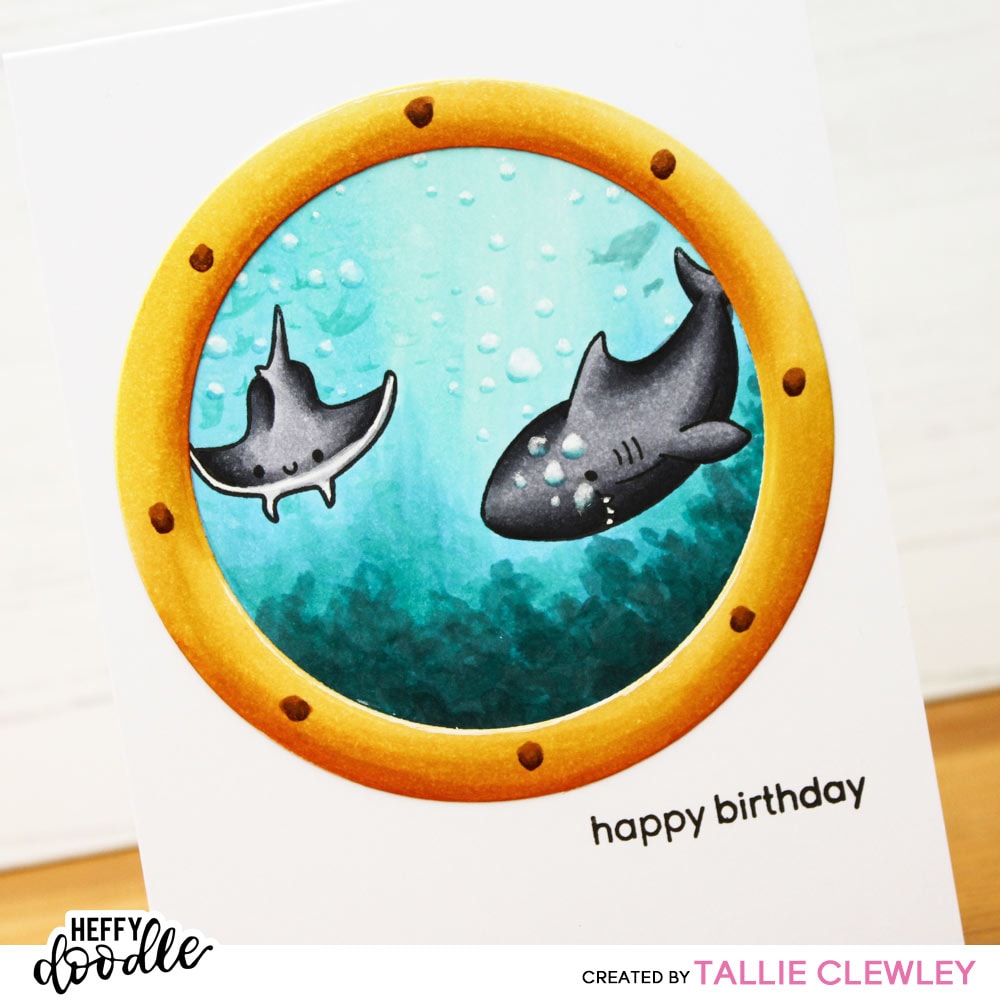
The next step was the Copic colouring! This part I really had fun with, though I would advise starting with the background first. I used a selection of BG markers using some diagonal strokes in the lighter colours to give the effect of light rays beaming down from the surface. I dabbed on a series of blobs in the darker markers to represent the sea bottom or foliage in the dark depths. I used Cool grey markers to colour in the cute little creatures, adding on lots of shadow to give some depth. I added some shadows behind them to give the effect of more in the distance and used my colourless blender to mark out some points for bubbles. I later added some darker semi-circles and some highlights with some white gel pen to make them stand out more. For the one-layer version, I was careful not to go outside the lines, though I knew I was going to cut out the dimensional version so I didn’t colour within the lines!

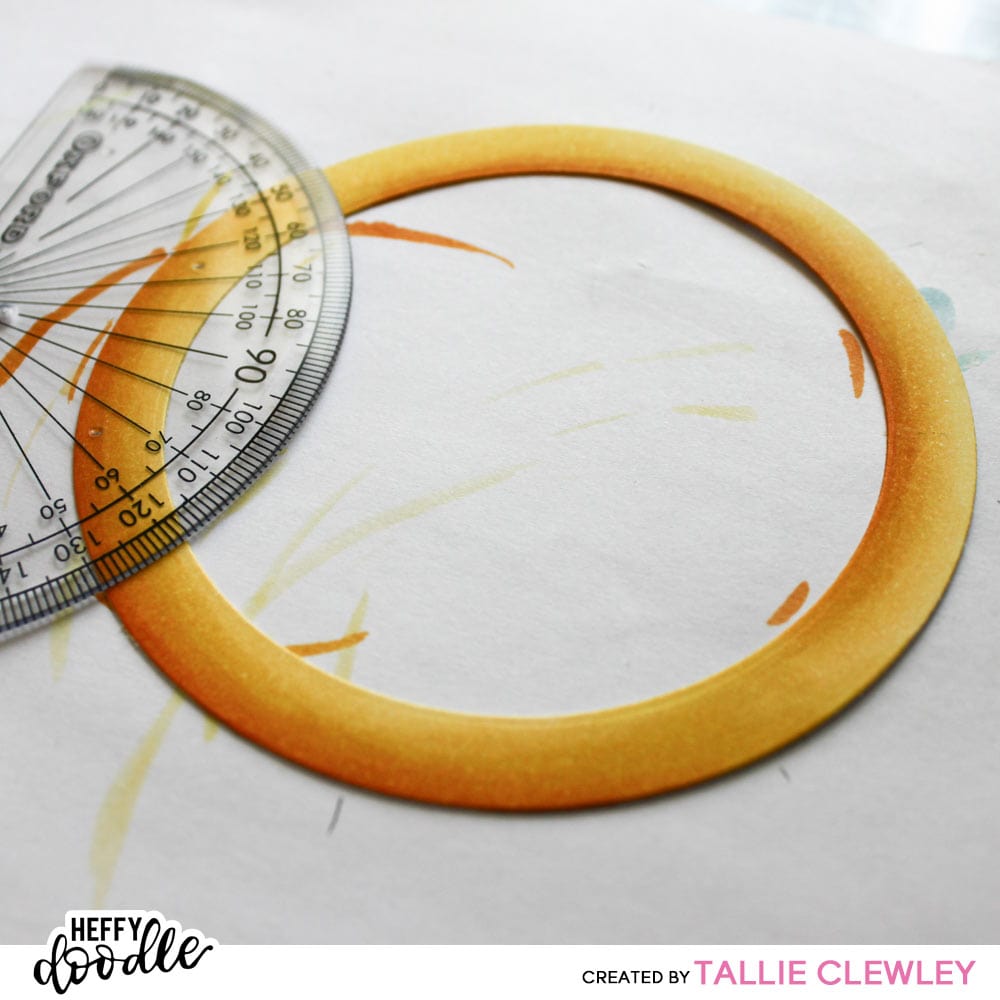
For the porthole, I used two circles dies to cut out a circle. I used some bright golden markers to colour it in, adding shadows to the bottom of the top and bottom of the porthole to give dimension. To add in the knuts (at least I think that is what they are called!), I actually got out my protractor to ensure I had evenly-spaced them out around the circle at every 45 degrees. I just went with it for the second version and it still turned out just as good!
For the layered version, I cut out the background with another circle die and adhered them both to a card base. I wanted a simple sentiment so I chose the ‘happy birthday’ from the Classic Sentiments set. I stamped this to the bottom left of the scene with some black ink.
For the one-layered scene card, I wanted to give some pop of dimension to the sentiment so chose the Roundabout Sentiments stamp and die. I cut out the banner, coloured it in with the same markers I used for the knuts on the porthole and white heat embossed the ‘HAPPY BIRTHDAY’ sentiment.
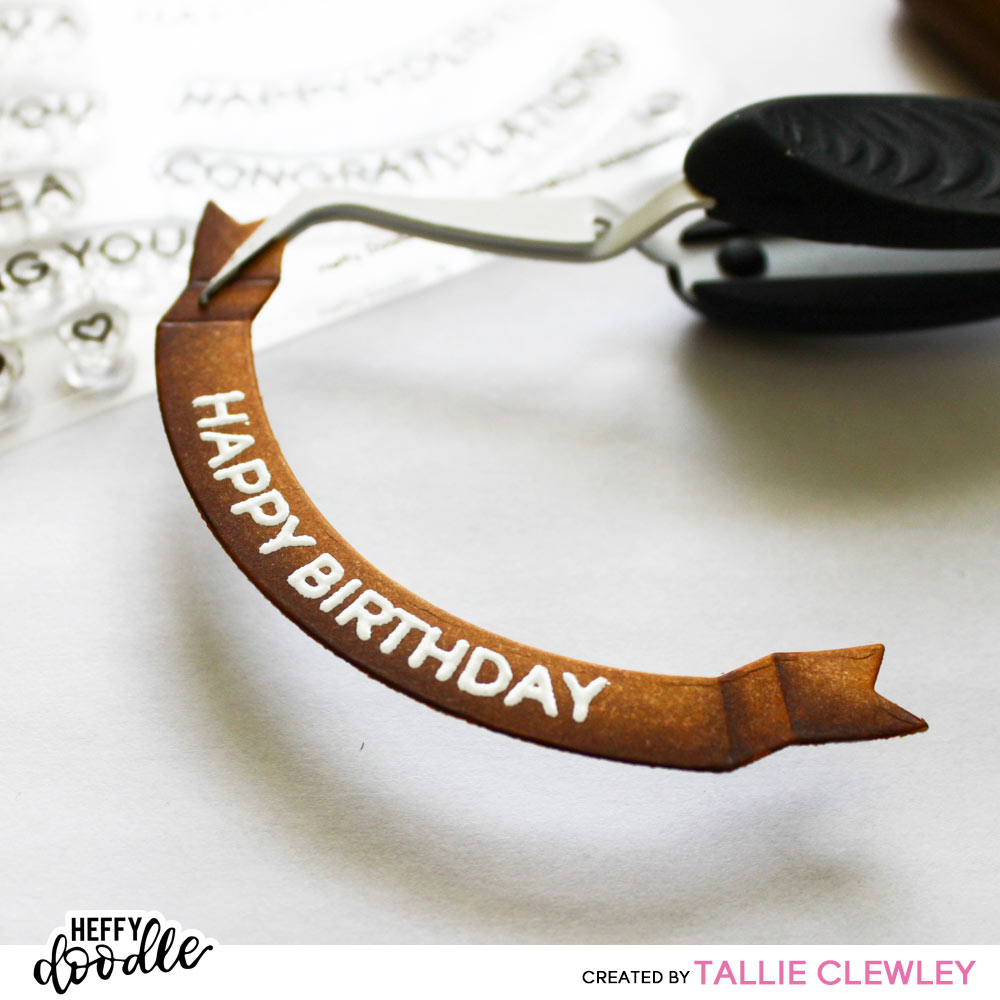
I then used some foam tape to attach this to the one-layer scene.
I don’t know which one I like best – they both have their unique points. Either way, a few last finishing touches with a white or black gel pen finishes off this pair of cards nicely! Give it a try – I’d love to see what underwater scenes you come up with!