
Spooky Halloween

Hi Crafty Friends,
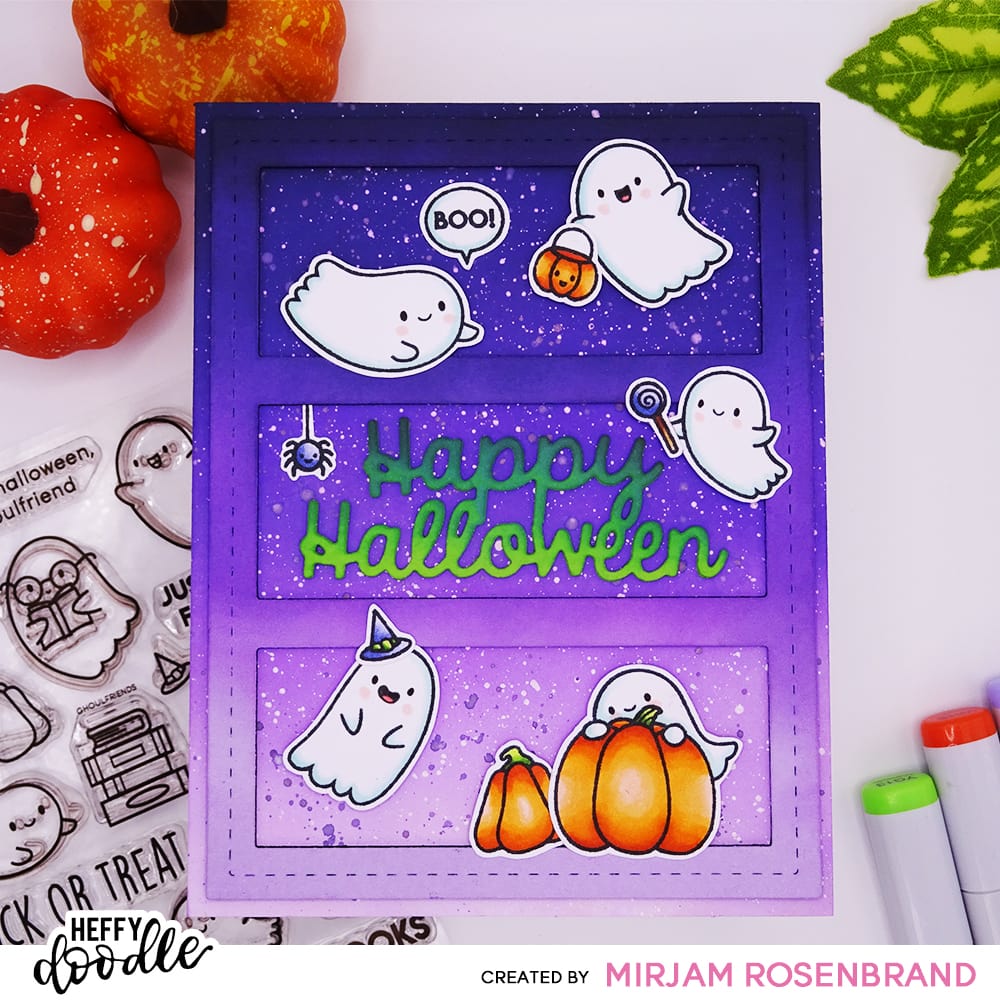
Today I’m on the blog with this spooky Halloween card. As we’re slowly approaching the Halloween season, I’m completely in the mood for spooky cards! Come, let me show you how I made this card!
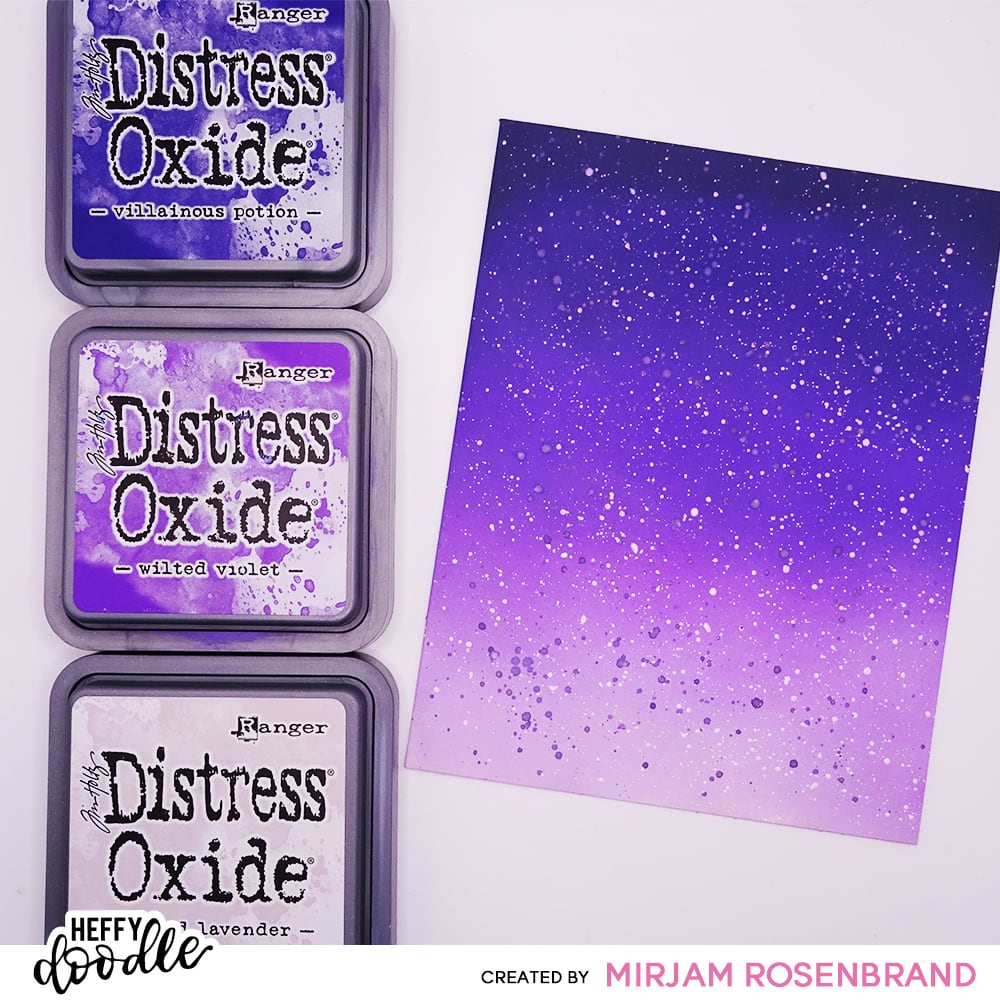
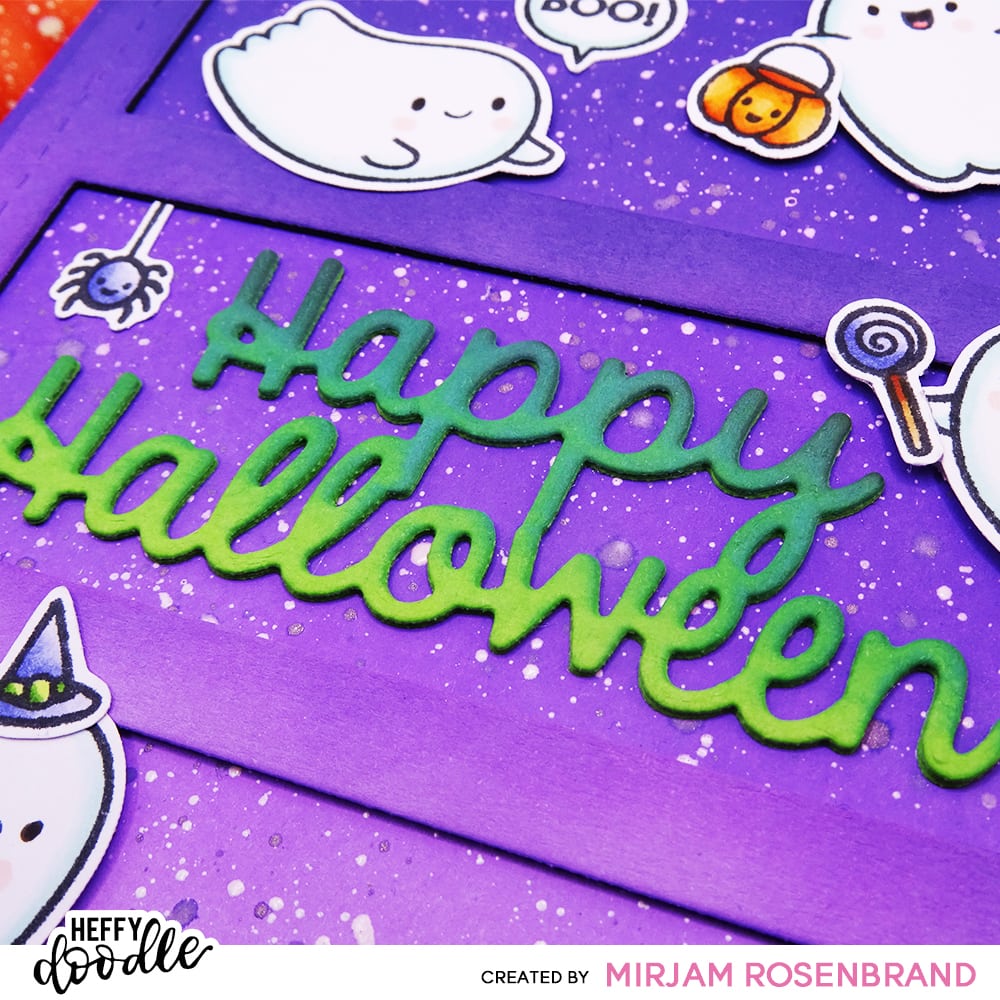
I started by creating my background, so it could dry while I worked on the other elements of the card. For this purple background, I blended 3 types of distress oxides together. Then, I went all in with splatters, and ta-da; a super fun and spooky background is ready.
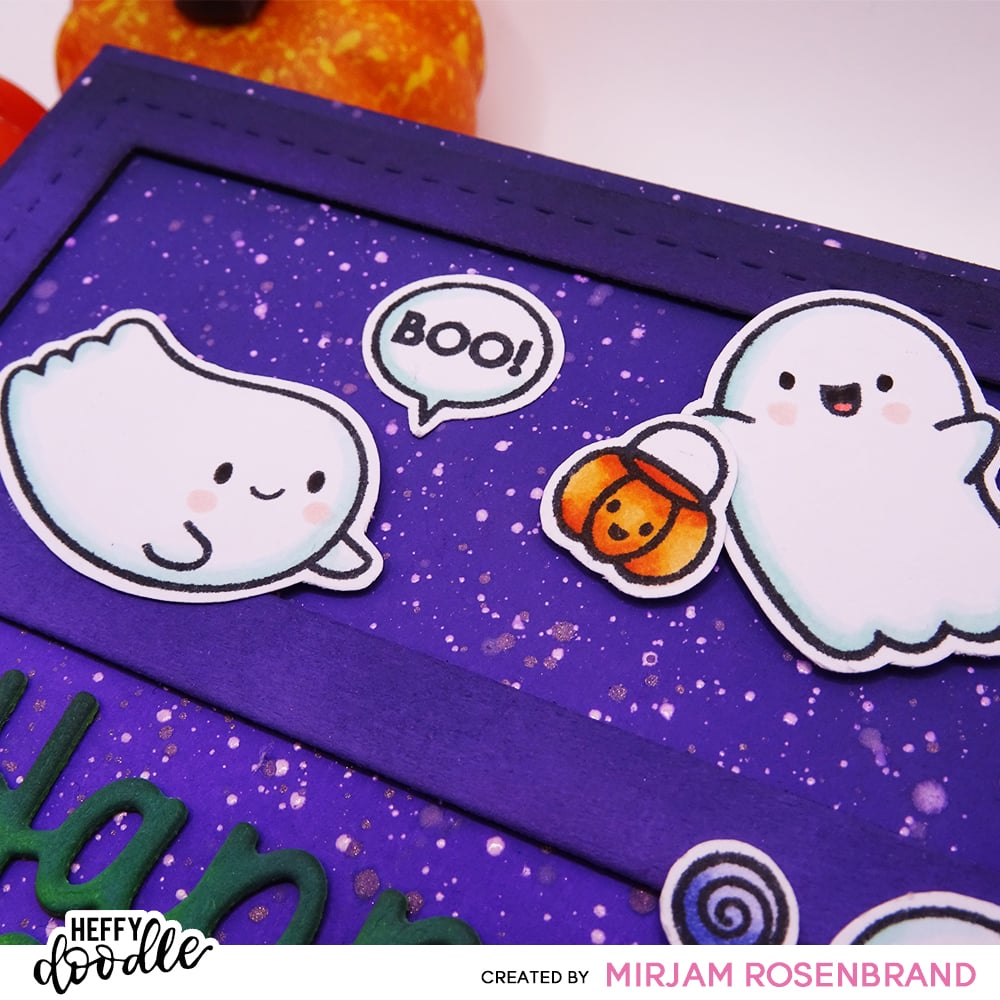
Now it’s time to die-cut the frame from the Stitched Birthday Trio Dies. I did this 3 times and then layered them on top of each other for more dimension in my card. To match the frame with the background, I used the same colors of distress oxide on the frame.
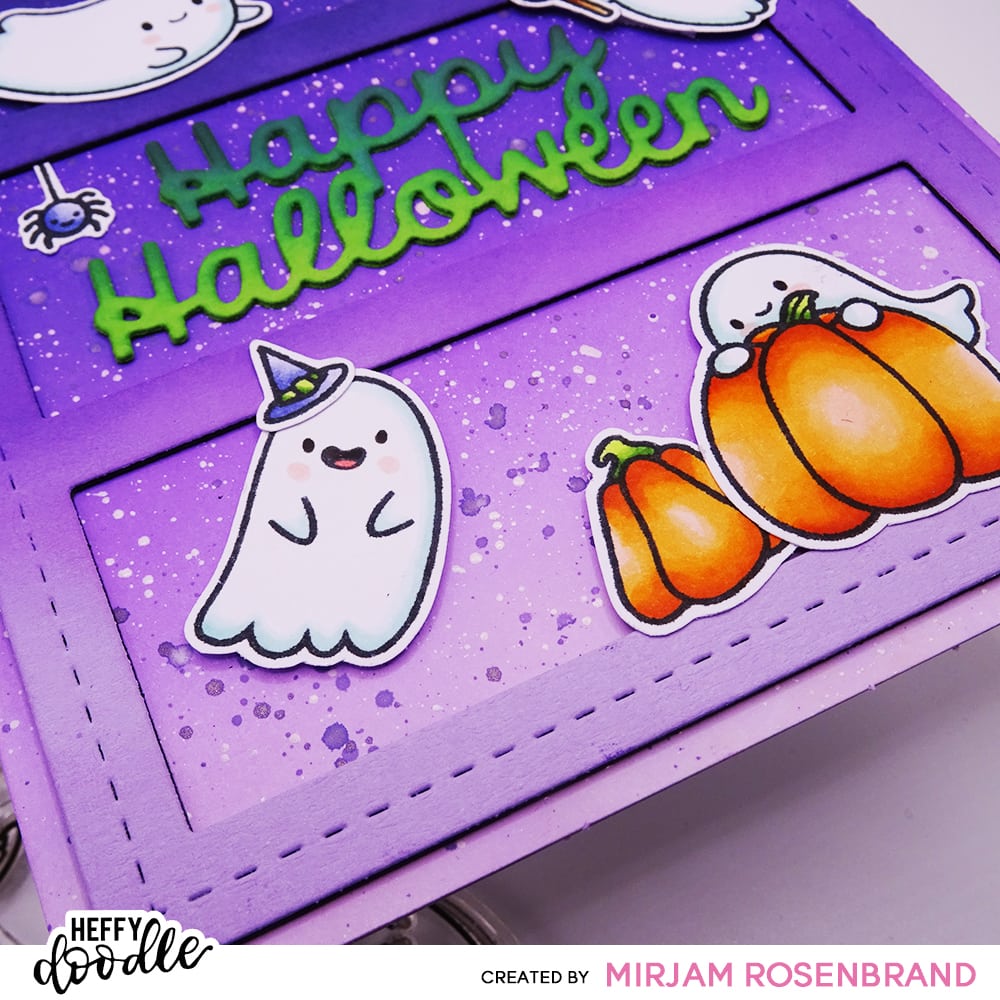
For the sentiment, I used the Happy Halloween Shadow Heffy Cuts Die and die-cut it using the Heffy Doodle Mini Die Cutting Machine. I used green Cardstock and blended it with dark green Distress Ink, so the sentiment would better complement my background. I also die-cut the “Happy Halloween” sentiment 3 times and layered them for more dimension.

This spooky card is only complete with the little ghosts from the Ghoulfriend Stampset and some accessories from the Costume Critters Stamps. I stamped these using Memento Ink on white cardstock and colored them with my copic markers.
I attached the Coordinating Dies with Heffy Memo Tape and ran everything through my Heffy Doodle Mini Die Cutting Machine.
Now it’s time to attach all the elements to my card. I’m using Foam Tape to add depth to some of the images, and the rest I’m adhering with some Glue.
I hope I’ve been able to inspire you with this spooky card. See you next time!
X Mirjam