
Simple Mail Art feat. Pandtastic Painters
Hi Heffy Doodle friends!

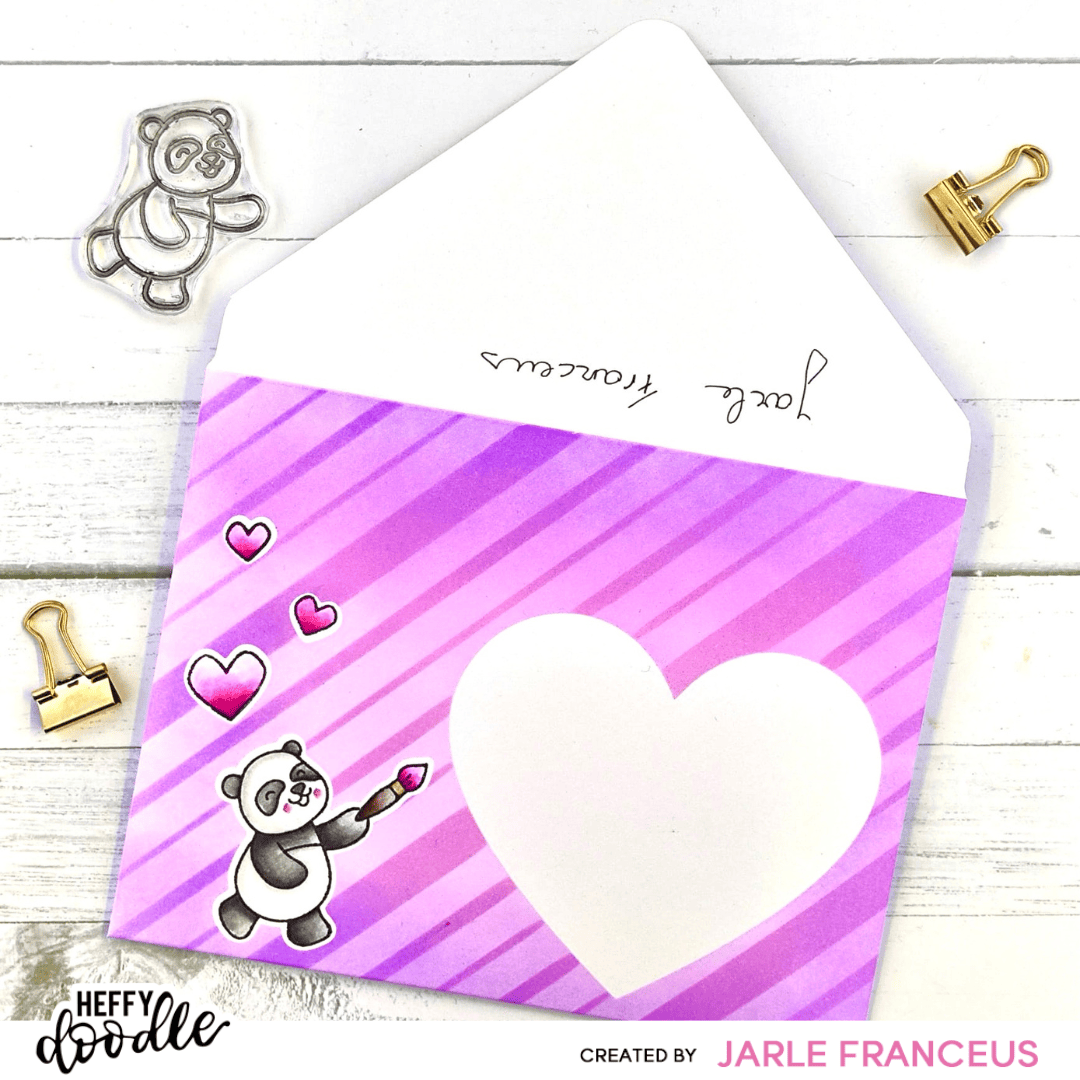
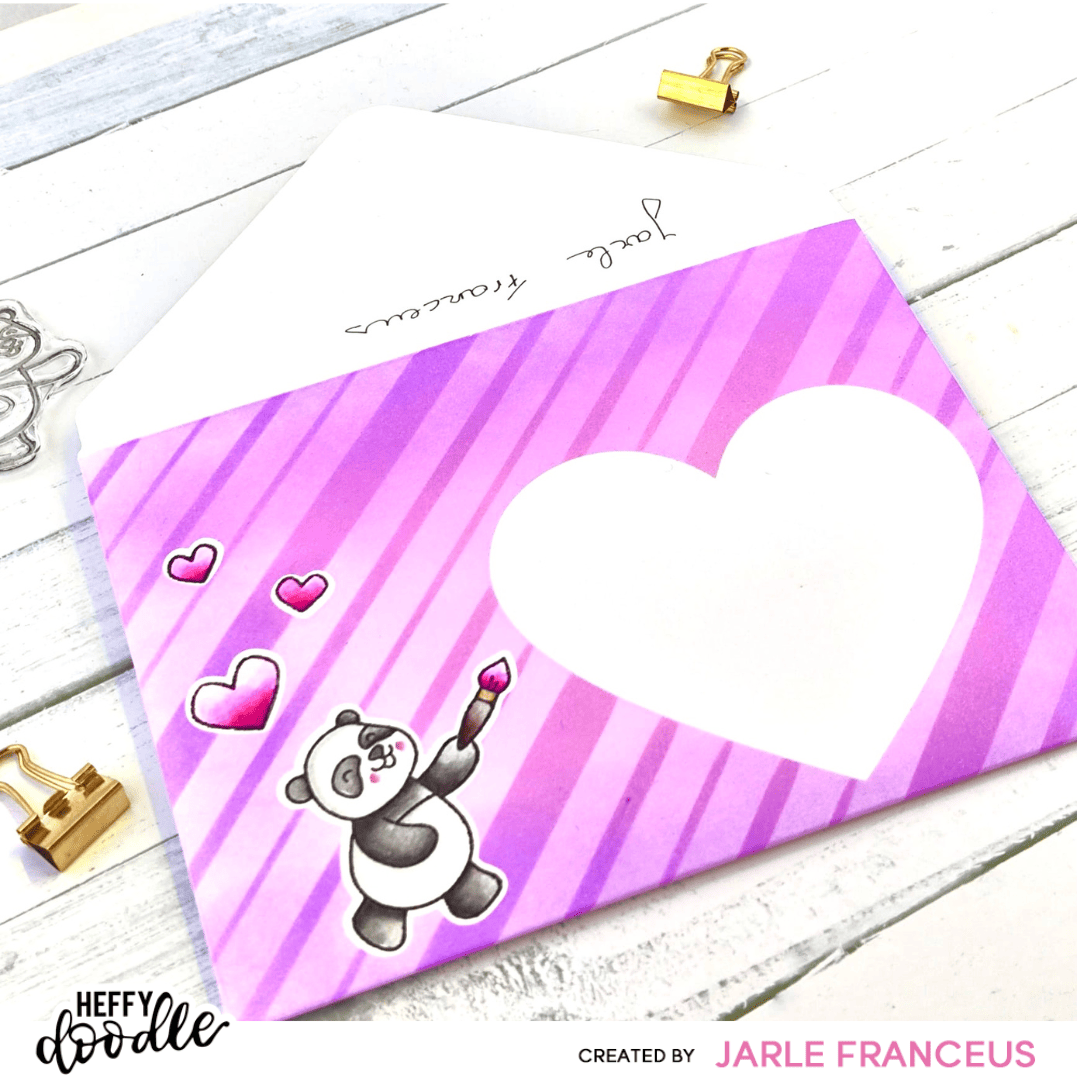
I have something a little bit different for you today. I created a cute envelope with an even cuter little panda and some stenciling. In this blog post, I will tell you step by step how I created this fancy envelope.
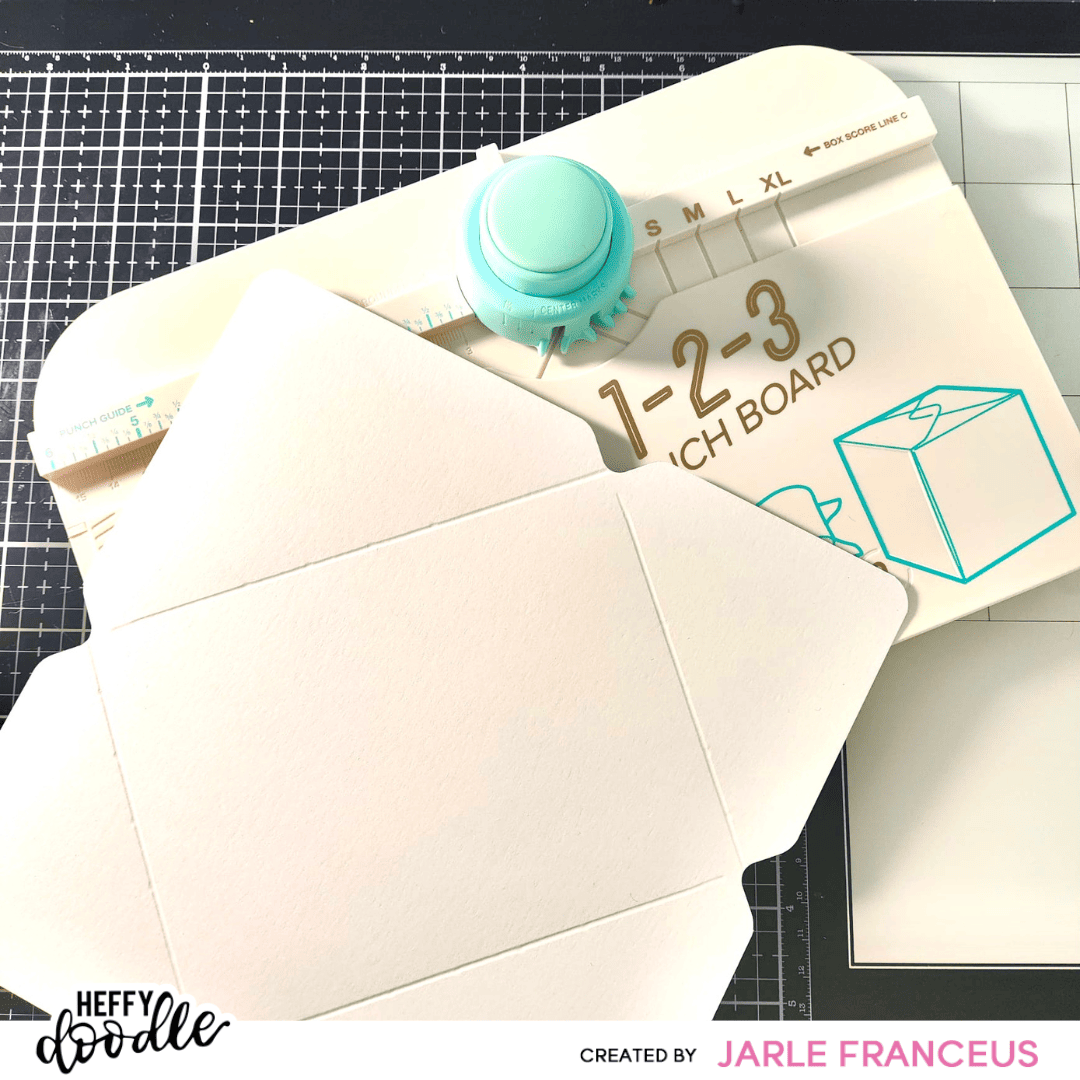
I started by trimming down a piece of Bristol Smooth paper to the correct size. I wanted to create an envelope for a standard A2 sized card and my 1-2-3 punch board tells me exactly what size my paper has to be. I just follow the steps that are printed on the punch board until I get the shape of an envelope. On the picture below, you can see how it’s supposed to look. This really is SUPER easy!
I masked off the 4 edges of the envelope with the wide Heffy Doodle tape. This is helpful because it tells me exactly what my ‘working space’ is and it also prevents any ink from transferring onto the flap, when I’m doing my ink blending later on.
I took out the masked heart from the ‘Heart Masquerade’ stencil. I put some temporary tape on the backside and placed it on the envelope, right where I wanted to write the recipient’s address. Then I stamped an adorable panda from the Pandtastic Painters stamp set with Versamark Onyx Black ink on the left side of the heart. Before stamping, I did wipe off a little bit of the stamped line where the panda’s ‘paw’ was. You can see it in the picture below, that the line of his ‘paw’ didn’t stamp. That’s because I wanted to stamp the paintbrush inside that paw. So no need for masking, I just completed the line when my coloring was done. You’ll see that later on. I also stamped 3 cute hearts from the Yappy Happy Mail stamp set, with the same Versafine Onyx Black ink. When the stamping was done, I die cut the masks with the coordinating dies from the stamp sets and Gina K Masking Magic. I placed all the masks on top of the stamped images.


Tip: You can definitely fussy cut the masks with scissors, but (1) I hate fussy cutting and (2) I’m terrible at it. So my solution is always: cut the masks with the coordinating dies… It does leave that white border, but I don’t really mind that…
After that, I took out the Funhouse Diagonal Stripes stencil and placed it on the envelope. It’s a little too small to cover the entire envelope, but since it’s a repeating pattern, I can ink blend in 2 steps. When I’m done with the first part, I just align it again and ink blend the second portion. The picture below shows you how I masked off the stencil on the right (with Heffy Doodle tape again) for that first portion of stenciling.
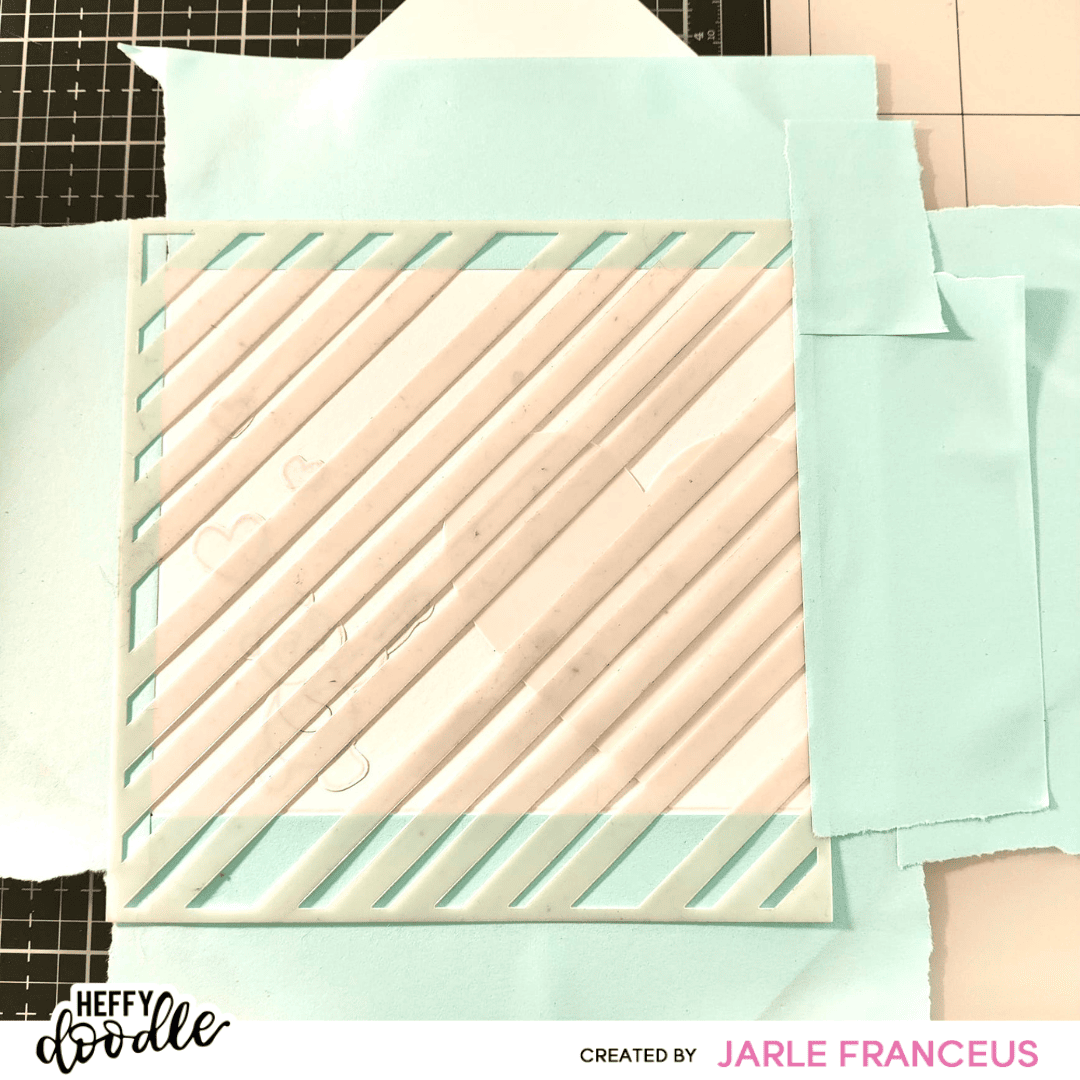
Since it’s a very intricate stencil, I chose to use my Paper Pouncers for my ink blending. I used Distress Oxides in Spun Sugar, Picked Raspberry and Wilted Violet. I started with the lightest color on the inside of the envelope and the darkest shade (Wilted Violet), more on the edges.
When I peeled off the stencil, I didn’t like the stark white stripes, so I did go over the entire envelope with residue ink. This way, the entire envelope got covered in ink and you can still see that fun striped design.
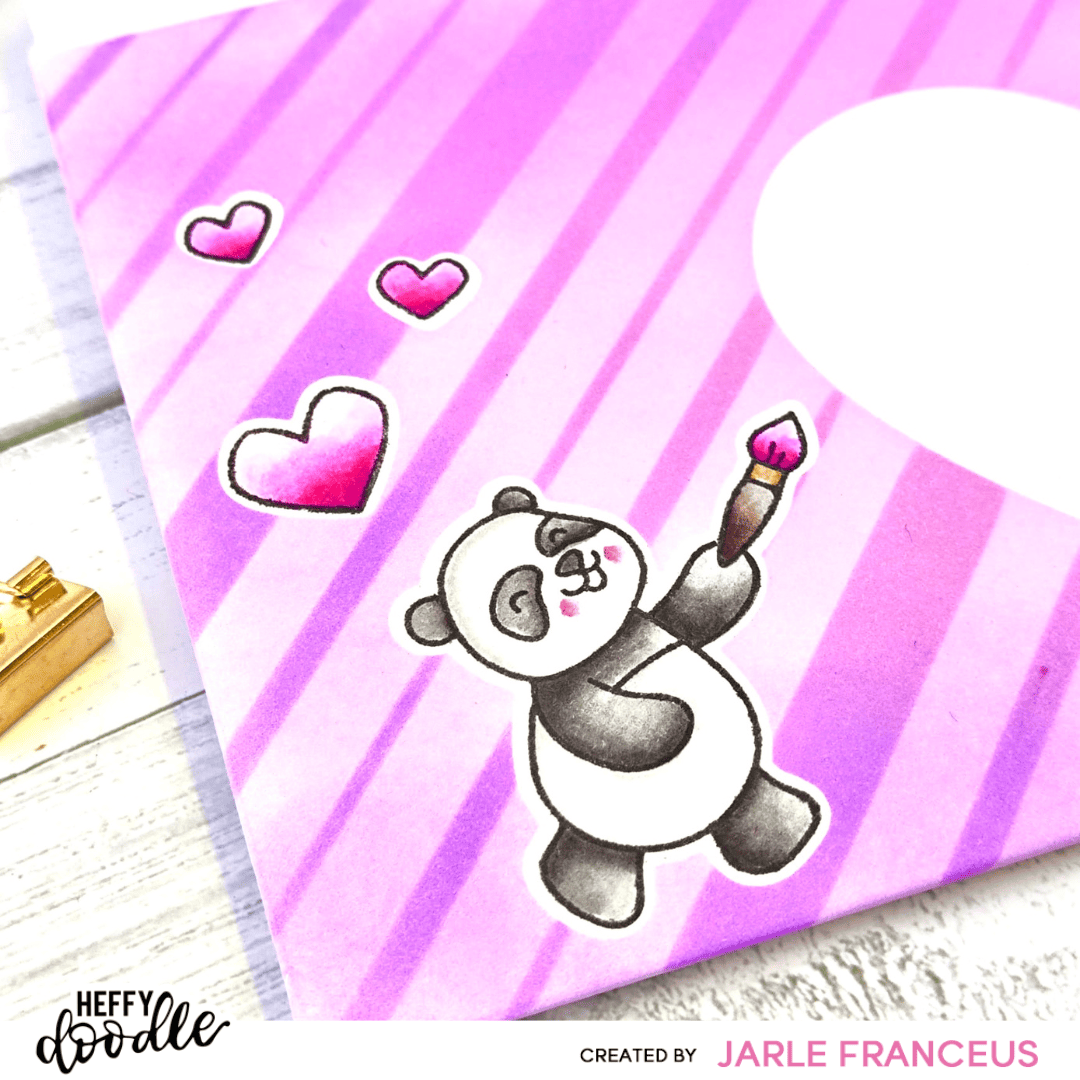
Then I took off all the masks (the hearts, the panda and the big heart stencil). Time to color! I took my Zig Clean Color Real Brush markers and watercolored the images in the following colors:
- Hearts: Light Carmine – Dark Pink
- Panda: Gray Brown – Natural Grey (Pale Rose for the blushy cheeks)
- Paint Brush: Deep Brown – Beige – Dark Pink
I also made sure to complete that stamped outline of the panda’s paw. I did this with a Copic Multiliner 0.3.
Before mailing this envelope, I will coat it with a bit of Distress Glaze, just to make sure the envelope design isn’t ruined when it gets a little wet in the mailing process…
This finishes off my project for today. This is a super simple way to pimp up your envelopes. A cute little image, a fun stencil design and you’re good to go!
I really hope you like how it turned out. Let me know if you want to give it a try sometimes!
Have a great day! Love, Jarle x