Shake Your Tail Feathers With Davina
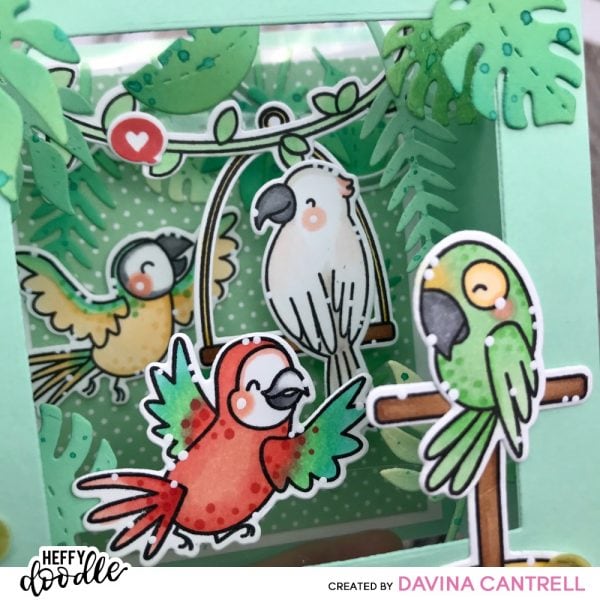
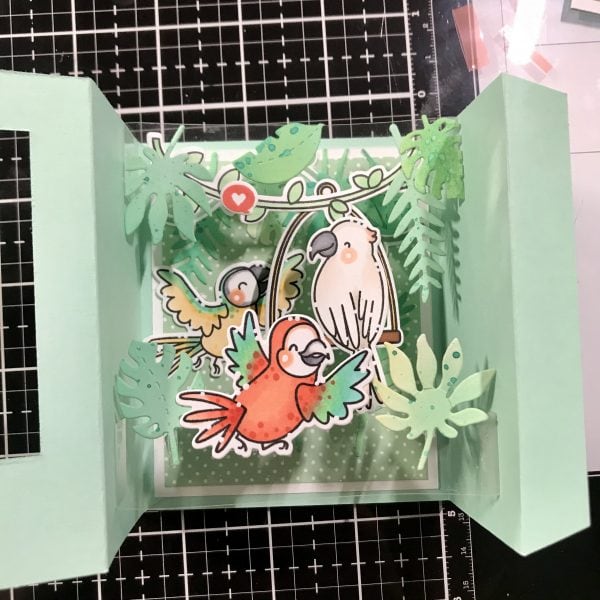
 Hello Heffy Doodlers! Davina here on the blog, with a really fun shadow box to share with you. This is a large custom size shadow box size that I like to make, which folds flat into an A2 sized envelope. This minty jungle scene was created using lots of fun Heffy Doodle products.The main source of images is from Wingman , but I also used some vines from Chimply the Best. I cut all those gorgeous leaves using the Amazonian Leaves Die Cuts.
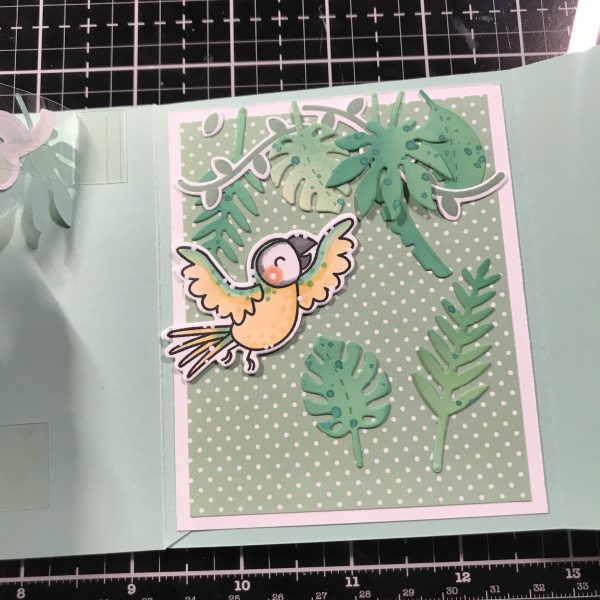
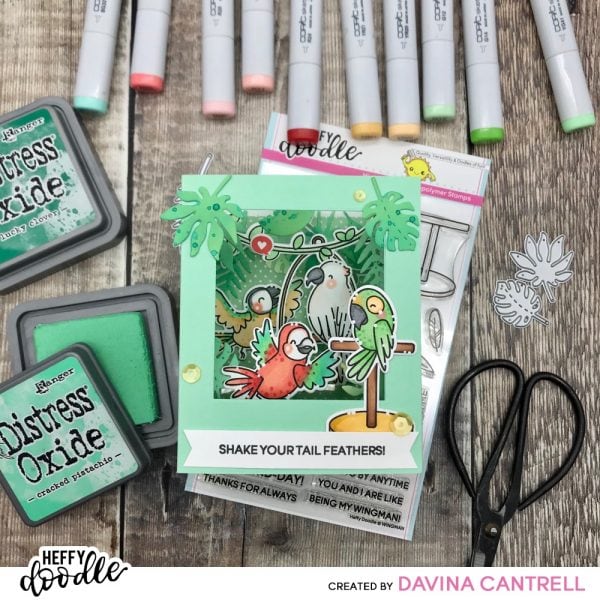 I made this card twice, almost. Originally I wanted to put a little monkey swinging in the back. But once I added my inner layers, he kind of got lost. So I had to remake the back panel. So don’t get confused if I have a random photo with a cute little monkey. I used the fantastic Hint of Mint cardstock from Heffy Doodle, it is so nice and thick. The super sturdy cardstock folds so nice, with no weird separation on the score lines. I make a custom size shadow box, that is 5.5 x 4.25 when folded flat. The box face is 3.5 x 4.25, which gives you 2 inches of depth. To make the box, I trimmed the cardstock at 6 inches, then cut the 6 x 8.5 piece in half, to create 2 pieces of 4.25 x 6 inch panels. I scored both at .5 inches, and then at 2.5 inches. Reinforce your folds with a bone folder. Use a die or your trimmer to remove the center window from only 1 of the pieces, making sure to leave at least 1/2 inch frame so the tab can connect.
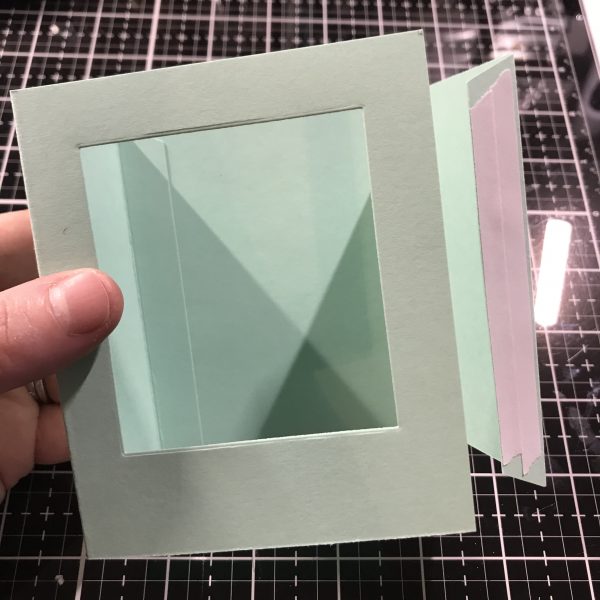
Line both panels up side to side, with the fronts facing down. Connect the front piece to the back piece, by adhering the 1/2 inch flap to the top of the back piece. Make sure the tab is on top of the face down panel, it will be on the inside when the box is assembled. We will not connect the remaining tab until later.
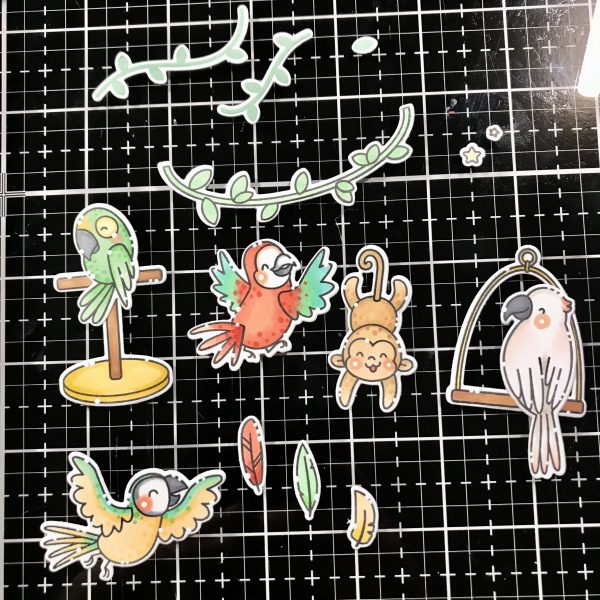
I stamped my images and colored them with copic markers. After using the coordinating dies to cut everything out, I added some small white dot highlights. I cut some leaves using the Amazonian Leaves Die Cuts from the little remaining window of mint cardstock and from white cardstock. I inked all the leaves with Distress Oxide Ink and splattered a little watery ink on them. I decorated my back panel with some minty dotted paper and my leaves and vines. Original I adhered a monkey, but I didn’t check the placement first and had to go back and try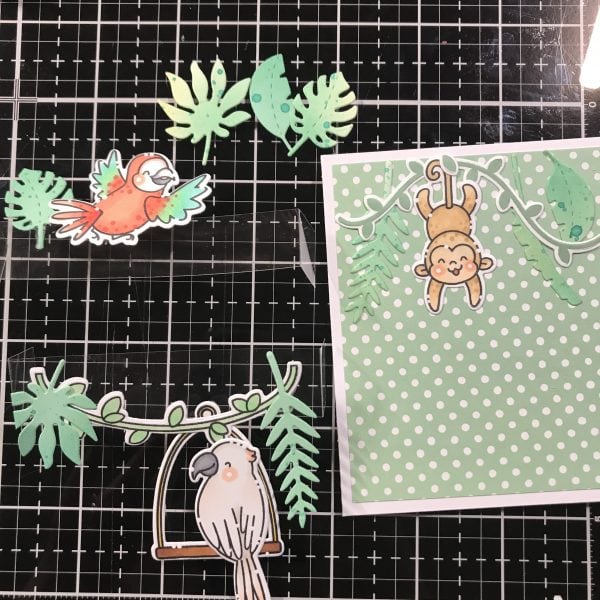
 To create the floating/flying images I used strips of acetate for the tabs. I cut two strips at 1/2 inch x 4.5 inches, and scored each strip 1/2 from the ends. I laid the strips over the panel to choose good placement for the leaves and birds and to glue down the back parrot in a good location. I decided to place one strip on the top, and the other from the bottom. I adhered some extra strong double stick tape to the flaps on both side of each tab. Only removing the release tape from the left sides, I secured the tabs face down on the left side
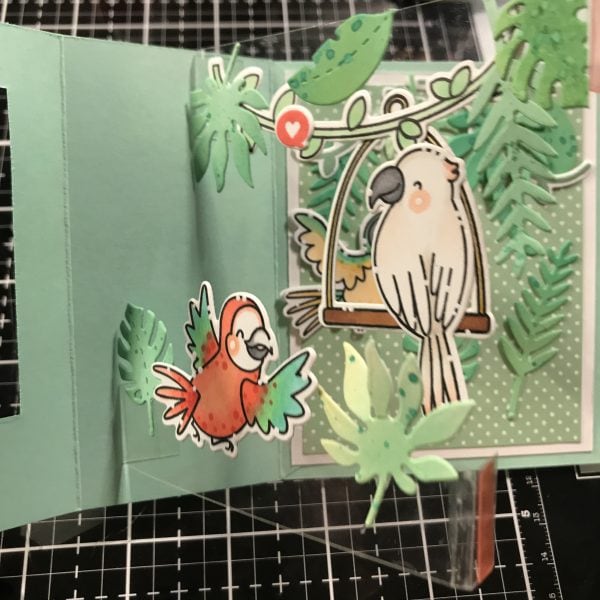
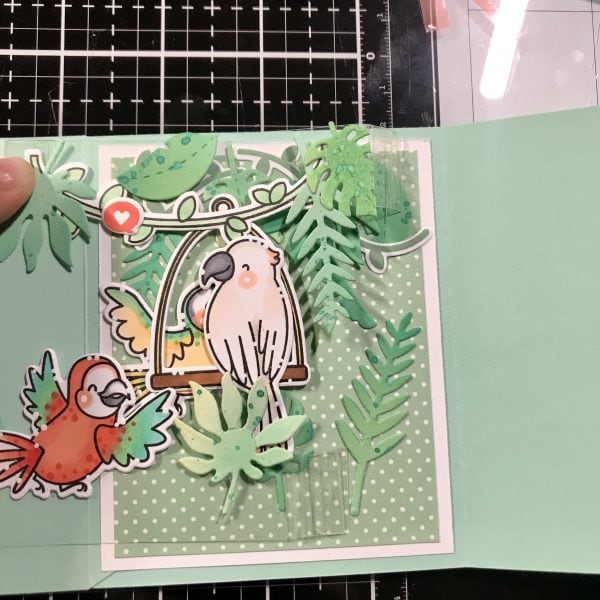
To get perfect placement for the tabs, fold the downward facing tabs on the score line, so they are now face up. Remove the release tape on the right flaps. Make sure they are straight and flat. Then carefully fold the right panel over the top. The adhesive will secure it in the proper place. Finally add double stick tape to the remaining panel flap, and secure the front piece. Then decorate the front.
Whew! That’s a lot. Sorry I’m long winded haha. I simply decorated a piece of card to fit on the back,
and folded everything back and forth to make sure it lays nice and flat. I hope you enjoyed this crazy tutorial and enjoy this unique sized shadow box. Thank you for dropping by,
Davina