
Sending You Oceans of Love
Underwater Scene
Hey Heffy Doodlers!
It’s Kelly here, and I’m sharing a card today that’s sure to put you in the mood for spending some quality time in the ocean!
Some of my favorite cards to make are the ones that look really complicated but are actually really easy to make! So let’s get started!
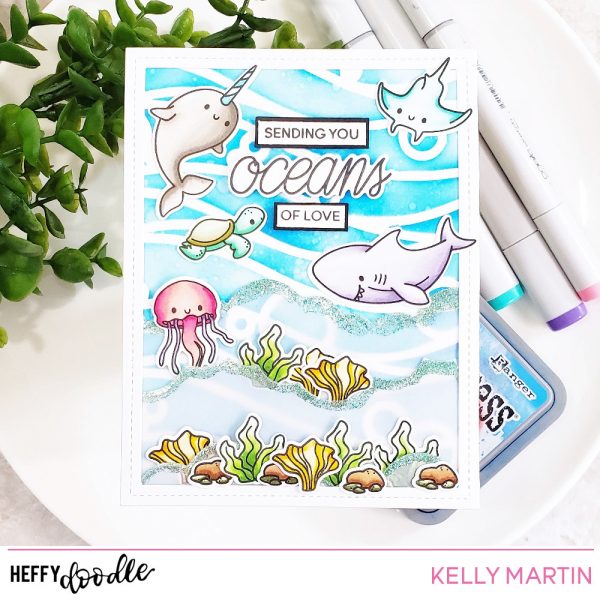
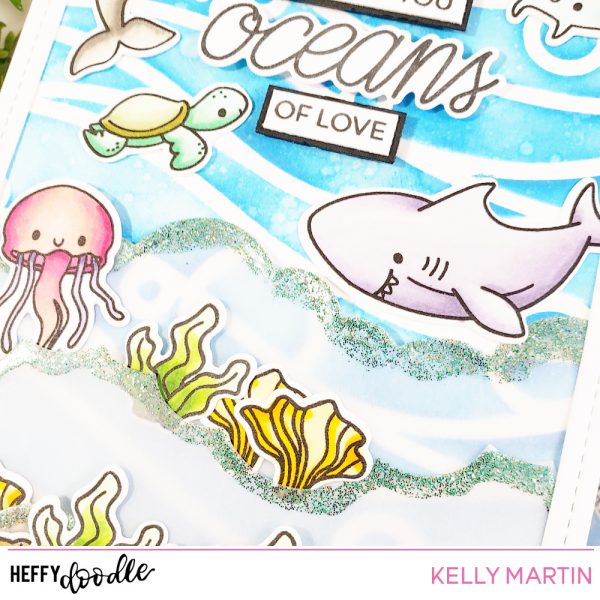
Blend Salty Ocean Distress Oxide ink through the Bubble Waves stencil on to a 4.25 x 5.5 inch card base. Using a cloud die, cut three pieces of vellum and then apply versmark ink along the edges. Apply embossing powder and heat set, then apply liquid glue to the edges of the vellum pieces and glue them down flat to your card. Hint: don’t glue the top edges of the vellum pieces down, because we want to be able to tuck things in-between those vellum pieces!
Now, before you panic about the ragged edges of the card and the glue showing through the vellum, stay calm–we’re gonna add a finishing touch at the end!
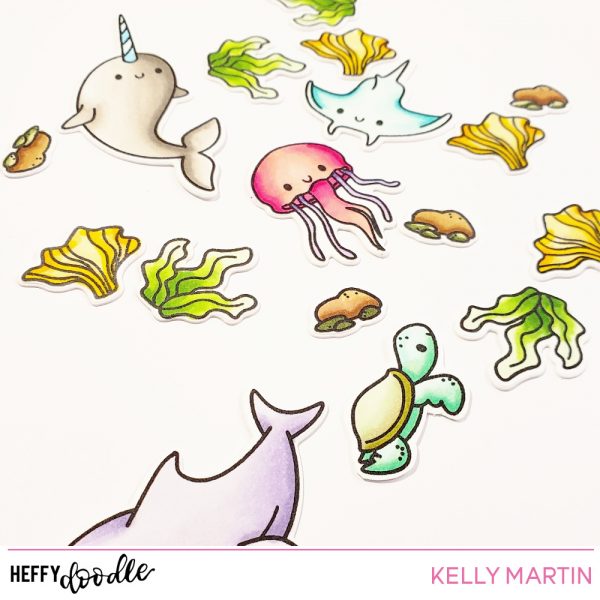
Stamp, color, and die cut your images from the Oceans of Love set and then set them aside.
At this point, it’s a good idea to stamp and glue down your sentiment so you know you’ll have room for it! I matted my sentiment pieces with black cardstock, and then mounted all three pieces with foam tape before adhering them down to the card.
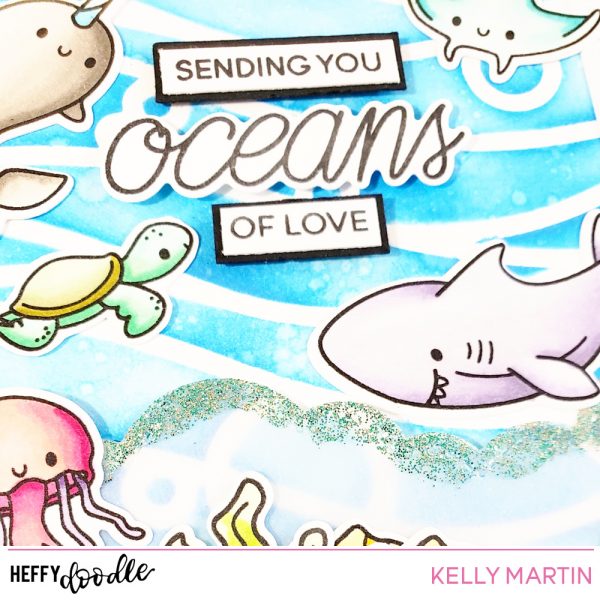
Now it’s time for the fun part! Arrange your images on the card until you’re happy with how they look, and then glue them down, one by one!
And now for the finishing touch! Die cut a stitched rectangle frame and glue it down to the card. You’ve now cleaned up all your edges and added the perfect securing anchor to the entire card!
Thanks so much for stopping by today, and hope you have some time to craft this weekend!
Hugs!
Kelly