
Pandtastic Interactive Pull Tab Card

Hello and welcome back to the Heffy Doodle Blog! We are SO glad you stopped by to see what crafty inspiration we have today! Today’s theme is “Stretch Your Supplies” with design team member – Tatiana!
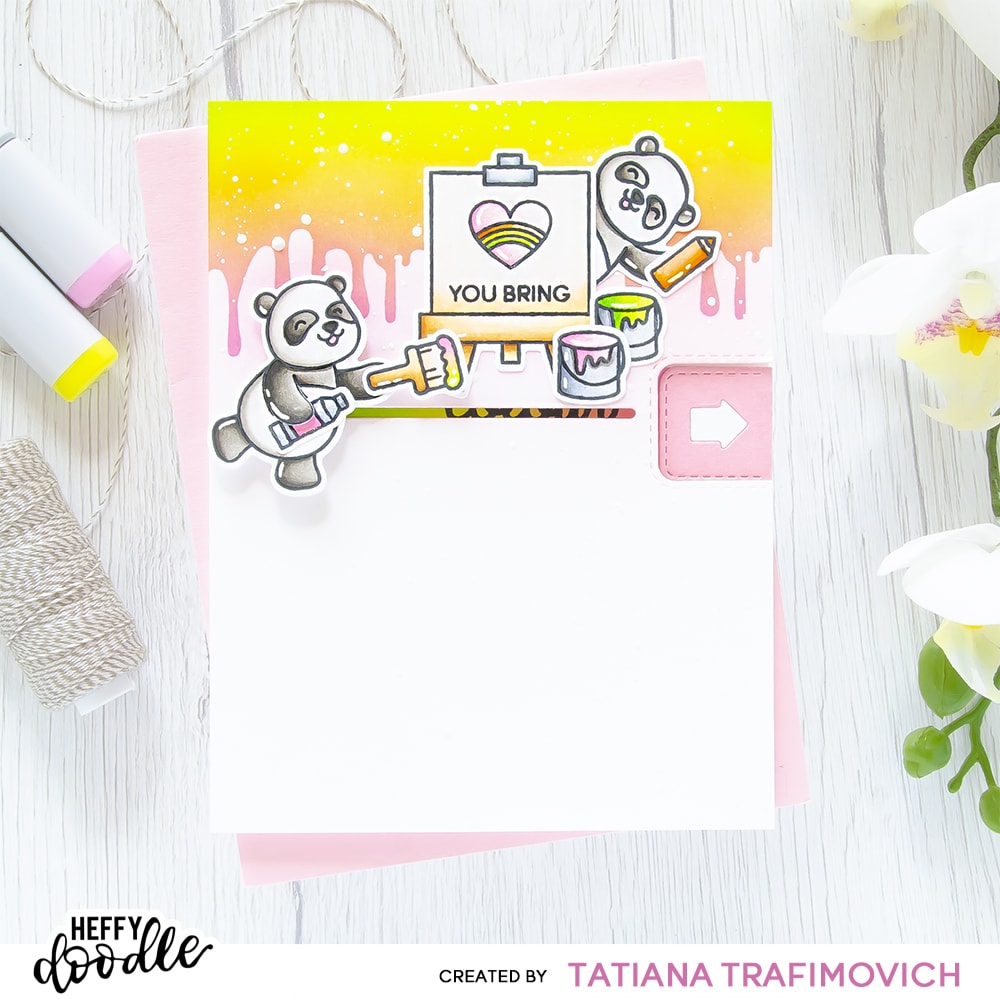
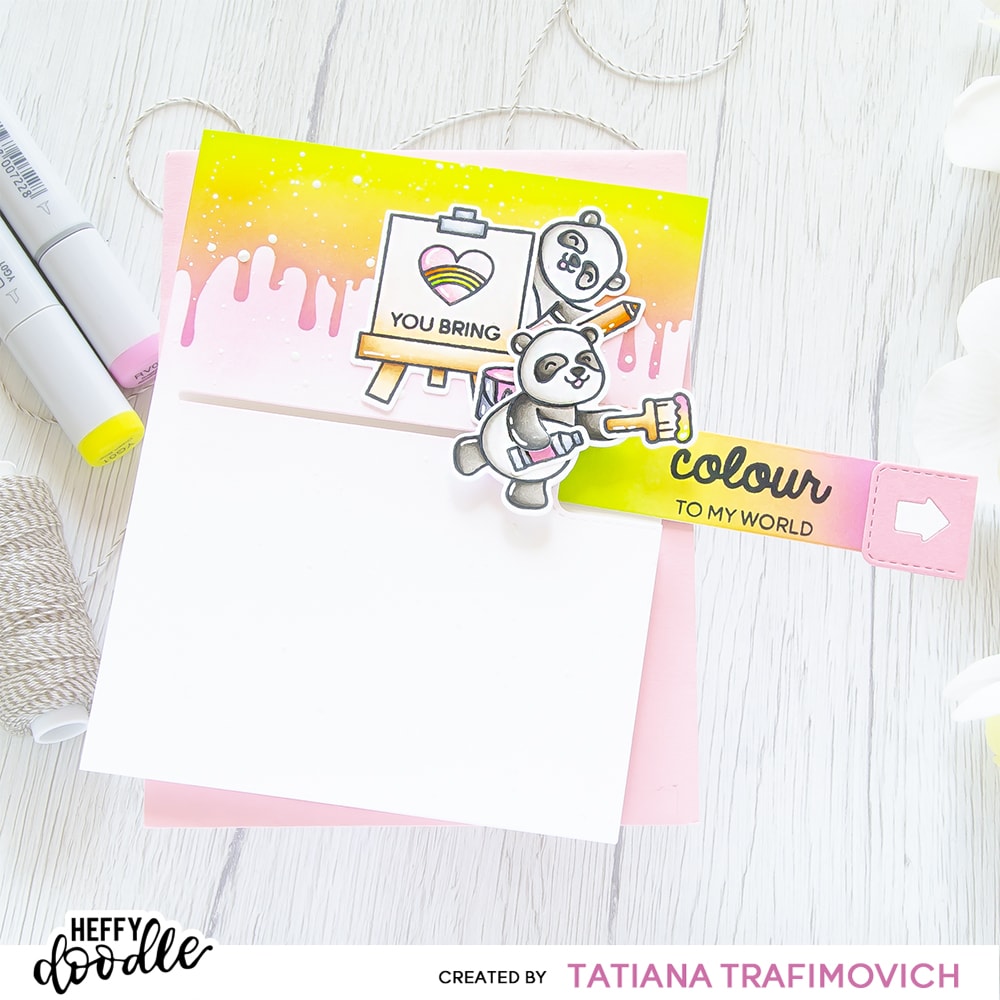
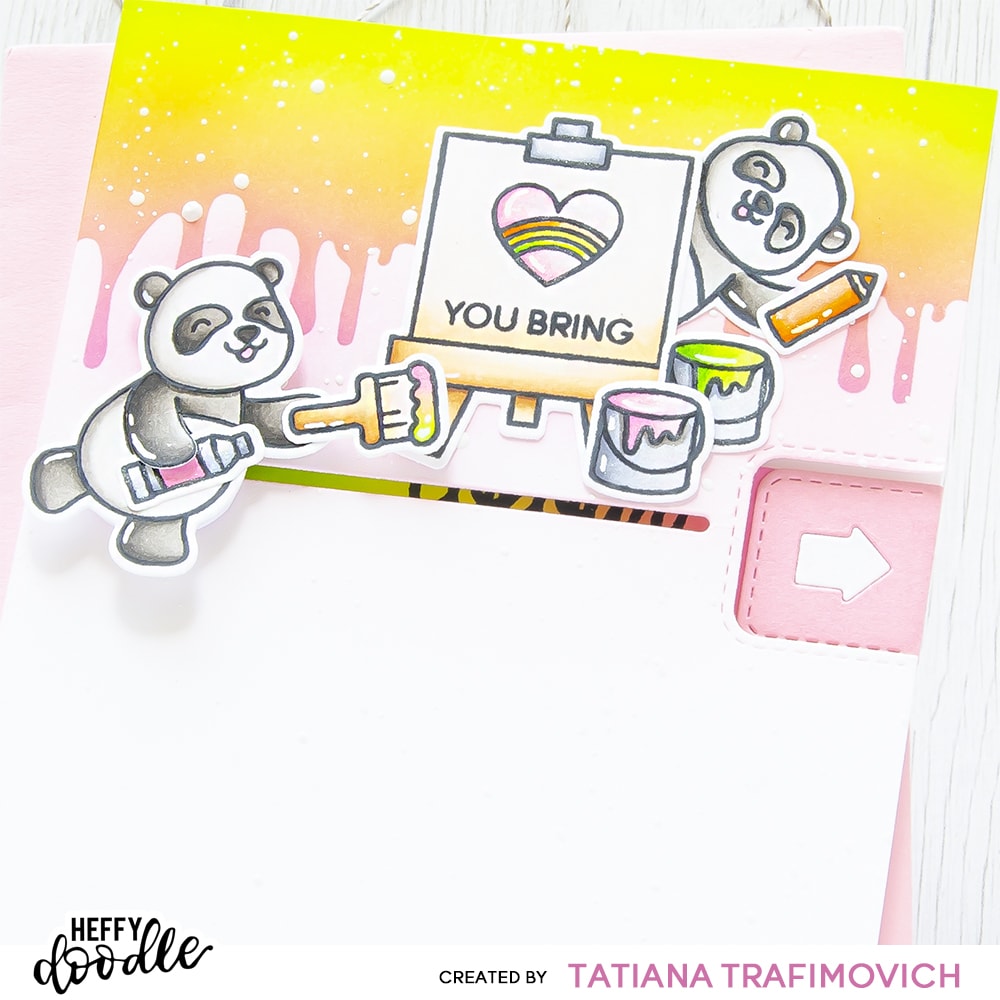
Today I came up with a fun interactive pandtastic card that features the most adorable Pandtastic Painters Stamp Set and amazing Slimline Pull Tab Dies! I love making interactive cards! However sometimes they can be tricky and time consuming since you have to figure out all the dimensions and create all the interactive elements by hand! Well, in this case the interactive die sets are a great addition to every cardmaker’s stash! They will make your life much easier because everything is already measured for you! Today I’m going to focus on how you can get more out of your slimline interactive dies and use on different card sizes. As an example, I created an extended A2 card by simply trimming the pul tab element to the desirable length. Then I gave more value to the interactive element by embellishing the pul tab die and adding the second hidden part of the message inside.
One last thing! If you are not sure how to assemble the interactive mechanism, please, check the product page by clicking HERE! You’ll find the video instructions towards the bottom part of the page!
Key Ingredients:
- STAMPS AND DIES:
- OTHER CRAFT SUPPLIES:
Step By Step Instructions:
- Die cut from Neenah Solar White paper all the elements you need, using the coordinating Pandtastic Painters Dies and Heffy Doodle Mini Die Cutting Machine. Save the negative parts of the dies.
- Stamp the outline illustration from Pandtastic Painters Stamp Set with Memento Tuxedo Black Ink. Use the negative parts of the dies as a guide for a perfect alignment inside the stamping positioning tool.
- Colour the stamps with COPIC MARKERS. I used on this card:
- pandas W00-W0-W1-W2-W3-W5-W7
- orange YR000-YR02-YR04
- yellow Y13-Y15
- pink RV000-RV10-RV02
- green YG00-YG01-YG05
- grey C00-C1-C3-C5
- brown E0000-E50-E51-E53-E55-E57
- Trim and score an extended A2 size card base (5 1/2″ x 4 1/4″) from Neenah Solar White paper.
- Create two parts of the interactive pull tab mechanism:
- CARD FRONT
- Trim a 5 1/2″ x 4 1/4″ rectangle from Neenah Solar White paper.
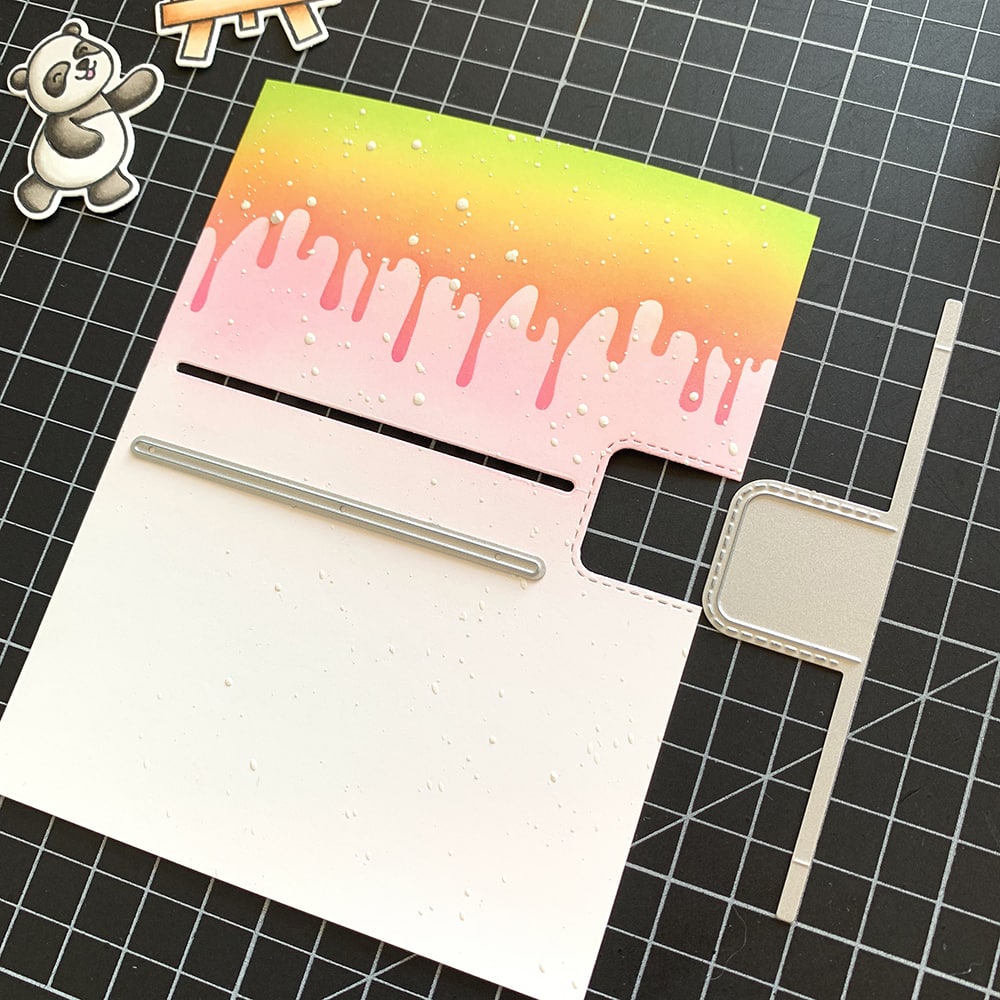
- Secure Messy Desk Stencil with Heffy Doodle Tape towards the top part of the card front and ink with Twisted Citron Distress, Squeezed Lemonade Distress, Spiced Marmalade Distress, Kitsch Flamingo Distress and Picked Raspberry Distress inks. Use the blending brushes to achieve a smooth result.
- Lift up the stencil and continue blending with Kitsch Flamingo Distress ink to extend the colourful background a bit until you fade it into white. Keep you hand very light!
- Use the notch die from Slimline Pull Tab Dies to cut a hole at the right side of your card.
- Use the longest slot die from Slimline Pull Tab Dies to cut a slot.
- Splatter the background with some tiny droplets of a white gouache diluted with a small amount of water.
- INTERACTIVE ELEMENT
- Die cut from a scrap thick cardstock a pull tab and additional circle topper dies, using Slimline Pull Tab Dies.
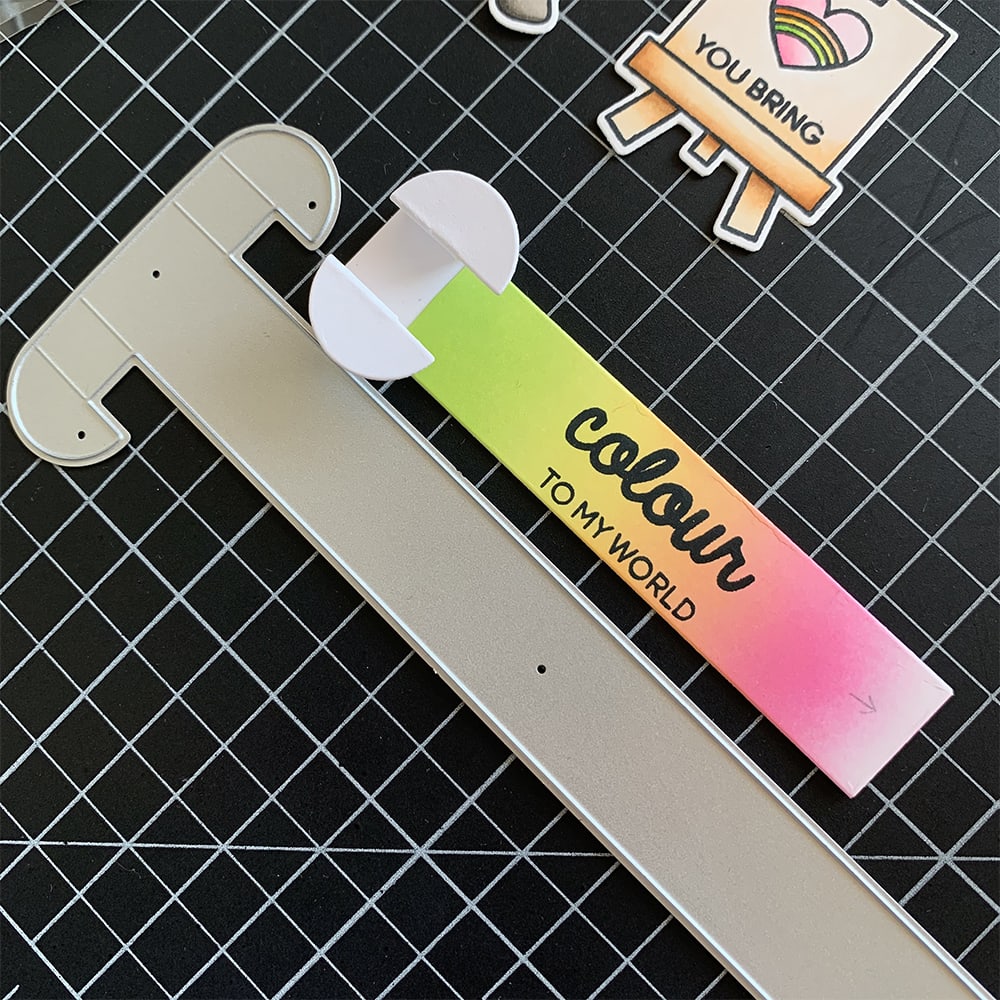
- Partially die cut from Neenah Solar White paper the straight rectangle part of the pull tab die.
- Ink it with Twisted Citron Distress, Squeezed Lemonade Distress, Spiced Marmalade Distress, Kitsch Flamingo Distress inks.
- Stamp the sentiment with Memento Tuxedo Black Ink.
- Glue both pull tab dies together with Glubert – Craft Glue and adjust the length to fit the card front.
- Insert the pul tab die inside the slot on the card front and secure it with the circle topper, add 3mm Deep Foam Tape to the back side of the inked card front and glue it to the card base.
- Die cut from Bubblegum Blush Cardstock the pull tab topper die (with an arrow), using Slimline Pull Tab Dies, and glue it to the interactive pull tab element. Please note that I didn’t use a wrap around belt die on my card since I didn’t have enough space for it!
- Arrange and glue in place all colored stamps, by popping the painter panda on a foam tape and all other element directly to the card front with Glubert – Craft Glue to make the interactive mechanism slide.
- Finish with a generous coat of a clear glitter pen and a couple of highlights added with a white gel pen.

That’s all for today! Hope you like this fun interactive card! Thanks so much for stopping by and have a fabulous day!
Hugs,
Tatiana