Ocean Scene with Distress Embossing Glaze
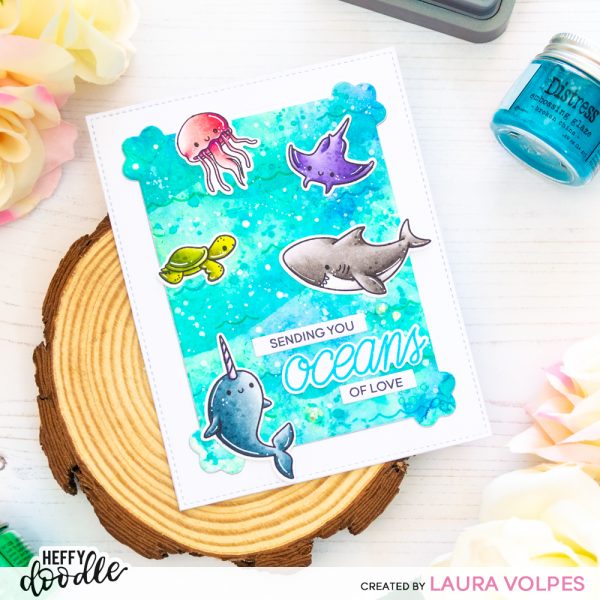
Hi everyone! It’s Laura here, and today I have an ocean scene card to share with you as part of my scene building series!

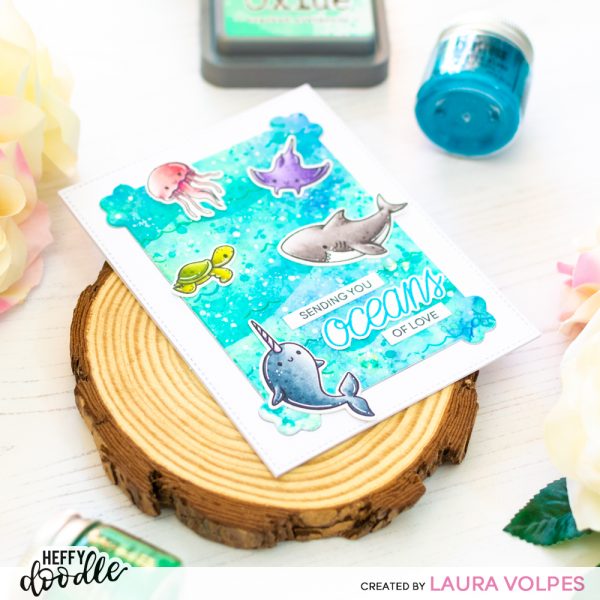
The card features the Oceans of Love stamp set and a fun background created with Distress Oxides and Distress Embossing Glazes. There is also a video at the end of this post – make sure to check it out for a step by step tutorial!
I started by creating the background on a sheet of Bristol Smooth cardstock by Strathmore. I die cut the cardstock with the Stitched Hearts Background die, in order to quickly add some cute details. I then used Distress Oxides and the Ink Smooshing technique to add color and texture to the panel. I used Cracked Pistachio, Peacock Feathers, Blueprint Sketch and Tumbled Glass.
Next, I used the Stormy Seas stencil and Distress Oxide in Peacock Feathers to add a subtle wavy pattern to the background.
To add even more texture, I stamped the waves in the Otter Side stamp set with clear embossing ink and embossed them with Distress Embossing Glase in Broken China and Cracked Pistachio. These embossing powders are tinted but slightly translucent, so will add color but look different on different backgrounds.
I then finished off the background by spritzing it with some water and adding droplets with white acrylic paint.
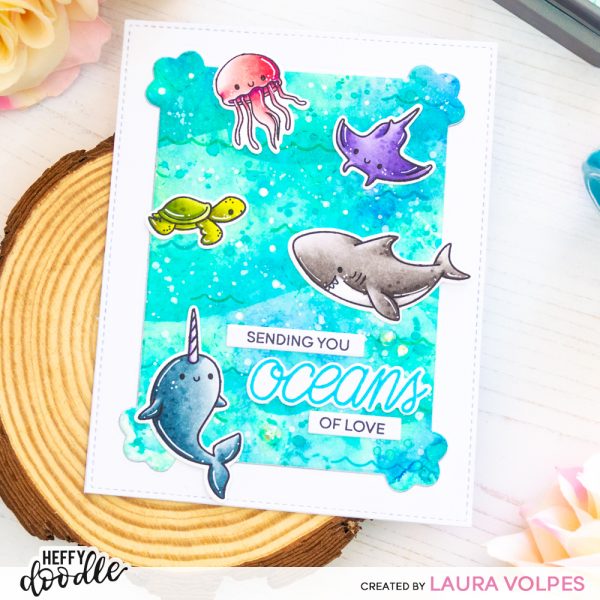
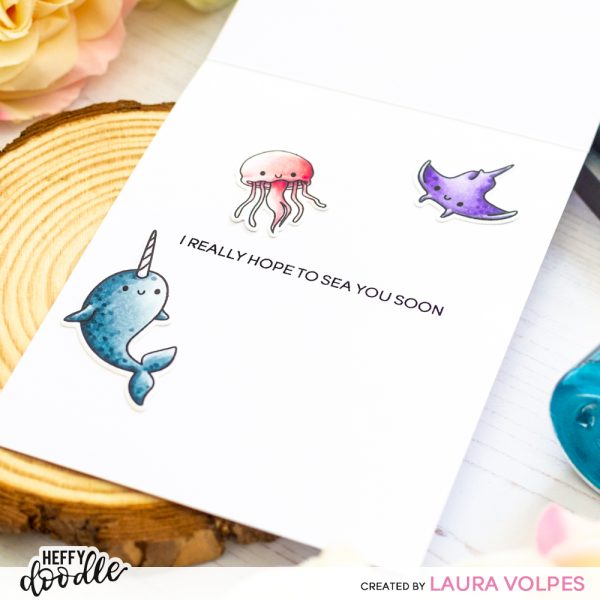
I set the background aside to dry and started working on my images. The stamp set I chose today is the Oceans of Love stamp set by Heffy Doodle – so cute!
I stamped the characters on Neenah Solar White 110lb cardstock with Spectrum Noir Alcohol Proof black ink and I colored them with Illustrator alcohol markers. Here is a list of the markers I used
- Narwhal: BGR5, BGR3, BGR2, BGR1, HB1
- Shark: BG7, BG5, BG3, BG1
- Jelly Fish: BP7, PP5, PP3, PP1
- Manta Ray: LV3, LV2, LV1, HB1
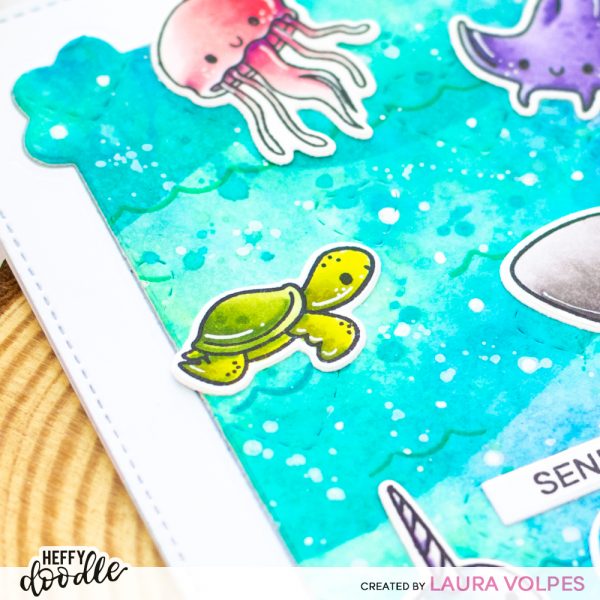
- Turtle: DG4, DG3, DG2, DG1, CG4, CG3, CG2, CG1
Once the coloring was over, I die cut everything with the coordinating dies.
At this point the background was dry, so I could go ahead and die cut it with the Clover Frame dies. With the same dies I also cut some white cardstock, and layered everything so that the focal panel is slightly raised with respect to the base.
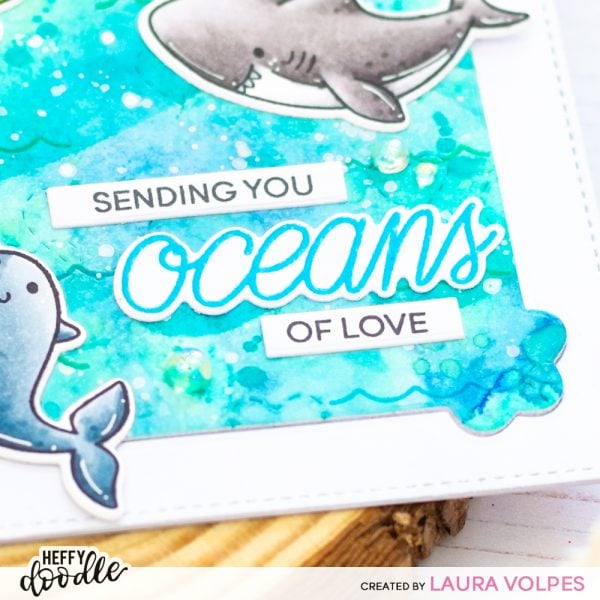
For the sentiment I used more stamps from the Oceans of Love stamp set. I stamped the words sending you and of love with black ink and created two thin banners with the Strips of Ease dies. For the word oceans I did some heat embossing over white cardstock with Distress Embossing Glaze in Broken China. I then used the Oceans of Love dies to die cut it out.
I also added some iridescent bubbles around the greeting for an extra fun touch.
Next, I used a white gelly roll pen to add highlights to the images and to emphasize some of the droplets in the background. Since I had a few extra images already colored and die cut, I decorated the inside of the card, too!
Don’t forget that, if you are interested in seeing a step by step tutorial for this card, you can watch the video down below!
Thank you all for stopping by and have a great day!