
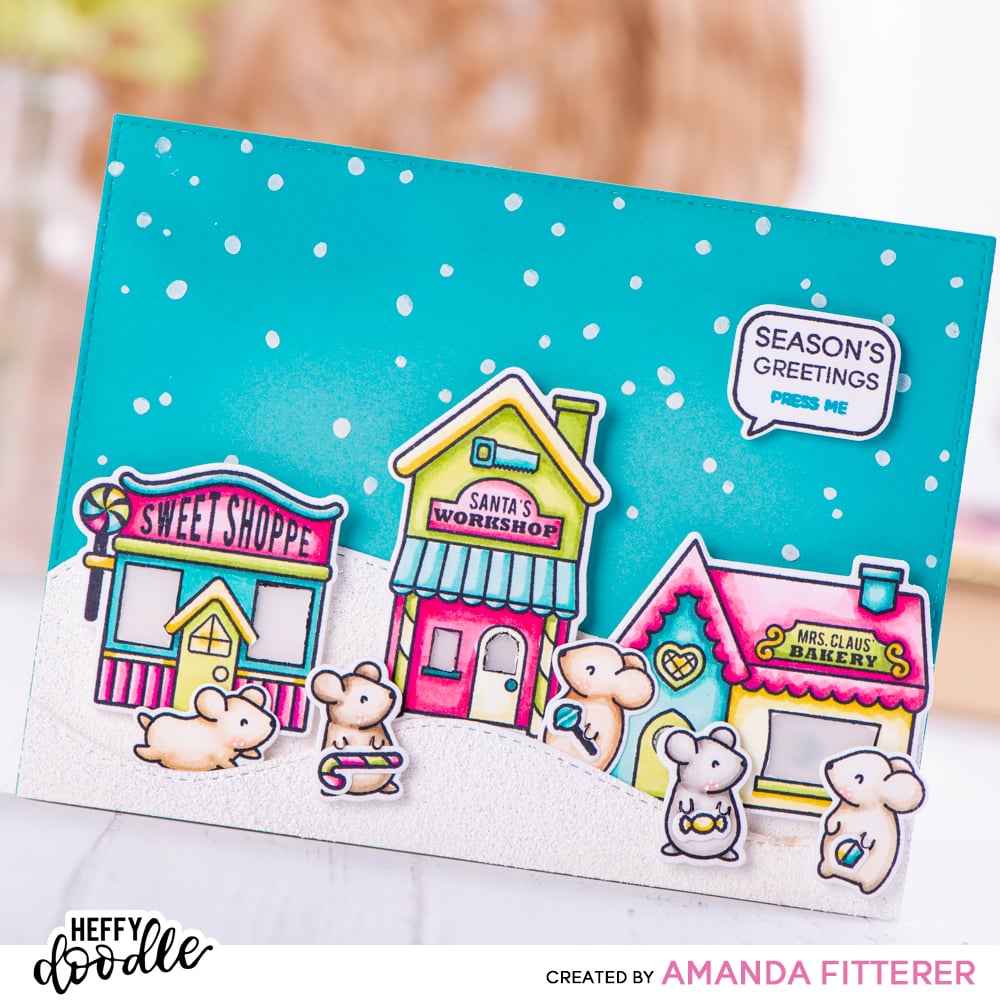
Light-up Santa’s Village

MERRY CHRISTMAS!!! I hope you’re having an amazing holiday filled with love, laughter, and family!
I have a fun light-up card to share with you today! To see the video, head to my Instagram!
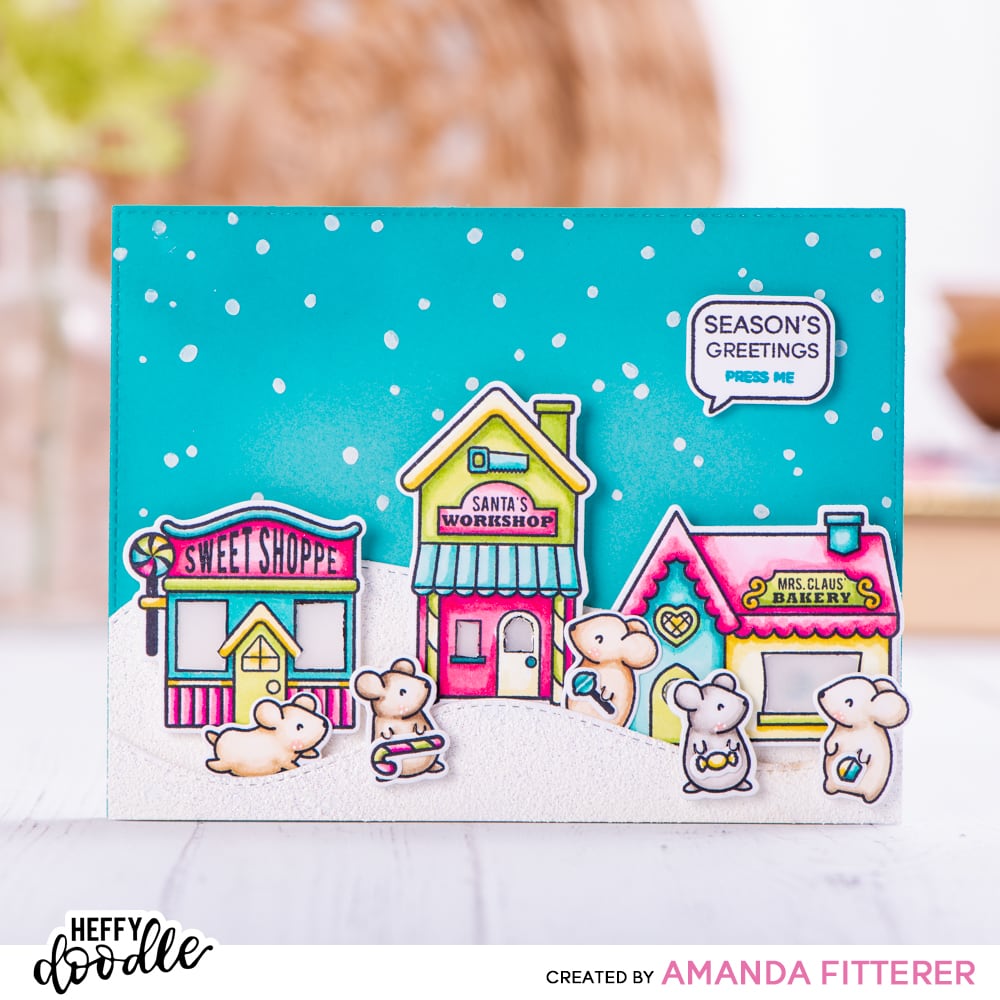

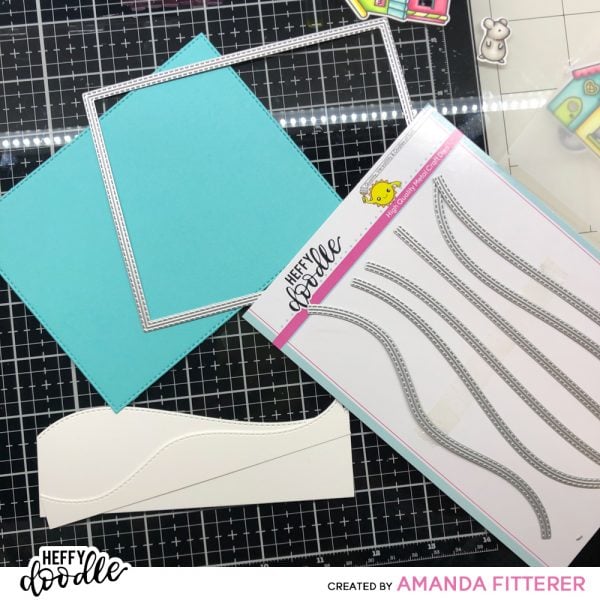
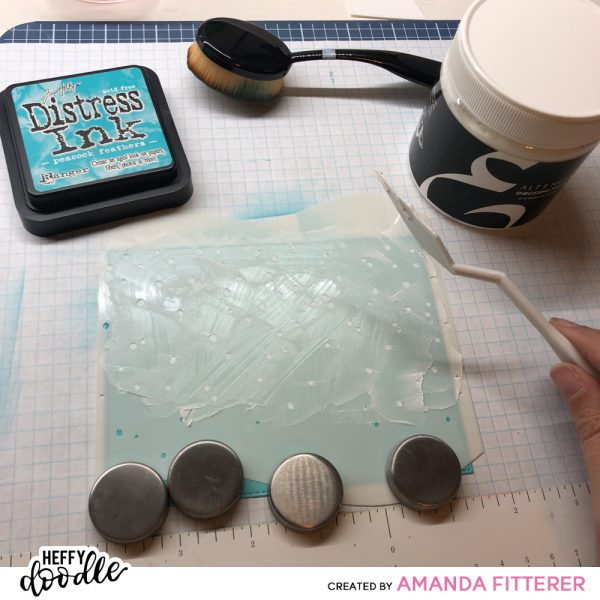
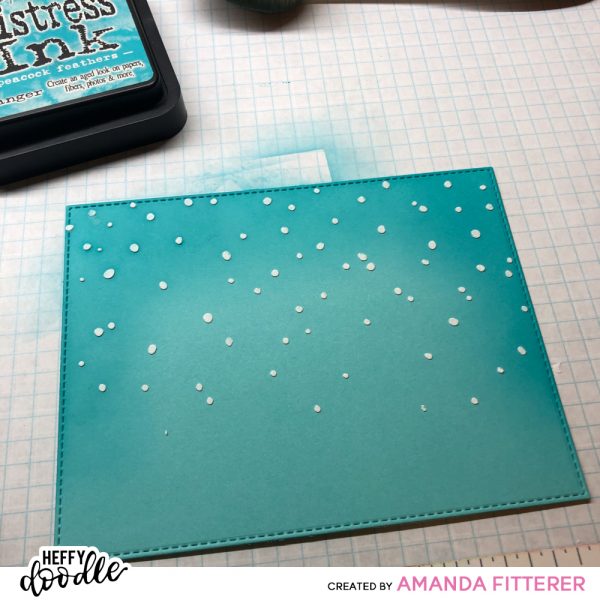
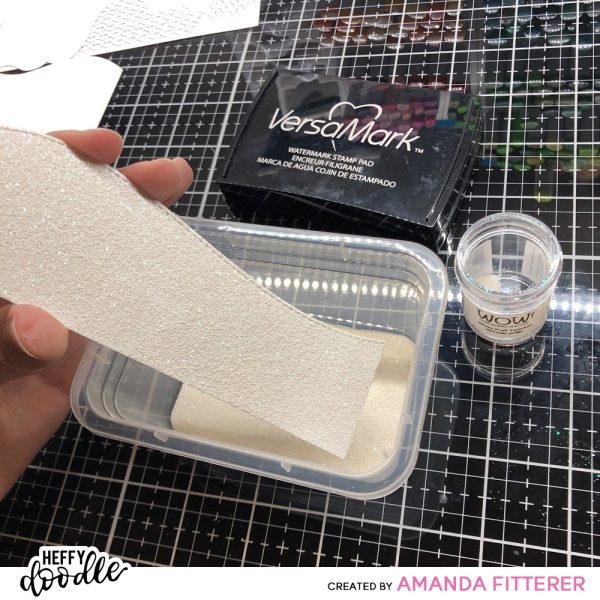
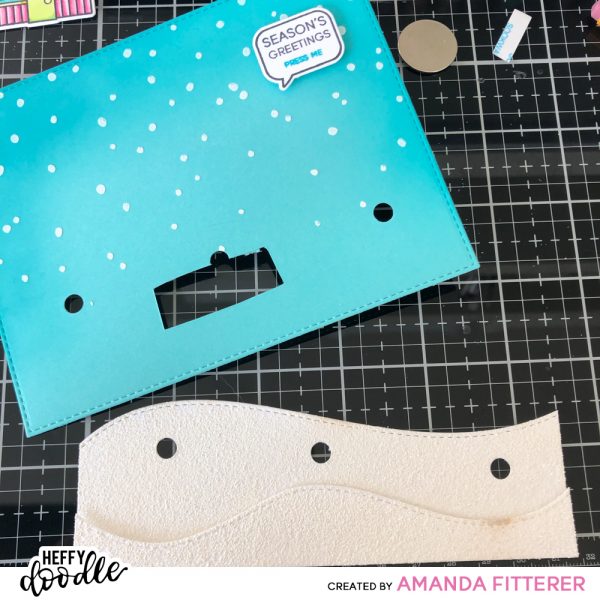
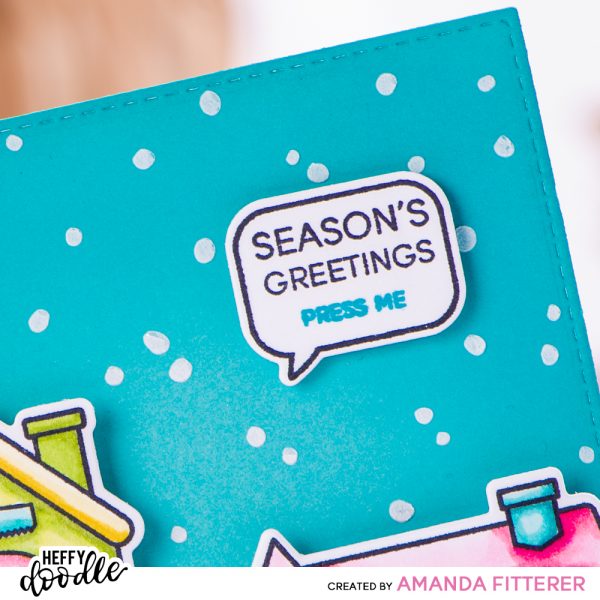
To make this fun interactive card, I started with my snowy background. I used the Stitched Rectangle Dies to cut my card base out of Simply Teal-icious Colored Cardstock. I darkened the edges of the cardstock with Peacock Feathers Distress Ink and then used the First Snow Stencil and embossing paste to create snowflakes. Using the Stitched Slopey Joes Border Dies, I created 2 snow hills. To make them sparkle, I covered the entire hill with Versamark Watermark Ink and then used the Wow! White Puff Twinkle Embossing Powder.
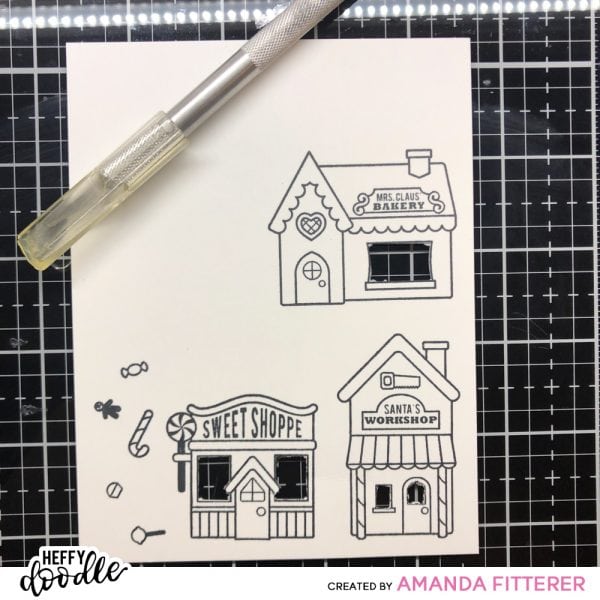
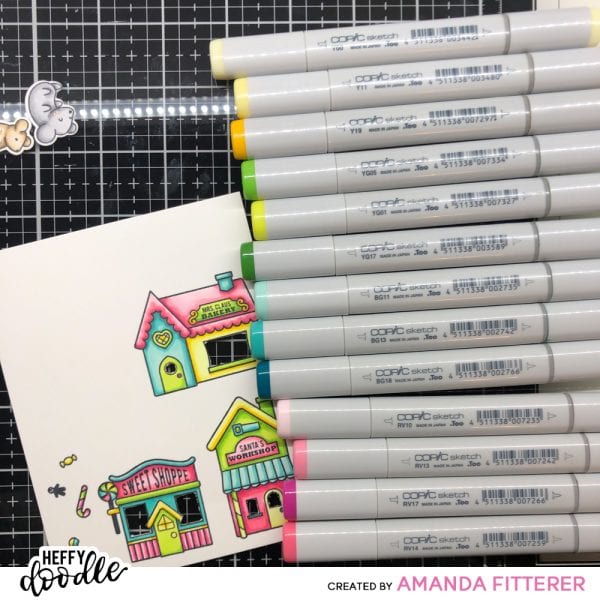
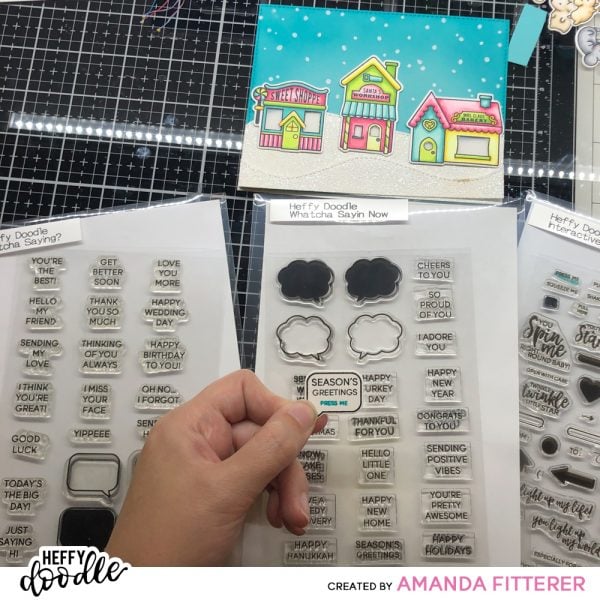
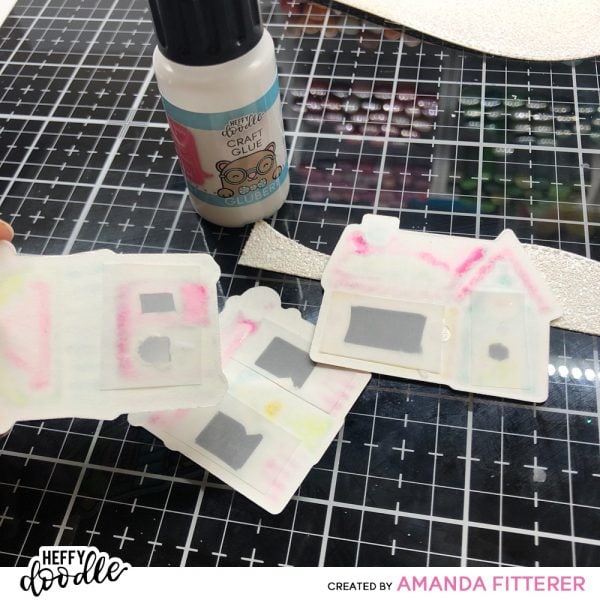
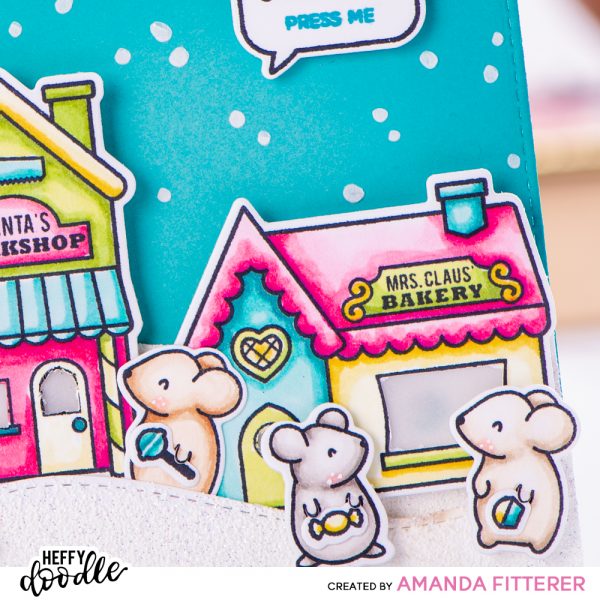
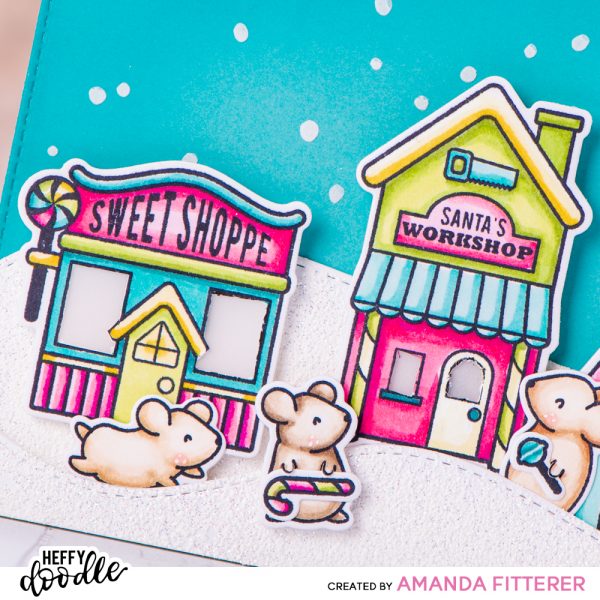
Next, I stamped my images from the Santa’s Village Stamp Set and the Hello Squeakheart Stamp Set. I cut the windows out of the village shops using an Exacto Knife and then I colored my images with Copic markers. For my sentiment “push” button, I used a combination of Whatcha Sayin’, Whatcha Saying Now, and Interactively Yours stamp sets.
Originally, I was planning on using EZ-Lights so it would be much less work to make these little houses light up. However, they didn’t get to my house in time due to USPS delays, so I had to use Chibitronics instead. You’ll notice I cut a small rectangle out that I would’ve used with my EZ-lights and then taped back in! I used a hole punch to create holes for my lights to shine through. I glued double layers of vellum down using Glubert.
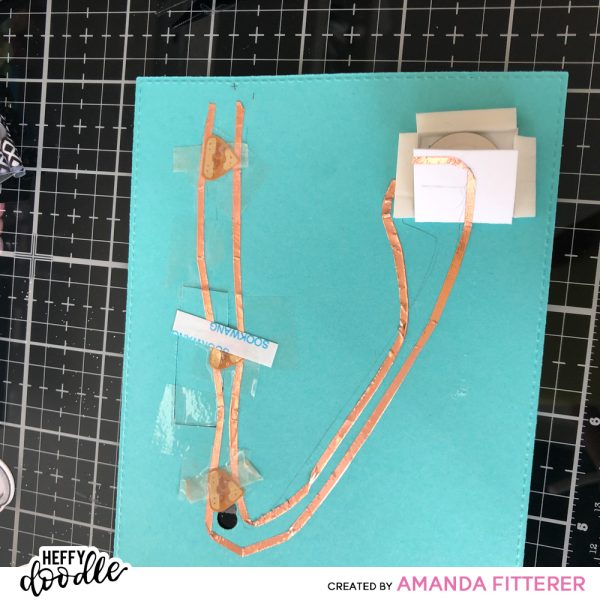
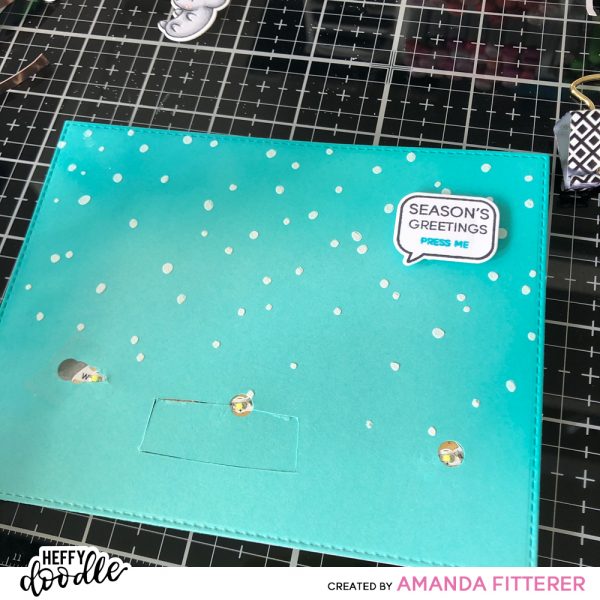
Once I had my lights in place, I used 3D foam squares, strips, and Glubert glue to adhere everything to the front of my card!
Thank you for stopping by the Heffy Doodle blog today!
Wishing you all a very Merry Christmas! Xoxo, Amanda
Kristen Snoozy
December 28, 2020 at 12:43 amThat’s awesome, what a fun and clever card!