
Interactive Card – Squeaking Adorable!
Hi Heffydoodlers!
Ready for some fun interactive cardmaking? Well, the Hello Squeakheart stamp set and dies in Release 3 is sooo squeaking adorable!! – I just had to make an interactive card with it! This card may look complex – but don’t be deterred – most of the time was taken up with planning how everything was going to be positioned and how the interactive elements would work, so if you follow my tutorial – it’s all done for you!! Making it easy-peasy!
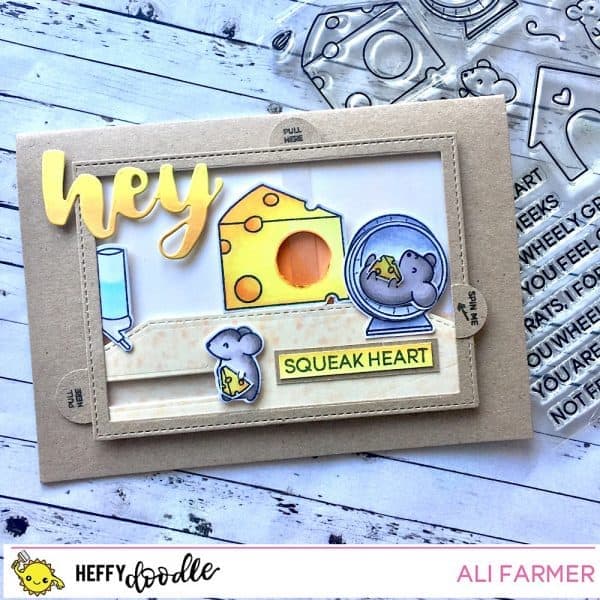
Here it is in action!!
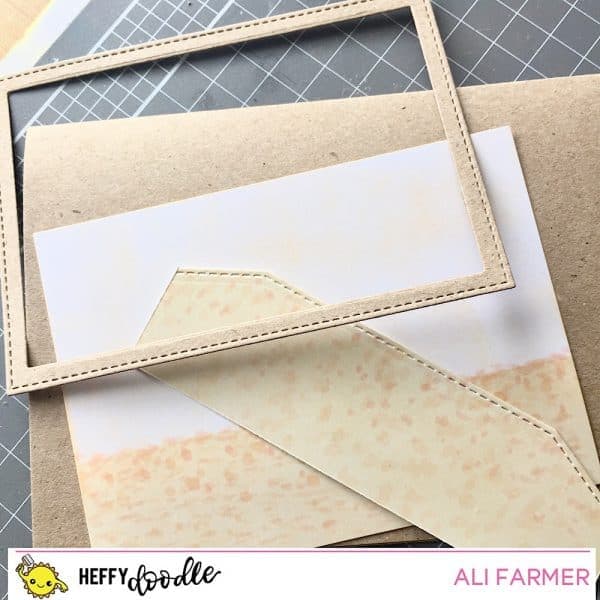
Step 1.
Create your background pieces and frame. I cut a frame using the mft Stitched rectangles Stax from brown card. I then cut a piece of white card to fit behind this. I cut an extra piece for the ‘floor’ and used an MFT edge die to shape the top of it. I sponged the background piece with light distress inks and ‘floor’ piece with the same. I added little spots of colour with light copics. These are the elements you will need for the scene background.
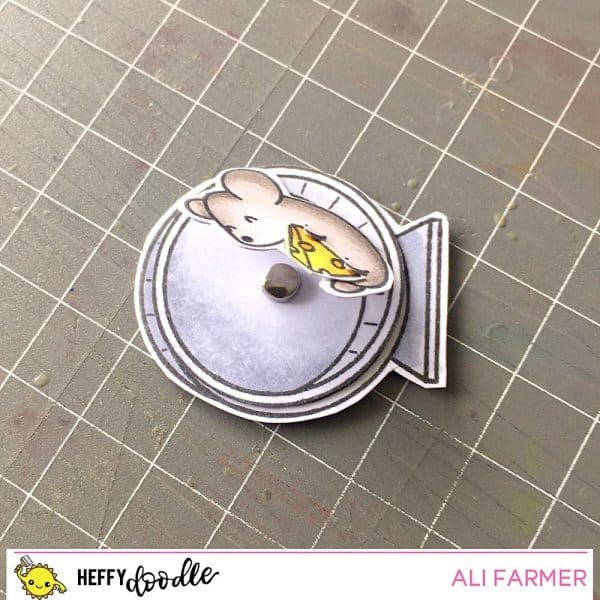
Step 2:
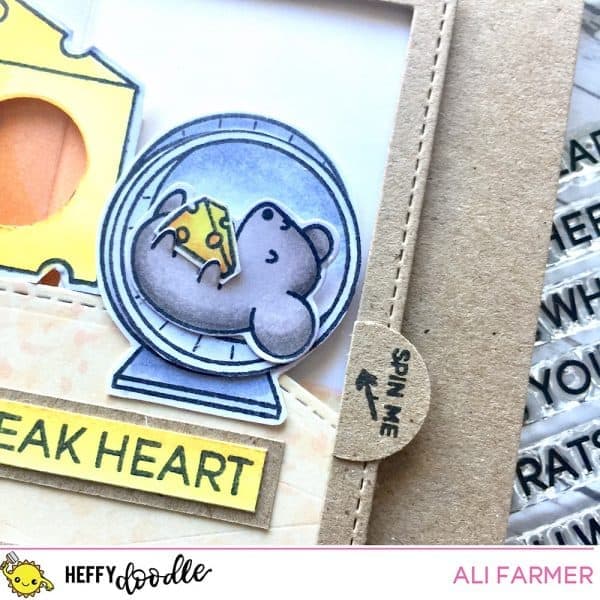
Stamp out the little critters (mine are mice), the cheese (big and small), the wheel (x2) and the water bottle from the Hello Squeakheart set, colour and die cut the pieces (except for the tiny cheese and wheels, which I fussy cut as I wanted to keep the centre section. With the second wheel image – just cut out the ‘circle’ part. Construct the wheel – line up the parts and punch a small hole in the centre of both, attach a brad so that it ‘spins’. Put adhesive on the back of the mouse and adhere him so that he covers the brad at the front. Put a little cheese piece in his paws.
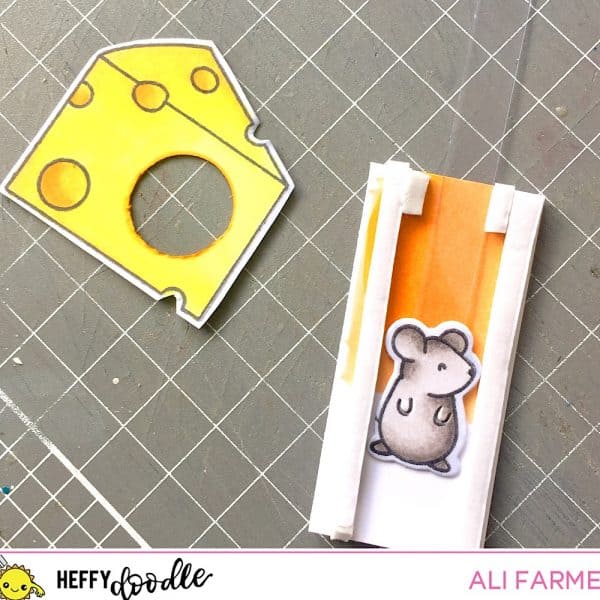
Step 3.
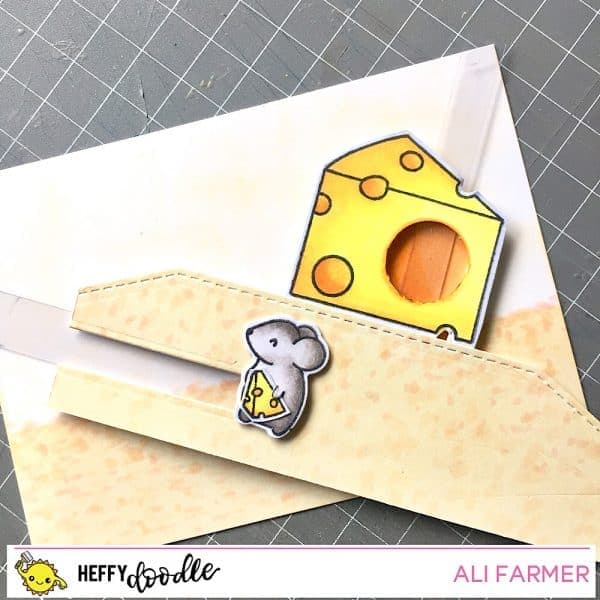
Cut the hole in the big cheese slightly bigger so that the little mouse can pop-up in it. Colour a strip of white card to go behind the hole and place two strips of 3D foam to make a channel for the mouse to move up and down in. Don’t forget to put little pieces at the top and bottom to stop him from moving too far! Attach a thin strip of acetate to the back of the mouse, place him in the channel and adhere the cheese on top so that he is snugly in his channel. You should be able to move him up and down with the acetate strip so that he peaks up in the hole in the cheese.
Step 4.
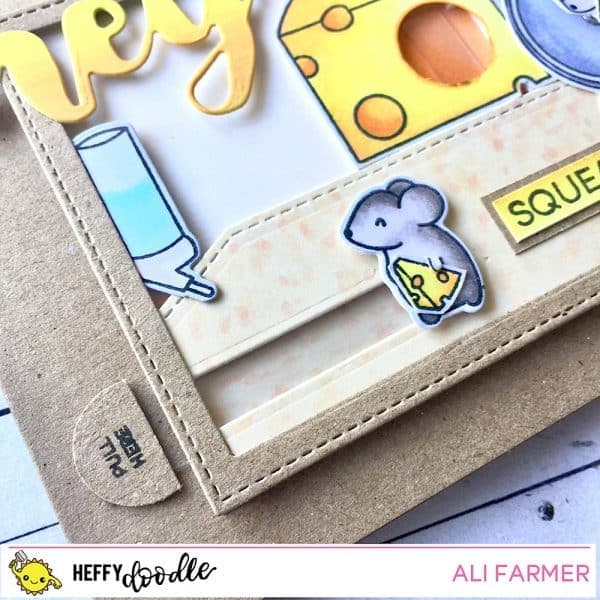
Use a slider die (I used My Favorite things surf & Turf slider die set) to cut a slider panel in the left hand side of your ‘floor’ background piece. I used 3D foam to create a channel above and below the slider slot. Attach the slider “dot” to another strip of acetate, place into the channel and adhere the mouse on the front with a 3D foam square.
Step 5.
Assemble all the elements to the background piece. Position the mouse & cheese and adhere to the back of the floor piece (making sure the little ‘sliding mouse’ will have enough room to move on the left-hand side).
Adhere the floor piece to the background piece with 3D foam. Adhere the mouse in the wheel on the right hand side of the cheese (make sure he is going to sit inside the frame). use 3D foam on the frame around the top and sides (leave spaces for the acetate tabs to move) and attach to the background piece.
Step 6.
Colour some white card with yellow and orange copics and die-cut the ‘hey’ die. Stamp ‘squeakheart’ on a strip from the same piece in Momento Tuxedo Black ink and back with brown card strip. Adhere to the card as shown. Stamp our Pull here (x2) and Spin here with arrow from the Interactively Yours stamp set onto little tabs and adhere them to the 2 acetate tabs and frame of the card (as shown).
Play away!!!
Hope you loved it as much as I do and I will see you again next time!
Ali xx
Pooja
February 17, 2018 at 1:21 pmAwesome card with so much of interactivity on a single card ! Not just kids but grown ups will also love to have this card ! Thanks for sharing:)
Ali
February 19, 2018 at 11:36 amThanks so much Pooja xx yes, this was fun to make and fun to play with afterwards too hehe!!