
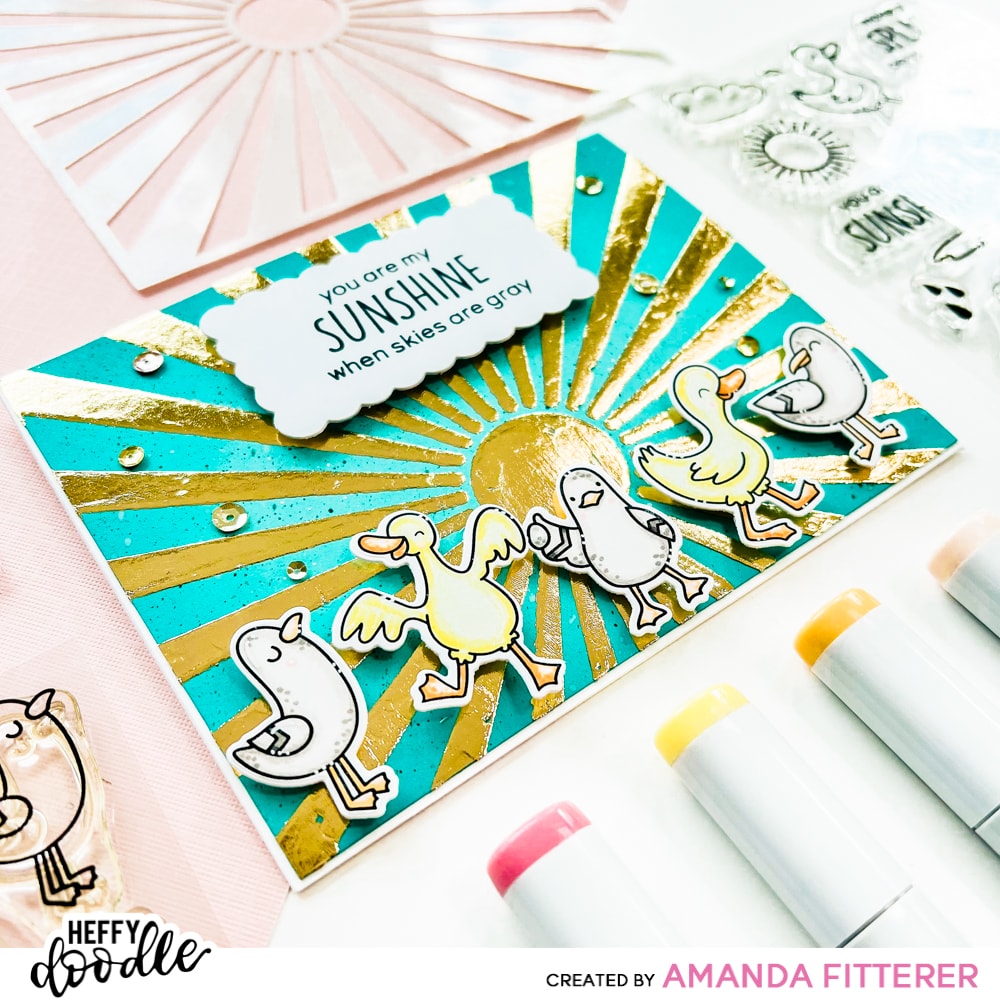
How to Foil Using Transfer Gel DUO and the Simple Sunburst Stencil

Hello my friends! It’s Amanda @craftyandcreativevibes sharing a foiling technique with you today! Keep scrolling to see step-by-step process photos on how to create this fun-filled card!
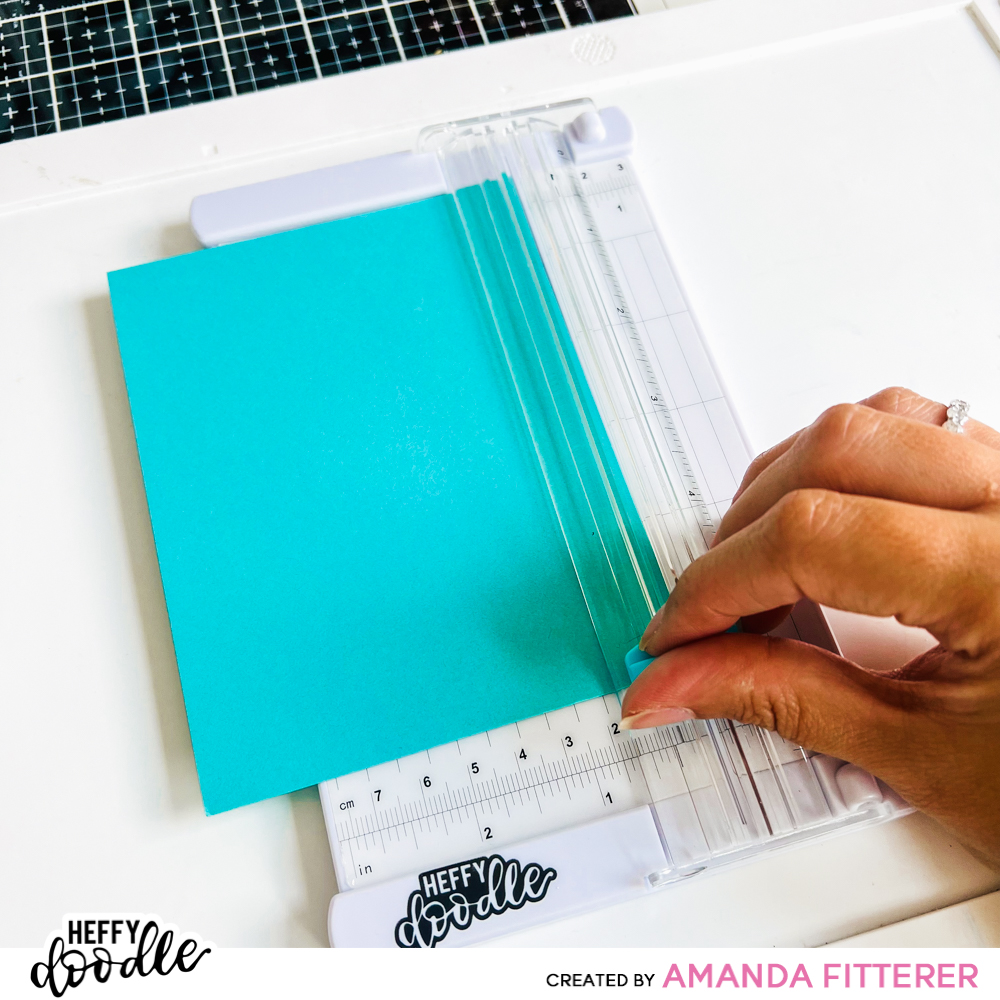
The first step to creating a beautiful card is to start with the cutest little trimmer in the world! Did you see the NEW Mini Paper Trimmer?! Eek! So, I’m trimming my Simply Teal-icious Cardstock down to 4 1/8″ x 5 3/8″. This is slightly smaller than A2. This will leave a very thin border from my white card base.
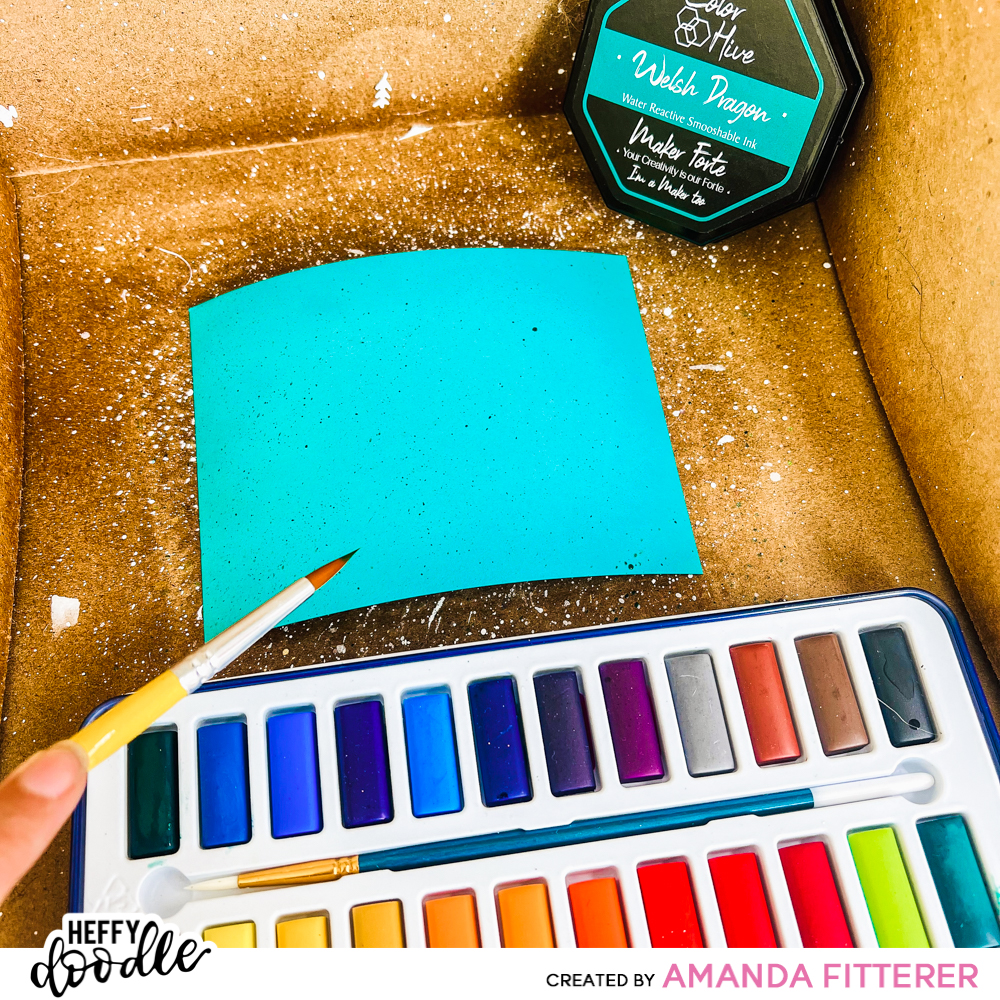
To create a little more texture on my cardstock, I’ve blended some Maker Forte Welsh Dragon ink around the edges of my card front. I’m flicking on some dark teal watercolor paint, some white watercolor pain, and a little bit of water as well.
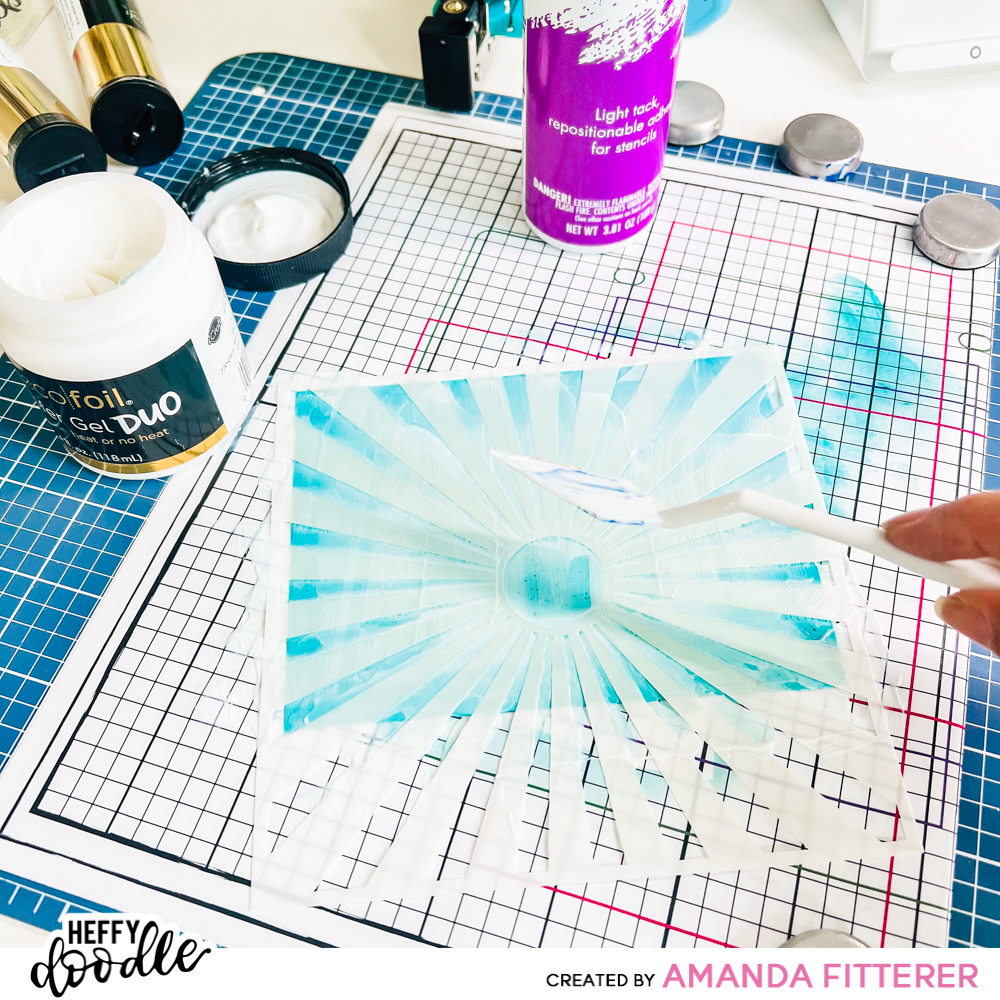
Now to create my gorgeous foiled background! I’ve spritzed my Simple Sunburst Stencil with Pixie Spray, let it dry for about a minute, and then pressed it onto my card front. Now I’m applying DecoFoil Transfer Gel DUO with a spatula through the stencil.
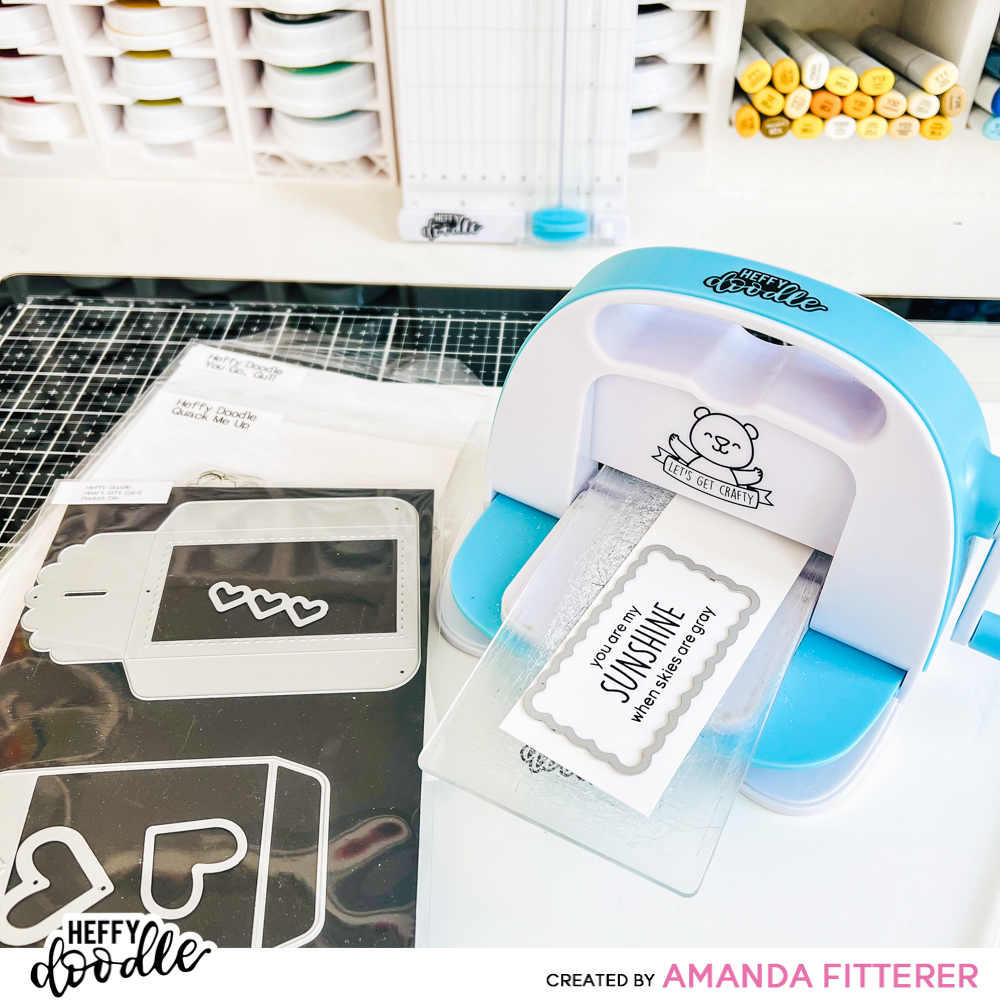
While I wait for that to dry, I’m going to move on with the rest of my card! I’m stamping a sentiment from the Quack Me Up stamp set and cutting it out using my Mini Die Cutting Machine and a die from the Heart Gift Card Pocket Die.
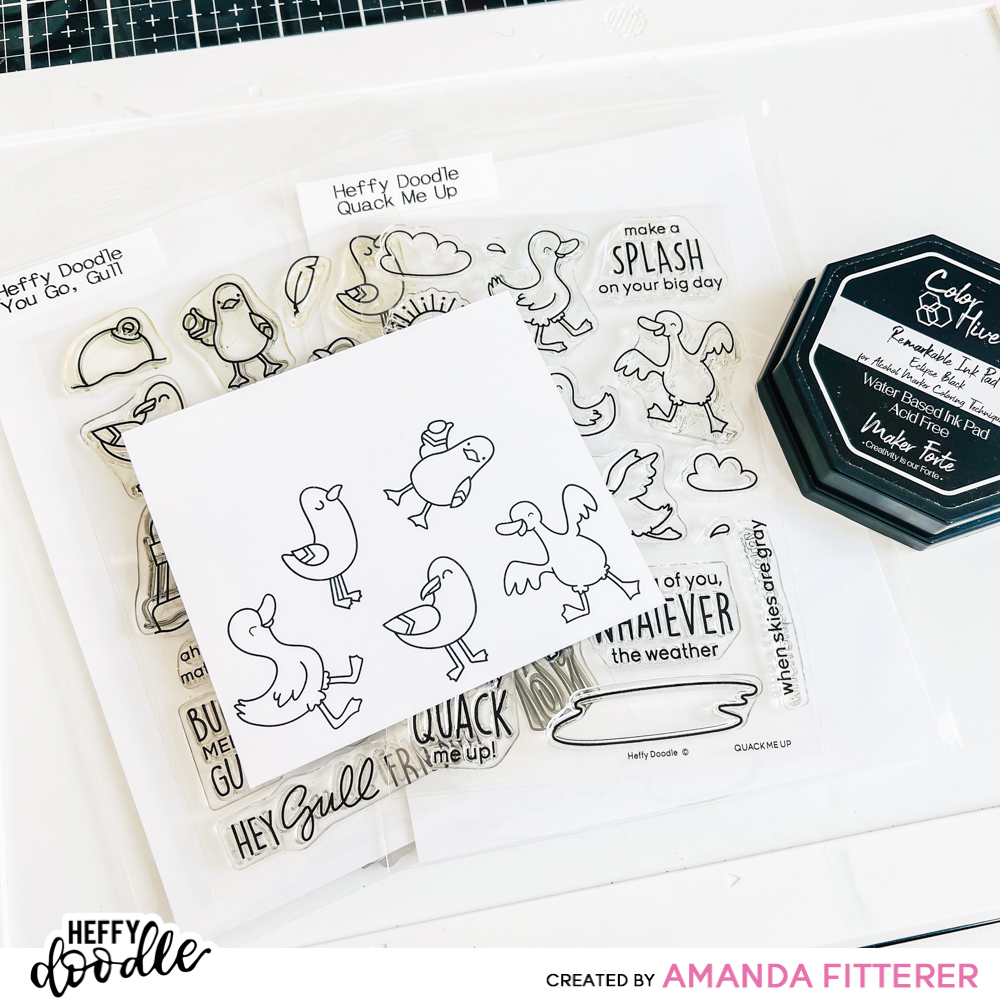
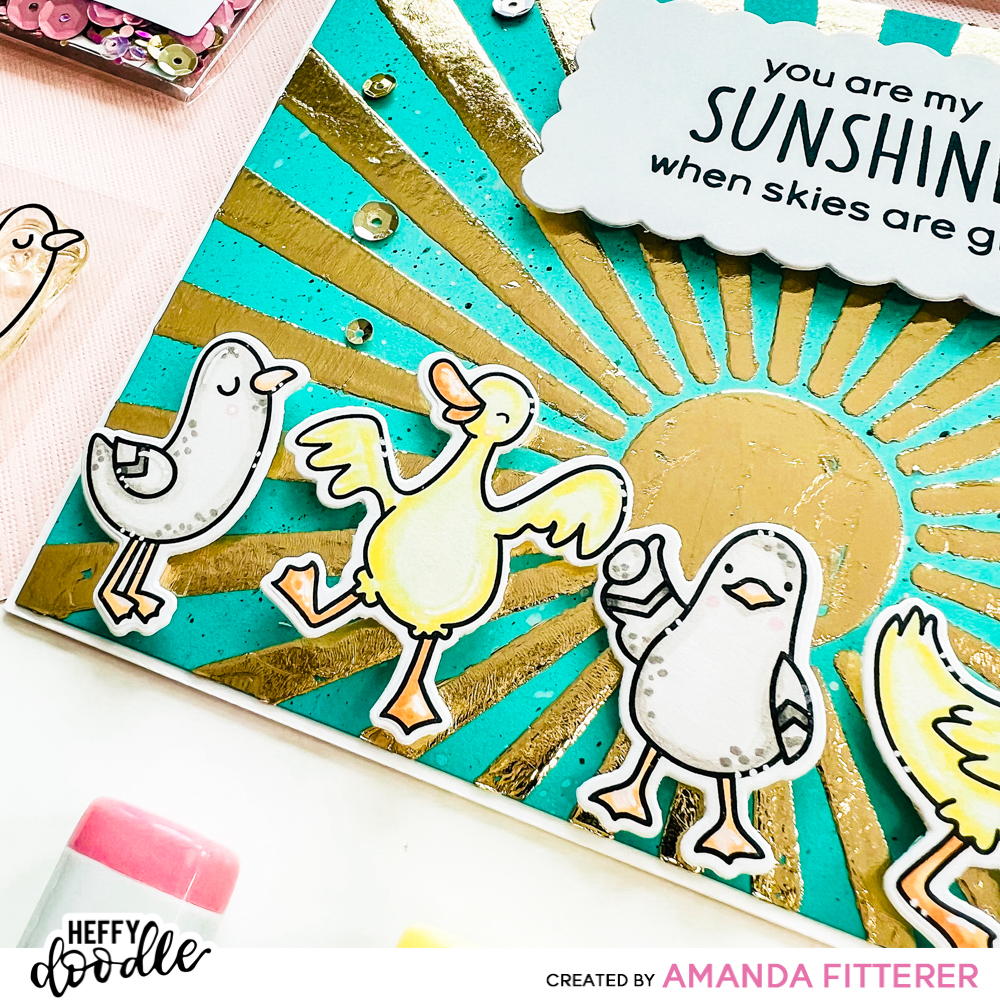
I’m ready to stamp my cute little birds! I’m using the You Go, Gull and Quack Me Up stamp sets and stamping with Maker Forte ReMarkable Eclipse Black Ink.
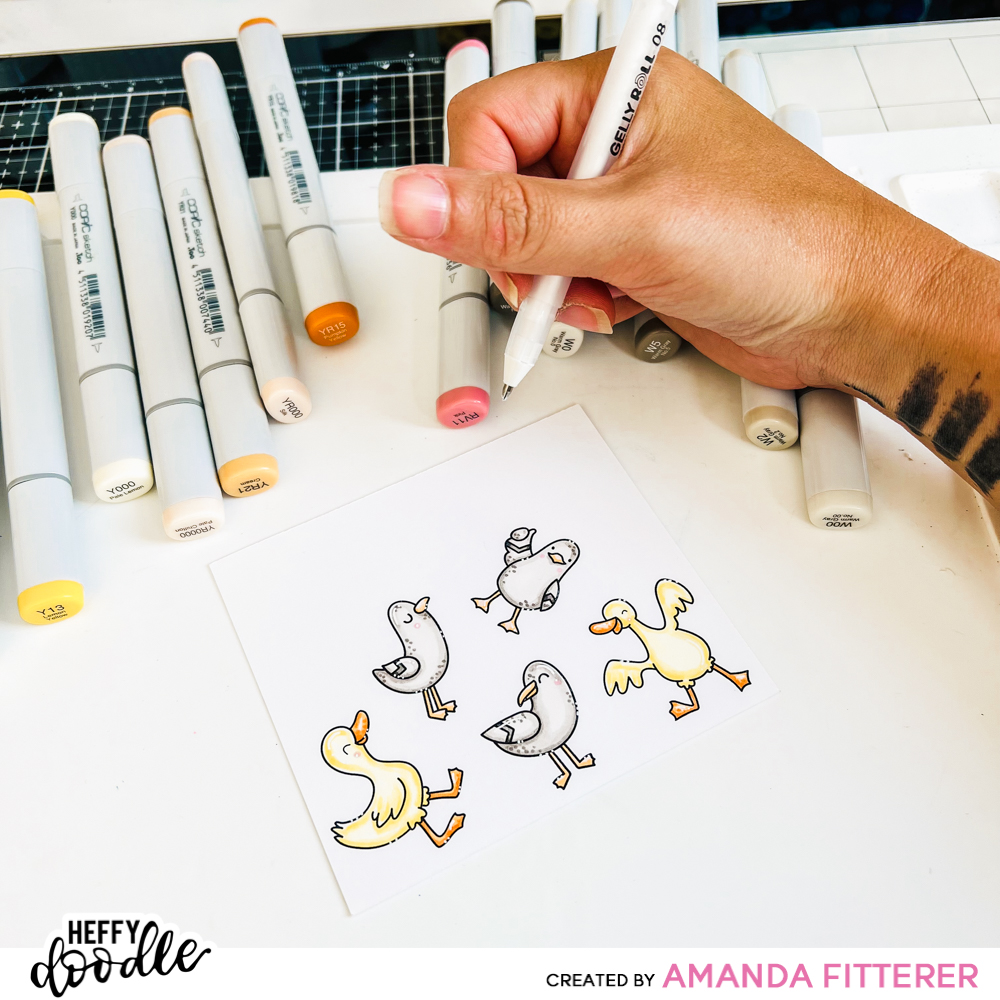
I’m coloring my cuties with Copic markers and adding highlights and dots with the Gelly Roll pen. Once finished, I’ll cut them out with my coordinating dies.
Now that my DUO gel is dry and clear (after approximately 1 hour), I’m ready to foil! I’m going to use pressure to foil, instead of heat from a laminator. The DUO gel can work either way! So, I’ve created a sandwich (using the normal die cutting sandwich for the Gemini Jr.), but I’ve added a piece of parchment below and above my card front and foil. So… it’s parchment paper at the bottom, then my card front (DUO gel side up), then my foil (shiny side up), then another piece of parchment paper.

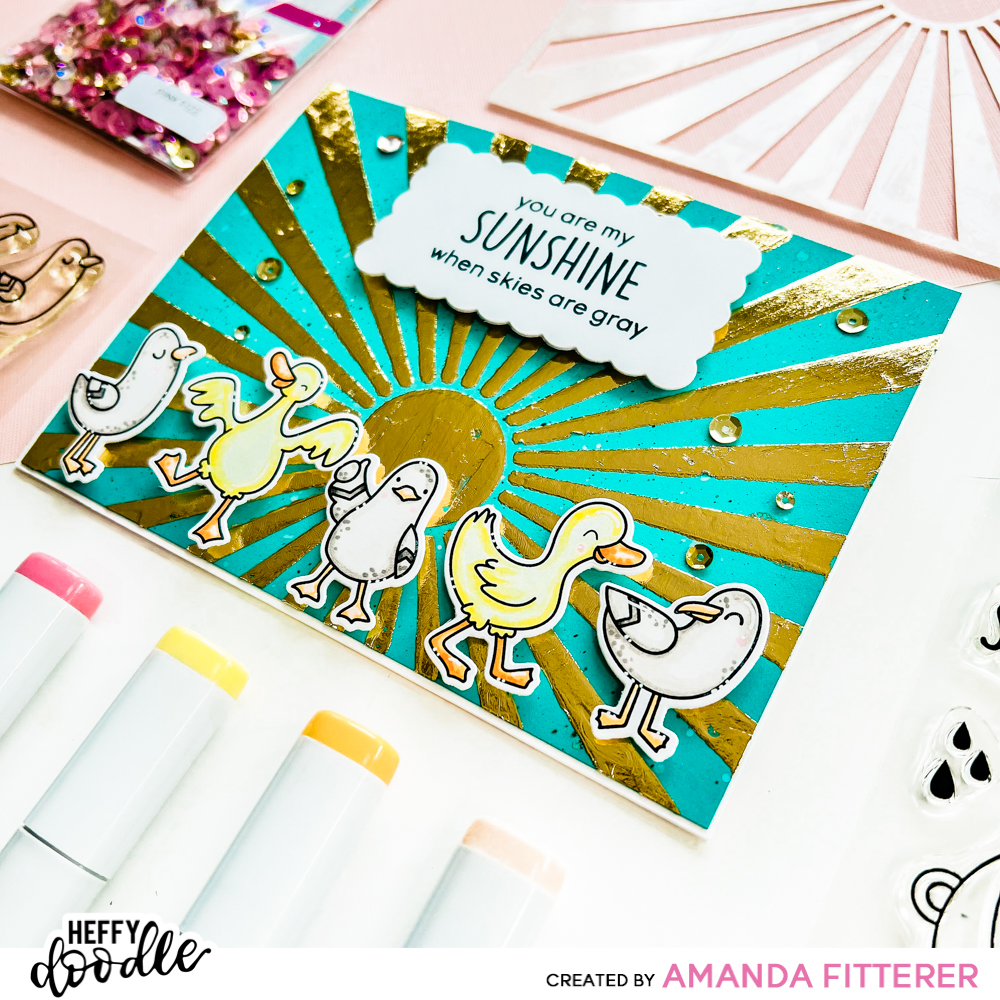
Now, for the reveal! Ooh… Ahh..
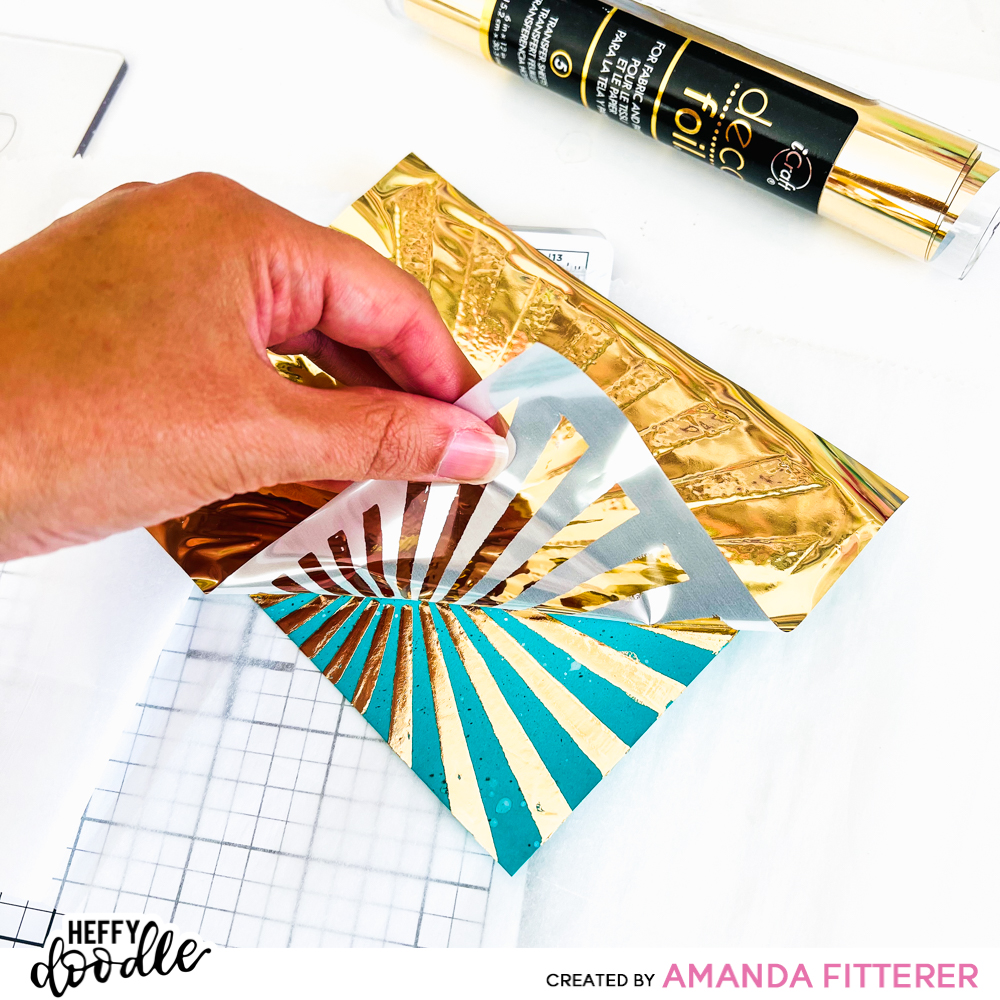
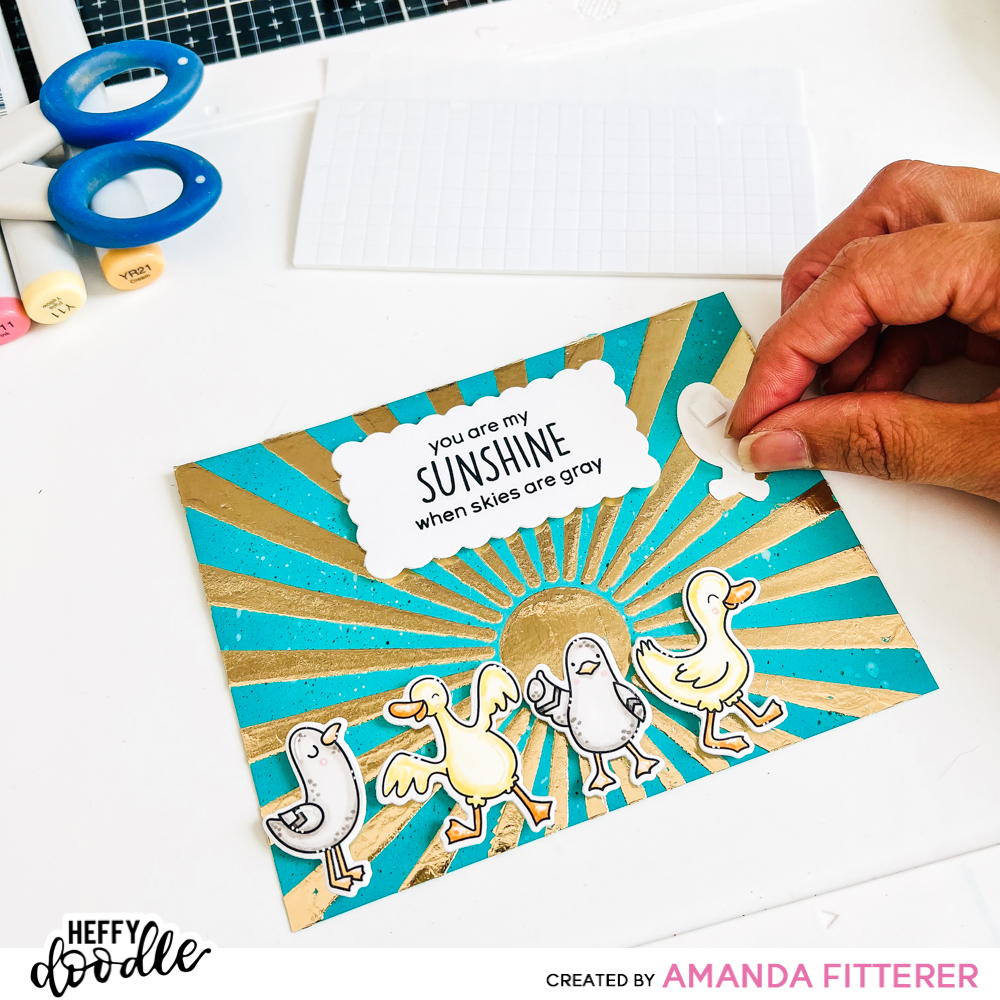
Once I’ve peeled back the foiling completely, I’m ready to finish off my card! I’m using 3D foam squares to attach my sentiment and stamped images to my card front.
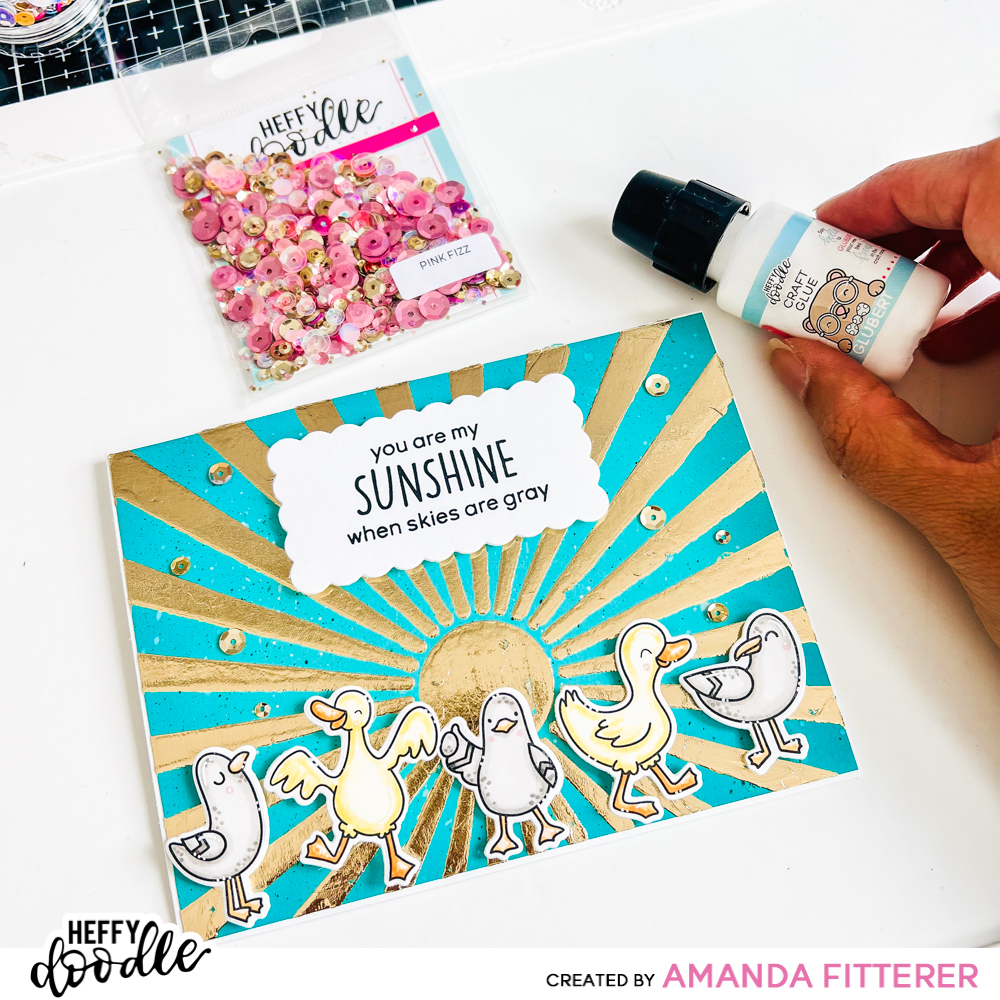
To finish the card off, I’m going to add some BRAND NEW Pink Fizz Sparkle Mix with some Glubert Glue. The last step is to attach the card front to my white A2 card base!
I really hope you enjoyed making this card with me! Are there any more techniques you’d like me to demonstrate? Leave a comment on this post letting me know!!
Until next time!! Xx, Amanda