
Hot Air Balloon Tag for Christmas
Hello my crafty friends, Carrie Rhoades here today, sharing a fun little Christmas project. A quick and easy altered gift bag with a super fun gift tag. I love having touches of personalized wrapping under the tree!
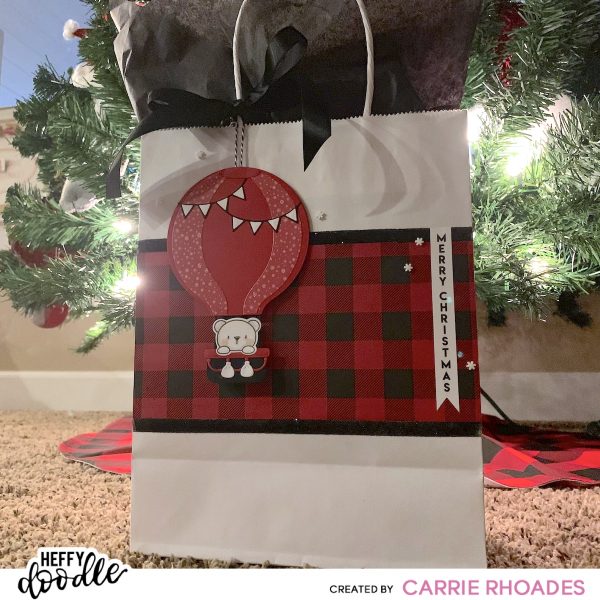
Do you ever get bags like this when shopping? I got this white bag recently while shopping. In the center of the bag is the store’s logo. But with the help of a piece of patterned paper the bag is transformed!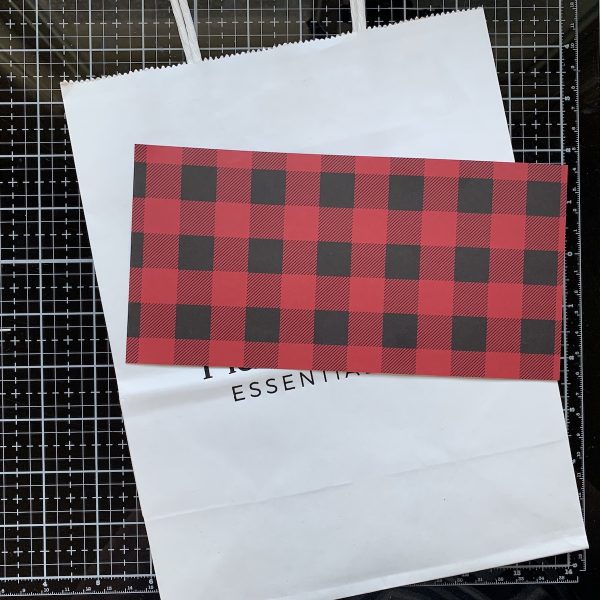
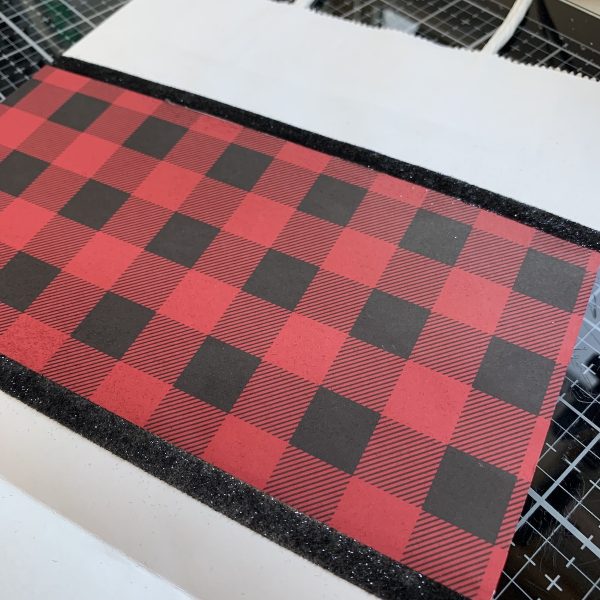
This piece of patterned paper from my stash is cut to 8″ x 4″. I glued it in place and then added a bit of flocking across the top and bottom. You can add so many things along the edges of your patterned paper; card stock, glitter, glitter paper, ribbon, a different patterned paper, washi tape, glitter glue, or a decorative die cut strip. I suggest shopping your stash and add something fun you have not used in a while.
I repeated this on the backside of the bag for a cohesive look, but you really could do just the front side to save on paper.
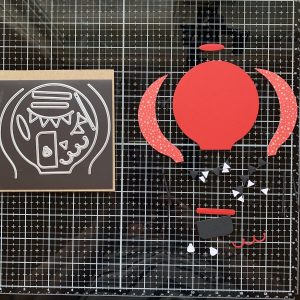
Now let’s move on to the adorable Christmas Hot Air Balloon Tag.
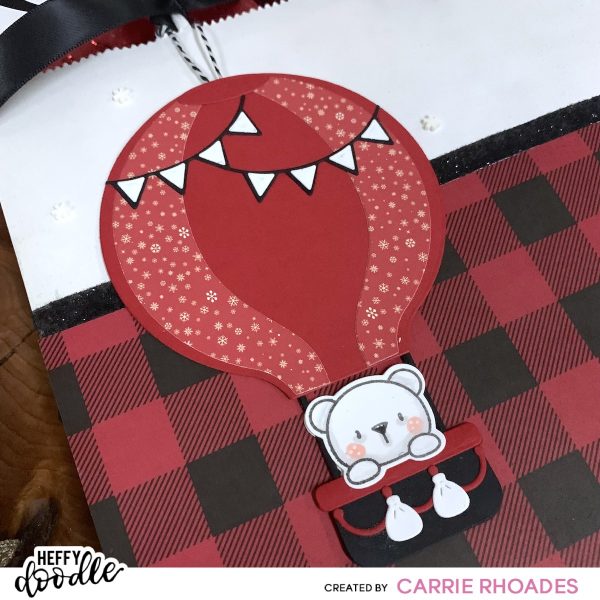
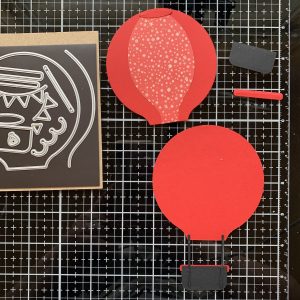
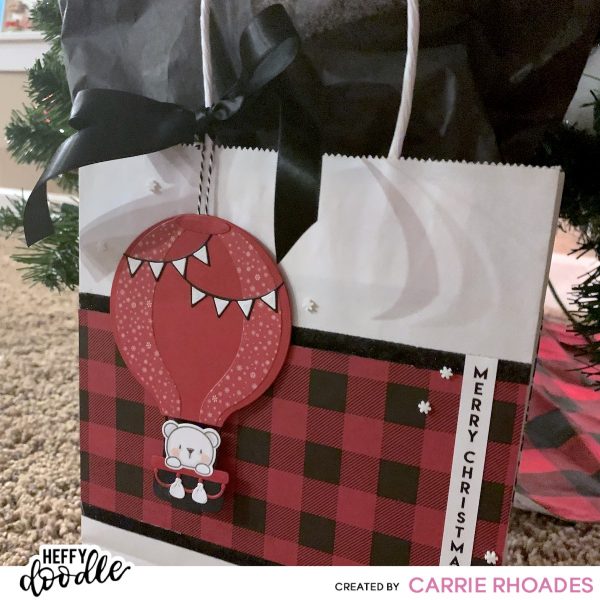
For this tag I used the Hot Air Balloon Die set. I die cut all the pieces that I needed for the tag going with Red, White and Black to match my bag. A touch of patterned paper on the balloon really adds to the Christmas feel.

These die cut pieces are easy to put together and make the cutest hot air balloon. I doubled up on the “rope” pieces that connect the balloon to the basket, since this piece will be a tag and not attached to a card.
I also die cut and extra balloon and basket, so I could make the tag more sturdy, hide the “rope” ends, and sandwich my twine between the two pieces so I did not have to punch a hole in the balloon. I also used the left over piece of patterned paper from die cutting the balloon sections for the front panel of the balloon and added it to the center of my second die cut. This still leaves room to right the “To” and “From” on the red sections. Once the twine was taped in place on the back of the balloon, I then glued the second balloon in place.
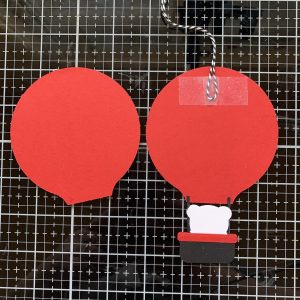
For the little polar bear riding in to join the Christmas fun, I used the Bed Heads stamp set. I also die cut and extra piece of the bear to sandwich behind the stamped and die cut bear to hide the COPIC coloring .
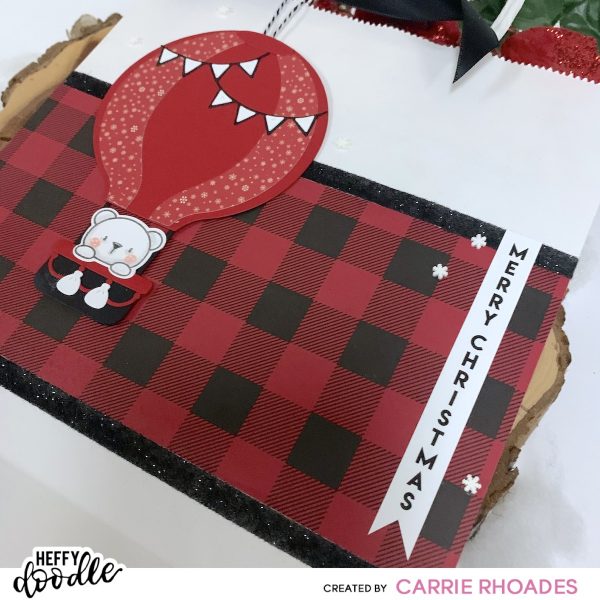
I added my Merry Christmas sentiment from the Down The Line Stamp set. I love the look of this little banner on the bag, it dresses it up a little bit more so if the tag is removed from the bag it is more than just patterned paper.
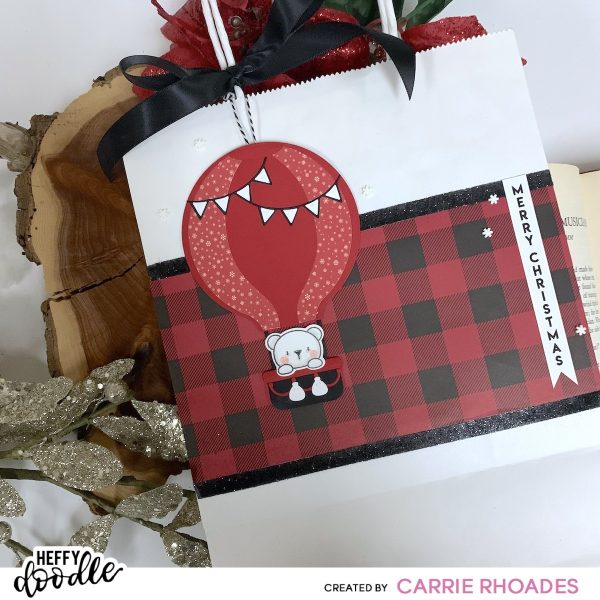
To finish off the bag I added a few snowflake embellishments and tied on a bit of black ribbon I had on hand.
And now this bag is ready for a gift! Thank you so much for stopping by, I hope that you find time this season to personalize your gift wrapping.
Happy Stamping
Carrie
You can find me on my other social media platforms HERE.
SUPPLIES: