
Hoppy Birthday!

Hi Heffy Doodle friends!
I’m so happy to be back with another card in my Sweet Scenes series for Heffy Doodle! We all need birthday cards in our stash, right? I made this cute little ‘hoppy’ card that features a little frog from the Be Hoppy stamp set. It’s always good to have a few extra birthday cards on hand when you need them! Now let me tell you how this card came together.
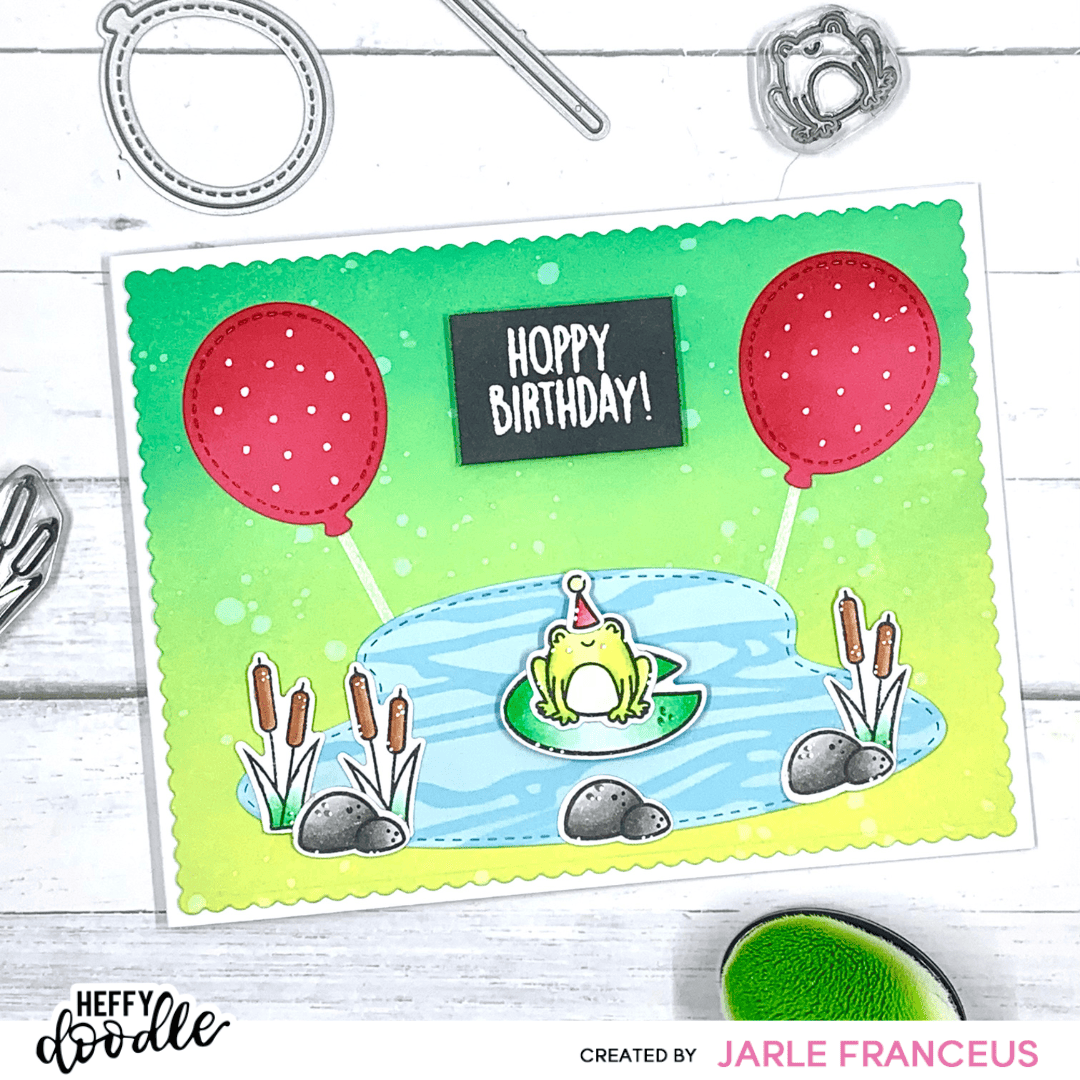
I started with my background panel. I die cut a Mini Scalloped Rectangle out of Bristol Smooth cardstock, since I wanted to ink blend the whole background. Distress Oxides work amazing for this purpose, so I used those in the colors Twisted Citron, Cracked Pistachio and Lucky Clover. I splattered on a bit of water and blotted it off with a paper towel. I set it aside to dry.
After that, I die cut the pond from the Build A Pond die set out of blue cardstock. Then I put the Ripple Waves stencil on top and, with my paper pouncer, I pounced on a bit of white pigment ink. This gave the pond just a little bit of extra detail.
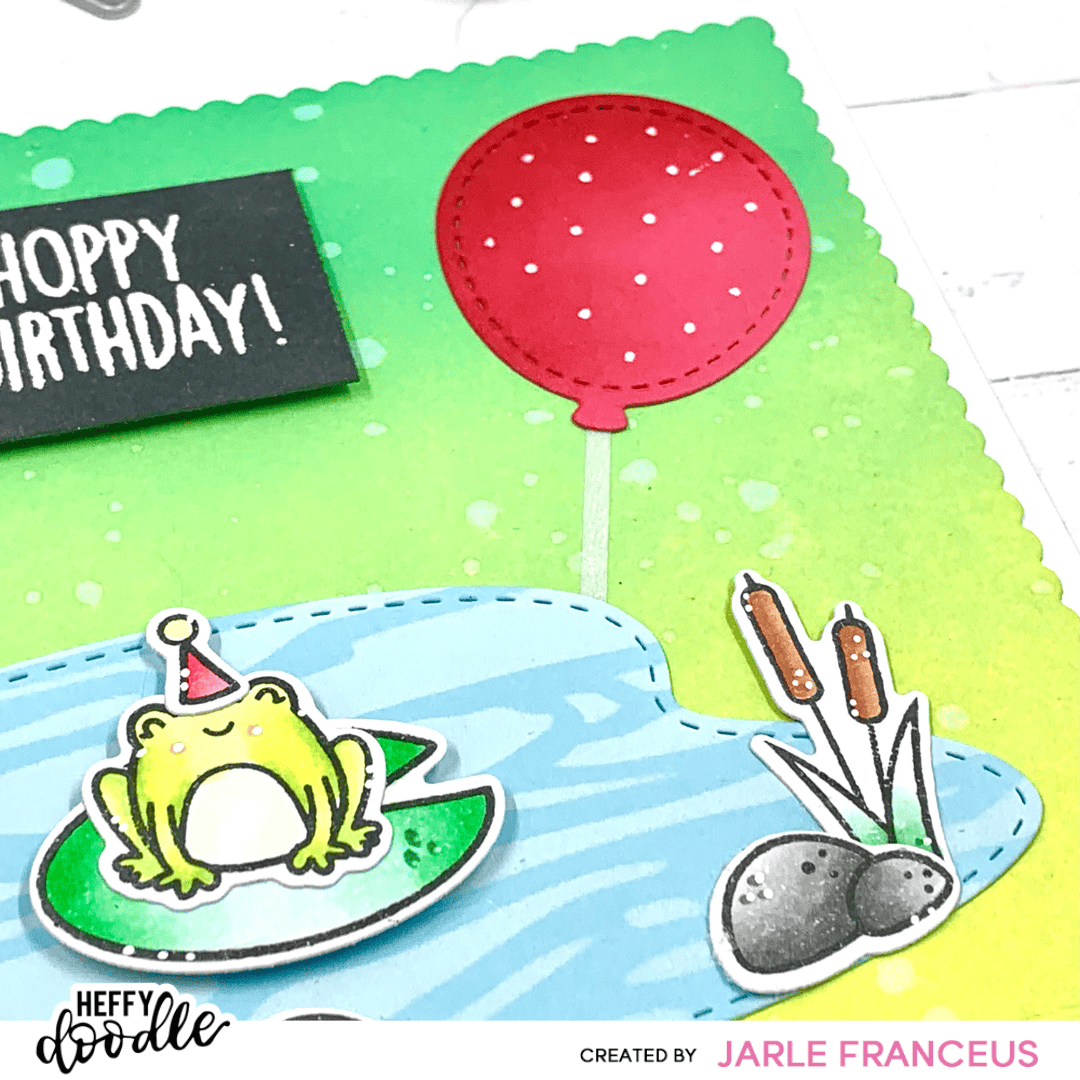
The last thing that I die cut, was the stitched balloon. I die cut 2 of those with Razzleberry cardstock. I added a bit of Concord & 9th Cranberry ink on the edges. I think that some extra ink really gives it that little extra something. With a white gel pen, I added some polkadots as well. The string of the balloon was cut out of Pearlescent Vellum. I adhered the balloon onto the vellum with liquid glue.
Tip: It would be super fun to use patterned paper for the balloons as well! I only thought of that after the card was all done…
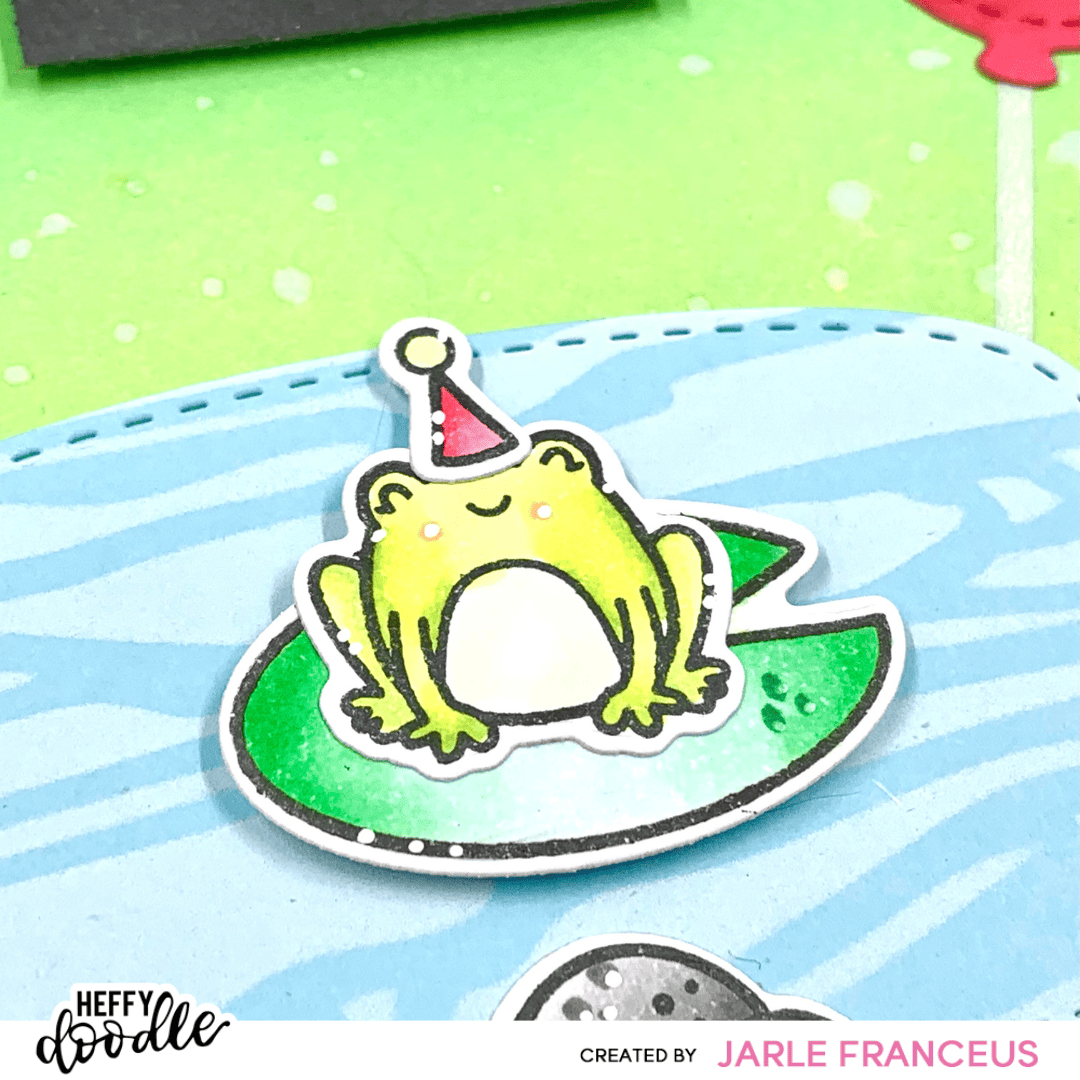
I stamped my images from the sweet Be Hoppy stamp set with Lawn Fawn Jet Black ink on alcohol marker friendly cardstock, since I was going to color with my Copic Markers. I listed the colors down below for you:
- Rocks: T5 – T3 – T1
- Frog: YG13 – YG01 – YG00 – YG0000
- Party Hat: Y13 / RV14 – RV13
- Greenery: G02 – G00 – G0000
- Cattails: E15 – E13
Of course, I used the coordinating dies and my mini die cutting machine so I had perfectly cut out images. In case you didn’t know: I absolutely suck at fussy cutting. I admire every crafter who can fussy cut with beautiful results… I’m so incredibly happy that coordinating dies exist…
To assemble my card, I combined liquid glue and foam squares to place down everything. I love dimension on cards, so I always try to pop up a few items.
My sentiment was white embossed on Oreo Crunch cardstock. I love the sentiment ‘hoppy birthday’. I think it’s so cute! With my mini paper trimmer, I cut out a perfect rectangle for my sentiment.
Tip: Before stamping on the sentiment with Versamark ink, try to wipe away any stickiness with an antistatic powder tool. You will get much more cleaner results when heat embossing.

My card panel was adhered onto a white card base (A2 sized) and that finished off my card.
Thank you so much for taking the time to visit the blog. I really appreciate it! Have a great weekend!
Love, Jarle x