Designing and selling clear photopolymer stamps and metal craft dies for card making and scrapbooking
December 8, 2021
Home for Christmas – Perfect Combos
Hello Everyone,
It is Zsofi here, welcome to another edition of my Perfect Combos series. If you are not living close to your parents, you will relate to the holiday card I brought you today. I did a little stenciling, die cutting and a little stamping too on this cute card, let me guide you through the process.
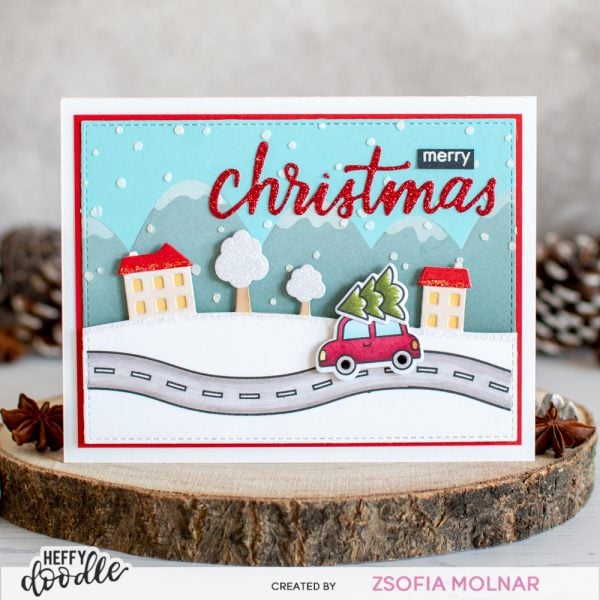
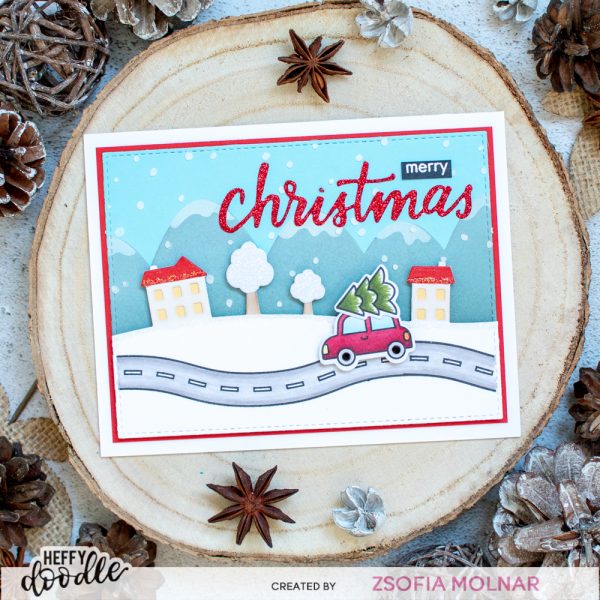
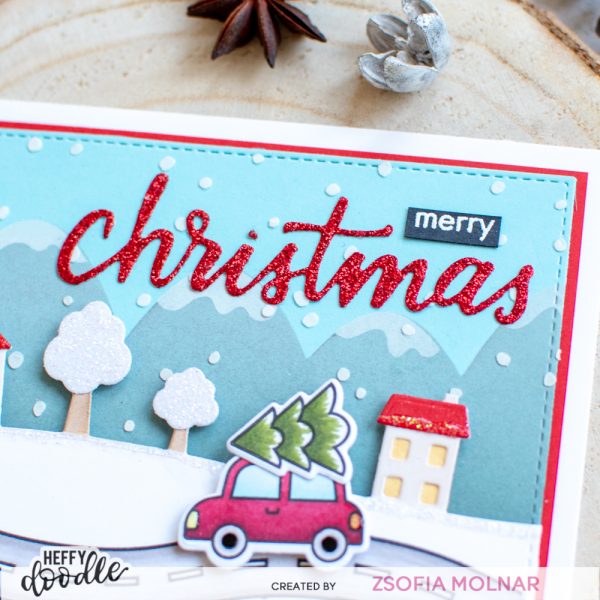
First I die cut a Stitched rectangle from blue cardstock and used the Marvellous Mountains stencil on it with Hickory Smoke Distress Oxide ink. Then I added snowcaps with white pigment ink, it looks lovely! Then I took the First Snow stencil and added white texture paste through it to the background.
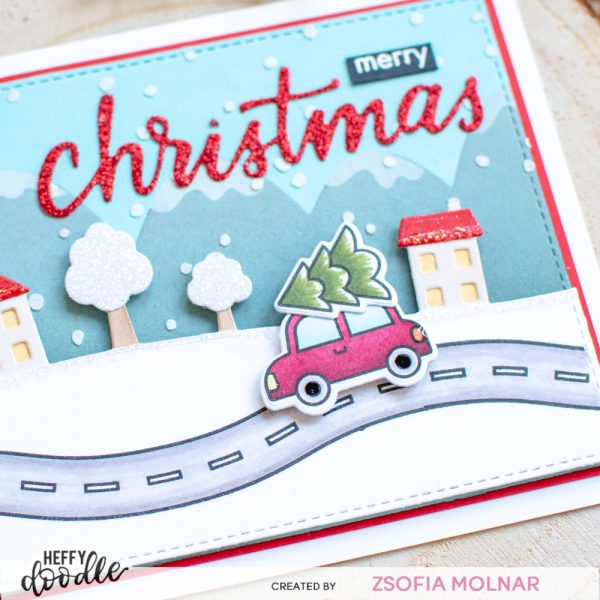
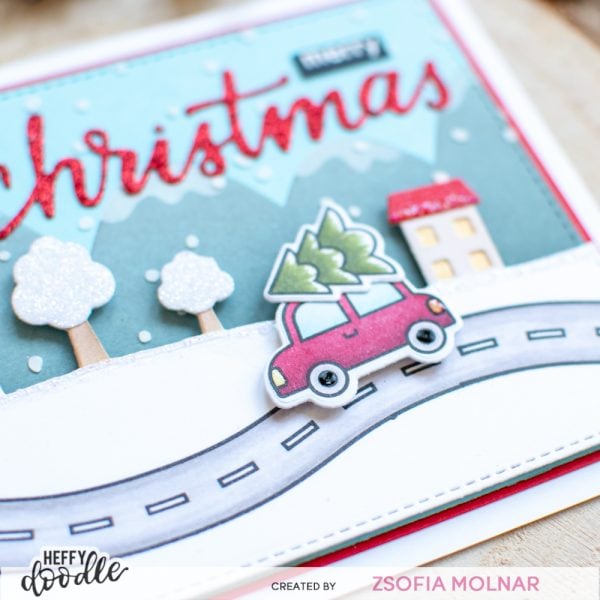
While it was drying I die cut the Little Town border die from a white stitched rectangle, leaving enough space on the bottom for the road which I stamped from the Home sweet home stamp set. I quickly coloured it with my BG Illustrator markers from Spectrum Noir. I did some ink blending on the houses and trees, and die cut the roofs and backings from cardstock scraps. To enhance the winter chill I cut the canopies from white glitter cardstock.
I also stamped a little car from Home sweet home and the tree from Santa’s Village, coloured them with the following Spectrum Noir Illustrator markers: DR5, DR3, DR1, BG9, BG4, BG2, BG1, IB2, IB1, CT1, GG5, DG4, DG3. I used the coordinating dies to cut them out and popped them up with 3D foam squares.
For the sentiment I used the Christmas word die and cut it from red glitter cardstock. I also added “merry” from the Classic sentiments set white heat embossed on a very thin grey cardstock strip. As a finishing touch I used some Stickles on the roofs and snowbank, and added drops of glossy accents on the wheels and lights of the car.
I hope you enjoyed my card design and will pop in again soon for more.
See you,
Zsofi


 First I die cut a Stitched rectangle from blue cardstock and used the Marvellous Mountains stencil on it with Hickory Smoke Distress Oxide ink. Then I added snowcaps with white pigment ink, it looks lovely! Then I took the First Snow stencil and added white texture paste through it to the background.
 While it was drying I die cut the Little Town border die from a white stitched rectangle, leaving enough space on the bottom for the road which I stamped from the Home sweet home stamp set. I quickly coloured it with my BG Illustrator markers from Spectrum Noir. I did some ink blending on the houses and trees, and die cut the roofs and backings from cardstock scraps. To enhance the winter chill I cut the canopies from white glitter cardstock.
 I also stamped a little car from Home sweet home and the tree from Santa’s Village, coloured them with the following Spectrum Noir Illustrator markers: DR5, DR3, DR1, BG9, BG4, BG2, BG1, IB2, IB1, CT1, GG5, DG4, DG3. I used the coordinating dies to cut them out and popped them up with 3D foam squares.
 For the sentiment I used the Christmas word die and cut it from red glitter cardstock. I also added “merry” from the Classic sentiments set white heat embossed on a very thin grey cardstock strip. As a finishing touch I used some Stickles on the roofs and snowbank, and added drops of glossy accents on the wheels and lights of the car.
 I hope you enjoyed my card design and will pop in again soon for more.
See you,
Zsofi
I hope you enjoyed my card design and will pop in again soon for more.
See you,
Zsofi