
Hello Wiper Card with Davina

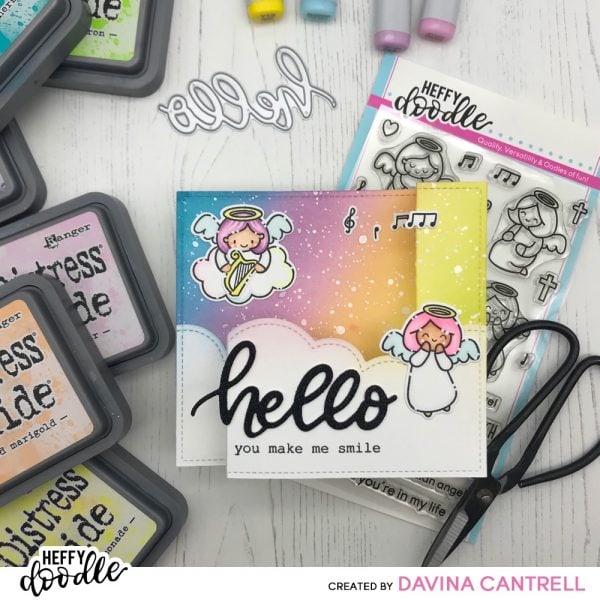
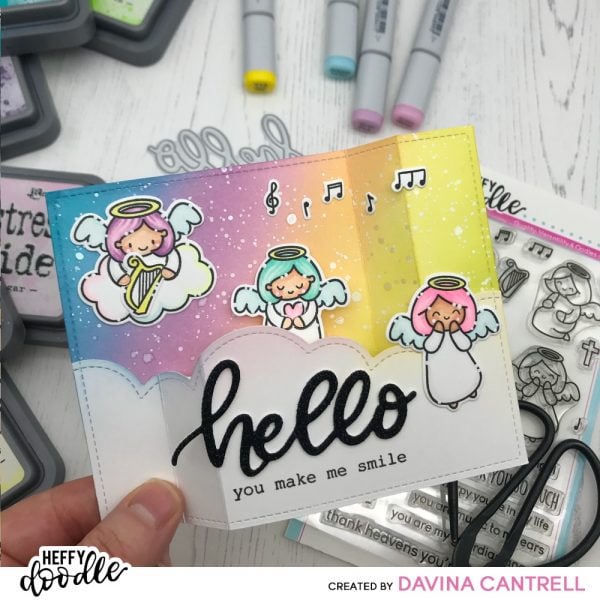
Hi lovelies! Davina here with another interactive card to share. Today I have a sweet rainbow Wiper Card, that allows my cute colorful angels to pop out from behind the clouds with a friendly hello. I used a stamp set from the latest release called My Little Angel and the matching dies.
There are many different ways to create these fun and simple cards, honestly the hardest part is the placement of the little hidden tab. But I used a common household object to help along.
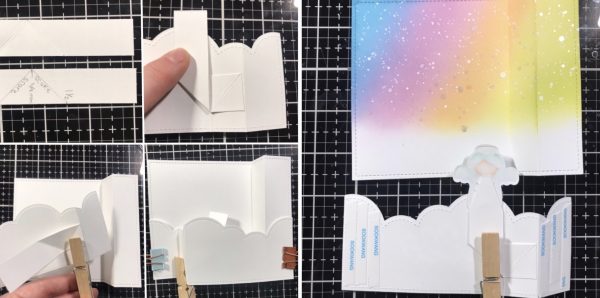
Using the largest stitched rectangle from the Imperial stitched rectangle dies I cut two panels sized at 5.5 x 4.25, then using a score board I created some score lines one inch from the left, then again at 3/4 of an inch. I reinforced my score lines with a bone folder, then rotated one piece upside down. Making sure a fold is at each end of the paper. Designate one piece for the bottom and one piece to be the top front layered piece. I used the Silver Lining Cloud Borders to cut a cloud layer about half way up my top piece. This will give my angel plenty of space to hide behind when closed.
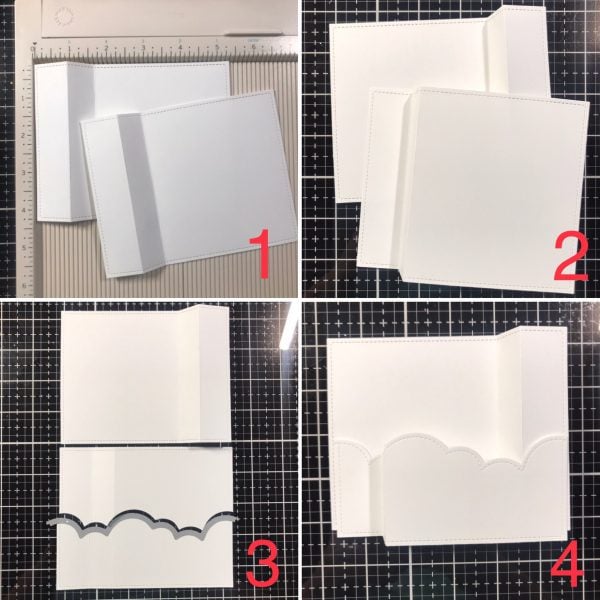
Next I cut a scrap piece of paper to be the tab that wipes out. I cut the piece of paper 3/4 inch wide and 3 inches long. Using a ruler, draw a line 3/4 of an inch in, then again another 3/4 in at the 1.5 mark. Score the tab diagonal from the corner to the first mark, then from the top to the second mark creating a triangle. Reinforce those folds. Only the small triangle portion at the edge will be adhered to the folded area of the card. The rest must be able to move and fold. So that it bends against the back of the paper, to pop up. I used a regular wooden clothes pin to temporarily hold the tab so that I could judge where to glue it down. A paperclip would work too, but be careful not to bend your paper or leave a black mark when removing it. When I had it placed where I thought I wanted it, I used two clips to hold the sides together to test the placement. It seems silly but I wanted to make sure. I ended up refolding my strip another 1/4 inch so that the image would be more in the center.
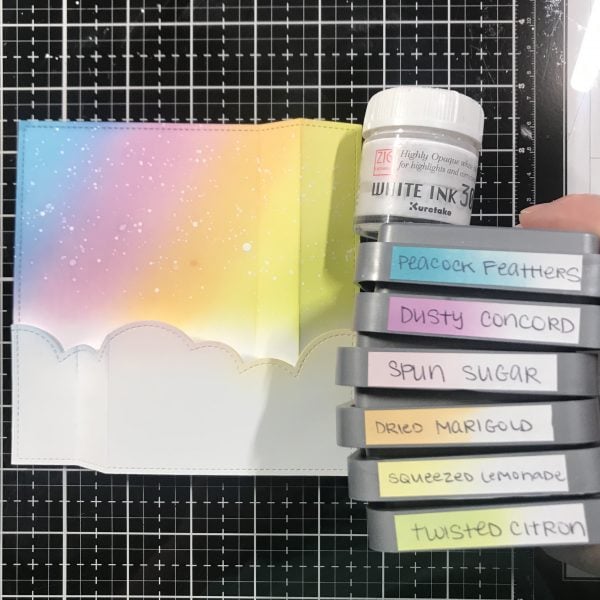
Now for the fun stuff. Using some bright rainbow colors, I gently inkblended the background paper in a diagonal soft rainbow. Making sure to extend it beyond where the clouds would reach. I carefully added ink to the very edge of the. Clouds using only the excess ink in my brushes without adding more. Then I splattered the background with clean water, white ink, and sparkly perfect pearls. Next I stamped my images using my stamp platform and Copic colored my angels in matching rainbow hues. After diecutting my images with the coordinating dies, I added small white highlights.
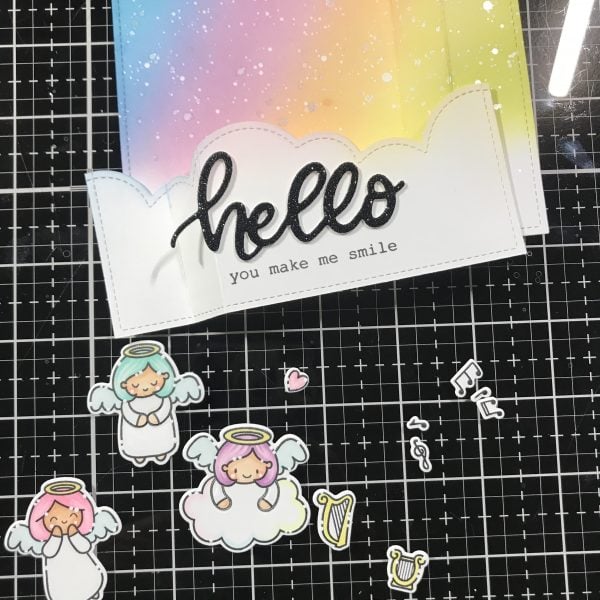
 I stamped a typed sentiment onto my clouds in the center, and mounted a glittery black “hello” that I created by layering 3 pieces of cardstock all cut with the Hello Heffy Cuts. When adhering, I made sure to leave the tail of the H with no glue, since it will hang off the folded area. I attached the left side only, of the cloud layer using score tape, then folded it open to the glue the small area of the tab in my desired location. I attached my angel to the tab and trimmed away a small portion that I didn’t want visable. Then I adhered the right side using more score tape with my angel popping up, I afixed the rest of my images where I felt they would look best in both, open and closed positions. Then I played with it for at least 10 minutes haha.
I really think it’s fun to create something that the recipient can play with. And they don’t always have to be super intricate. This was a quick card to put together and there are so many videos on YouTube showing how to create this type of wiper card. You don’t need a special die, both the assembly is the same, and the dimensions! So get out there and give it a try, you will enjoy it!
Davina
Click to see video! 8820AE72-3308-4410-884E-B6E7D6D26156
Melissa Leftrick
February 18, 2020 at 2:28 pmSo beautiful!!!!