
Heffy Doodle and Thermoweb Collaboration Extravaganza!
Foiling with Stencils
Welcome back to the party, friends!
We’ve been having oodles of fun playing with all kinds of fantastic Thermoweb products this week, and I’m excited to share this card with you!

Let’s start with the background!
Tape down a stencil to your piece of cardstock and apply Deco Foil Transfer Gel through the stencil, using a palette knife or even an old credit card/gift card. Let it dry until the gel becomes hardened and clear and then choose your foil to make it pretty!
Trim down a piece of deco foil large enough to cover your background, place it on top of your background with the colored side facing up towards you.
Fold a piece of 8.5 x 11 piece of cardstock in half, horizontally, so that the crease is along the short side of the paper. This folded piece of cardstock will be your “carrier.”
Place your background along with the foil over top of it inside your carrier. I also recommend adding a 3rd element: an additional piece of cardstock, the same size as your panel to act as a shim. This will help your foil adhere well to the gel without any mistakes. You can add that additional piece of cardstock underneath your panel with the gel on it.
So now, inside your carrier, you have the foil, the gelled background, and the additional piece of cardstock.
Turn on your laminator and let it warm up for about 30 minutes. I use the hot 5 ml setting, and then run your carrier bundle through the laminator, inserting the folded/creased edge into the laminator first.
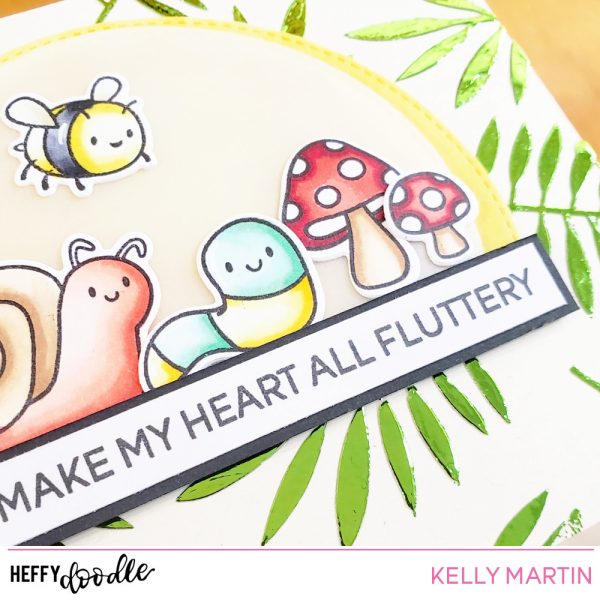
Once the carrier comes out the other side, open it up and take out your beautiful background! Adhere it down to a 4.25 x 5.5 inch cut and scored card base, and then cut out two circle pieces with your circle dies. Cut one large circle in yellow cardstock and one slightly smaller circle in vellum.
Color your images, die cut them out, and glue them on to the middle of your vellum circle, creating a scene. Apply glue on to the back of your vellum circle, on the back of all your die cut images (so you can hide the glue!), and then glue the vellum circle on to the yellow cardstock circle, centering it up in the middle. Cut off the bottom half of your circle panel and then glue your half circle scene on to your foiled background.

Now you’re ready for the finishing touch! Stamp your sentiment on to a white cardstock strip and then glue it on to a slightly larger black cardstock strip. You can adhere this completed sentiment piece on to your card and then step back to admire ALL THE SHINE!!!
Time for the fun part! We’re giving away a £30 gift certificate to the Heffy Doodle Shop! To enter, show some love and comment throughout the week, one random winner will be selected. Contest closes June 19th (midnight EST) winner will be announced June 20th. Be sure to also check out the Thermoweb blog for more inspiration!
Thanks so much for stopping by and happy crafting!
Darlene DeSario
June 12, 2019 at 7:36 pmHeffy doodle stamps are adorable! This card is great! Tyfs!
Meghan Kennihan
June 12, 2019 at 8:01 pmThis is soooo cute! I love the leafy foiled background!
Sue D
June 12, 2019 at 9:02 pmso cute with these critters and the foiled background.
Sharon Gullikson
June 12, 2019 at 9:59 pmOh, how I love these critters. They are all just adorable. I would love to be able to make cards with foil–this is so cute.
Marisela Delgado
June 12, 2019 at 10:13 pmSuch cute cards. I love critters.
Brian Poteraj
June 12, 2019 at 10:13 pmThe bugs in the forest, with the sparkly leaves, are great. They are very cute. Nice job.
Carla Hundley
June 13, 2019 at 12:35 amFabulous scene and
love the center piece
on top of the foiling.
Carla from Utah
Pooja
June 13, 2019 at 6:55 amWhat a adorable card ! Loved the foiled bg.
Mirella Rogan
June 13, 2019 at 1:37 pmSuch a sweet card, and the foiling looks great!
Denise Bryant
June 13, 2019 at 3:53 pmSuper cute card! Love that foiled background!
Lori Smanski
June 13, 2019 at 7:31 pmoh this is so sweet. thank you for sharing how you did it