
Elfish Antics Wreath Builder
Hello, Tallie here, with an early touch of Christmas inspiration! The Elfish Antics stamp set is perfect for this technique and the good news is that it is currently on sale at the moment! The technique uses a template to allow you to continuously rotate your card panel within a stamp positioning tool to end up with a perfectly aligned wreath/circular design.

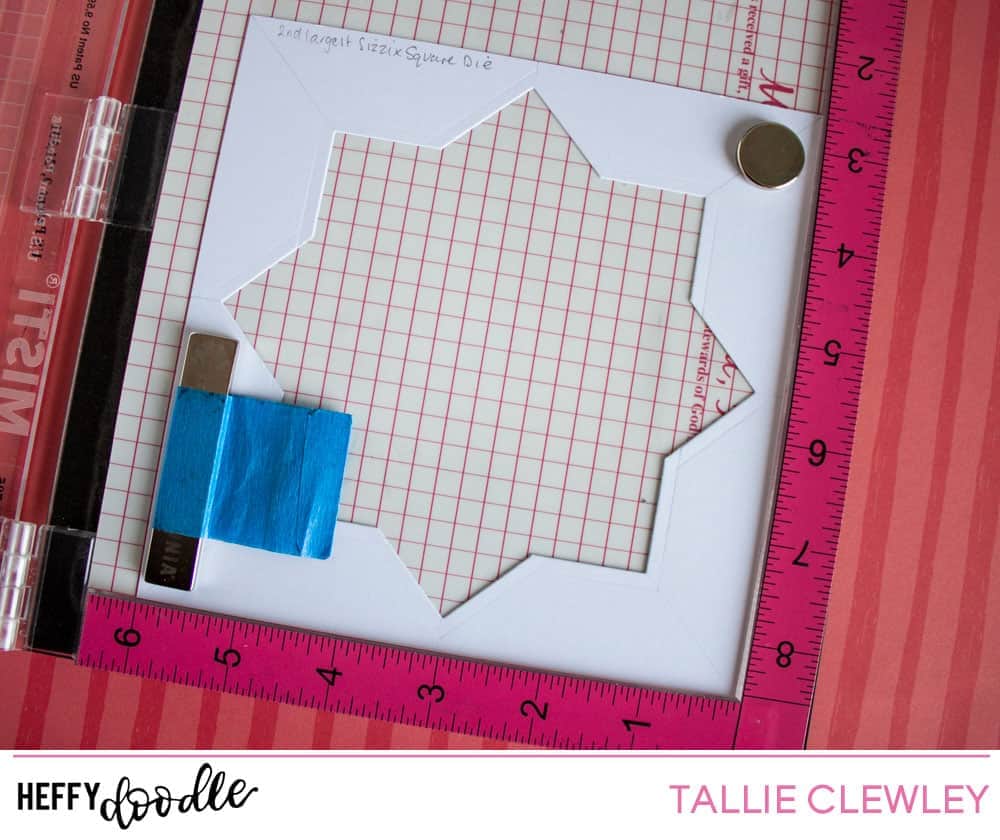
To start, I created my own wreath template. Using a 6×6 inch piece of card, I die cut two squares from the centre using a 3 and 3/4 inch square die. I made sure the die was perfectly aligned by drawing horizontal, vertical and diagonal lines.
On a panel of blending card stock cut with the same square die, I stamped out the top half of the elf from the Elfish Antics set. I then stamped out three more of the elves, rotating the panel by 90 degrees each time. In the spaces between the elves, I used the stocking stamp from the Elfish Antics set and the filled in stars from Teacher’s Pet and Interactively Yours. I used the same technique, aligning the stamps and then rotating the cardstock in the template to get the perfectly aligned design. I then took out my Copic markers and coloured the elements in using bright reds and greens.

For the sentiment, I took a circle die cut and gold heat embossed ‘Merry Christmas to You’ built from the sentiments in the Elfing Christmas Words set. I popped this up with some foam tape and adhered it to the centre of the panel, hiding the incomplete stamping of the elves’ bodies. I mounted the panel onto some gold mirror board and adhered it to a side-folding 4 1/4 inch square card base. A few touches of gold gel pen finishes it off nicely.

Give this technique a go and see what you can create!
Thanks for reading, happy crafting!
Tallie