
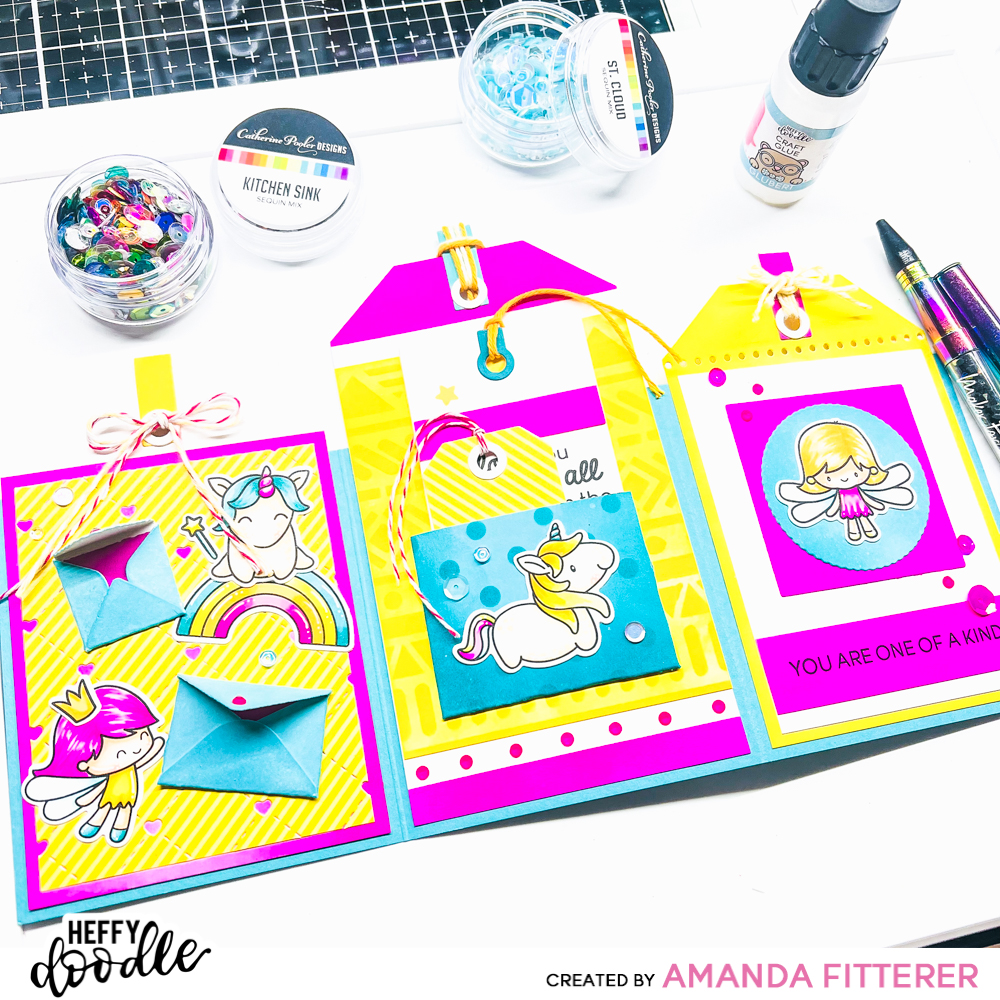
Easy Tri-fold Tag Card
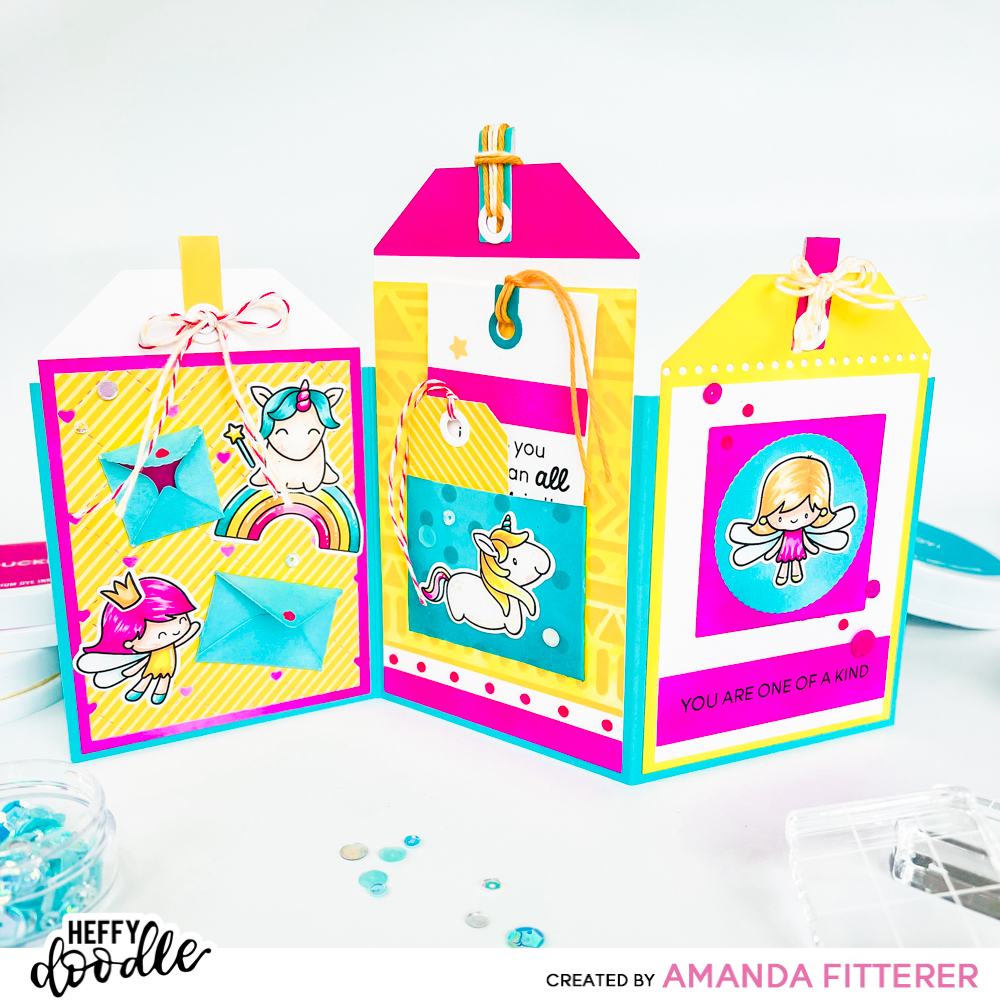
Happy Monday, friends! It’s Amanda here with a really easy tri-fold tag card to share with you! I have step-by-step photos to share with you! So grab your crafty supplies and let’s make it together!
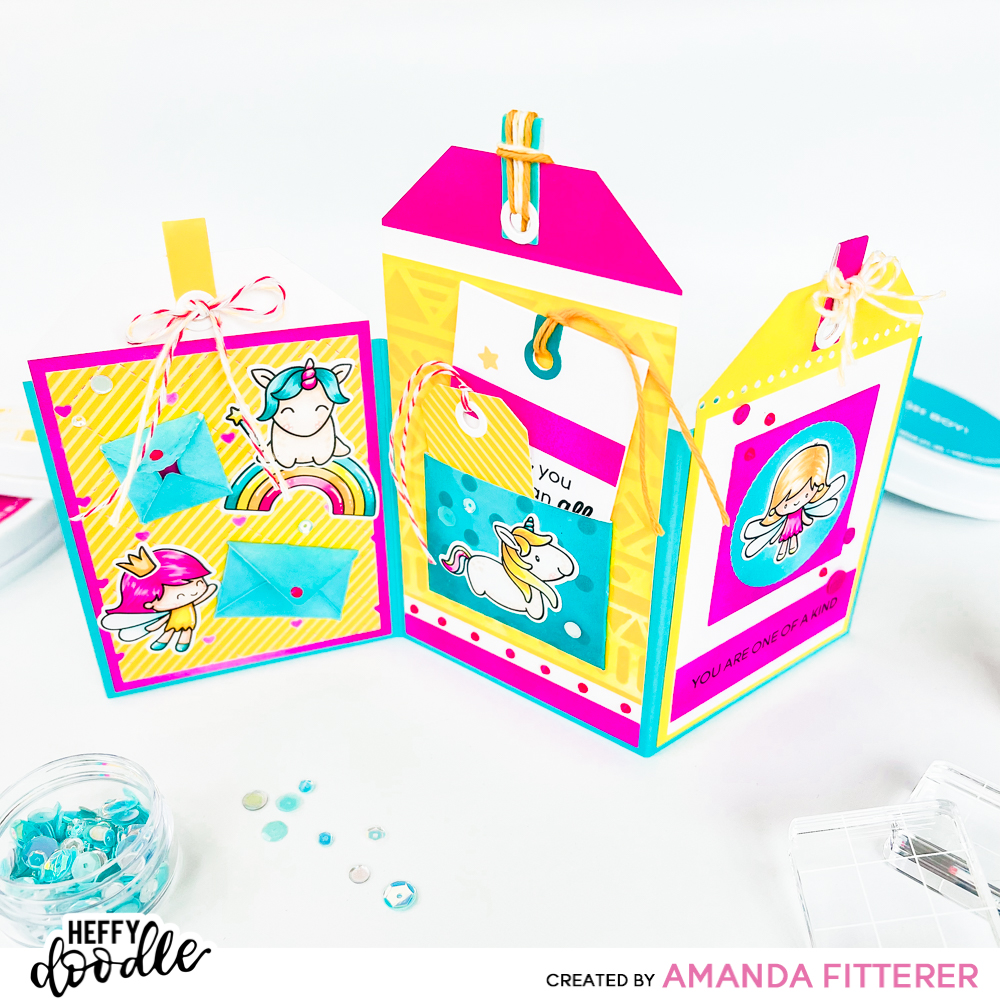
First, trim a piece of cardstock to 10.5″ x 4″. Score at 3.5″ and 7″ and fold into a “Z”.
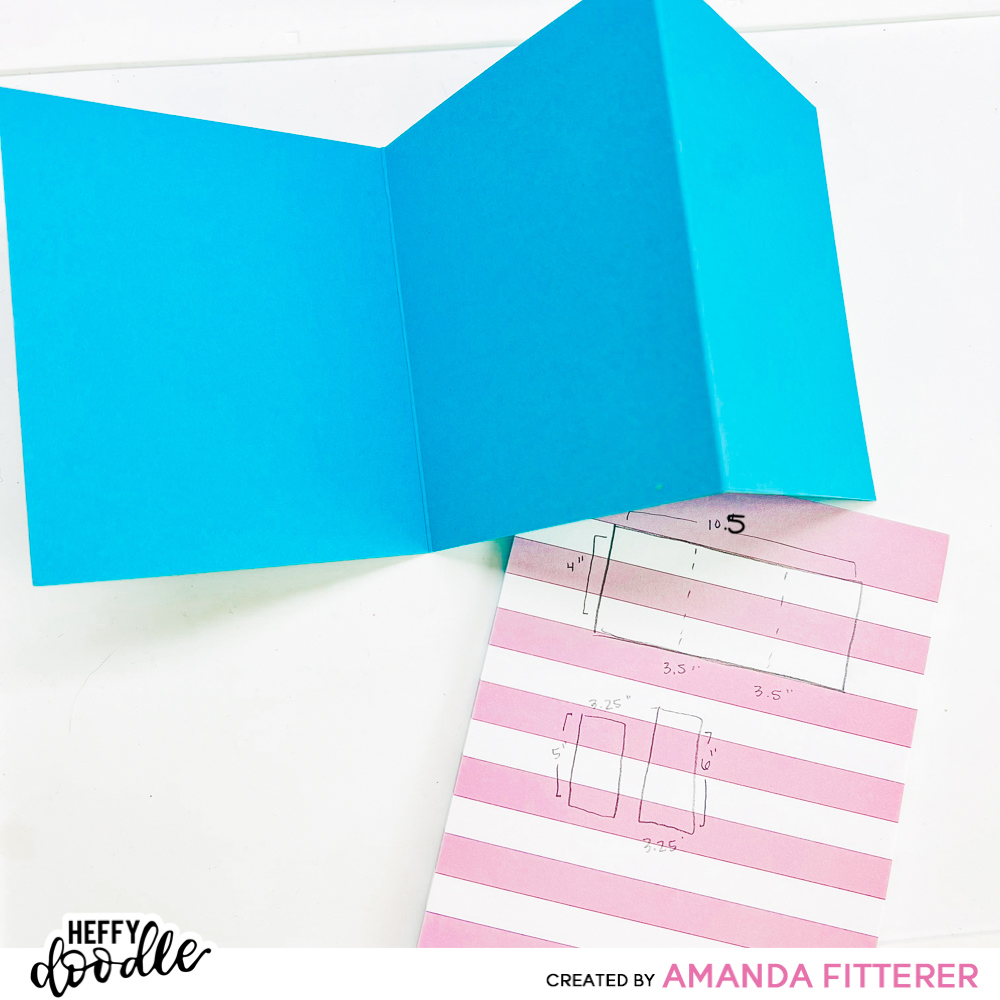
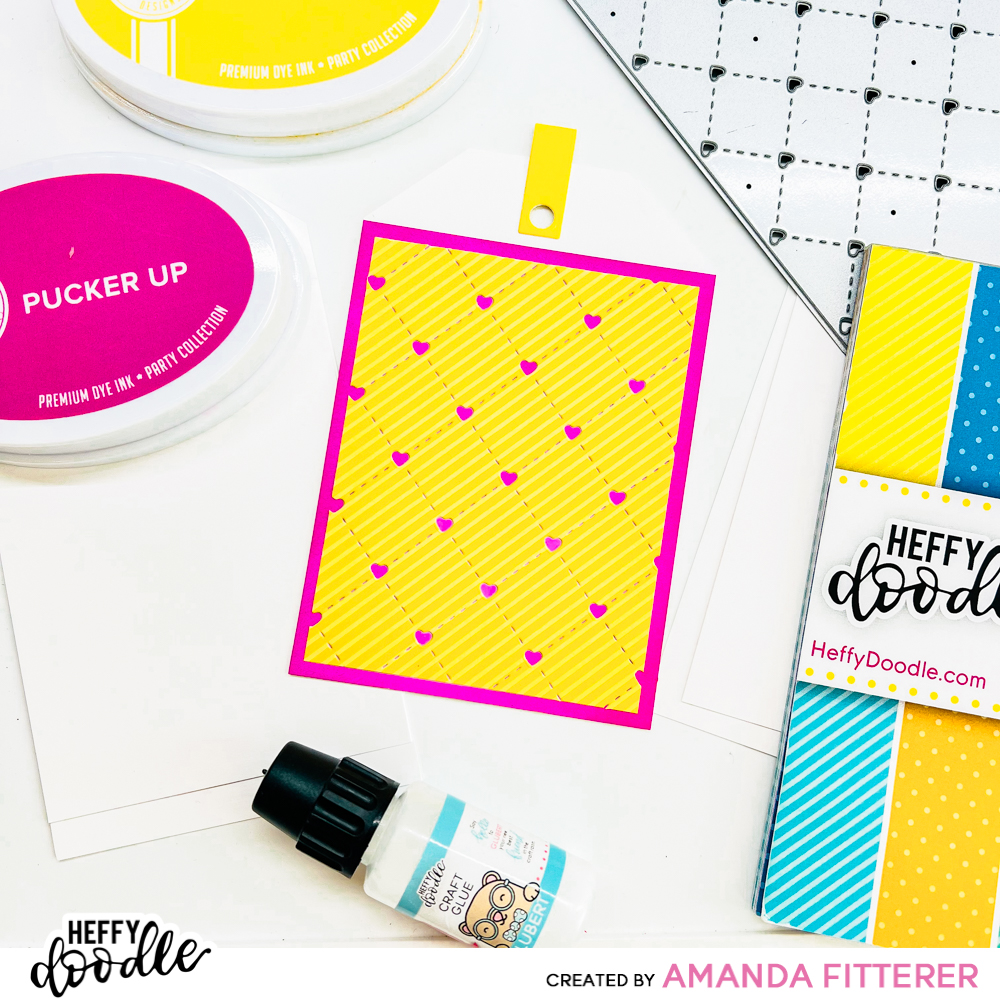
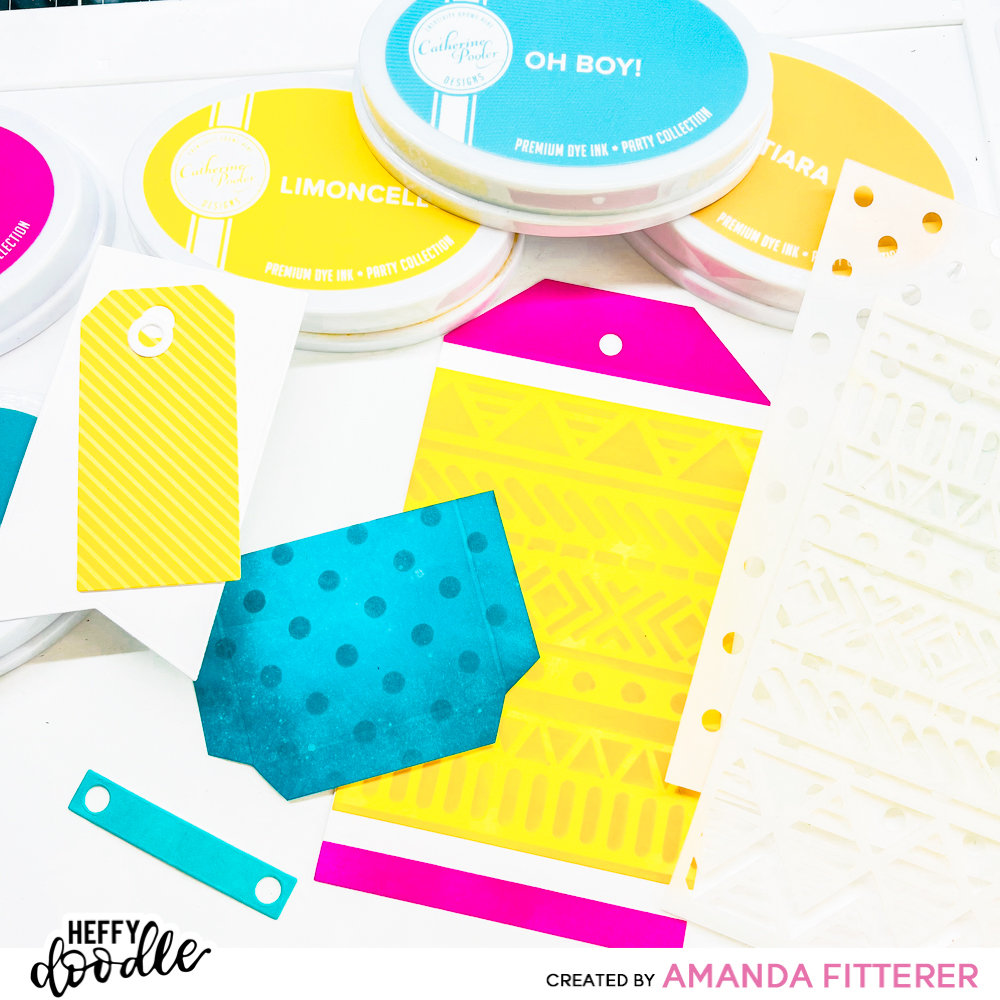
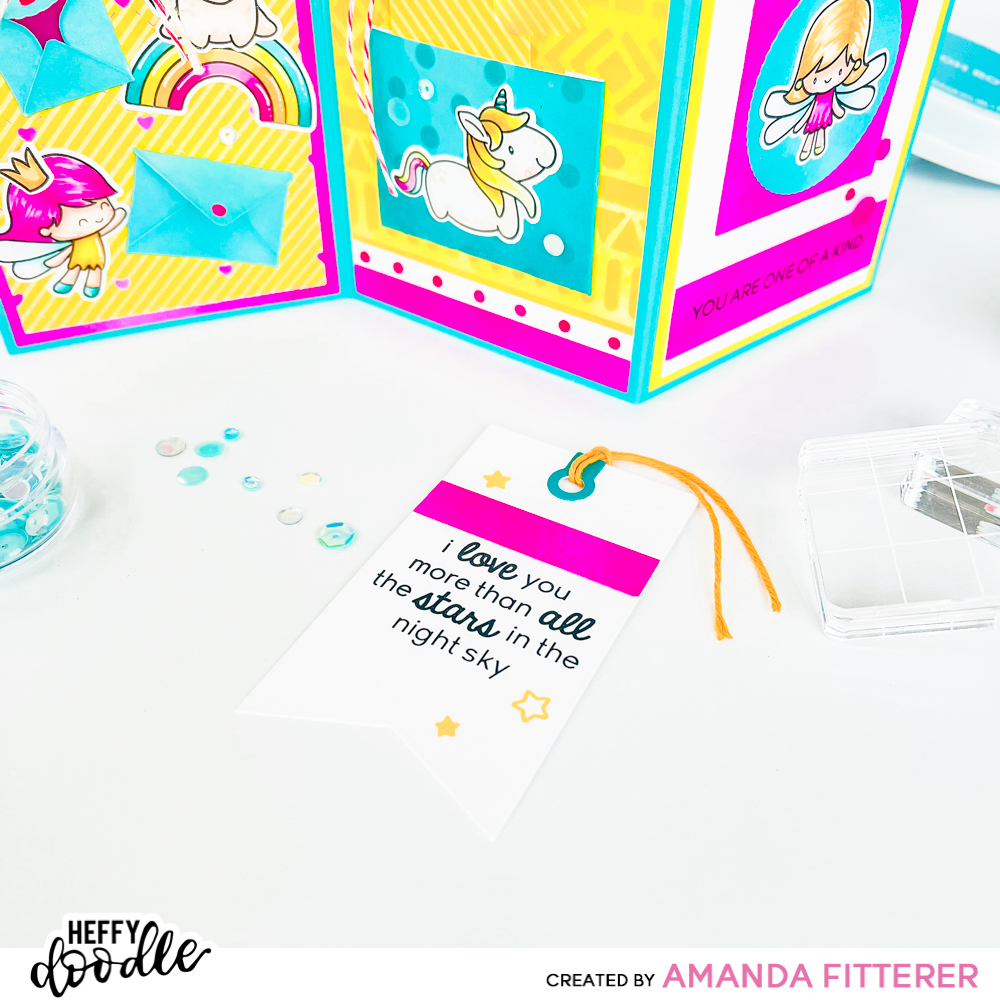
Now, we’re going to make some tags for each panel. Trim 2 pieces of cardstock to 3.25″ x 5″ and 1 piece to 3.25″ x 6″. Trim off the corners of each piece of cardstock to create a tag and add a hole punch in the center. Decorate your tags however you like.
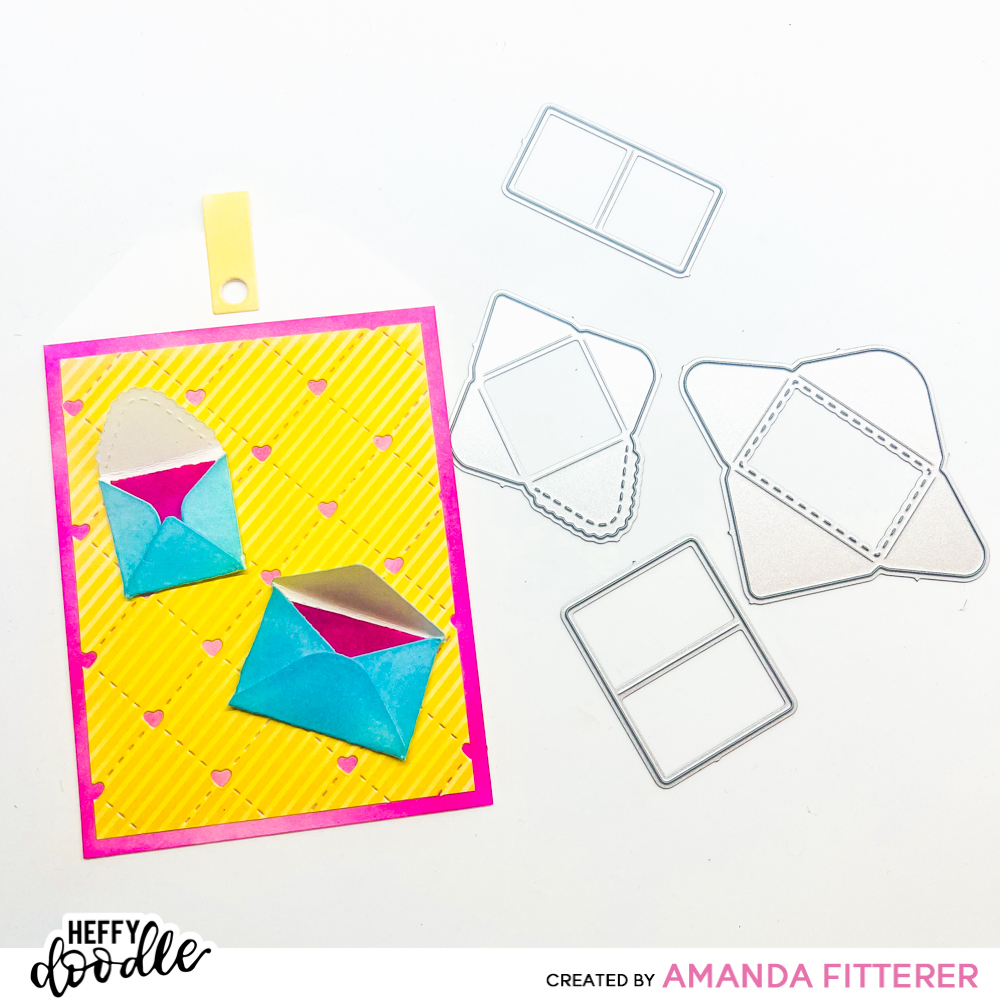
For this first tag, I have used Heffy Memo Tape to mask off the top of the tag and blended Pucker Up along the bottom. I have paired it with a piece of paper from the the Summer Holiday Paper Pack and used the Quilted Heart Background Die.
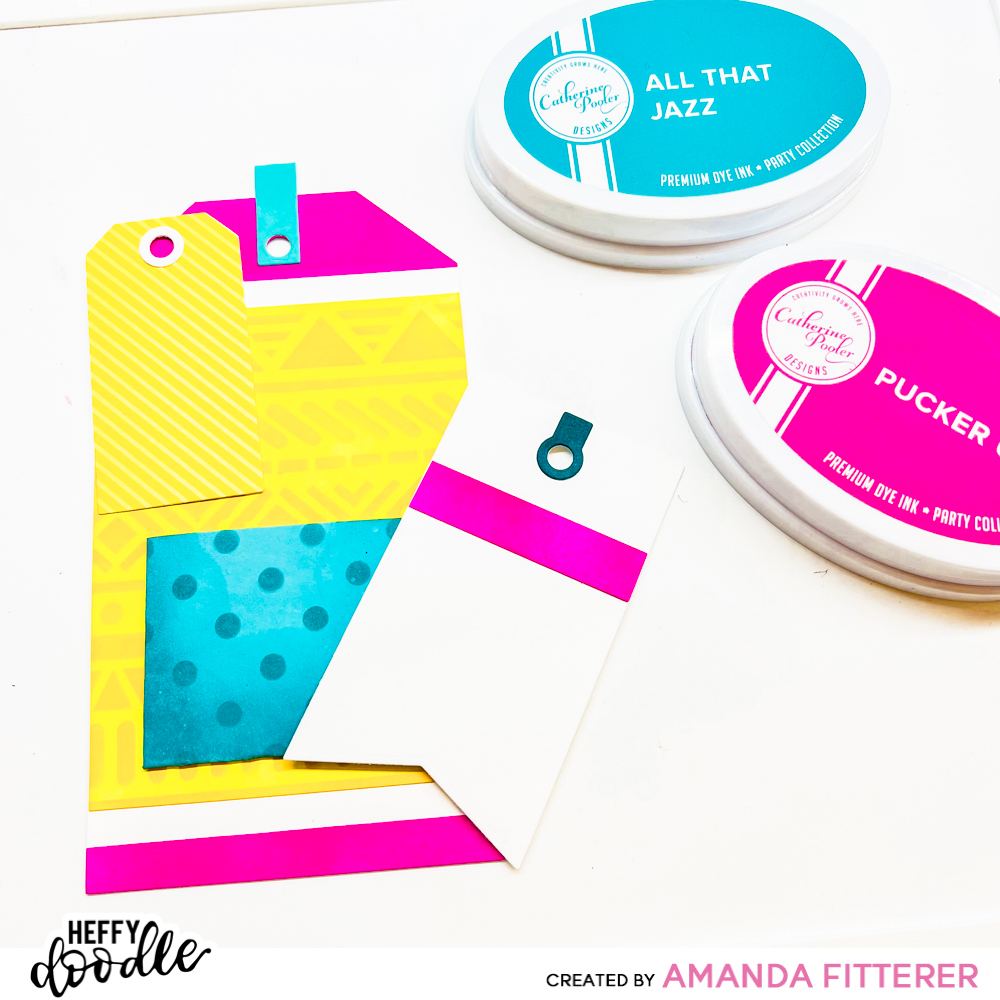
I’m also adding some mini envelopes from the Slimline Mini Mail Dies.
For my second tag, I’m using Limoncello, Tiara, and Pucker Up. I’m using the Fiesta Time Stencil to decorate it as well. I’ve also created a pocketfold for this tag using Oh Boy! and the Let’s Polka Stencil.
I’ve also cut some mini tags using some tag punches and dies.
For my last tag, I’ve used some of the essential Heffy die cuts. I’ve added a dotted border to with the Lovely Little Border Dies. I’ve created a layered frame on the front using the Mini Essentials Dies.

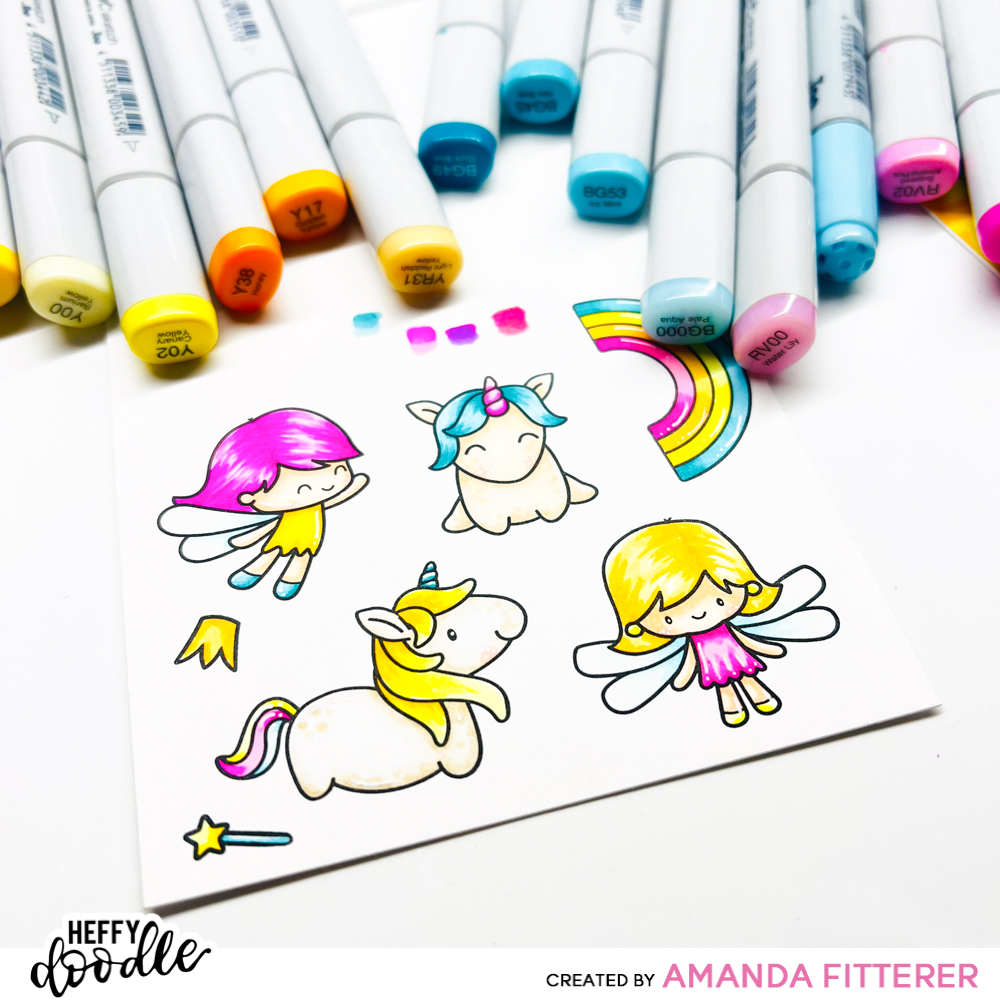
Now, let’s add some cute characters and sentiments! I’m grabbing the Fluffy Puffy Unicorns, Absotoothely Awesome, and the Superstar stamp sets. I’ve stamped them, colored them with Copic markers, and cut them out with the coordinating dies.
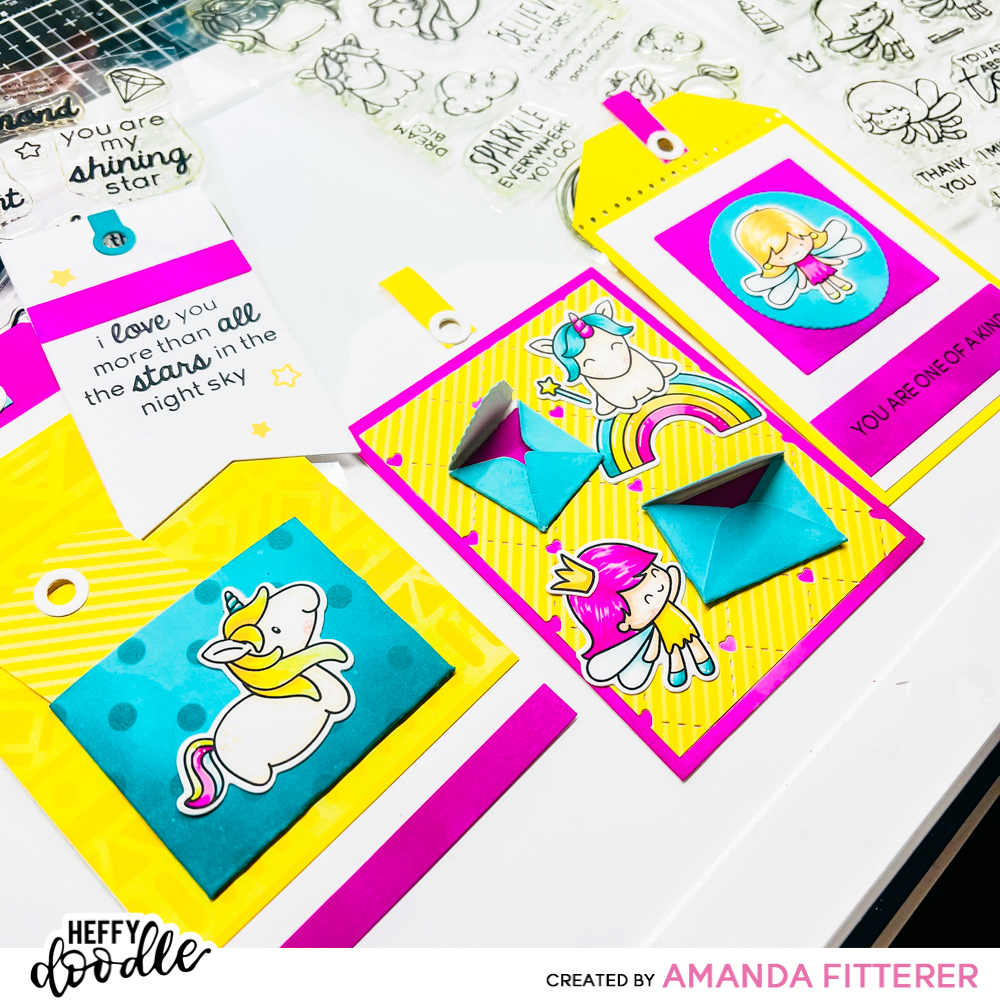
I’ve adhered my tags to my tri-fold base with Glubert Glue. Now, I’m going to embellish away! I’ve added sequins and ribbons to my tags.
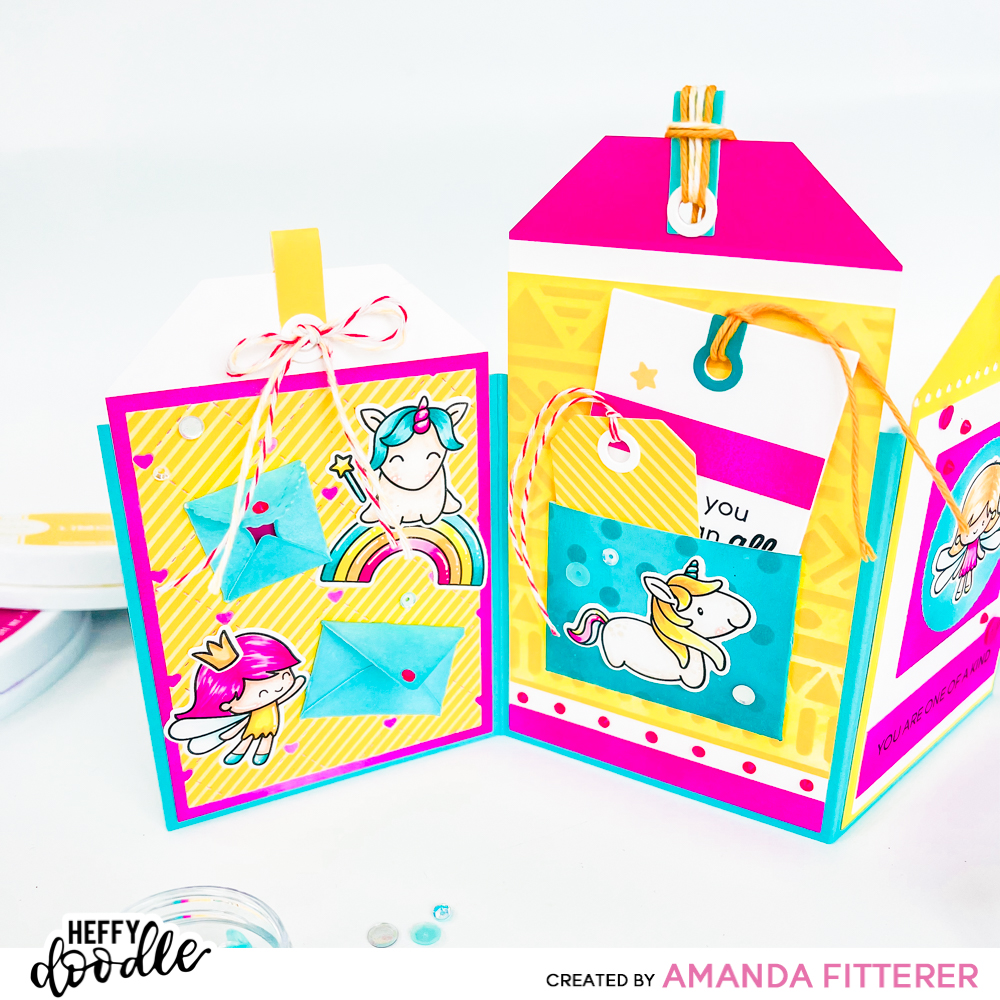
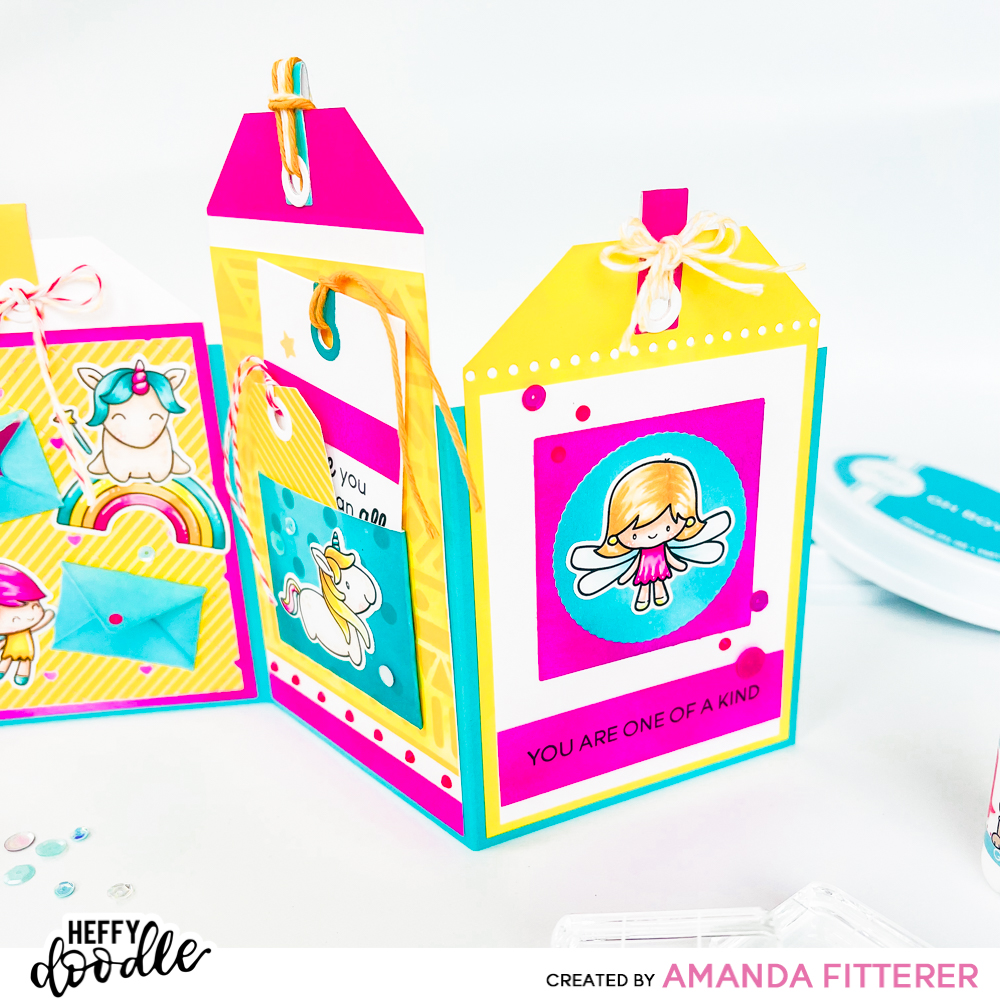
Here’s some more pictures of the finished project!
I hope you’ve enjoyed this blog post and hope you come back tomorrow for more inspiration!