
Hello and welcome back to the Heffy Doodle Blog! We are SO glad you stopped by to see what crafty inspiration we have today! Today’s theme is “Stretch Your Supplies” with design team member –
Tatiana!
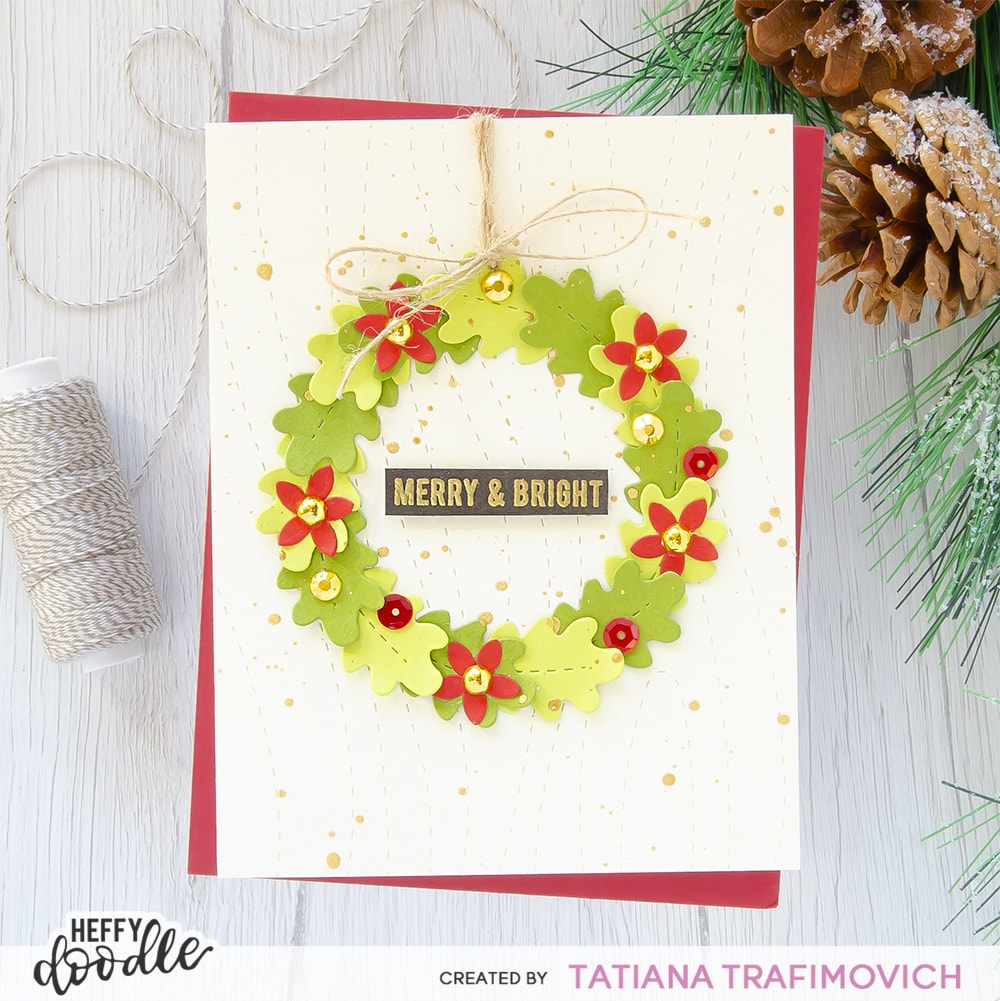
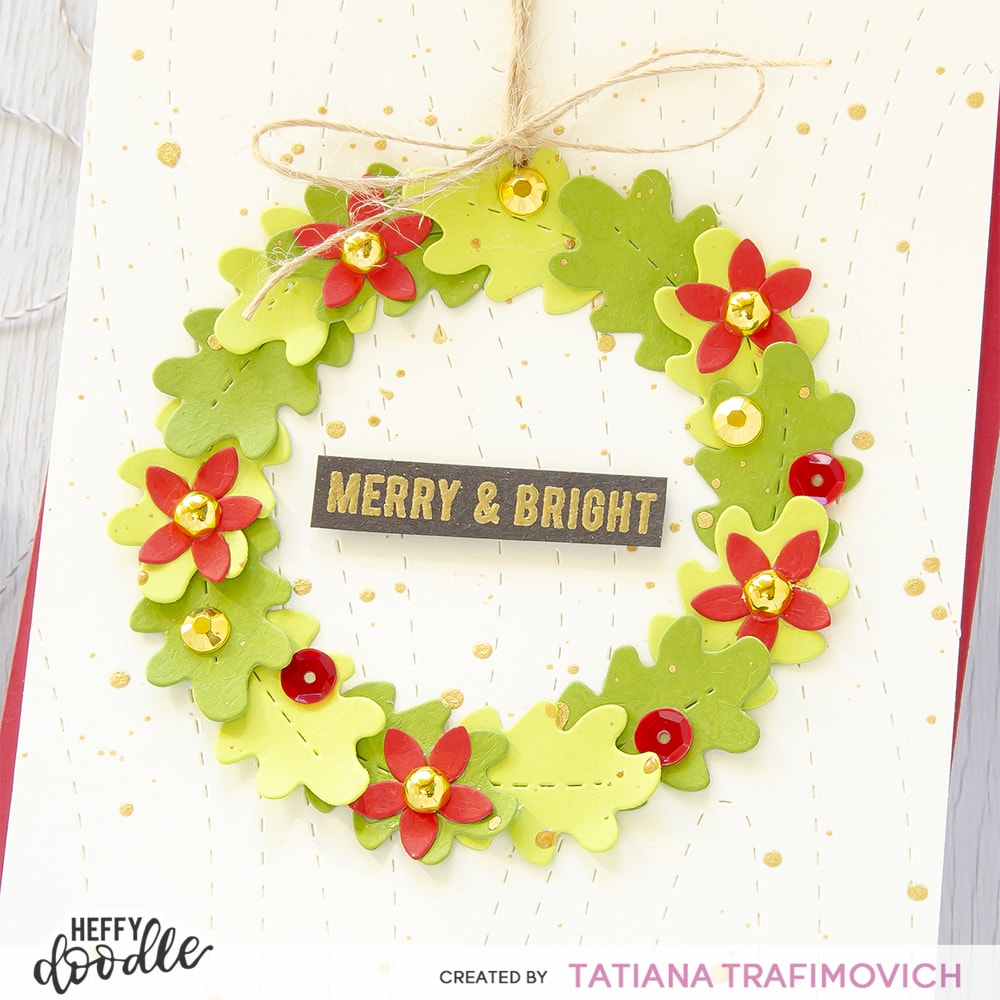
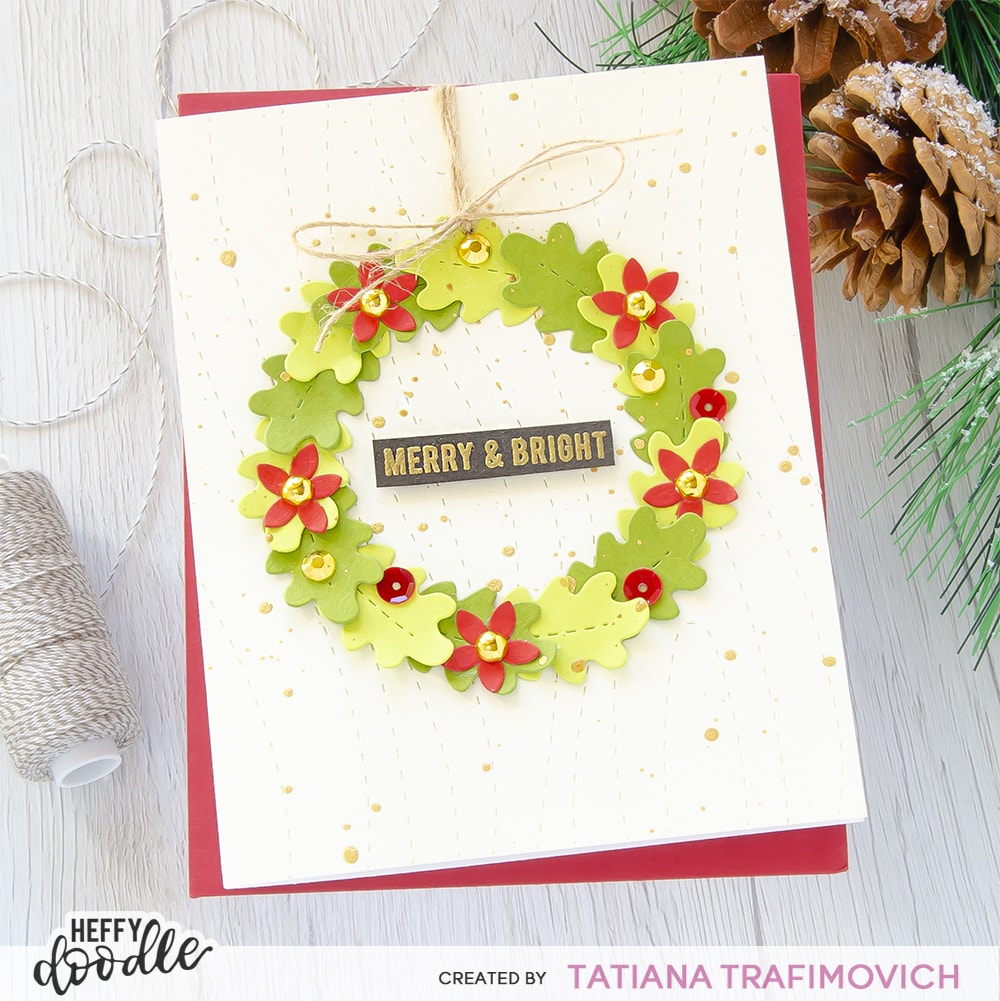
Today I came up with an awesome Christmas wreath made from non holiday die sets! This fun die cut project was so easy and fun to put up together! I started with two shades of green and big leaves from
Forest Leaves Dies to build a basic wreath and then created cute little red five petals flowers, using tiny leaves from
Tree-mendous Peekaboo Tree Dies just to give a cheerful and bright festive touch. The
Woodgrain Texture Background Die, die cut from a cream cardstock instead of a usual white one, made a simple, but perfect background on the card front.
Key Ingredients:
Step By Step Instructions:
- Trim and score an extended A2 size card base (5 1/2″ x 4 1/4″) from Neenah Solar White paper.
- Trim a 5 1/2″ x 4 1/4″ rectangle from a cream cardstock for the background.
- Add a faux stitched Woodgrain Texture Background on the cream cardstock by running it through a die cutting machine and glue it directly on the card front with Glubert – Craft Glue.
- Trace a circle with a pencil in the center of the card front to use as a guide for a perfect wreath.
- Die cut a bunch of leaves from two shades of green, using Forest Leaves Dies and Heffy Doodle Mini Die Cutting Machine.
- Die cut a bunch of small leaves, using Cherry On Top red cardstock from Heffy Doodle Coloured Cardstock – Mix 1 and Tree-mendous Peekaboo Tree Dies.
- Arrange all the leaves following the pencil circle and glue them in place with Glubert – Craft Glue.
- Splatter a gold shimmer spray all across the card front. Let the spray air dry well.
- Poke a whole towards the top of the wreath with a craft pick, wrap a kraft twine around and tie a bow.
- Heat emboss in gold onto black the sentiment with VersaMark Clear Embossing Ink. Don’t forget to prep the cardstock with a Powder Tool Applicator to prevent the embossing powder to stick where you don’t want it!
- Finish with some metallic gold jewels and red sequins.
That’s all for today! Hope you like fun and bright die cut project! Thanks so much for stopping by and have a fabulous day!
Hugs,
Tatiana
