
Create the Hoppiest Card with Be Hoppy
Hi, it’s Kari with a new video! Today we are going to create the “Hoppiest” card with the new Be Hoppy Stamp set and the new Build a Pond Die set! These products go so well together and this card was a delight to create.
Watch the video below or in HD on YouTube:
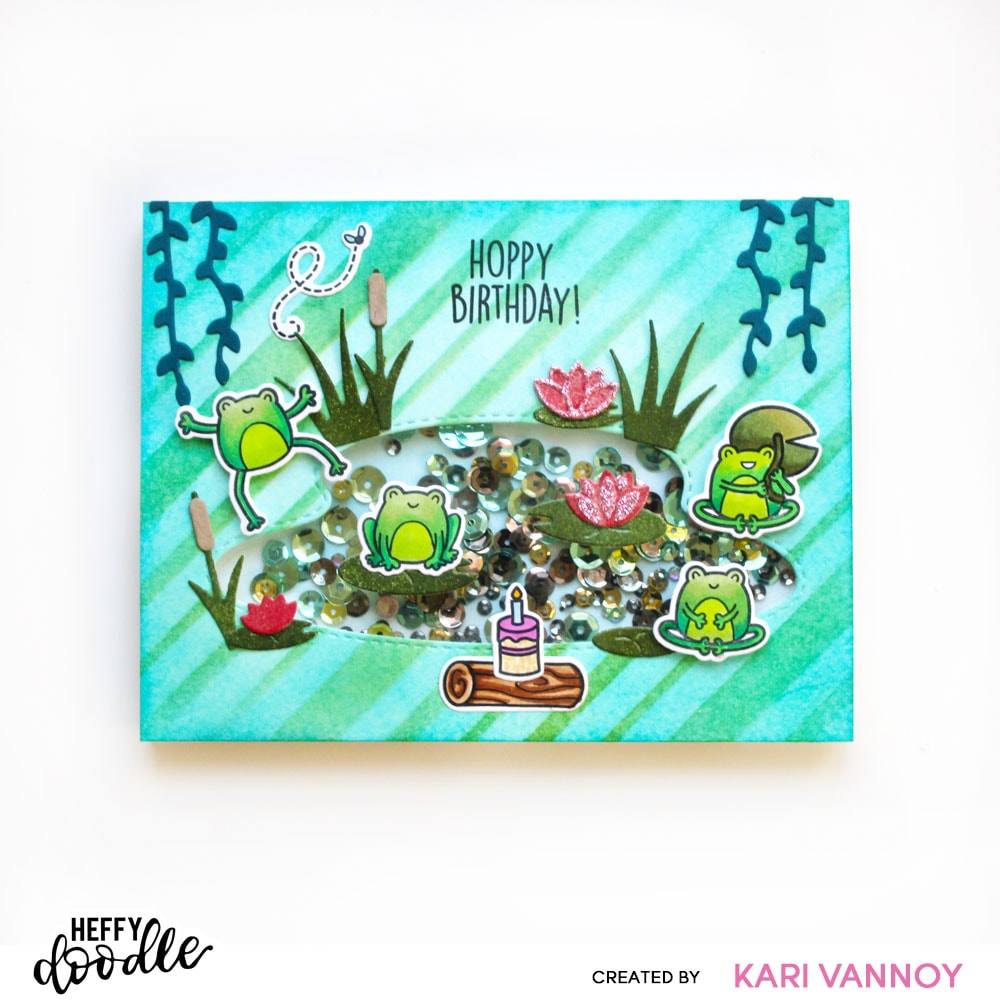
I started building this card by adding some blue ink to the card panel. The new Funhouse Diagonal Stripes Stencil adds some extra interest to the background! I used a little green and a bit more blue ink through that stencil. I love that you can also use this Funhouse Diagonal Stripes stencil in a different direction over the top to create a great plaid if you want to.
Once all the inking was done, I cut out the smallest pond from the Build A Pond die set. The small pond also adds a stitched border line around the pond, which is such a nice detail.
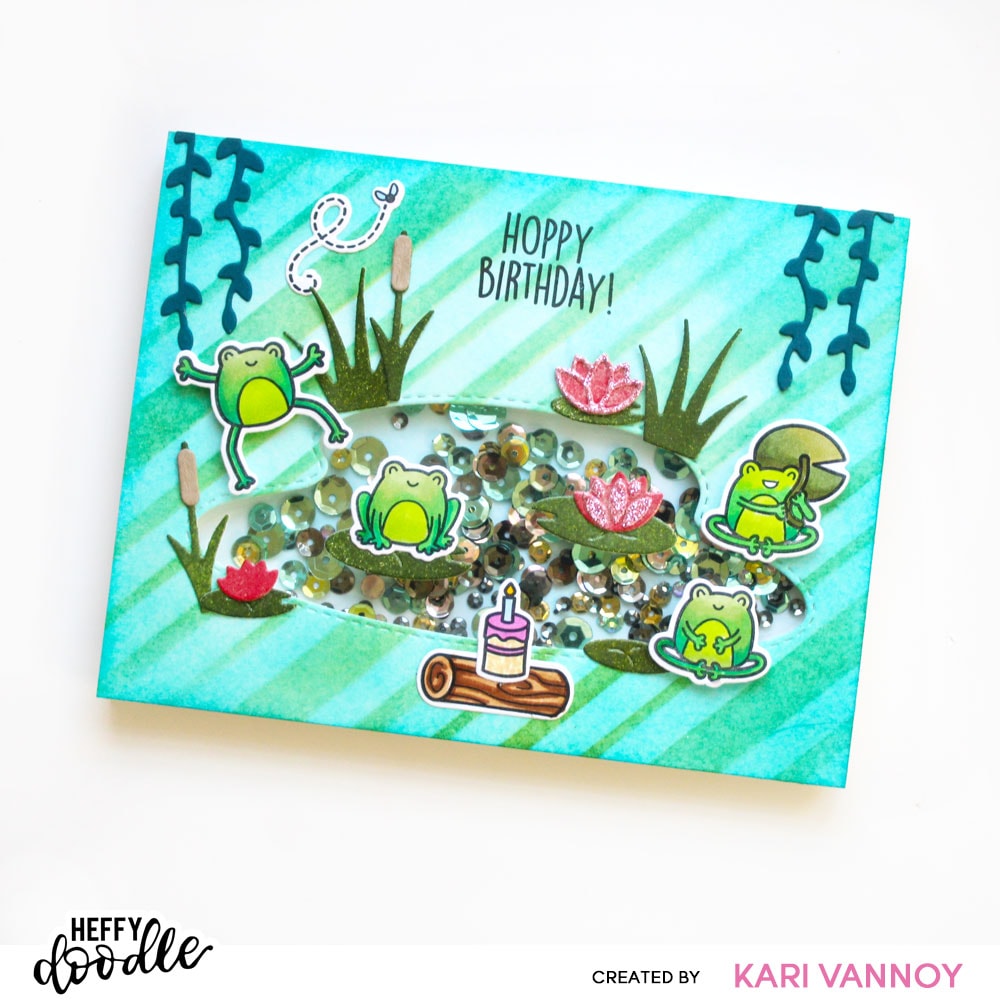
Before I added the acetate to the back of the pond cut out, I traced a slight pencil line on the card base to show where that pond cut out would line up. This helps to show where to place the Enchanted Moss Sparkle Mix! This sparkle mix has the most beautiful colors for a pond scene, and it includes gems. (Gorgeous!)
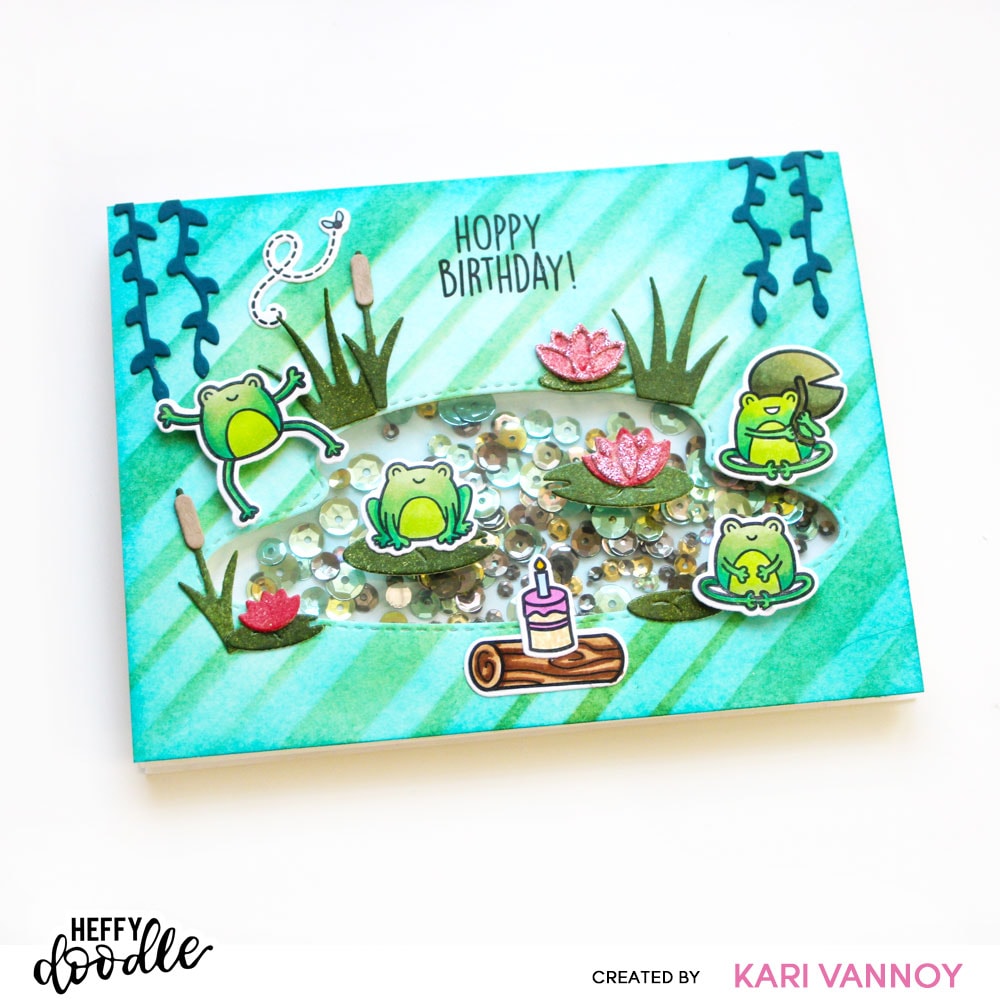
I die cut all the grasses, cat tails, lily pads, flowers, and vines from the Build a Pond die set. It’s amazing all the different designs that come with this die set. This die set would also work well to build a scene with the Flock Star stamp set, and the Special Delivery stamp set (with the storks)!
I also used a few of the grasses from the new Freshly Cut Grass Dies to really build out the scene.
Then I stamped, colored and die cut all the images from the Be Hoppy Stamp & Be Hoppy Die set. I built the entire scene on the front of the panel and stamped the sentiment before adding the foam tape to the back of the panel.
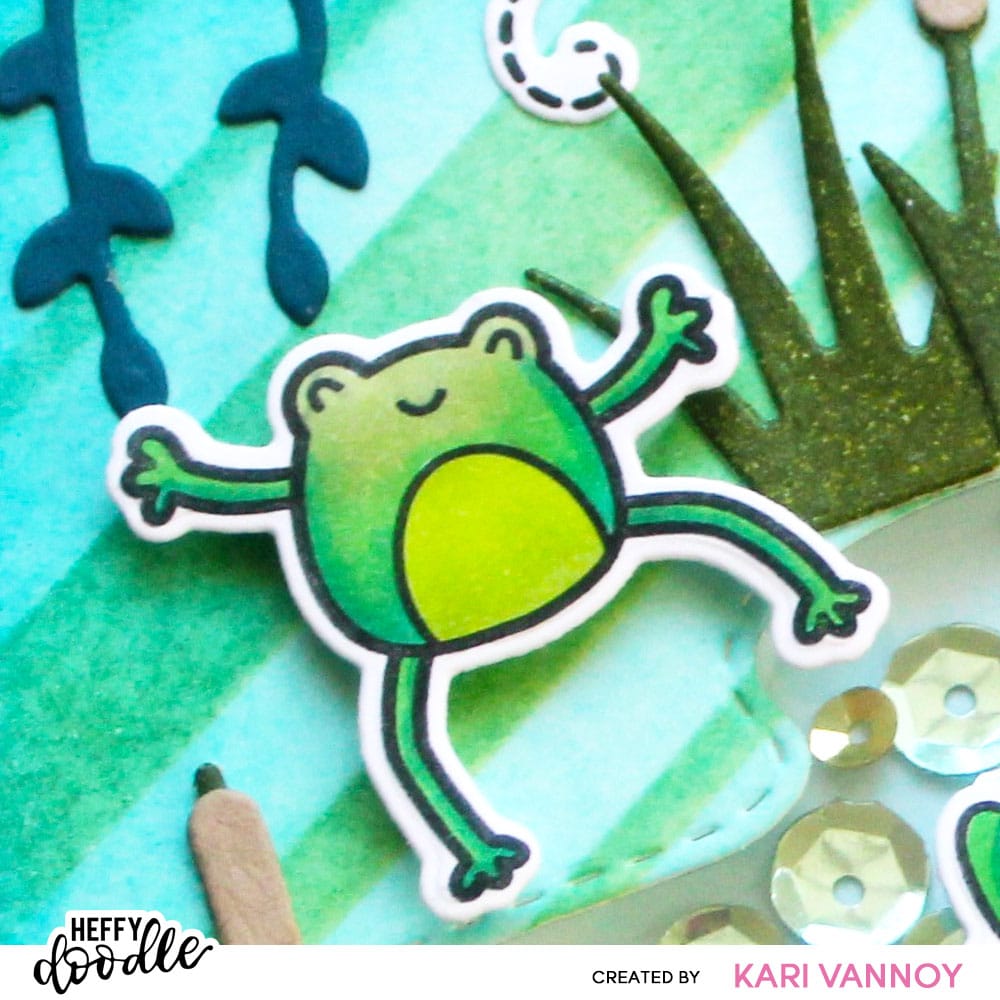
This jumping happy frog has me smiling every time I see him!! LOVE! I put the entire card together and shook it a few too many times for testing. It’s so fun to shake! *Wink*
I hope you enjoyed this project! I’ve put together the supplies I used so you can easily go and check them out in the Heffy Doodle shop.

Thanks for stopping by today! See you next time,
Kari