
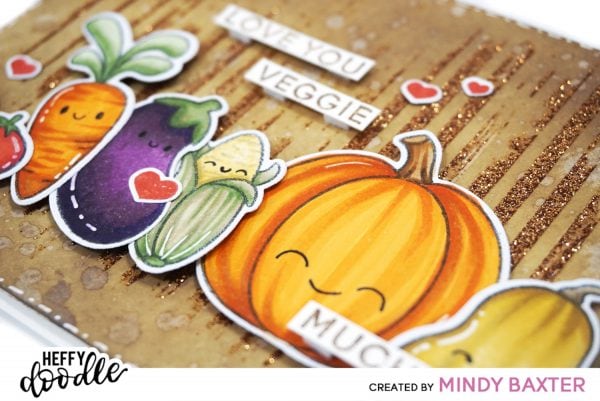
Coloring Smooth and Textured look with Copic Markers by Mindy Baxter

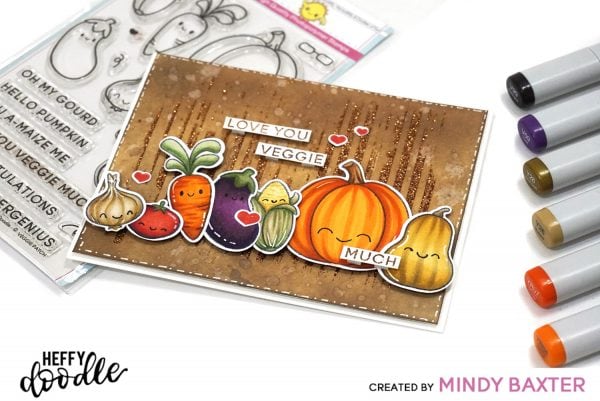
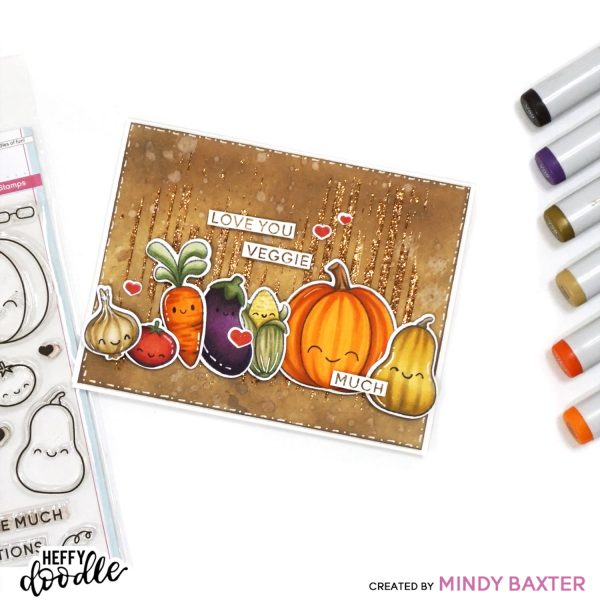
Hello crafty friends! It’s Mindy here and I’m so excited to share my first post with you today. I adore this stamp set I’m using, it’s called Veggie Patch. I stamped all my images in Memento Black ink and stamped onto Copic Xpress it Blending Card.
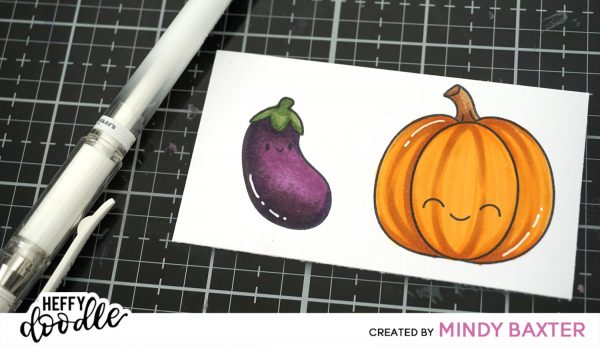
All of these little veggies have different textures to them. The squash, pumpkin, carrot, corn and onion all have texture and the eggplant and tomato have a smooth surface. I’m going to give you some step by step instructions on how to achieve these different looks using your Copic Markers.
Here’s a list of the Copic Color Combos I used on each of these little veggies.
Onion – E40, E41, E42, E43, Y26
Tomato – YG67, YG61, R29, R24, N5
Carrot – YR04, YR07, YR09, E33, YG61, YG67
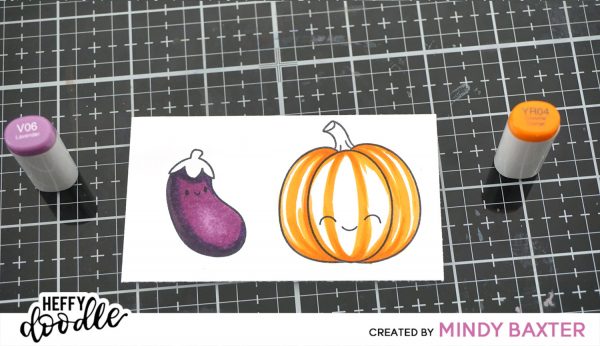
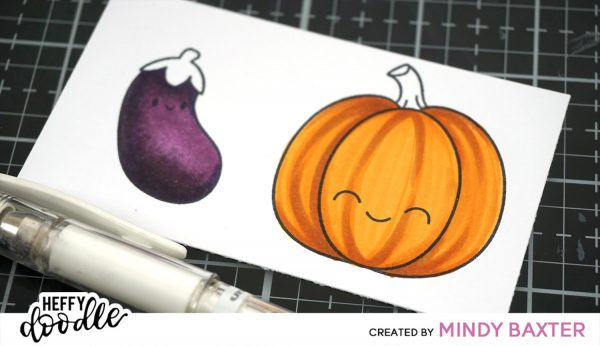
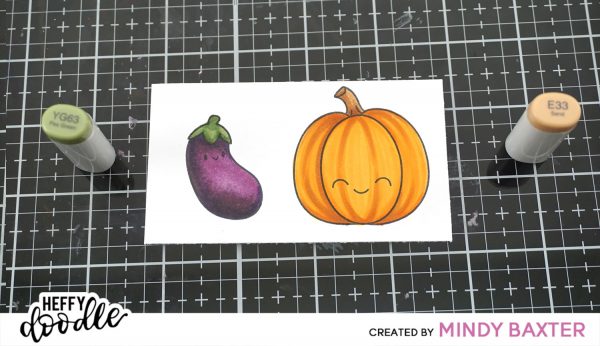
Eggplant – V99, V09, V06, YG61, YG67
Corn – Y21, Y26, Y28, YG61, YG63, YG67
Pumpkin – E33, E37, YR04, YR07, YR14
Squash – E33, Y21, Y26, Y28, E43, E41
Step by Step
Start by adding color to the shadowed area using the darkest color.
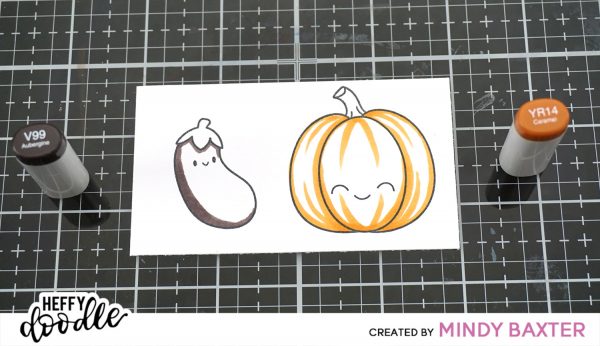
Come out a little bit more with the next color.
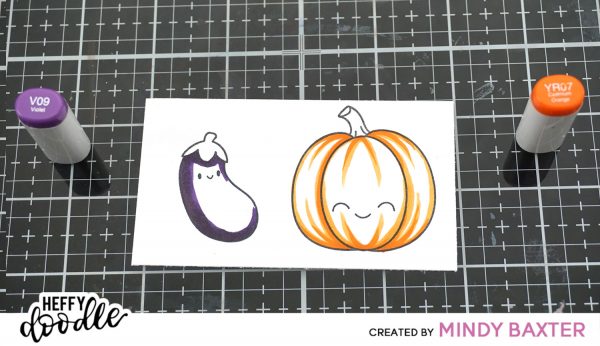
Next, you want to use the lightest color and drag out the darker colors. This will pull the darker color out a little and blend out the colors.
Now in the next photo you want to go back and deepen those shadows.

Then we are going to drag out the darker color again.

If you look in the above photo you will see I went outside the lines. In the photo below you will see I covered up my mistake by using my white gel pen. 🙂
Then, we’ll add a little shadow to the each of the stems.
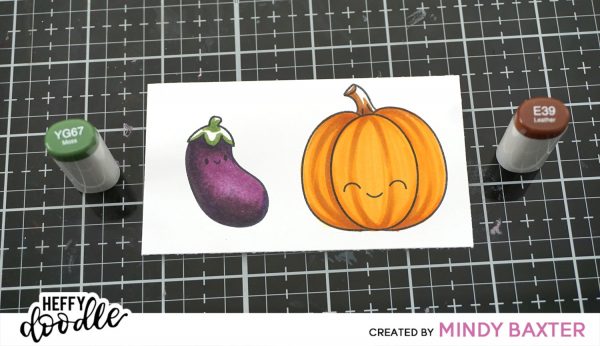
Next, fill in those stems.
In the photo below you will see where I added the white highlight.
I hope you enjoyed my step by step Copic tutorial. Now, to share how I did my background.
Step 1. Sponge my card front with Vintage Photo Distress Oxide Ink.
Step 2. Splatter some water on the background.
Step 3. Re-sponge some more Distress Oxide Vintage photo and let dry.
4. Then I used the Pinstripe Stencil and Nuvo Glitter Drops and added some scattered striped in the center of my background.
5. I used my white gel pen to add the details around the edge of the card.
6. I cut out my Veggies using the coordinating Veggie Patch Die Set and used some foam tape to attach to my card.
I hope you feel inspired to create after reading this post. Thank you so much for joining me today. Until next time Crafty Friends!
♥ Mindy
Let’s Connect on Social Media!
Sharon Gullikson
November 13, 2019 at 12:51 amMy gosh thrilling is amazing. I am going to look at your work again. So great!!
Sharon Gullikson
November 13, 2019 at 12:52 amMy gosh your coloring is amazing. I am going to look at your work again. So great!!