
Christmas Forest Card

Hello there! Claudia (@mrsclocards) here for another Color Me Happy Wednesday.
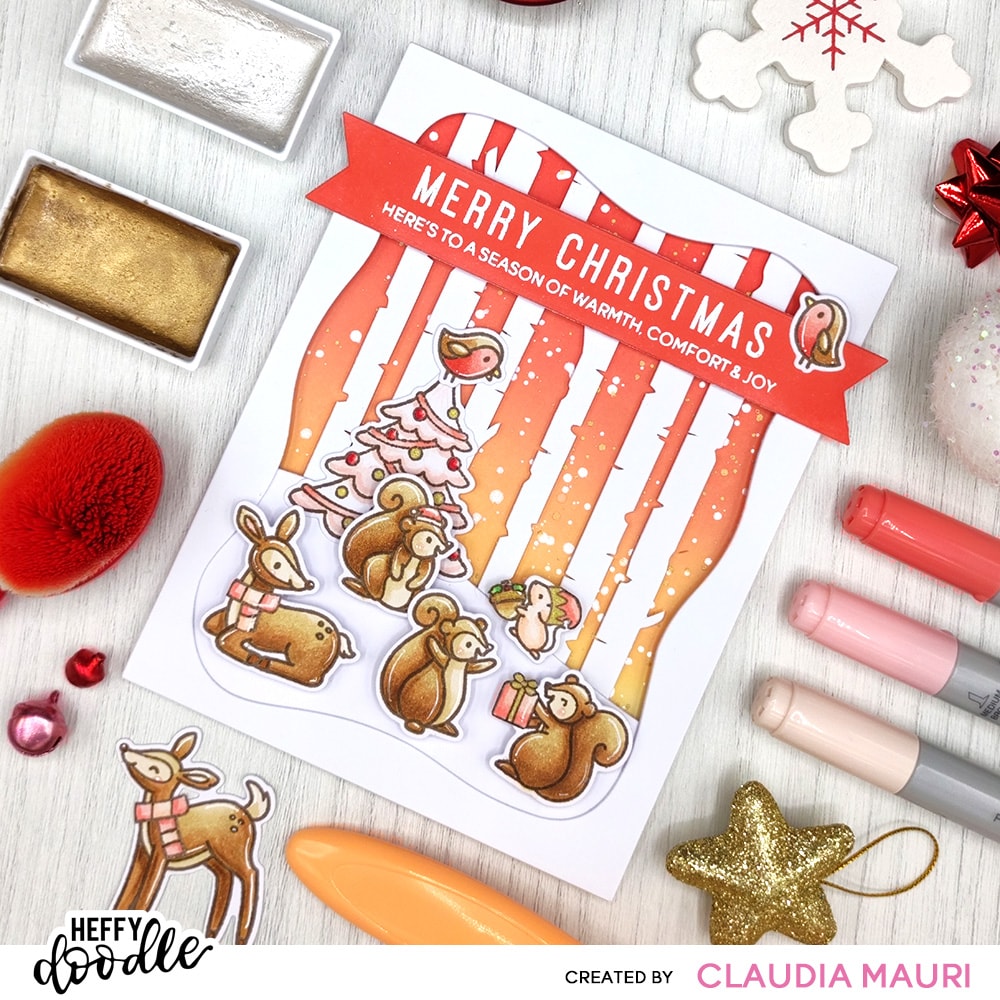
Christmas is approaching fast and I’m in need of tons of holiday cards: for today’s project, I once again stretched my supplies and made this Christmas card using-among the others-the Deer To Me stamps and dies set, the Nuts About You stamps and dies set, the Holiday Sentiment Duos stamp set and the Elm Street dies.
Curious to know where those background birches come from? Keep reading!
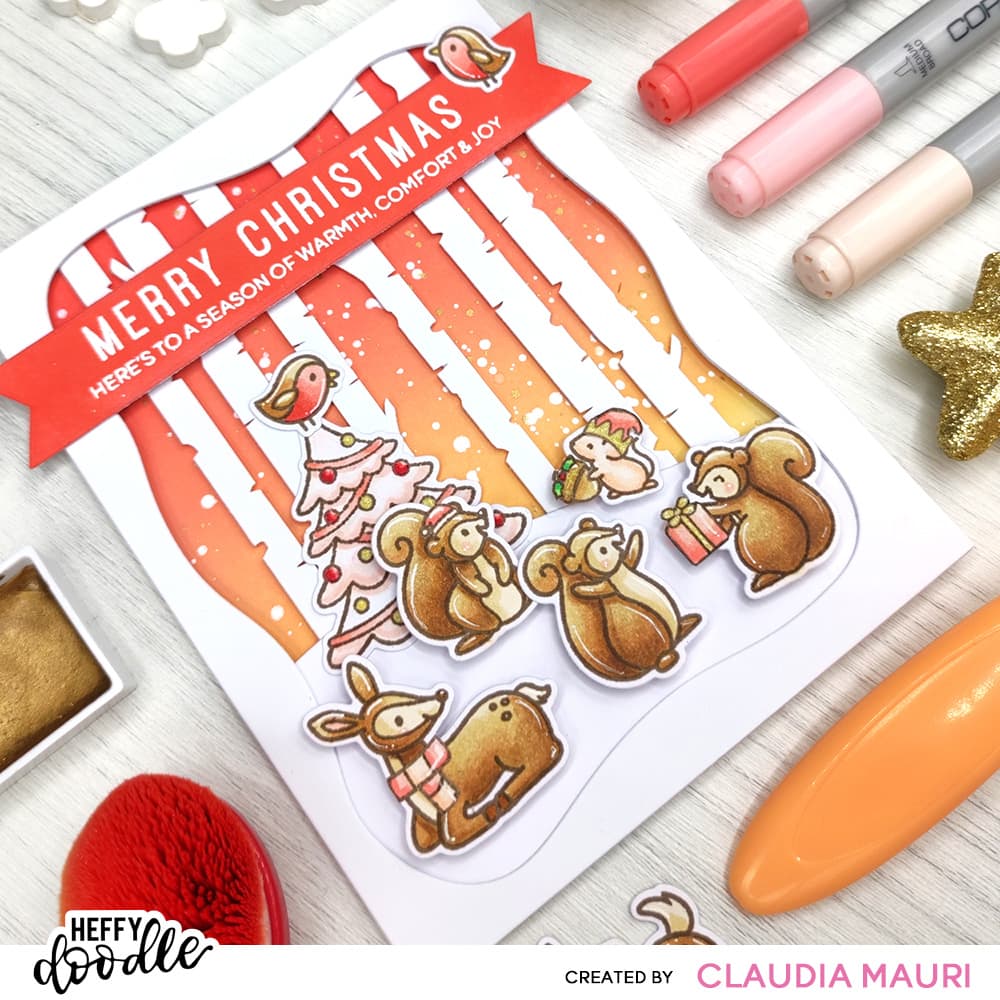
First of all, I stamped the images from the Deer To Me, Nuts About You and Wanna Build a Snowman stamp sets using Memento Rich Cocoa ink on a sheet of Heffy Doodle Alcohol Marker Friendly Cardstock. For the coloring I used Copic Markers in the following colors:
– DEER and SQUIRRELS: E31, E33, E35, E37, R20
– MOUSE: E00, E02
– BIRDS: E31, E33, E35, R20, R22, R24
– PRESENT: R000, R20, R22
– CHRISTMAS TREE: E00, E02, R20, R22, R24
I used the coordinating dies to cut all the images, then I decided to intensify the shadows on the animals using a brown colored pencil; after that, I added highlights and sparkle with a white and a gold gen pen. I fussy cut all the little images that were supposed to end up over the critters and I glued them in place.
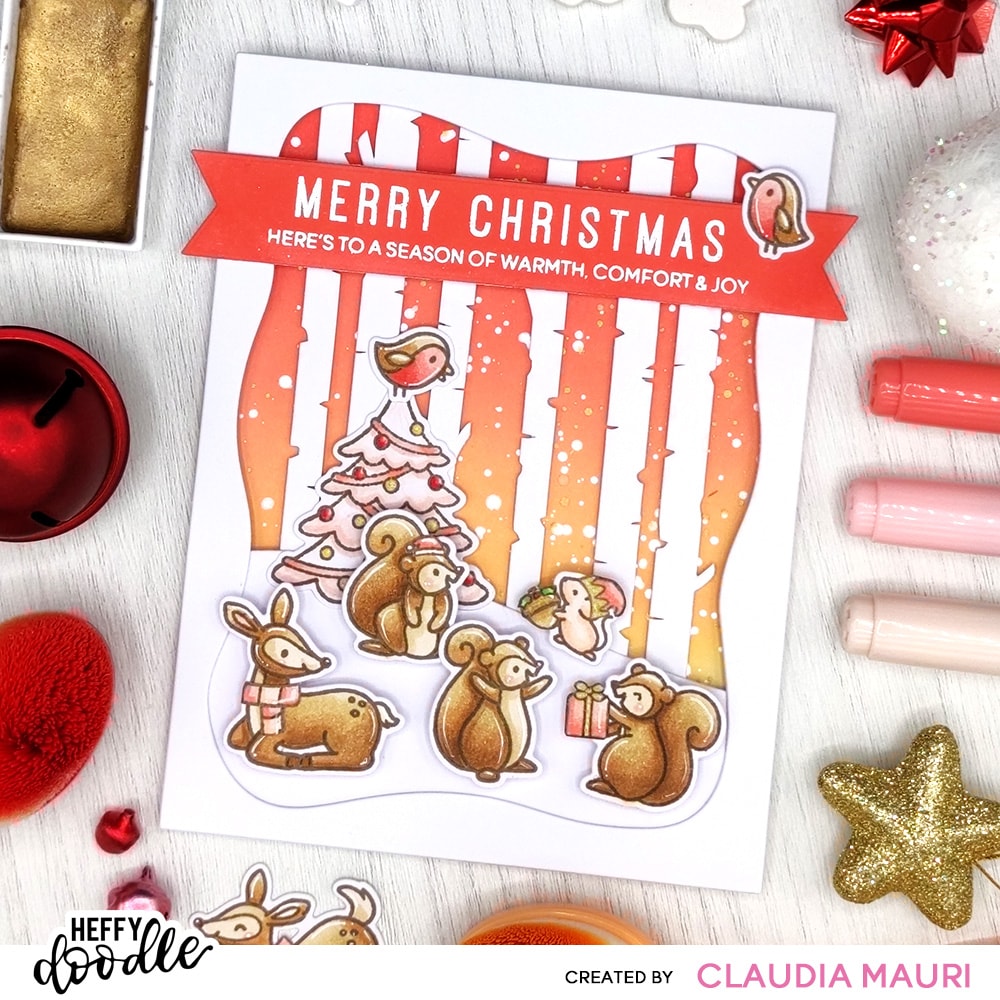
For the background, I took a piece of Heffy Doodle white cardstock and I ink blended it with Distress Oxide Abandoned Coral and Dried Marigold, then I added splatters of white and gold Gansai Tambi watercolors-I later die cut it using the biggest Imperial Stitched Rectangles die. While it was drying, I die cut the Rolling Hills Landscape die from a piece of white cardstock and I used the sky part as a snow bank for my background. I also die cut the frame from the Elm Street die set three times, then I glued them together for making a sturdy cover frame.
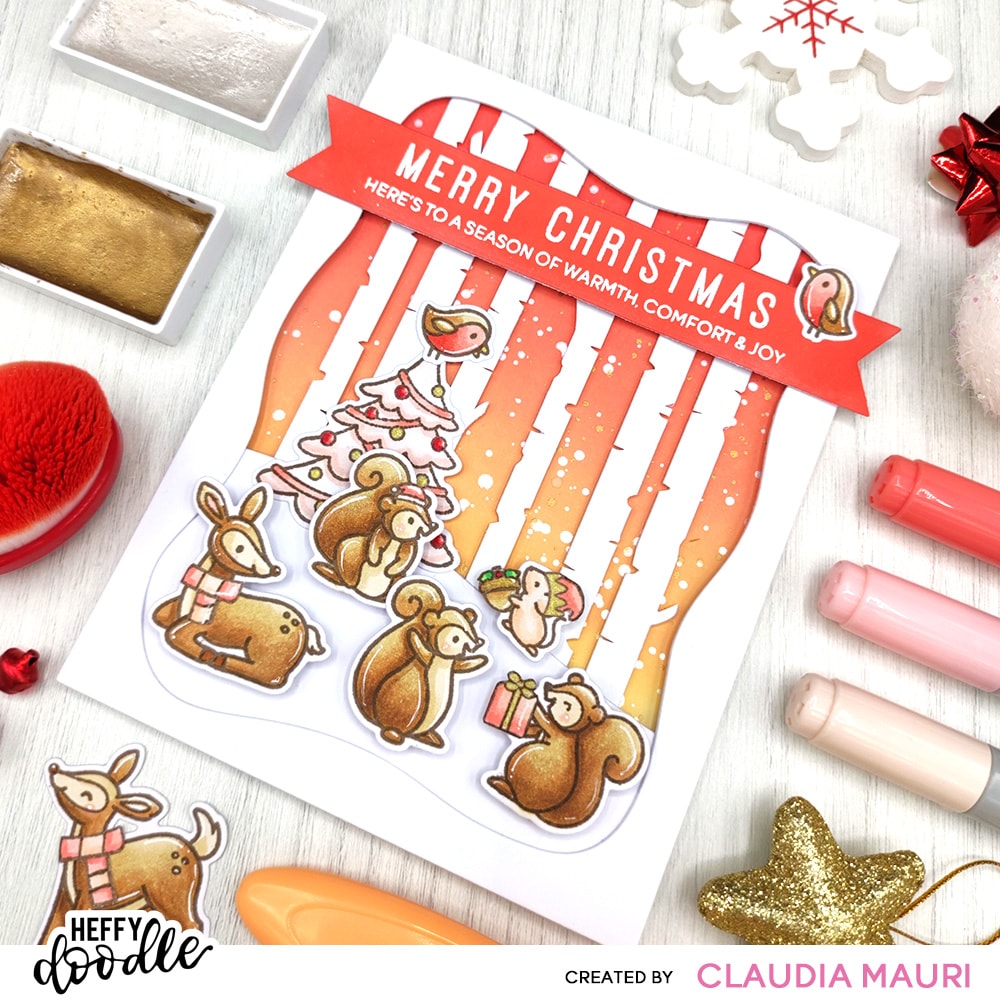
I really wanted to set my scene in the woods, but I didn’t want to use colored trees, so I created the birches forest by die cutting several “plain” trees from the Deer To Me coordinating dies set and adding little cuts here and there using my scissors. I also divided a couple of the biggest ones in two for having smaller birches. That really gives the background a fantastic magical and wintry look!
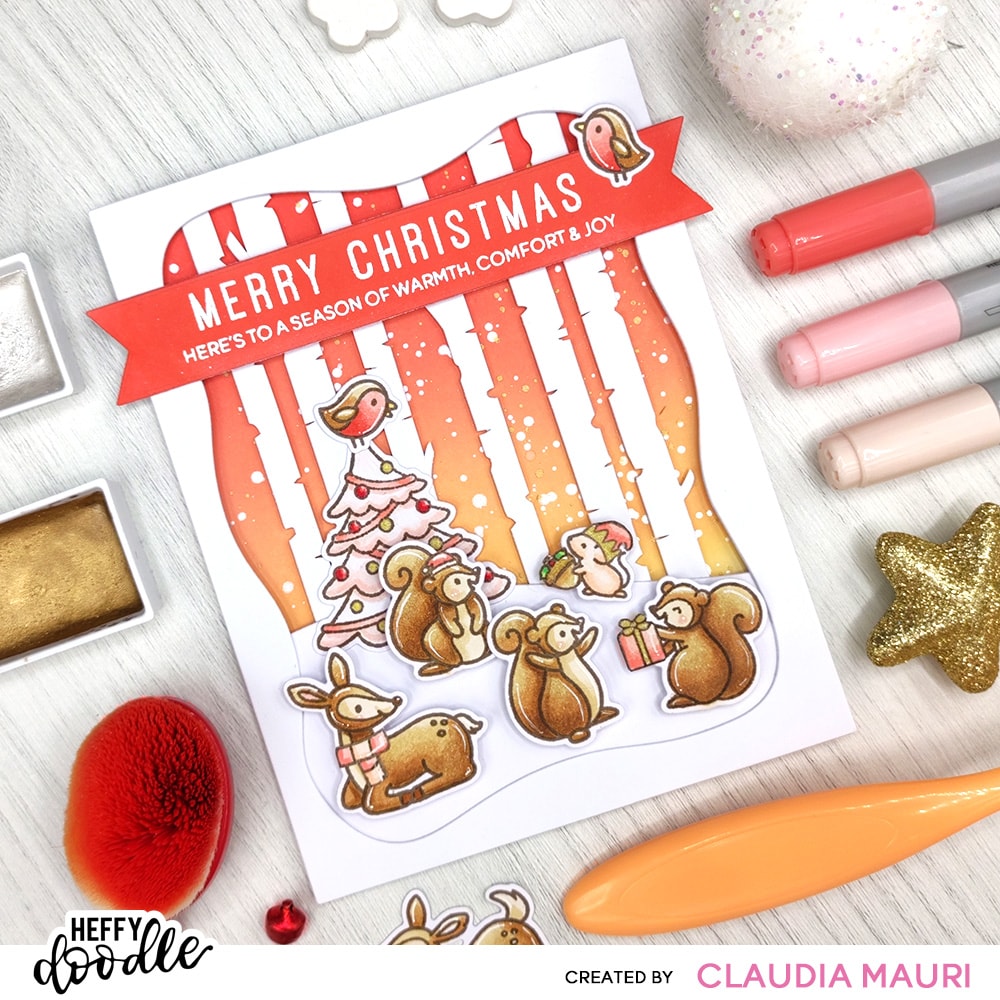
I assembled the background and the front part using foam tape and foam strips and I added the images to create the holiday scene. For the sentiment, I ink blended a piece of cardstock with Distress Oxide Abandoned Coral and I heat embossed the phrase from the Holiday Sentiment Duos stamp set using white embossing powder. Finally, I die cut it with a More Strips of Ease similar die and I added it to the card.
Happy crafting!
Claudia