
Christmas cards – Warm Hugs & Elfish Antics
Hello everyone!
My name is Alexandra I’m so excited to be guest designing for Heffy Doodle today! Christmas is coming! I love this beautiful time of the year! This is a wonderful season when all cardmakers create magical cards for family, friends and colleagues.
I have 2 holiday cards to share with you featuring the new Warm Hugs Stamp Set (HFD|SSS) and Elfish Antics stamp set (HFD|SSS) You can use these wonderful sets for any occasion especially birthdays that fall in winter! I used these sets as digital stamps for both cards.
For the first card I started to create the northern sky using Distress inks: Tumbled glass, Shaded lilac, Spun sugar and Squeezed lemonade.

Then I drew an ice-hole with the Copic markers. (Many thanks to Sandy’s Allnock tutorials) After that I die cut all images using my scissors. I glued the images to the background and colored them in with my markers, then I added shades for the ice-house and for the people.

Next I stamped the “Winter wishes” sentiment. To finish off my card I added tiny stars for the sky and some glitter highlights using “Wink of stella” Brush pen.

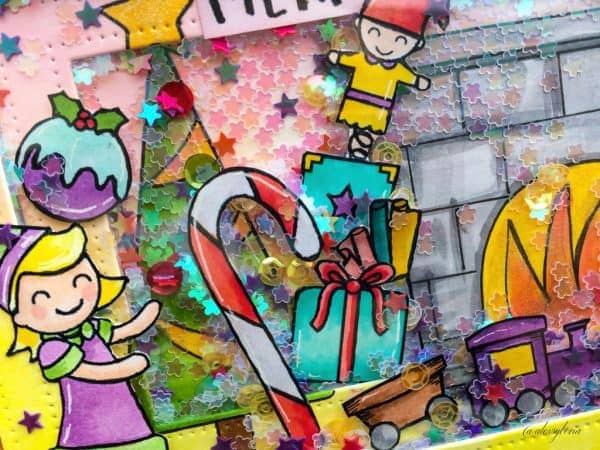
For the second card I decided to make a shaker. I love the extra touch of an interactive card! To start off my card I die cut all images using scissors and colored them in with the Copic markers.
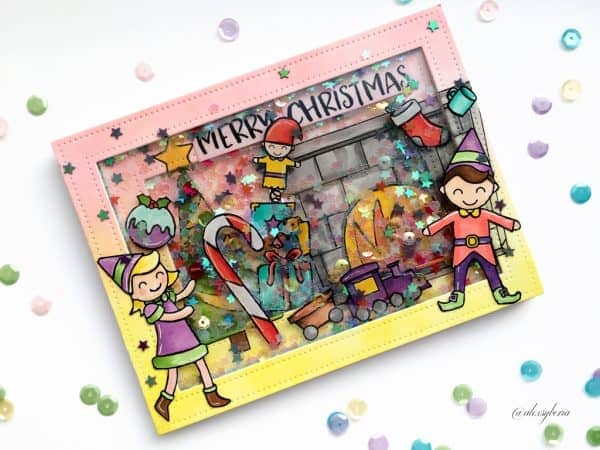
I made some ink blending on a piece of cardstock with Distress inks: I used Spun sugar and Squeezed lemonade. I wanted to create a cozy Christmas scene. So I decided to draw a fireplace using my markers. Then I stamped the Christmas tree by MFT and colored in the image with markers as well. Next I die cut two frames and a rectangle from this cardstock using the Averey Elle Double Pierced Rectangles dies. My idea was to make “a volume” inside of the shaker window.
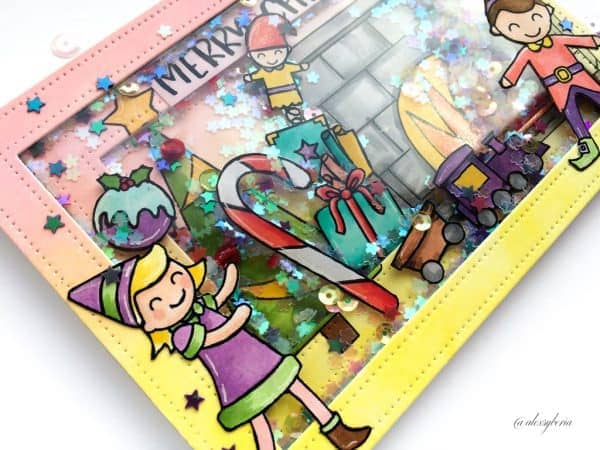
And the second step was the making of the scene. At first I glued the rectangle to the centre of the card base and then I adhered the first frame using foam tape. And the second frame I attached to the acetate piece to make a window shaker. Once all the images were ready I adhered them to the card base using foam tape and glue as well. Then I added sentiments and made accents for some images using “Wink of stella” pen. To finish off the card I applied foam tape to the back of the second frame and filled the shaker with sequins and confetti, removed the backing paper and adhered the shaker window to the base scene to complete the design.Some images and sequins I attached to the front of the shaker window.
That is all! 🙂
Thank you for stopping by and have a wonderful day!
Marjorie Dumontier
November 15, 2017 at 12:26 pmThat’s such an a amazing shaker card ! The volume inside the shaker window is really cool !