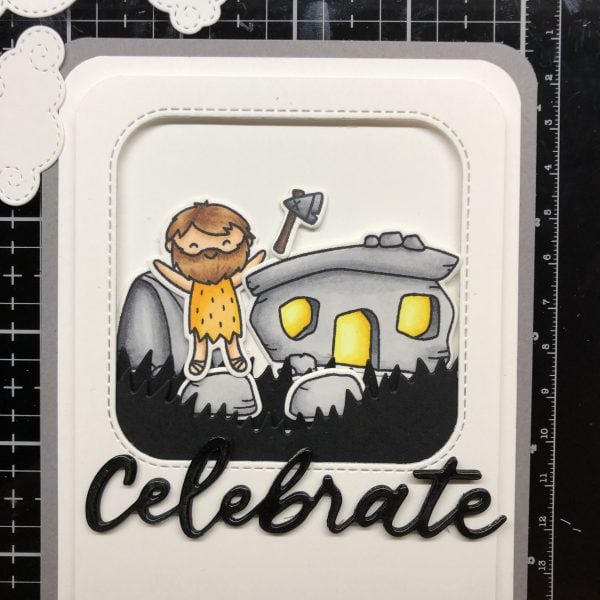
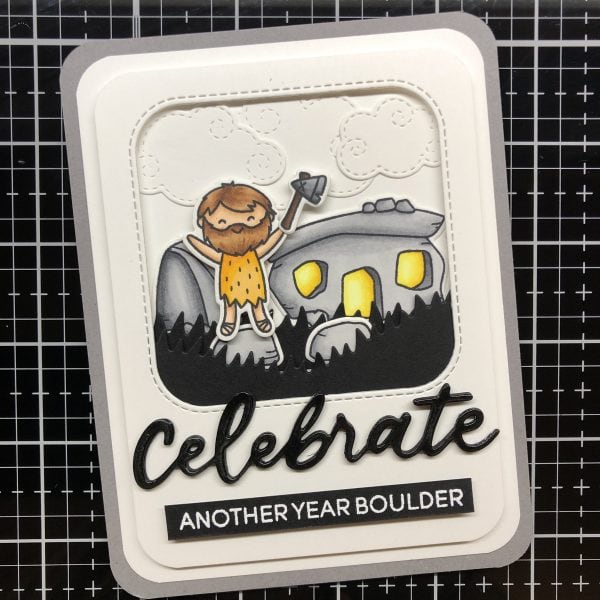
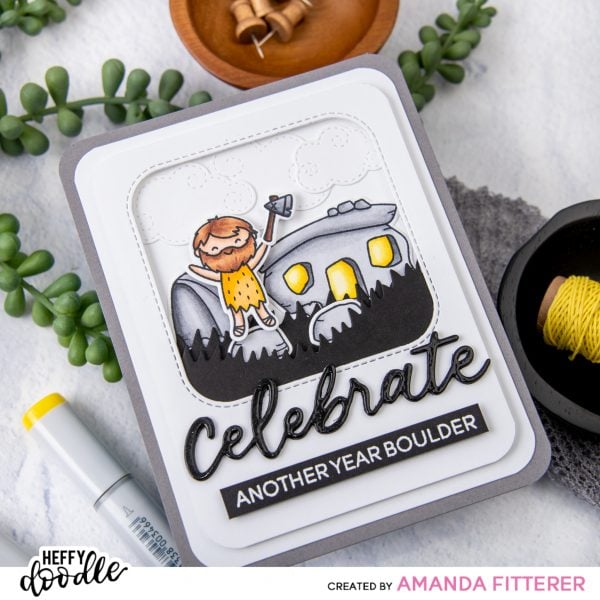
Cardmaking 101 – Celebrate Another Year Boulder!

Hey guys! Amanda Fitterer here!
Welcome to Cardmaking 101! I’m super excited to get into the details of this Prehistoric Pals project!
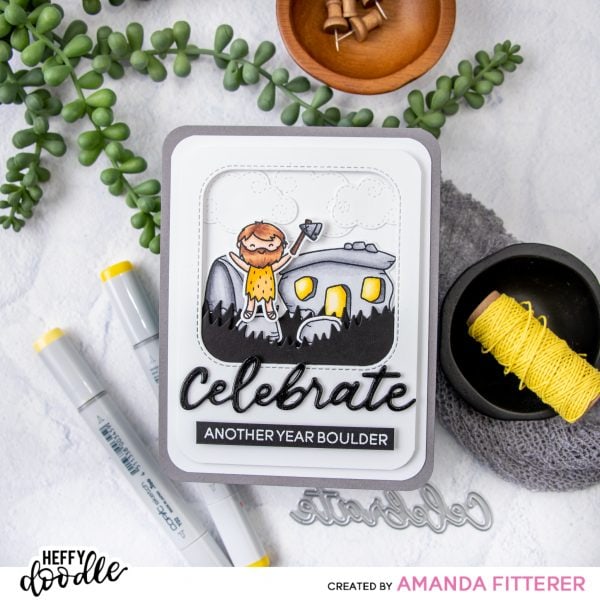

Sometimes, a simple color palette is the way to go if you’re feeling overwhelmed or uninspired. Choose 1 or 2 colors and stick with them for your entire project. I chose yellow and yellow/orange to be my colors for this project. You can always add any neutrals (grays, blacks, whites, browns, and skin tones).
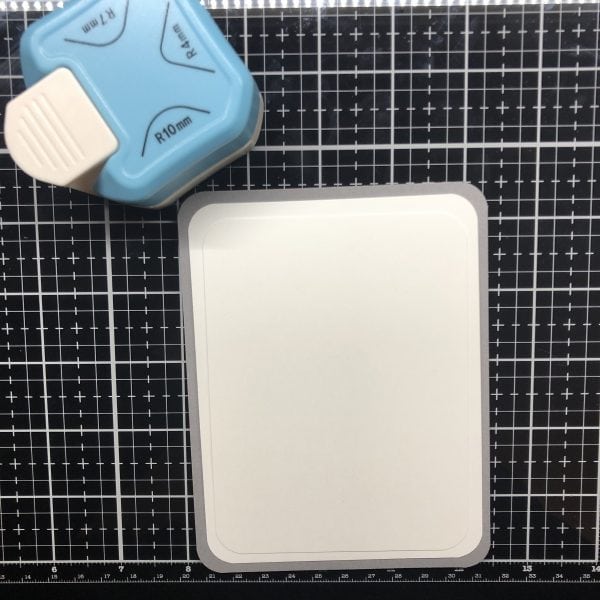
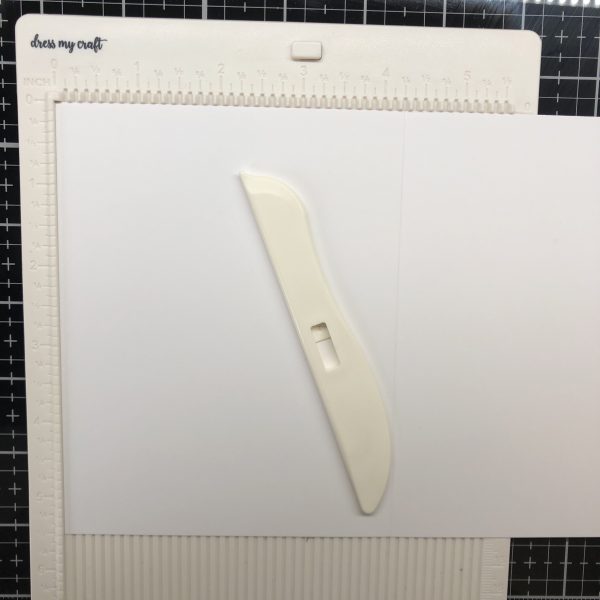
I’m making an A2 size card which is 4.25″ x 5.5″. This is a very common size that most artists use. As you can see in the photo below, I cut a piece of Holy Mackerel cardstock down to 4.25″ x 5.5″. I then cut a piece of Neenah Solar White cardstock down to 4″ x 5.25″. Then, I cut 1 more piece of the Solar White cardstock to 3.75″ x 5″. I rounded the corners using the 10mm side of this 3-in-1 Corner Punch. Creating layers like this can really make your card look more dimensional and professional!
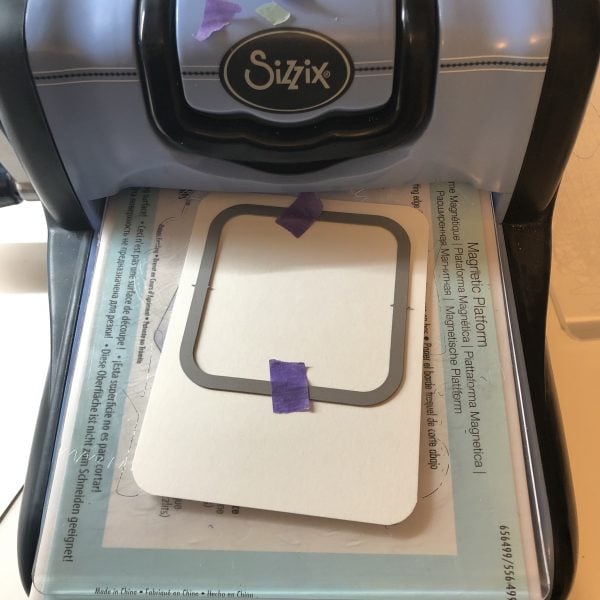
Using some Purple Tape, I secured my die to my smallest piece of white card stock. I wanted to leave room at the bottom for my sentiment, so I placed the die towards the top. I ran it through my die cutting machine.
Now, I’m ready to get into the real fun stuff! Stamping and coloring!
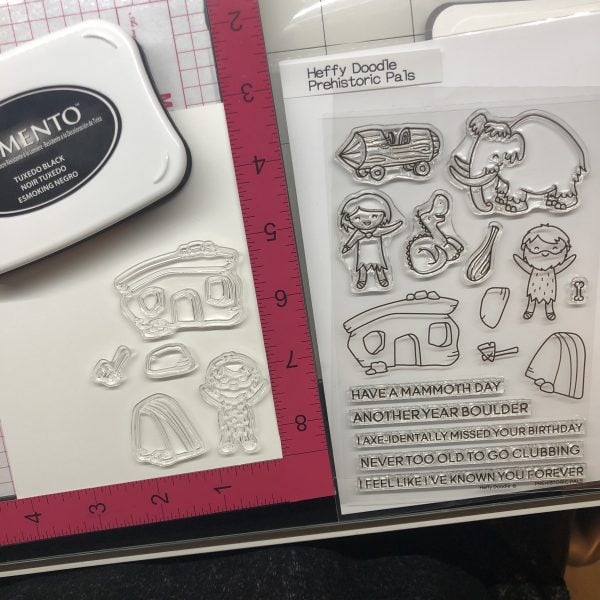
I used a few of the stamps from the Prehistoric Pals stamp set. I placed a new piece of Neenah Solar White Cardstock on my MISTI stamping platform. You don’t need a stamping platform, but it does make it easier to get crisper and cleaner stamped images. You could also use a clear acrylic block.
I always use Memento Tuxedo Black ink. It is my go-to ink pad. For this project, I am going to color my images with Copic markers and this stamp pad is very Copic friendly. This means it won’t start to bleed once I start adding color.
I lay my stamps out randomly because I will cut them out later with my coordinating dies.
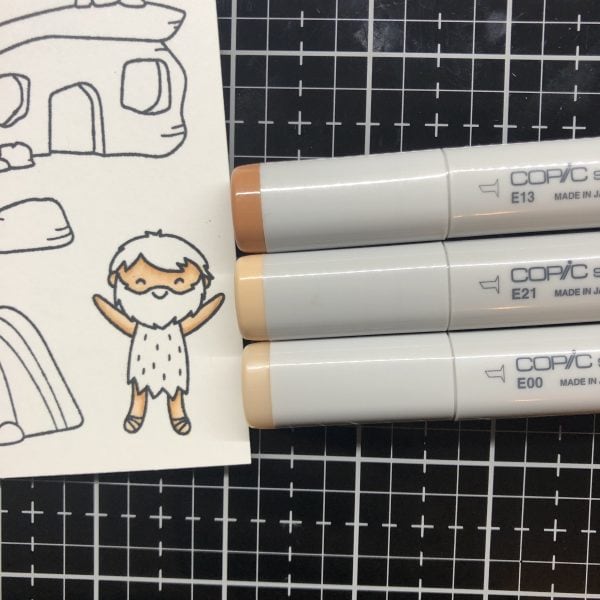
Color first – then die cut! It’s much easier to color your stamped images on a bigger piece of paper than it is to color in tiny pieces of paper! Trust me!
For the skin of my little man, I used E00, E21, and E13.
I started by coloring all his skin with E00. Then, I used E21 around the shadow areas. I used E13 next for the darkest shadow. Then, I blended all the colors together with E00 again. (I used this process with all the images below, as well.)
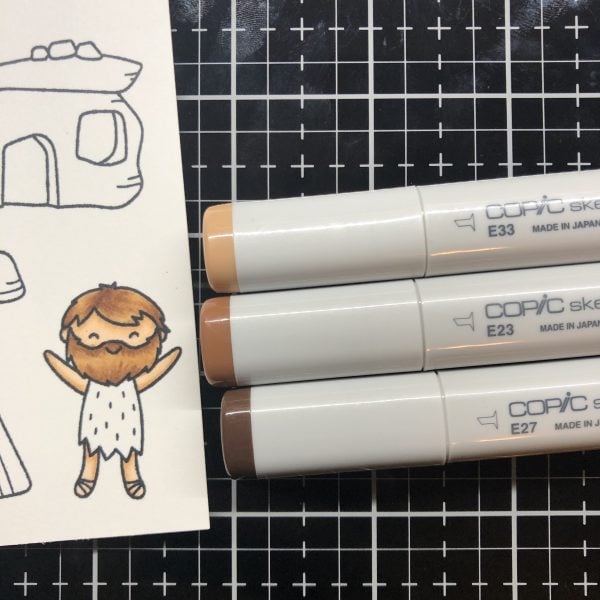
For his hair, I used E33, E23, and E27. I used more of a “flicking” motion on his hair to try to mimic hair strands.
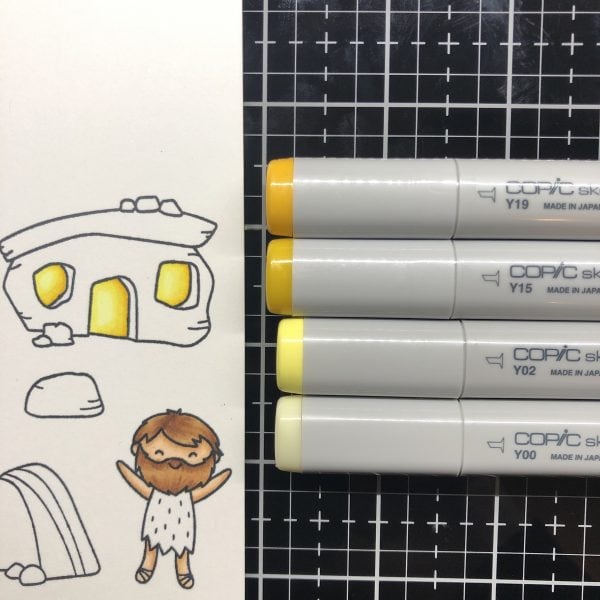
I used Y00, Y02, Y15, and Y19 for the windows and door openings.
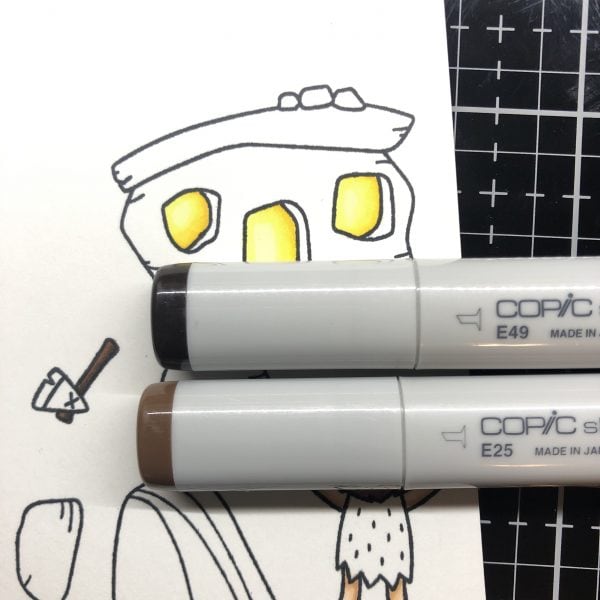
For his ax handle, I used E25 and E49.
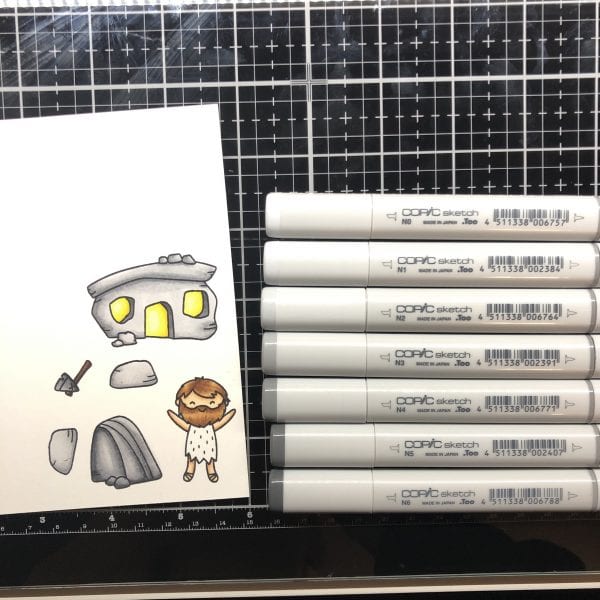
For his house, ax, and boulders, I used Neutral Grays. I used N0, N1, N2, N3, N4, N5, and N6. I only used N6 on the darkest boulder and the ax. If you don’t have all the N’s, you can just use the odds or the evens (i.e. N1, N3, N5).
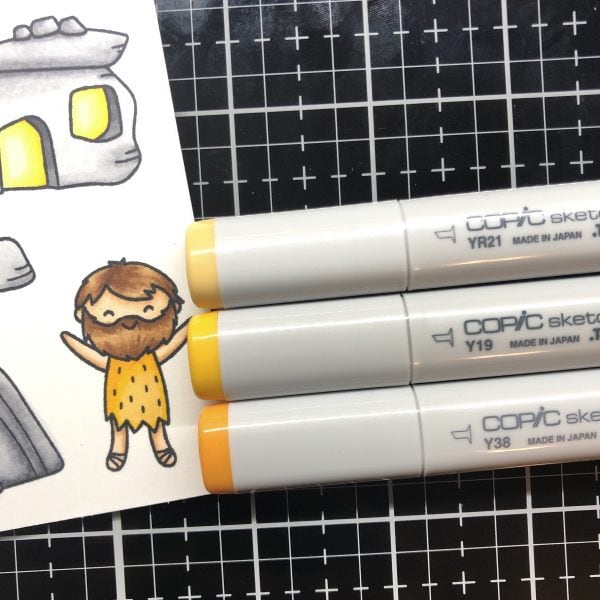
And finally, for his cute caveman outfit, I used YR21, Y19, and Y38.
After they were all colored in, I used my coordinating Prehistoric Pals dies to cut them out with my die cut machine. As I did earlier, I used Purple Tape to ensure those tiny dies didn’t shift at all and ruin all the beautiful coloring!
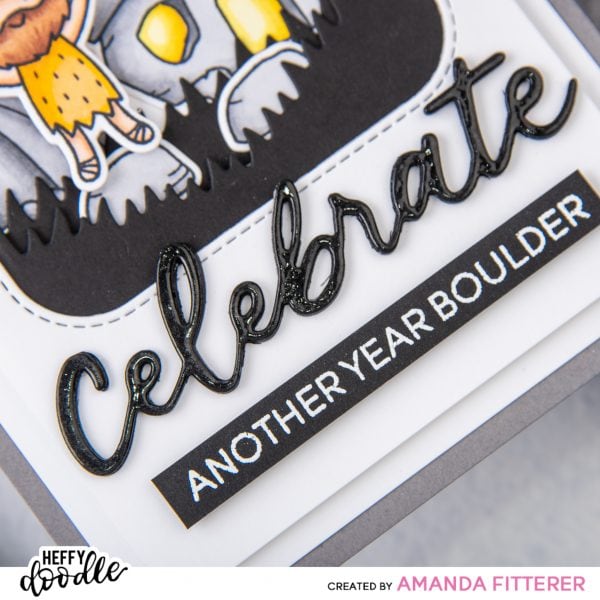
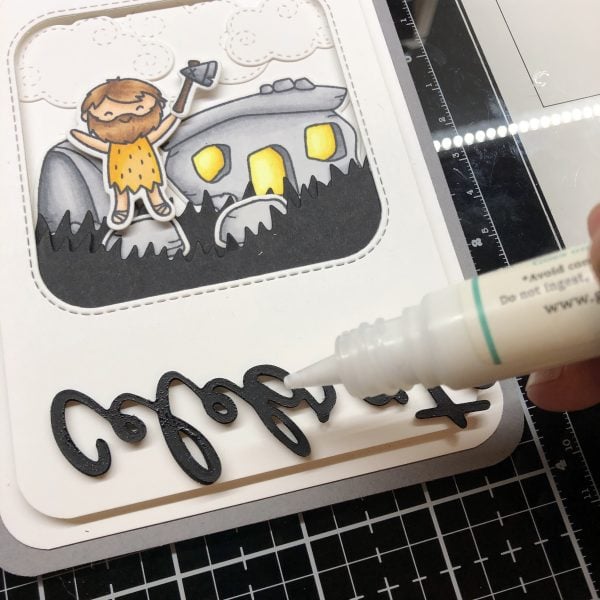
Next, I’m going to show you how to make the dimensional, shiny “Celebrate”. This is a super cool process!
I die cut Celebrate 4 times in Oreo Crunch cardstock.

I glued them together with a glue pen one on top of the other.
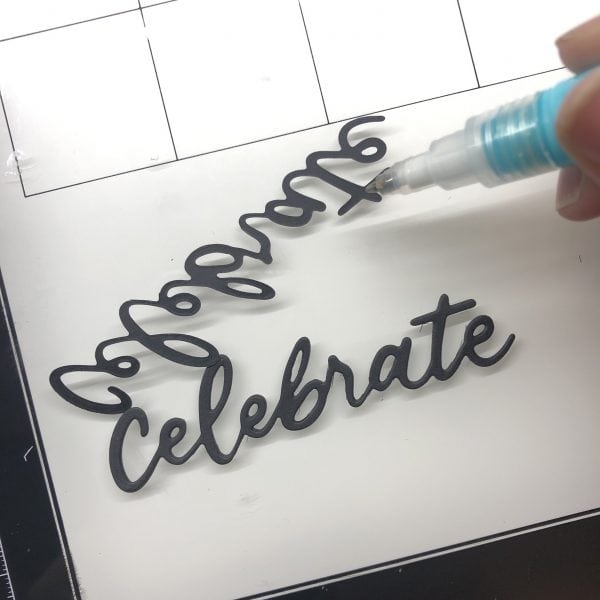
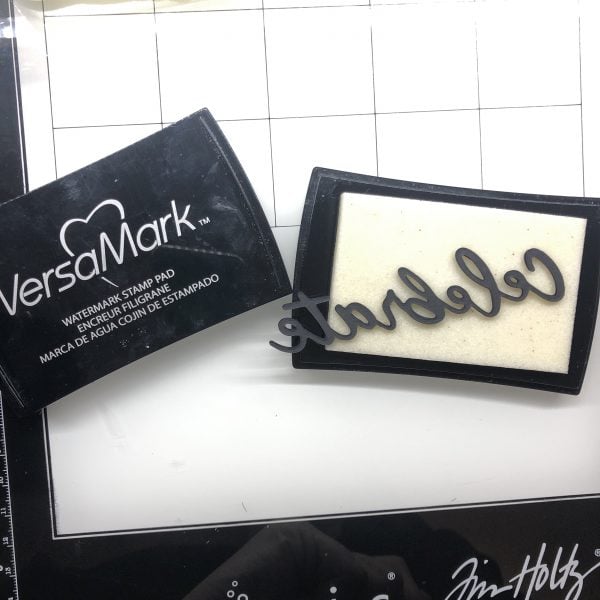
I put my Celebrate on top of a Versamark Watermark Stamp Pad. This stamp pad stamps clear and is sticky. It will hold embossing powder.
I pushed the die cut down using my fingers, making sure to cover the entire front of the word with ink.
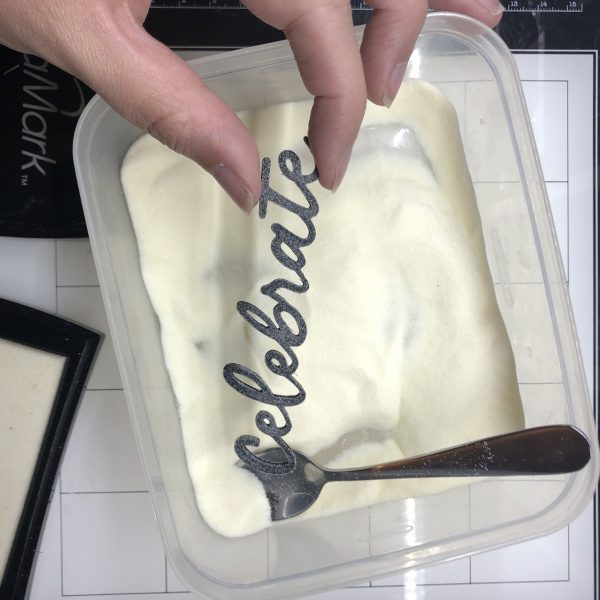
I covered it heavily with clear embossing powder.
I got out my handy dandy tweezers so I didn’t burn my hand with the heat gun! Also, they keep me from removing any embossing powder with my fingers!
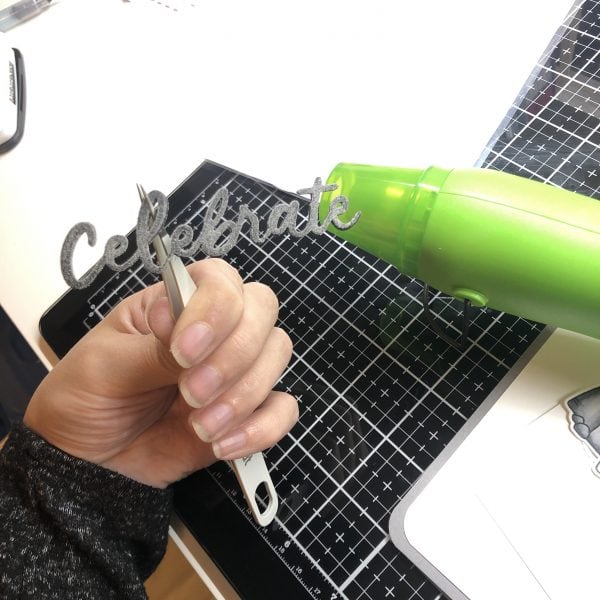
(Not pictured, I used my heat gun and melted all the embossing powder. If you don’t get a good shine the first time, add more embossing powder before it’s cooled and do it again!)
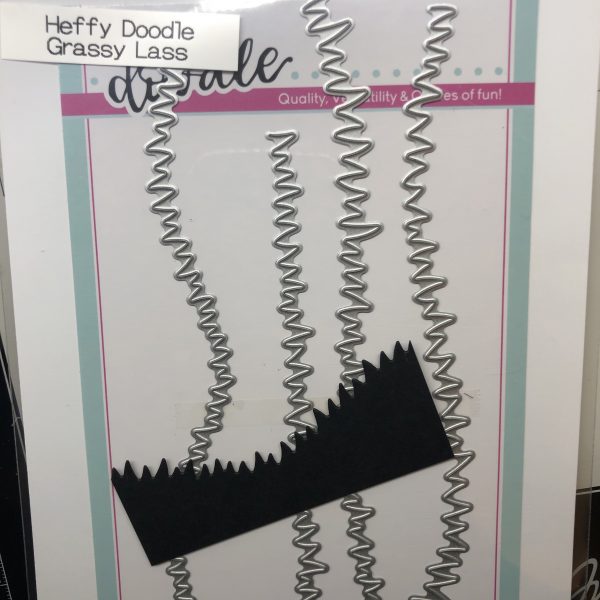
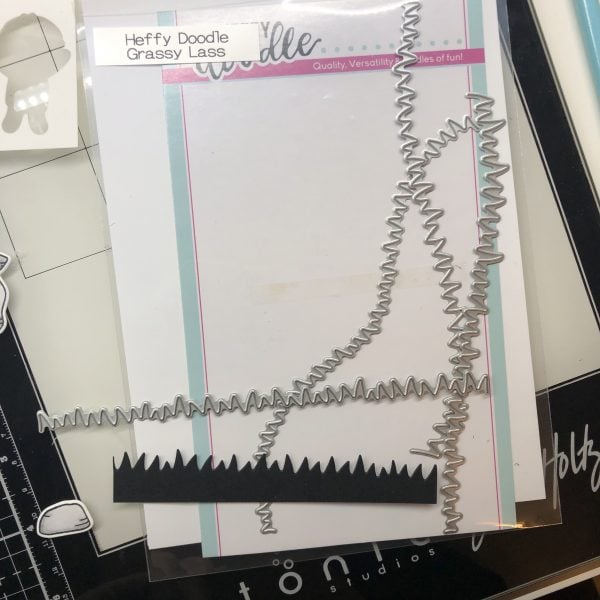
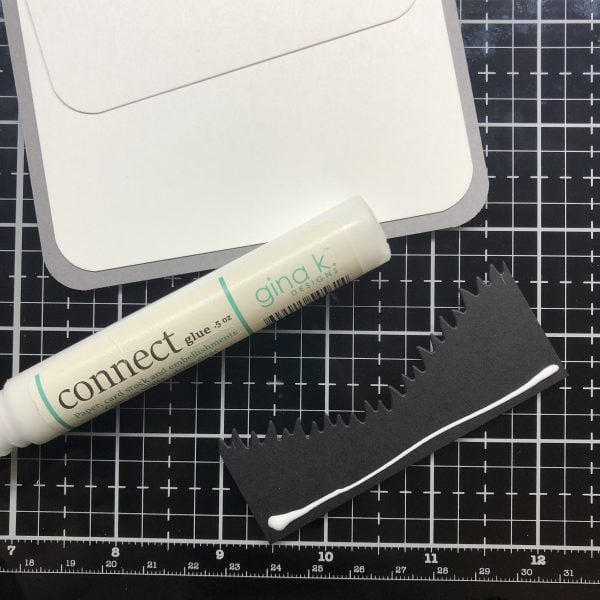
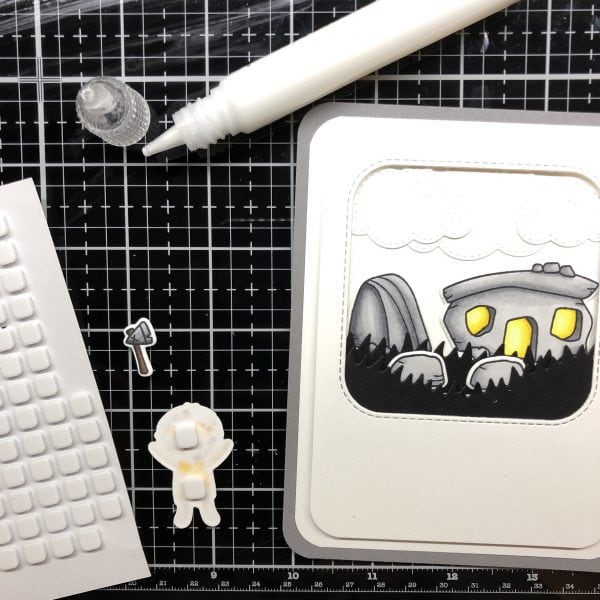
Now to work on my scene! I wanted to stick with my simple color palette, so I used my Oreo Crunch cardstock for grass. I used the Grassy Lass dies.
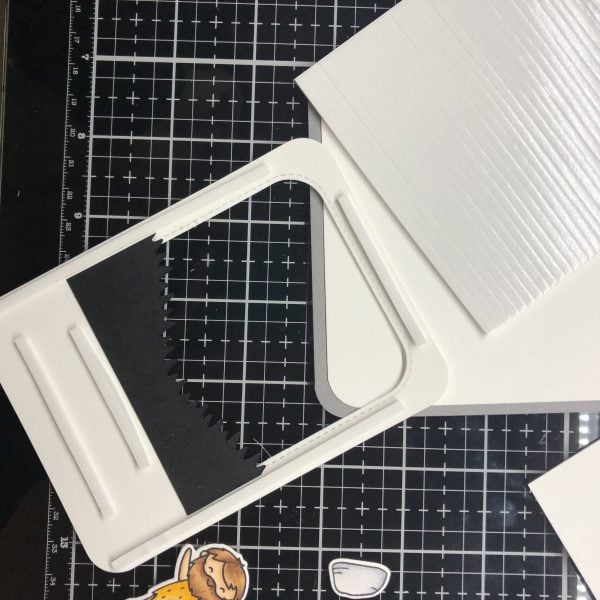
I glued the smaller grass to the front of the larger grass. Then I glued my big piece to the card front.
I used Darice 3D foam adhesive strips on the back of my card front and then adhered it to my background cardstock.
Next, I cut out my cute Swirly Clouds.

I laid out where I was going to glue everything, to make sure it looked ok before I started adhering them to the card.
I used glue for my clouds, house and boulders because I wanted them to stay in the background. On the man and his ax, I used 3D foam squares. I had to cut a square in half to get it small enough to fit behind the ax.
I also used glue for my “Celebrate” sentiment.
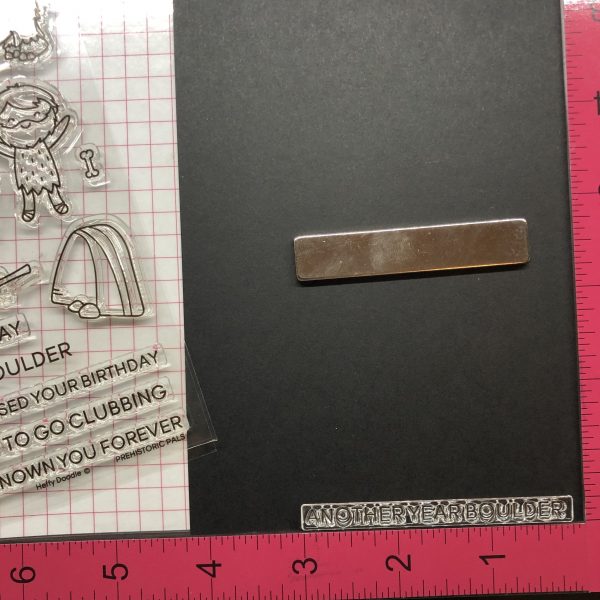
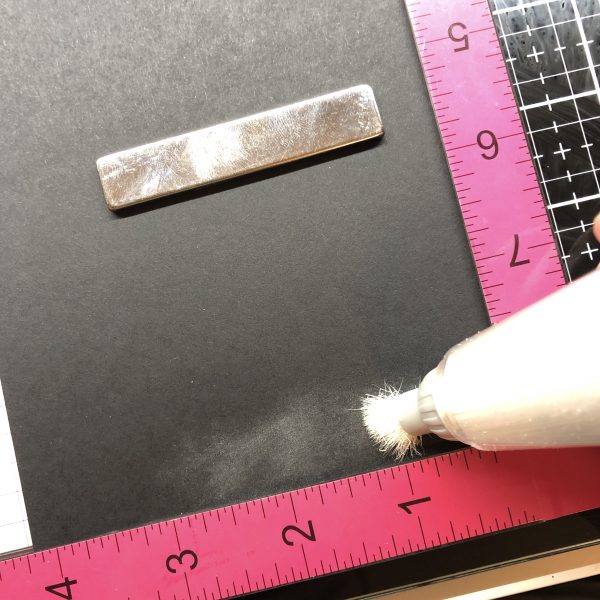
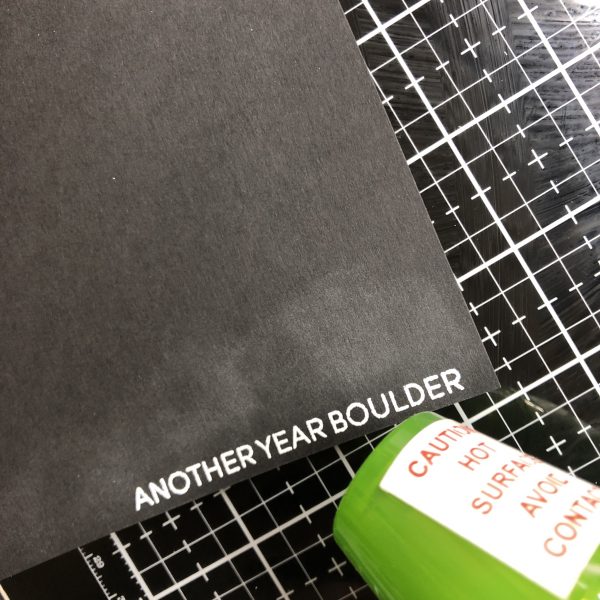
Now for the final piece! The “ANOTHER YEAR BOULDER” sentiment strip.
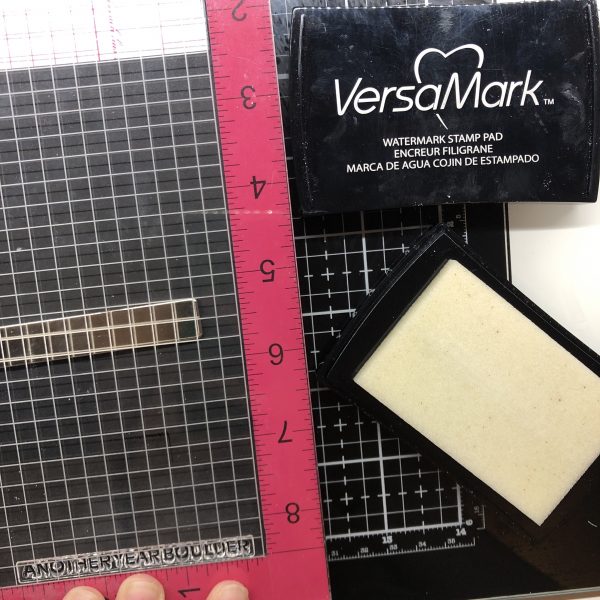
I placed the sentiment on my Oreo Crunch cardstock. I made it straight across the bottom. This will make it easy to cut into a straight strip.
I used an anti-static tool to make sure the embossing powder only sticks to the ink. This will help the sentiment look more crisp and clean.
I stamped with VersaMark Watermark.
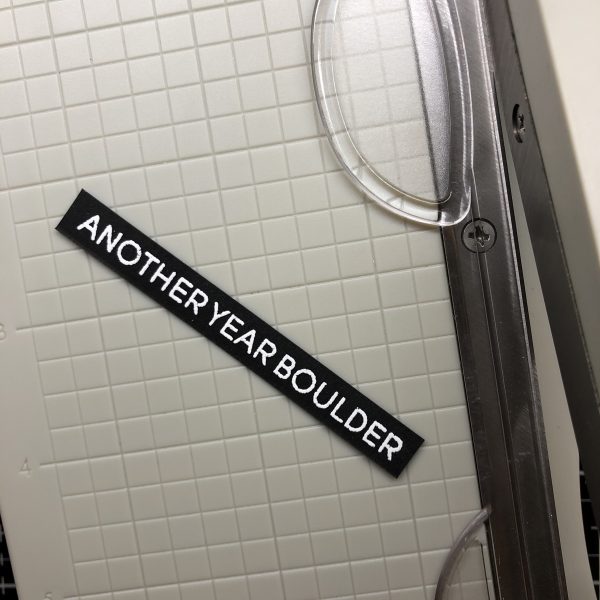
I used Ultra Fine white embossing powder.
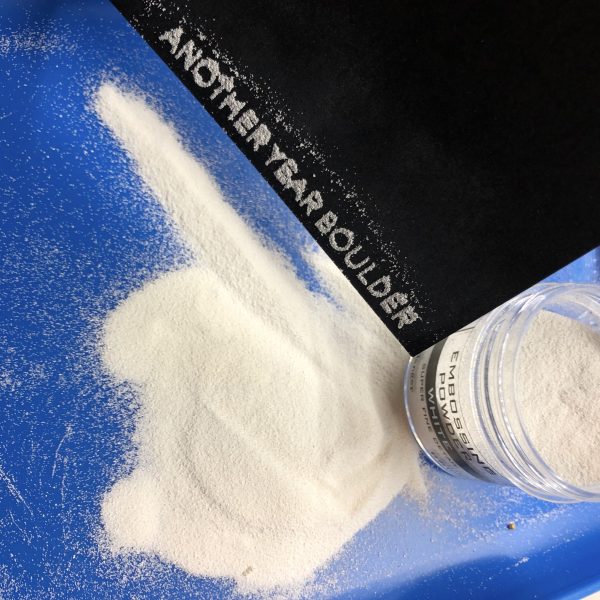
I tapped the cardstock to get all the loose particles off. For any stubborn pieces, I use a paintbrush to brush them off.
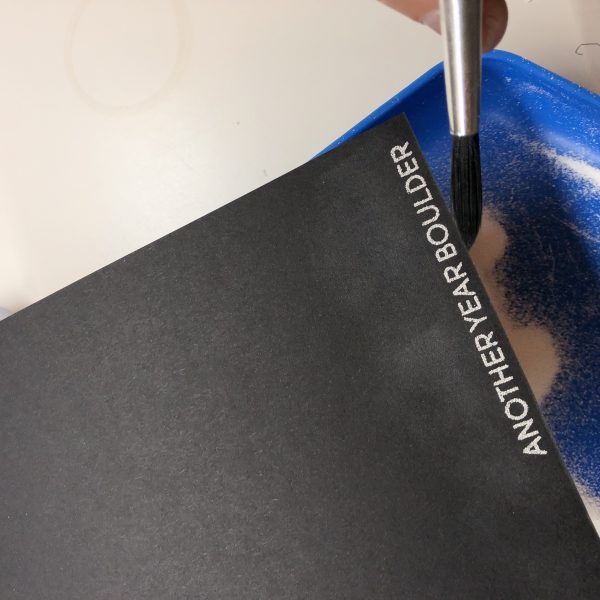
I used my heat gun to emboss it. I heat the back side first and then the front. This keeps the gun from blowing away all the powder.
I cut my strip out with a paper trimmer, but you could also use the wonderful Strips Of Ease dies which make sentiment strips really easy peasy!
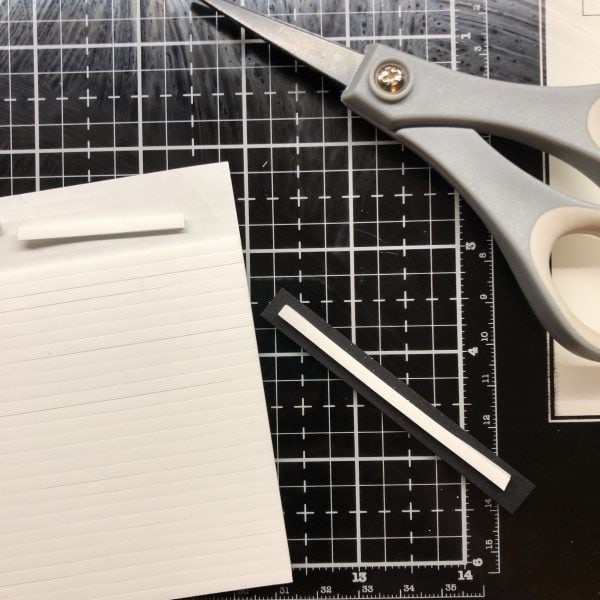
I wanted my sentiment to have some dimension, so I used a 3D foam strip to adhere it to my card.
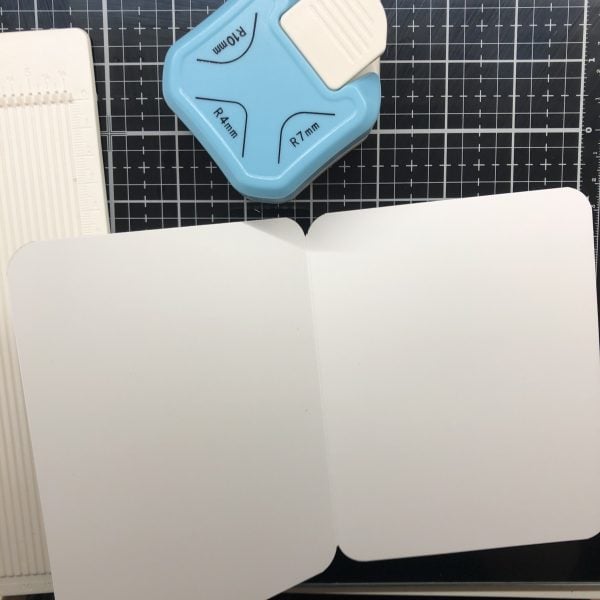
For the actual card, I used a piece of white cardstock cut to 5.5″ x 8.5″. I scored it at 4.25″ and then folded it.
Using my 3-in-1 Corner punch, I rounded each corner with the 10mm side.
Then, I used a tape runner to adhere my card front to the card! Voila! Done!
Here’s another photo of the finished card!
Thank you so much for reading! I hope it was a helpful blog post!
Until next time…
Xoxo, Amanda
Products used from Heffy Doodle:
Prehistoric Pals Stamps and Dies
Oreo Crunch and Holy Mackerel Cardstock
Please note that there may be affiliate links in this blog post, but there’s no additional cost to you when clicking these links! You’re just helping me out!