You Are My Rainbow Magical Shaker Card

Hey there! It’s Claudia (@mrsclocards) here and today I’m making it rain here on the Heffy Doodle blog!
I made Magical Rain shaker cards in the past but I always wanted to make one with rainbow beads. When I saw the Quack Me Up stamps I knew I finally found the right stamp set for doing it!
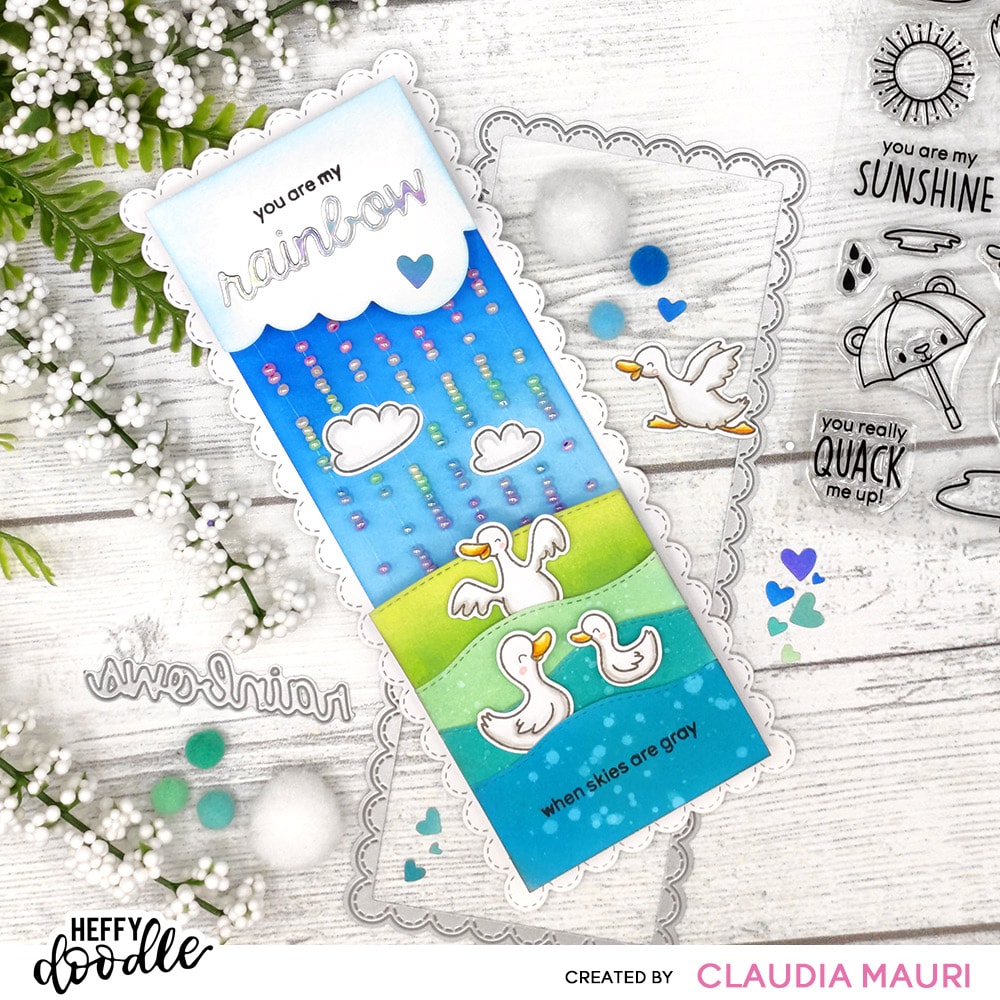
The process may seem long but, in fact, it probably took me less time that usual since there’s not much coloring here. Using beads always takes me back to my childhood days and that’s probably the main reason why I love using them!
First of all, I threaded the seed beads (I bought these at Flying Tiger several years ago) on invisible nylon thread using a very thin needle: I like to do this in advance to be sure I won’t waste time during the cardmaking process.
Then, I stamped the images from Quack Me Up and colored them super simply with Copic Markers, then I used the coordinating dies to cut them out.
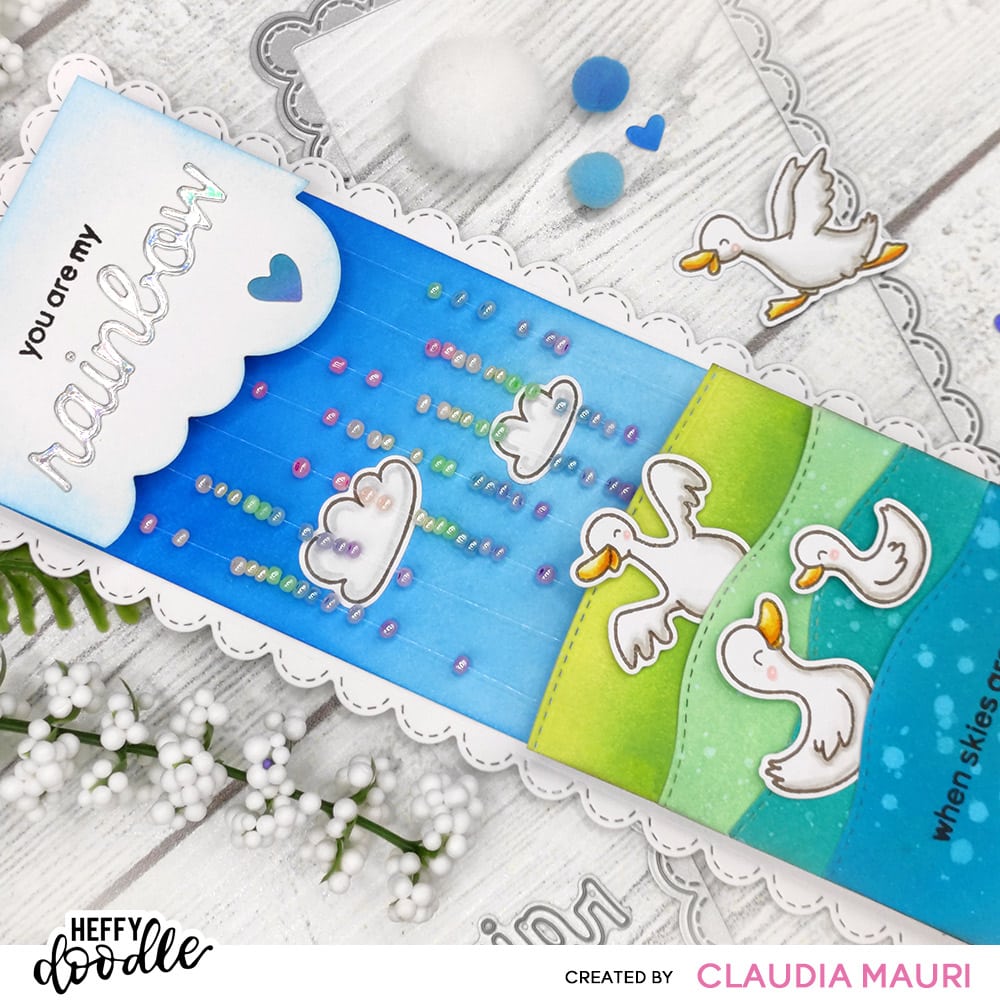
I wanted to use the Slimline Pull Tab die as my card base so I took a sheet of heavy white cardstock, I die cut two scallop rectangles and glued them together. Then I trimmed down two 2.75 by 7.75” panels from another sheet of white cardstock and I ink blended one of them using Distress Oxide Tumbled Glass and Salty Ocean, leaving the top and the bottom blank since I intended to cover them. Again, I glued the ink blended panel over the other one: with this type of shaker cards, it’s super important that the base parts are flat and sturdy so don’t be afraid of making two or even three background layers!
I applied a piece of Heffy Doodle 3mm Deep Foam Tape on the top and one on the bottom of the blue background; I did it very close to the borders to leave room for the beads to hide behind cloud/water parts I’ll make later. I used an anti-static powder tool all over the inner edges to prevent the beads from sticking to the foam tape and then I marked down the spaces between the lines.
(Just a note about threading the beads: as you can see in the picture below, I threaded one rainbow from pink to violet, then one from violet to pink, the pink to violet etc. That’s because I usually prefer not to cut the wire until the end and I find it easier to make one line from top to bottom and then one from bottom to the top and so on; this requires the rainbows to be in “opposite” orders.)
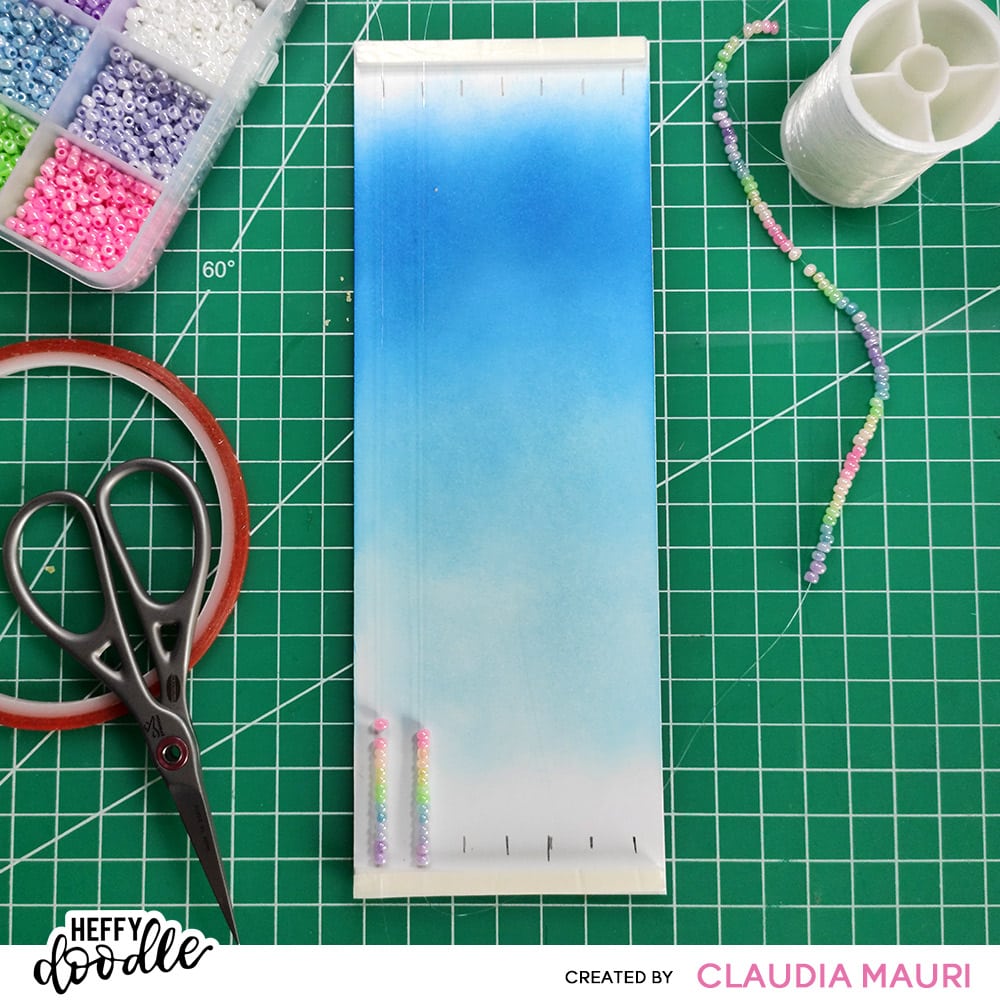
Now the fun part! I lifted a small portion of the cover tape from the foam adhesive, I put the wire over the foam tape, I put the cover tape back and then pressed it down to make the thread adhere as much as possible.
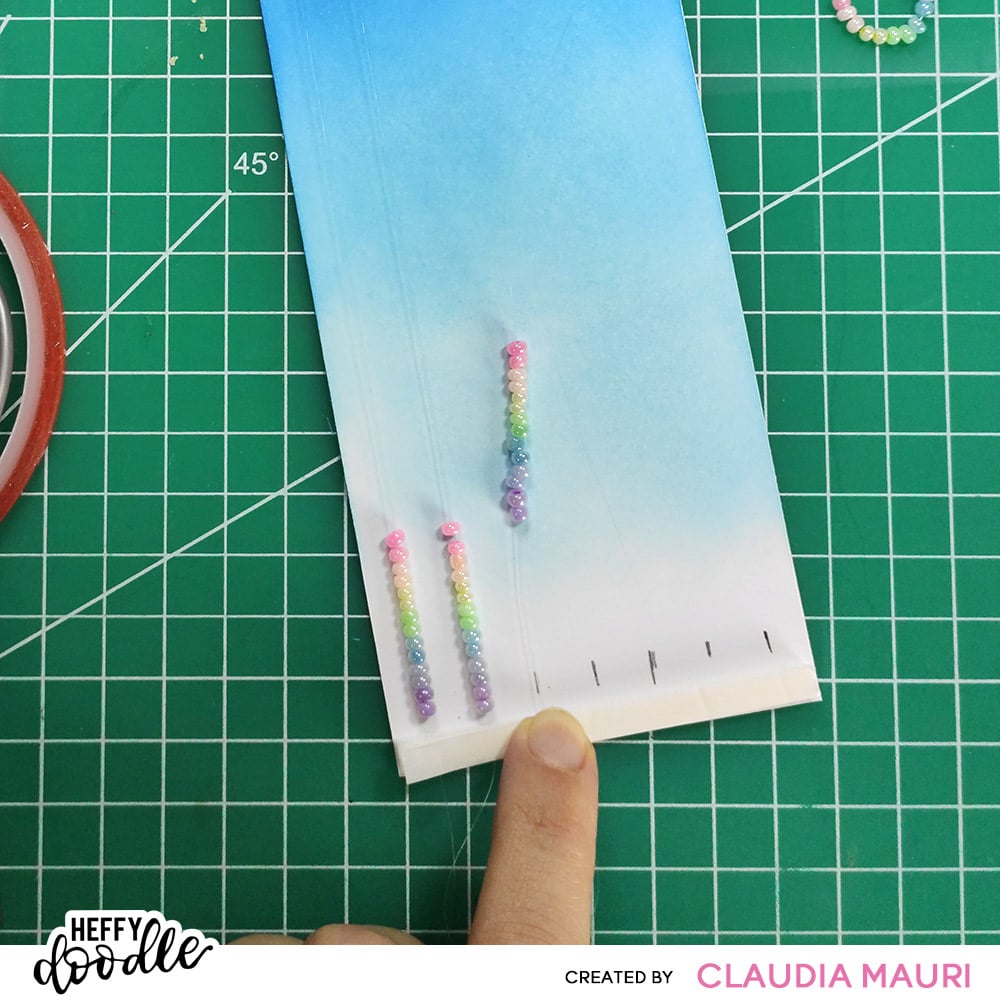
I took a single “rainbow” from the beads strip and placed it inside the card, then I tightened the thread to be as straight as possible and did again the lift/push process with the top foam tape. You can see here I was doing a sort of “wave” with the beads working from top to bottom and vice versa, ’cause I prefer not to cut the wire until I’m finished.
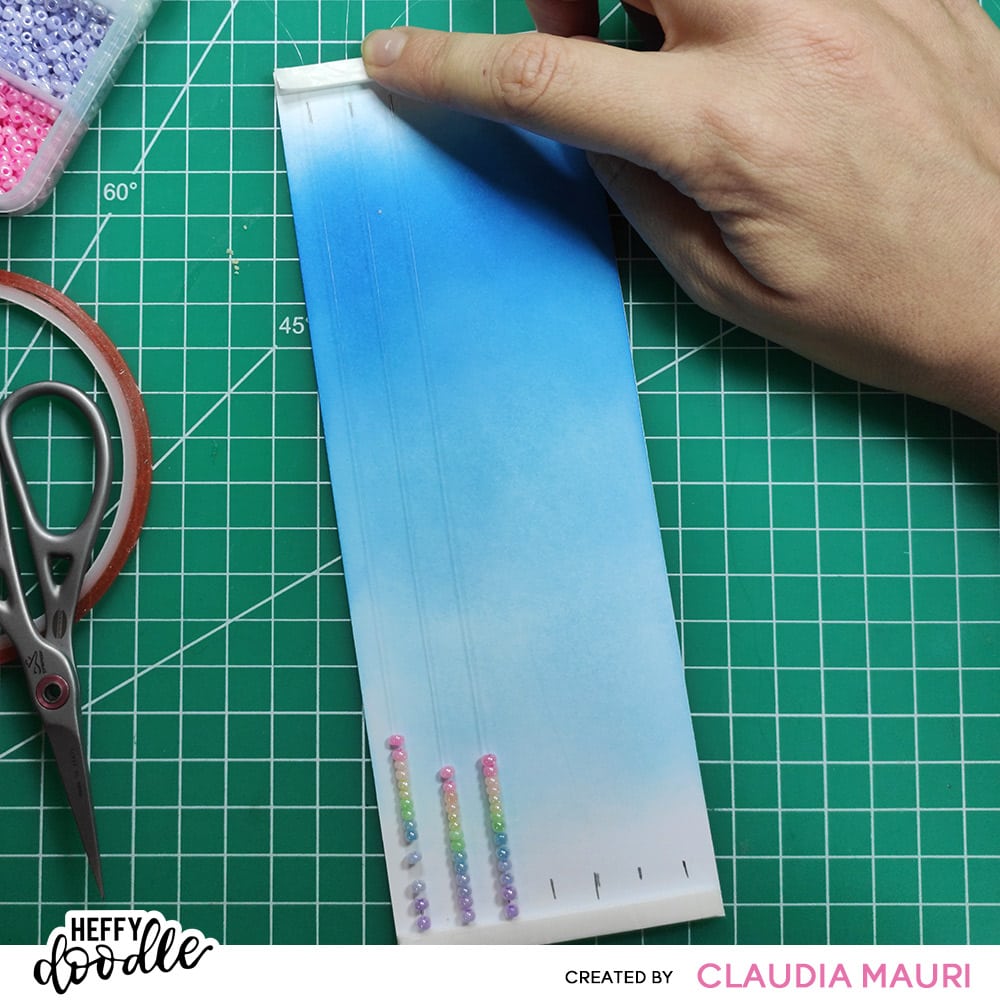
At this point, I usually place a very small double sided adhesive strip over the wire to secure it to the foam: you can see I used a red one here.
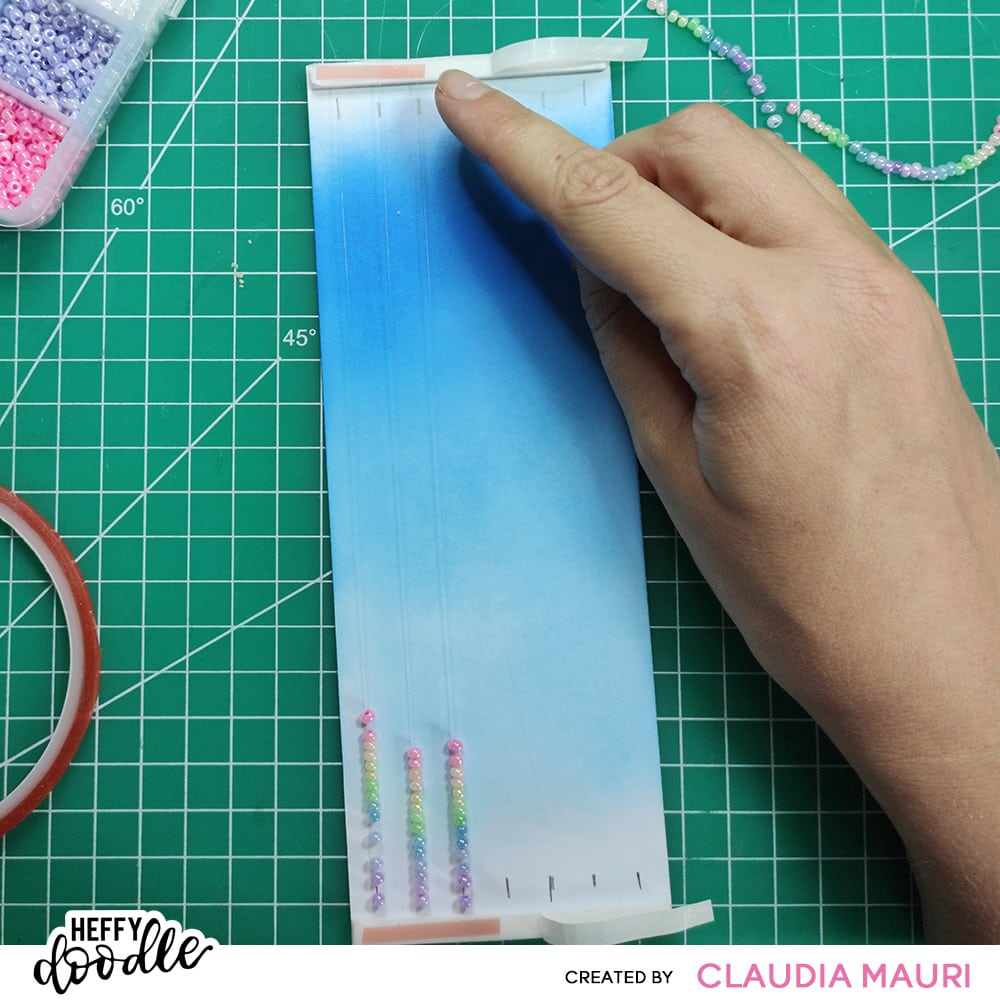
I left some wire outside the card, to be sure I could trend it later if needed, and I repeated the whole process for all the seven shaker lines. Once I was done, I applied another strip of foam adhesive over the other ones and used the powder tool again. I know, it’s already plenty of layers in this card and it’s not finished yet LOL
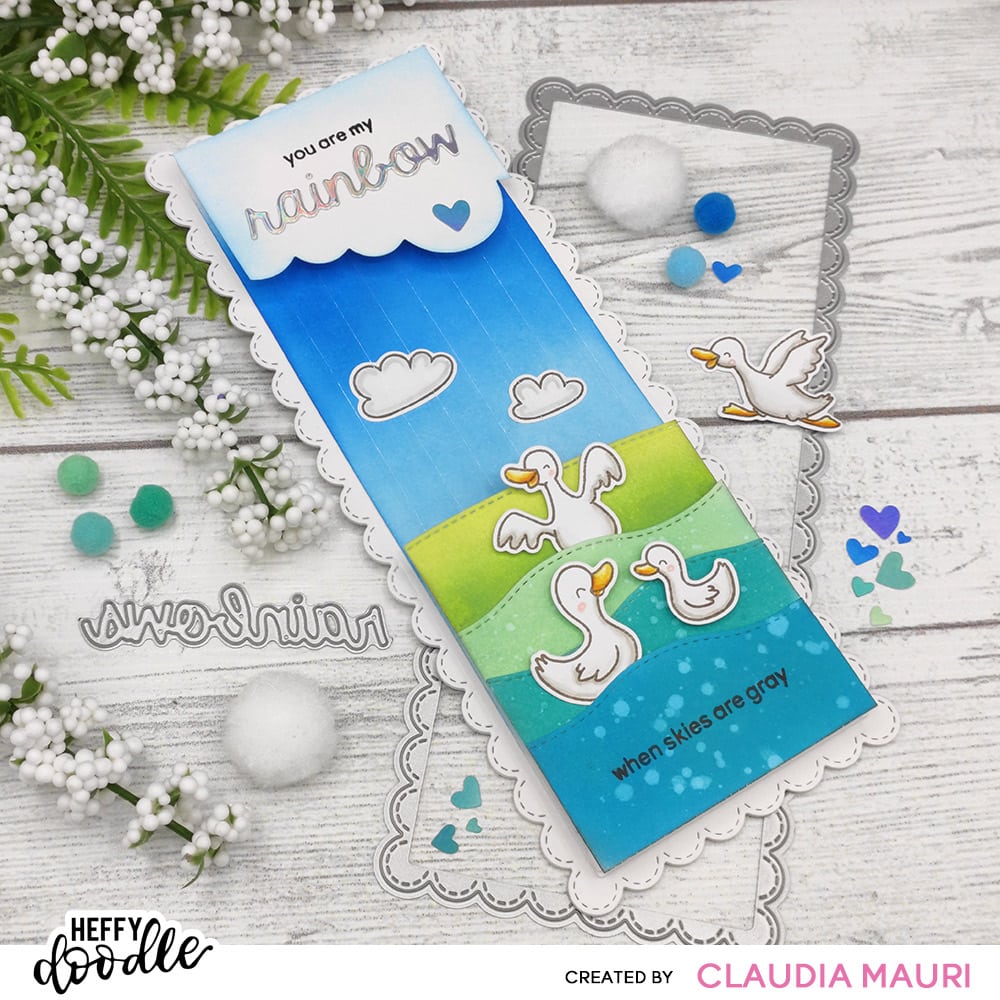
Now I could focus on the part that would cover the beads: the cloud and the water. For the top, I used the little cloud border from the Big Shadow Box die on a piece of white cardstock, then I used Versafine Onyx Black ink to stamp the “You are my” sentiment from the Quack Me Up set. I also used the word from Rainbow Builder Coordinating die on Tonic Studios holographic cardstock and cut out the final S with a pair of scissors, then I glued it under the sentiment.
For the bottom part, I ink blended some cardstock with Distress Oxide Twisted Citron and Mowed Lawn for the hill, Cracked Pistachio, Peacock Feathers and Mermaid Lagoon for the water; I used the Slimline Scenery dies to cut them and I stamped the “when skies are gray” on the Mermaid Lagoon piece. I glued the pieces together leaving some void space in the middle where I could insert the ducks later.
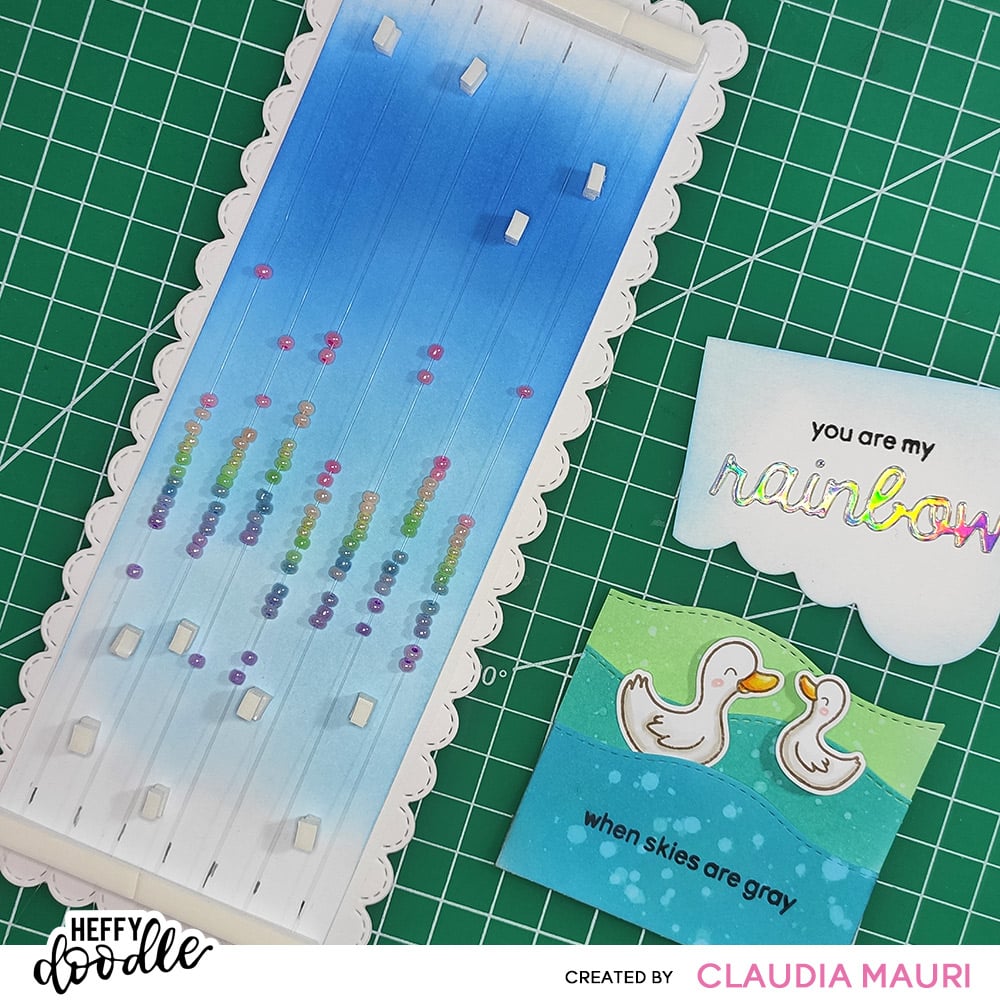
Before adding the top and the bottom parts to the card, I needed something to hold them up so I cut small pieces of the 3mm foam tape and carefully placed them between the shaker rows, always checking that the beads could still go up and down. I had to make two layers of this tiny pieces to have everything at the same level, then I eventually cut the excess wire, I put the landscape pieces in place and finally added the three ducks using foam squares and the little clouds using glue.
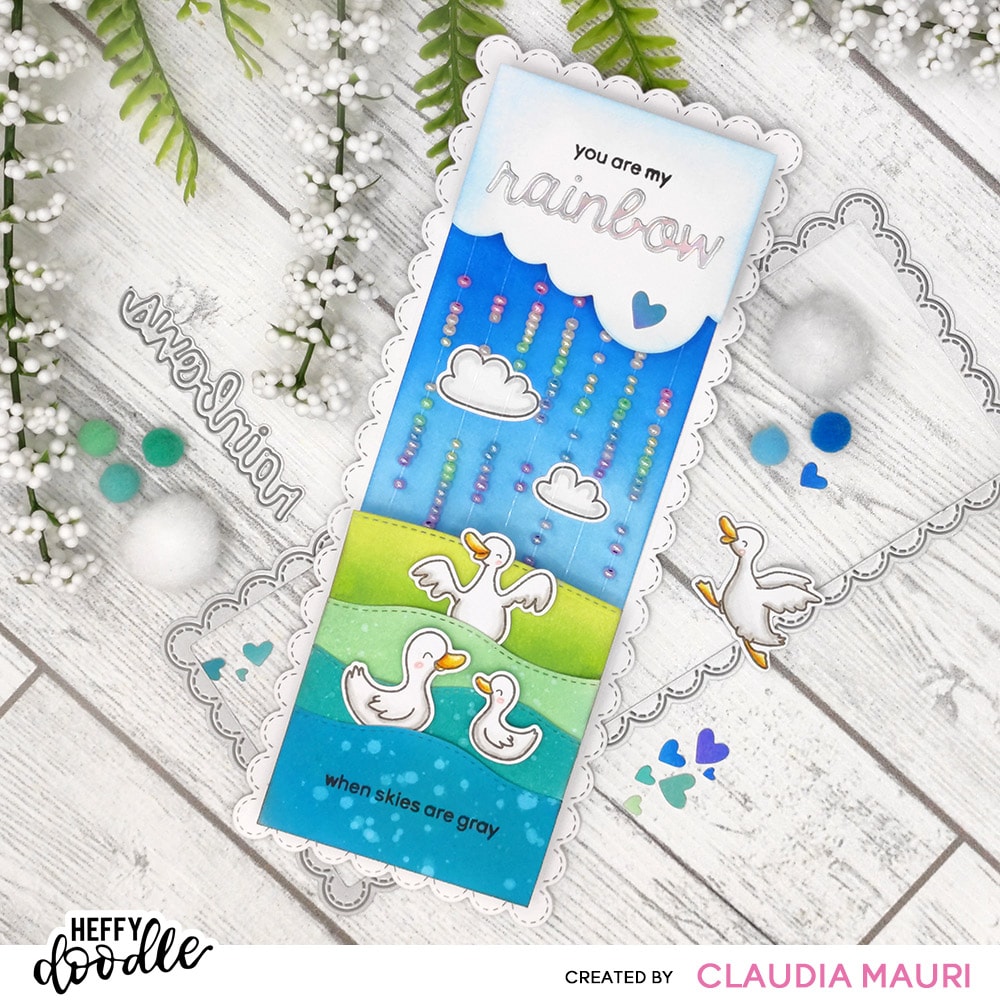
I thought it would be fun to also include a picture of the card without the beads: it’ not colorful but I love this aqua shades so much!
I tried my best for showing you how I make Magical Shaker cards, however if something’s not clear feel free to ask: I also recommend you to watch our talented Julia’s @craftroomadventure video tutorial on YouTube!
Happy crafting!
Clo

Vickie Leaf
March 27, 2022 at 6:08 amWonderful card and great direction. Thank you for sharing.
Claudia Mauri
April 1, 2022 at 1:58 pmThanks a lot Vickie! <3