
Squirrels Having Fun in Autumn!

Hello crafty friends! I am happy to be back on the Heffy Doodle Blog to show you this adorable Autumn Themed card. Aren’t these squirrels just adorable?? I love them so much!
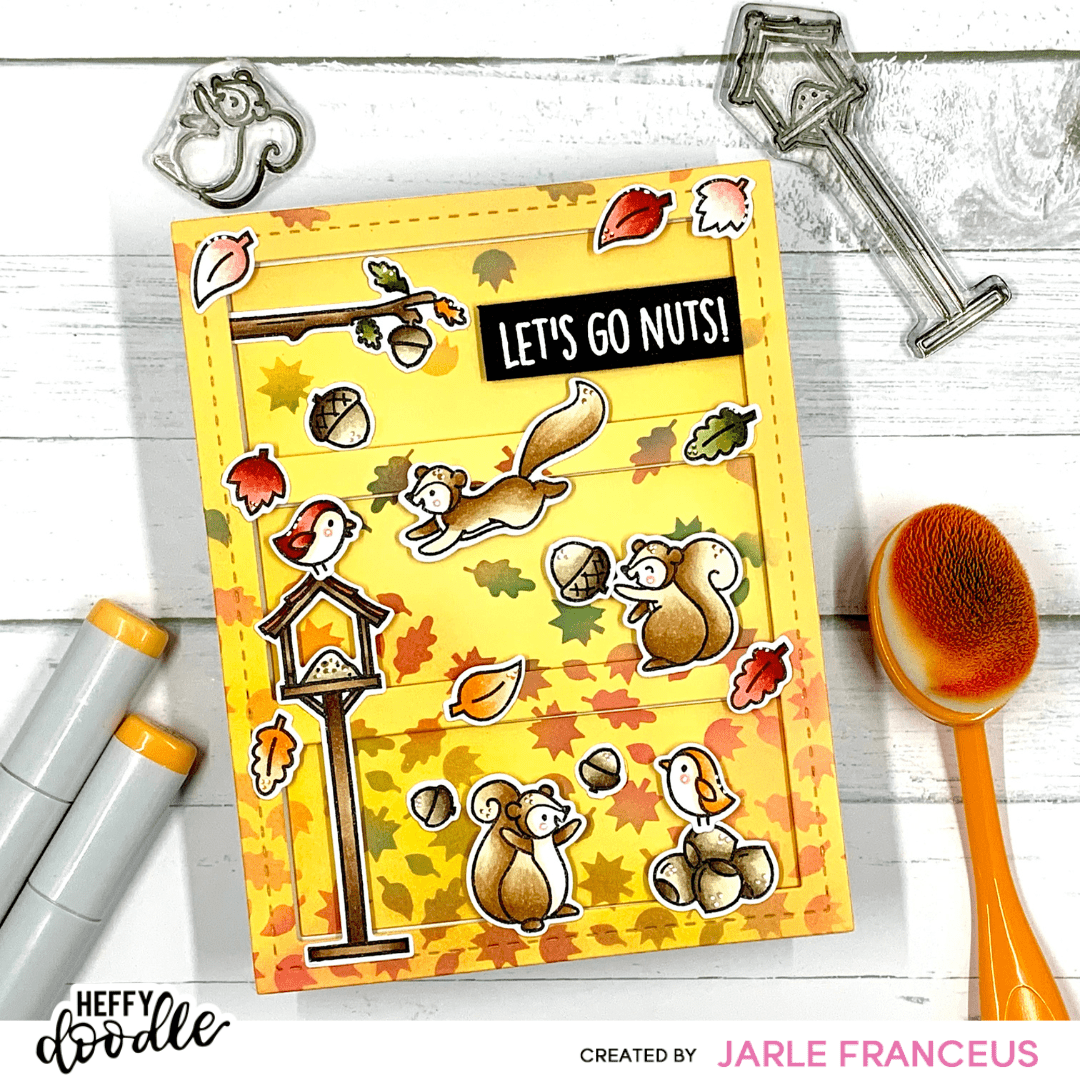
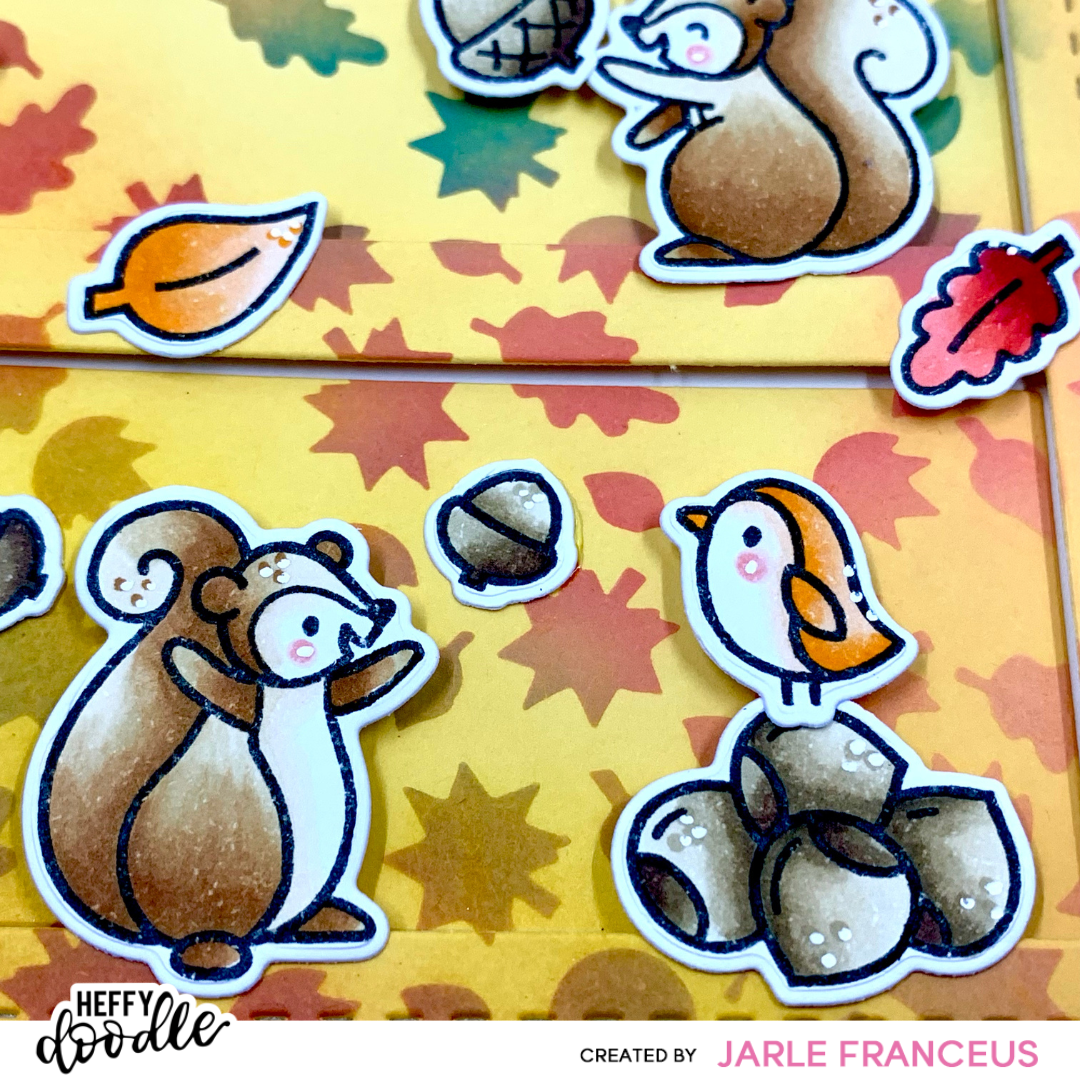
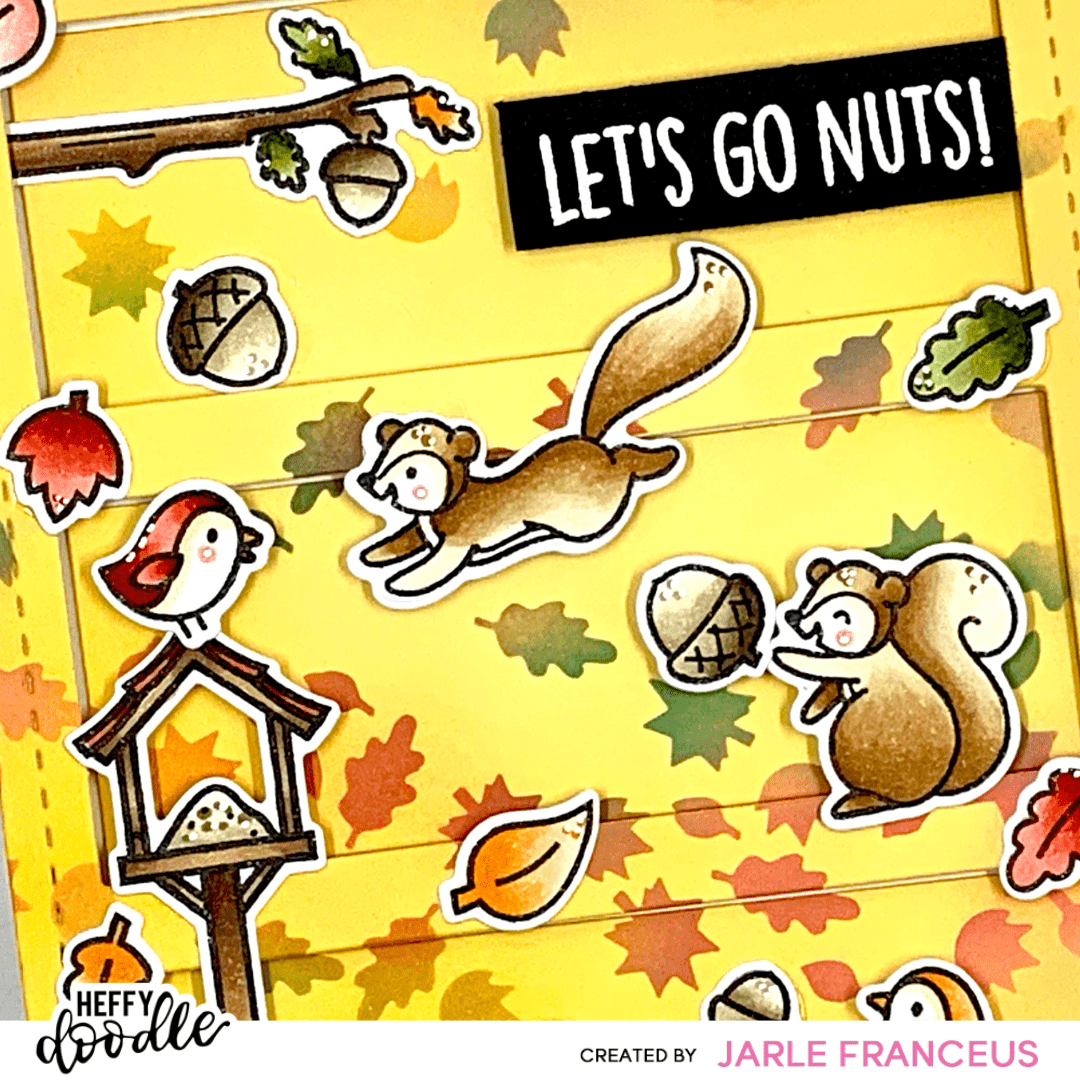
I started out by stamping all my images from the Nuts About You stamp set with Lawn Fawn Jet Black ink on alcohol marker friendly cardstock. I always let the ink dry for about 5 minutes before I start my coloring.
I listed the colors I used below:
- Leaves:
- YG99 – YG95 – YG03
- R32 – R30 – R000
- YR16 – YR14 – YR00
- R29 – R24 – R22
- Squirrels: E35 – E33 – E31 – E30
- Wood: E27 – E25 – E23
- Acorns: E47 – E44 – E43 – E41
As always, I die cut my images with the coordinating dies and my mini diecutting machine.
After that, it was time for my stenciling. I debated quite a bit about using white or colored cardstock. I eventually started with Butterscotch cardstock. I put my Falling Leaves stencil on top so that I could give the leaves some fun Fall colors. I used my Distress Oxides in the colors: Mustard Seed, Dried Marigold, Abandoned Coral, Candied Apple and Rustic Wilderness. There is no right or wrong way to do this. I just put colors down on different places. I would recommend using Oxides though, when you stencil on top of colored cardstock.
To give it that little extra something, I die cut my stenciled background with the Stitched Birthday Trio Frame dies. I also rotated my stencil so that most of the leaves were on the bottom of my card panel.
Then it was time to start working on my sentiment. I used the ‘Let’s go nuts’ from the same stamp set. I prepped my black (Oreo Crunch) cardstock with an antistatic powder tool. I stamped the sentiment with Versamark ink and sprinkled on some white embossing powder. I tapped off the excess and heat set it with my heat gun.
I trimmed it down with the cutest mini paper trimmer of the world!
I used an A2 sized cardbase and put the frame on with some foam strips. The three other panels were glued down with liquid glue. This gave me a little bit of wiggle room to put the panels just in the right spot! I then played around with my images until I was happy with the placement. Some of the images are popped up, some were glued down flat. This created lots of dimension on the card and I find that dimension really adds that little something extra on a handmade card!
That’s it for now Heffy Doodlers! I really hope you like this Autumn themed inspiration. I will be back soon with another card!
Love, Jarle x