Playing With Textures By Joy Baldwin
Hello crafty friends and Merry Christmas! I like having different textures on my cards, so today we are playing with textures to create a Christmas Card. You could definitely do this on any card design. Let’s get started.
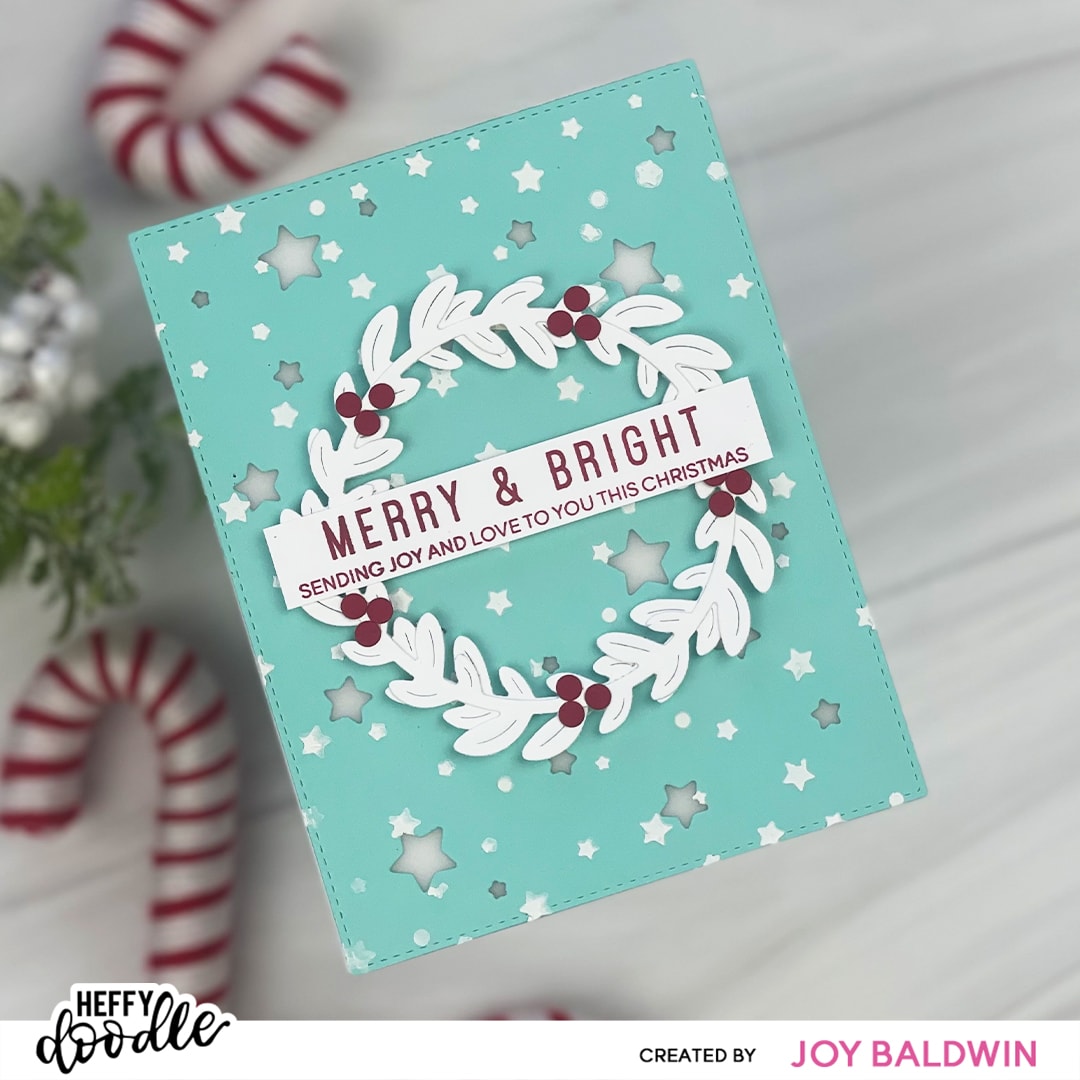
I started with the background, I die cut the teal cardstock with the Stargazer Backdrop die, this will leave you with open stars of different sizes on the background. Then I used the Starfall stencil with Cloud Whip texture paste and stenciled the stars on the background. So we have the cardstock texture, then the stencil paste is another texture.
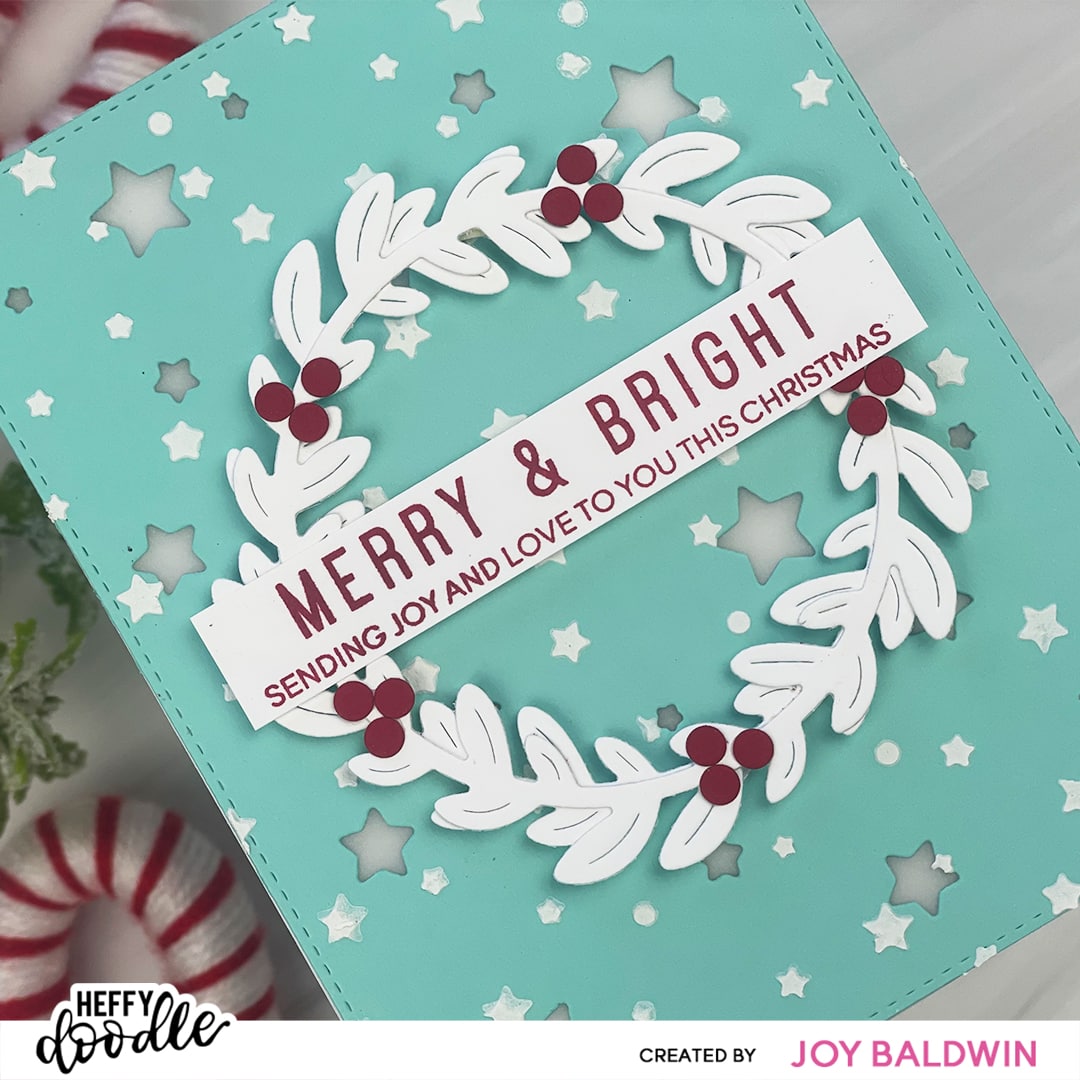
While the background is drying, I die cut the Leafy Laurel Circle dies from white cardstock (twice) and then the berries from red cardstock. I layered the two wreaths on top of each other, slightly shifted to give the wreath a thicker look. Then I adhered the berries around the wreath. I stamped the sentiment from the Holiday Sentiment Duos with red ink and trimmed it out with a paper trimmer.
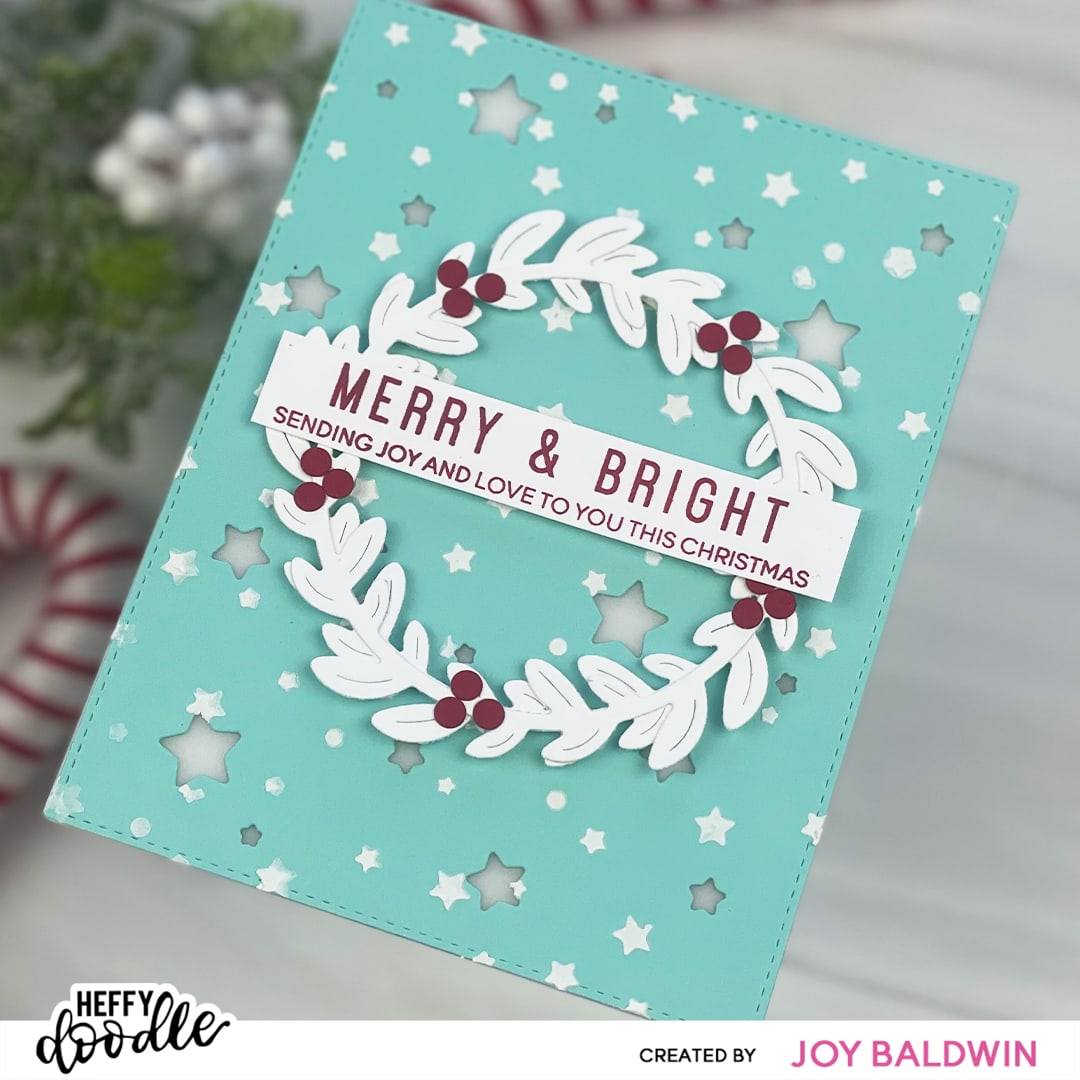
For the final texture, I used vellum. I placed it behind the background panel to give the open stars a frosty look. I adhered the wreath in the center with foam tape, added the sentiment across the center with foam tape as well. To keep the frosted look of the vellum, I added foam tape behind the card panel and adhered that to an A2 card base.
I hope you enjoyed this project, have a Merry Christmas and a Happy New Year!
Hugs,
Joy Baldwin
Create It With Joy