
Mix and Match Valentine’s Day Card

Hey, Heffy Doodlers! It’s Amanda Fitterer here on the blog with you today with a super cute Valentine’s card! Keep reading to see how I created card!

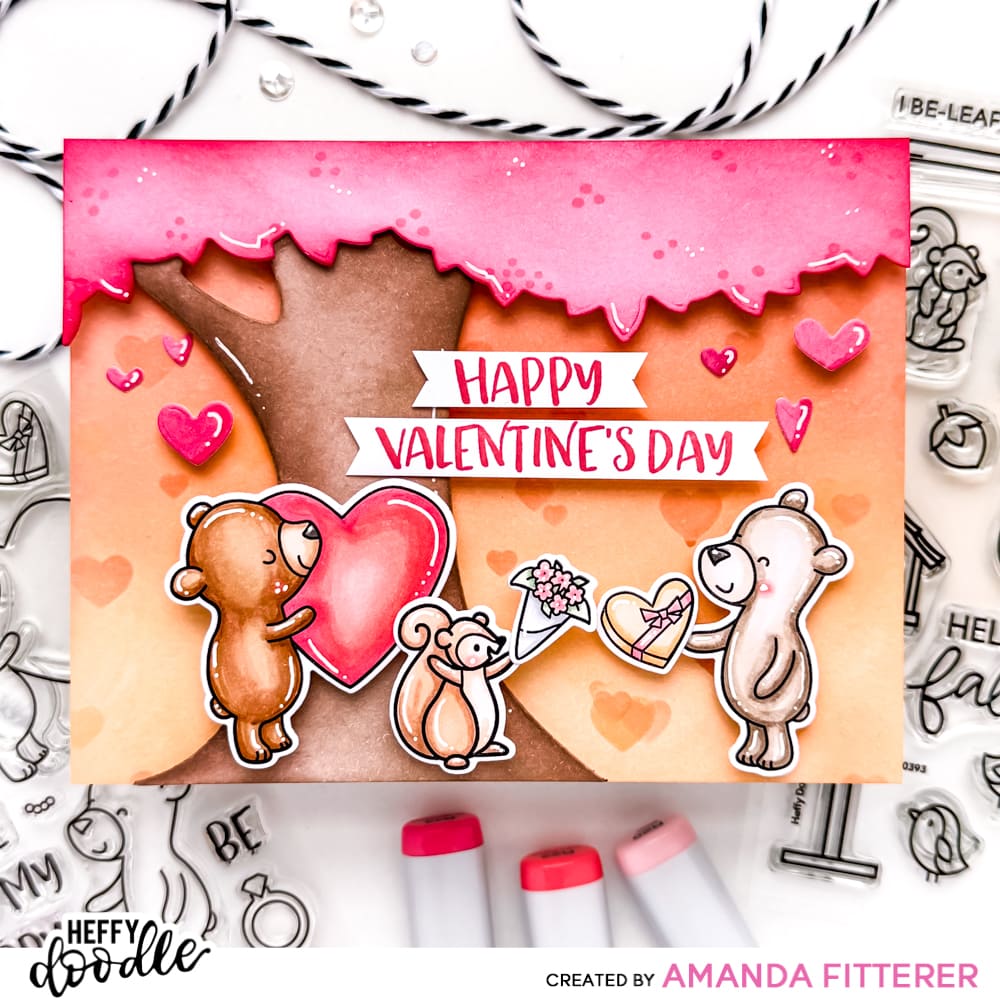
To make this card, I started by creating my background. I ink blended Apricot and Clay Mask on the entire background. I added some hearts using the Layering Hearts Stencil. I continuously moved the stencil around and ink blended until I got multiple layers of hearts.
I used the Tree-mendous Peekaboo Dies to create my tree. I ink blended the trunk with Sand Castle and Over Coffee inks. For the leaves, I blended Polished and Rouge and then added some extra dots using my Copic marker R22.

Next, I stamped, colored, and die cut my images from the Beary Big Hearts and Nuts About You stamp sets. I also stamped my sentiment and trimmed the pieces out with a trimmer and scissors.
For my extra hearts, I die cut the smallest hearts from the Whole Lotta Hearts Die Set.

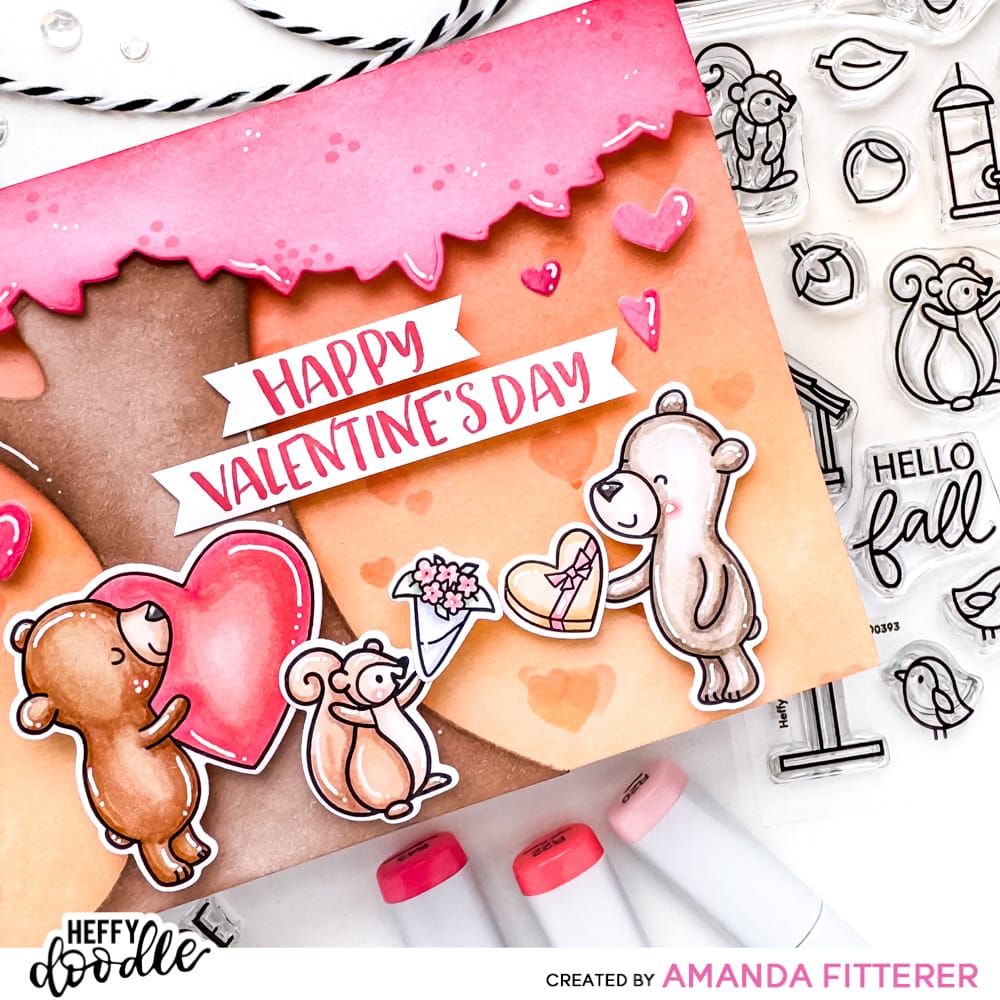
The last step was to assemble the card! I used 3D foam squares and tape to adhere everything to my background.
I surely hope you have a HAPPY Valentine’s Day with your loved ones! Xx, Amanda