
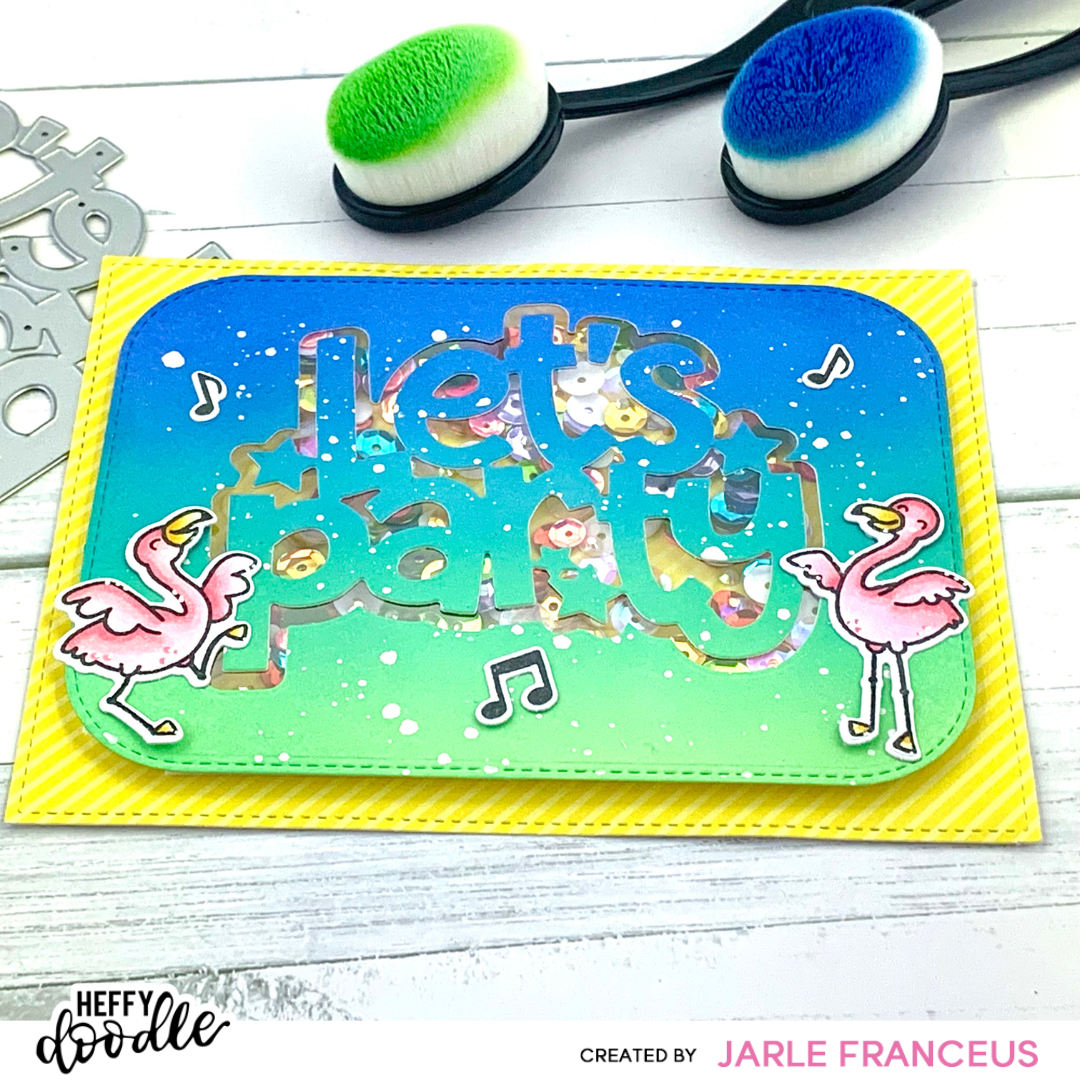
Let’s Party Shaker Card

Hi Heffy Doodle Friends!
I’m back with a super fun shaker card, that is perfect for a birthday! I used a few goodies from the latest Heffy Doodle release.
Let’s see how this card came together.
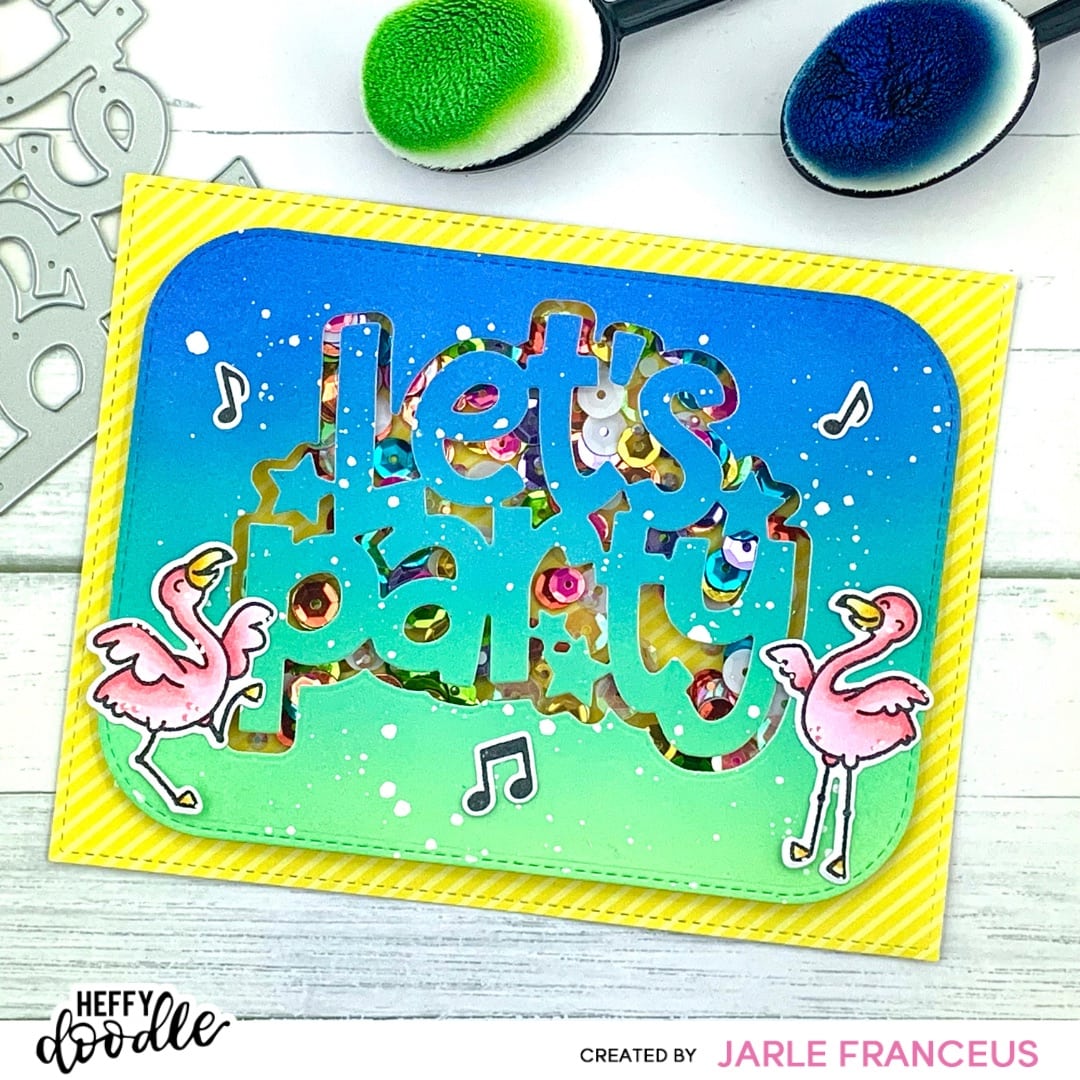
I started by die cutting a Stitched Rounded Rectangle out of Bristol Smooth cardstock. I blended the whole background with Distress Oxides in the colors Cracked Pistachio, Peacock Feathers and Blueprint Sketch. I haven’t used this combo before. I mostly use warm colors for my backgrounds I think. But I will definitely remember to try this combo again!
I splattered on white gouache for added interest, and set my panel aside to dry.
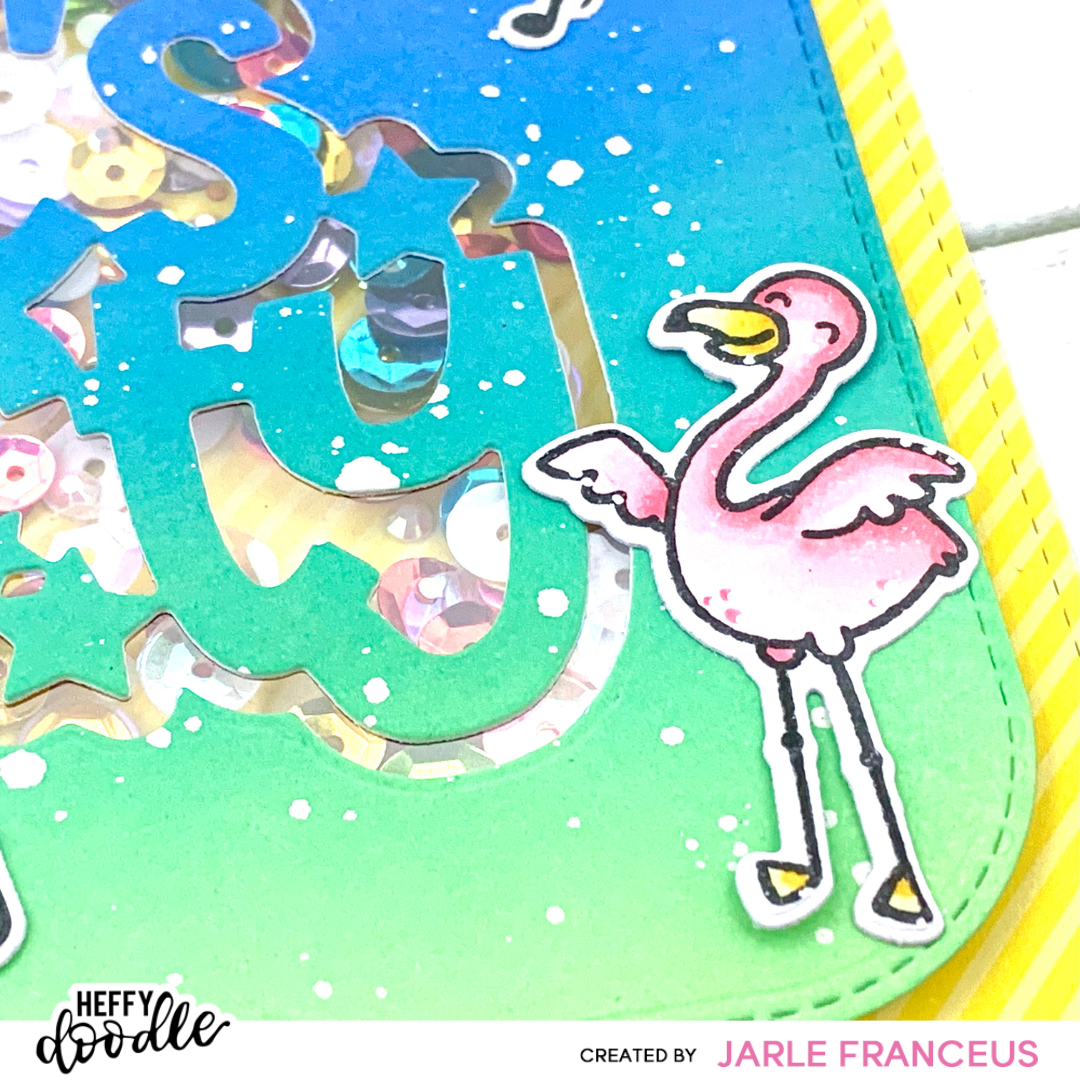
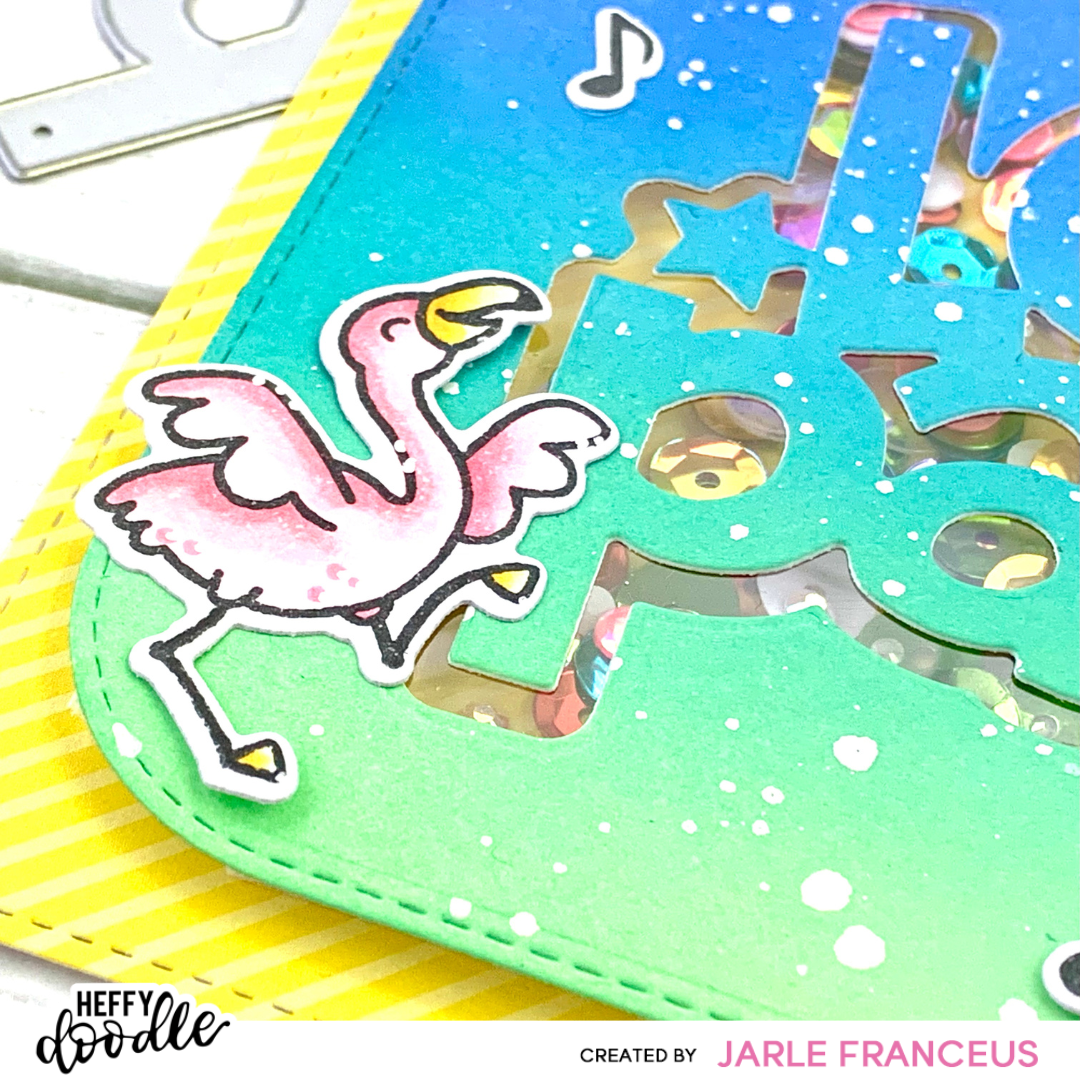
For the images, I used the Flock Star stamp set. I stamped them with Lawn Fawn Jet Black ink on alcohol marker friendly cardstock and colored them with my Copic Markers.
These are the colors I used:
- Y17 – Y15 – Y13
- RV13 – RV21 – RV10
After die cutting them with the coordinating dies and the mini die cutting machine, I added a few white gen pel details. I’m still debating on whether I like those or not! Sometimes they turn out great, sometimes they don’t. So it’s more of a love-hate relationship with my gel pen. Does it sound familiar to anyone of you…?
When my panel was dry, I took the shadow die from the Jumbo Let’s Party and I die cut it out of the blended panel. Then I took that shadow die cut and die cut the Let’s Party sentiment die out of that little ‘shadow piece’. I put the sentiment itself aside and worked on the shaker first.
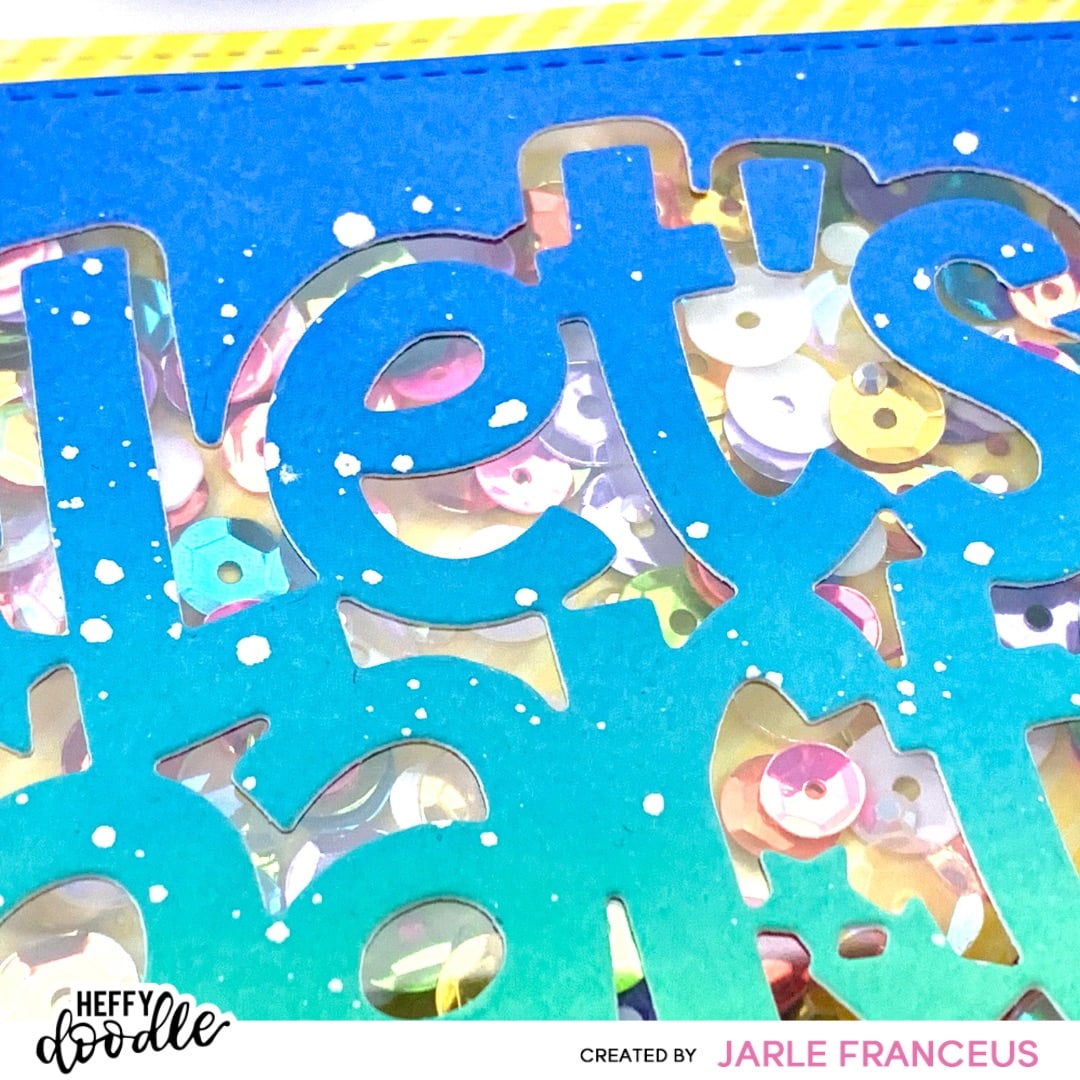
So for that, I adhered a piece of acetate on the back of the blended panel (with that shadow already cut out). I put Heffy Doodle Foam Tape all around the see through panel and I poured the Pride sequins in the ‘well’ I created with my foam tape. I die cut a yellow piece of patterned paper from the Wildflowers paper pad with a regular stitched rectangle. I placed that on top of the shaker well and this created my shaker piece.
PS: I’m in love with that paper pack!
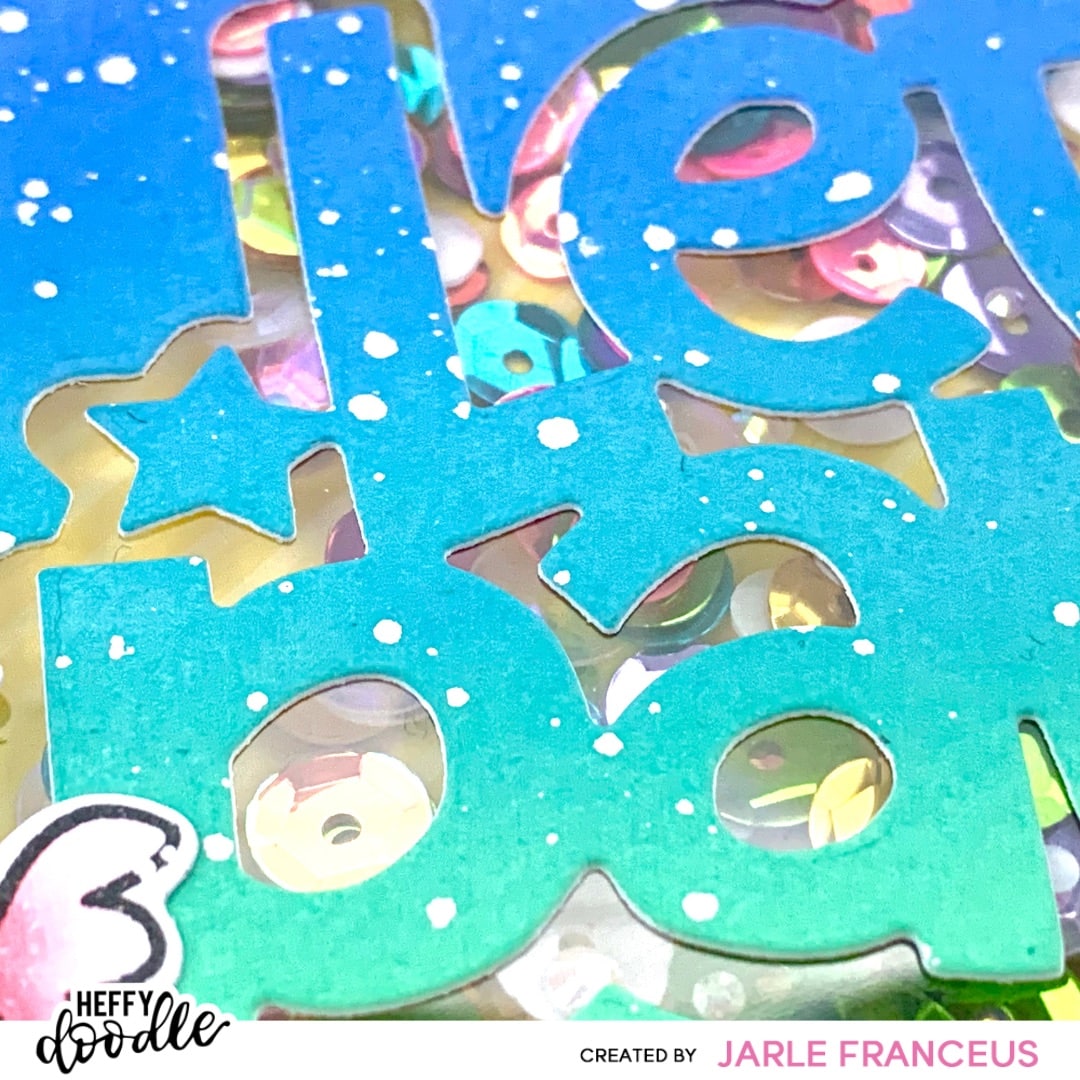
I took the sentiment I cut out earlier and adhered it directly on that piece of acetate. So you can see the shaker bits as a shadow around the sentiment. I really like this effect. It’s subtle, but special!
To finish the card, I put down my images around the Jumbo sentiment and adhered everything flat on a white card base. This simple shaker card was all done!
Tip when you make a shaker card: Look at the colors of the sequin mix you want to use and make sure to choose the colors of your background and images accordingly.
I’m super curious what you think of it. You’re always welcome to leave a comment below.
Thank you so much for stopping by and I will be back soon with another project!
Love, Jarle x