
Ink Blended Christmas Cards (NO STAMPING)

Hi friends!
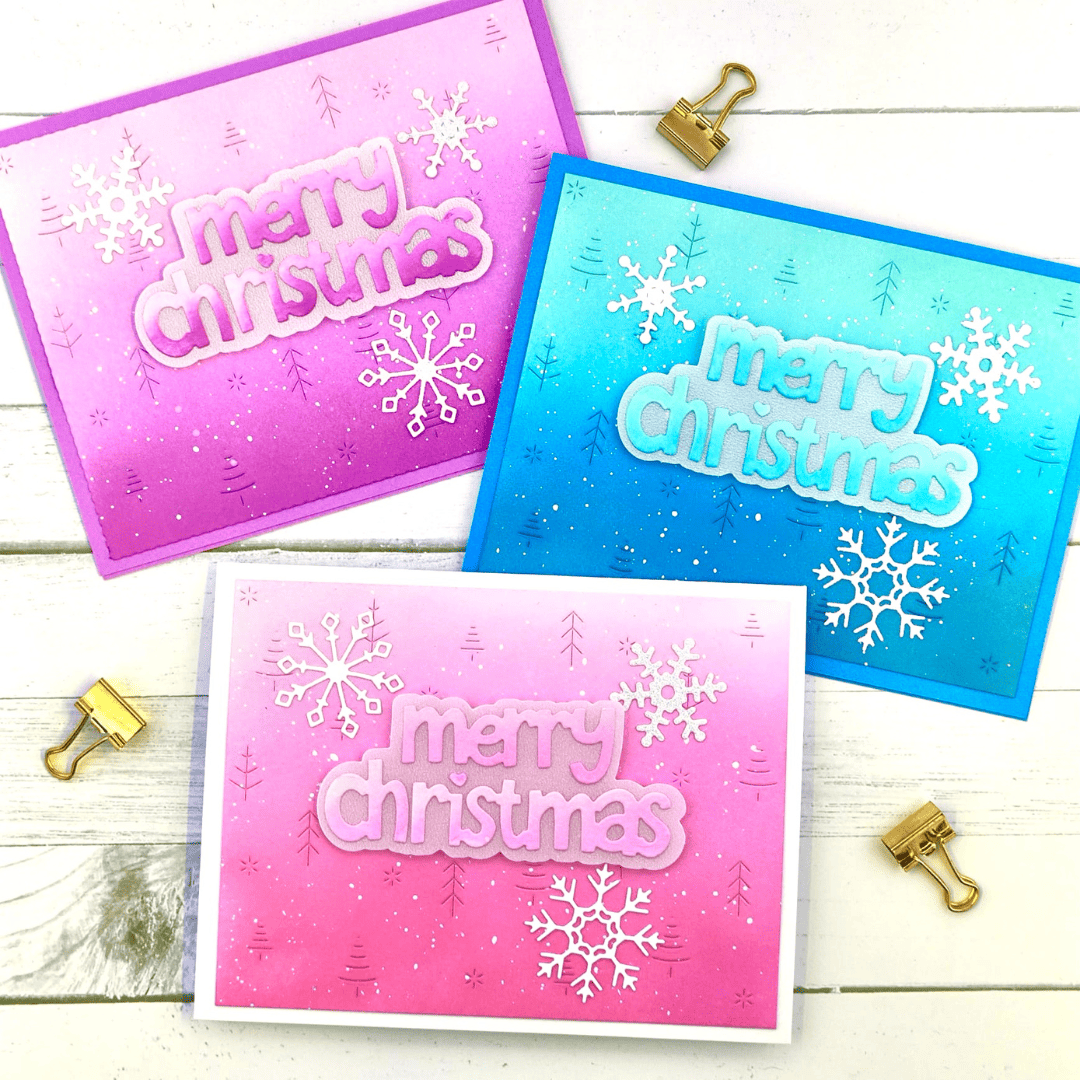
I’m so happy to be back on the Heffy Doodle blog today. I made a set of 3 Christmas cards with a few items of the newest release. Let me tell you how these came together!
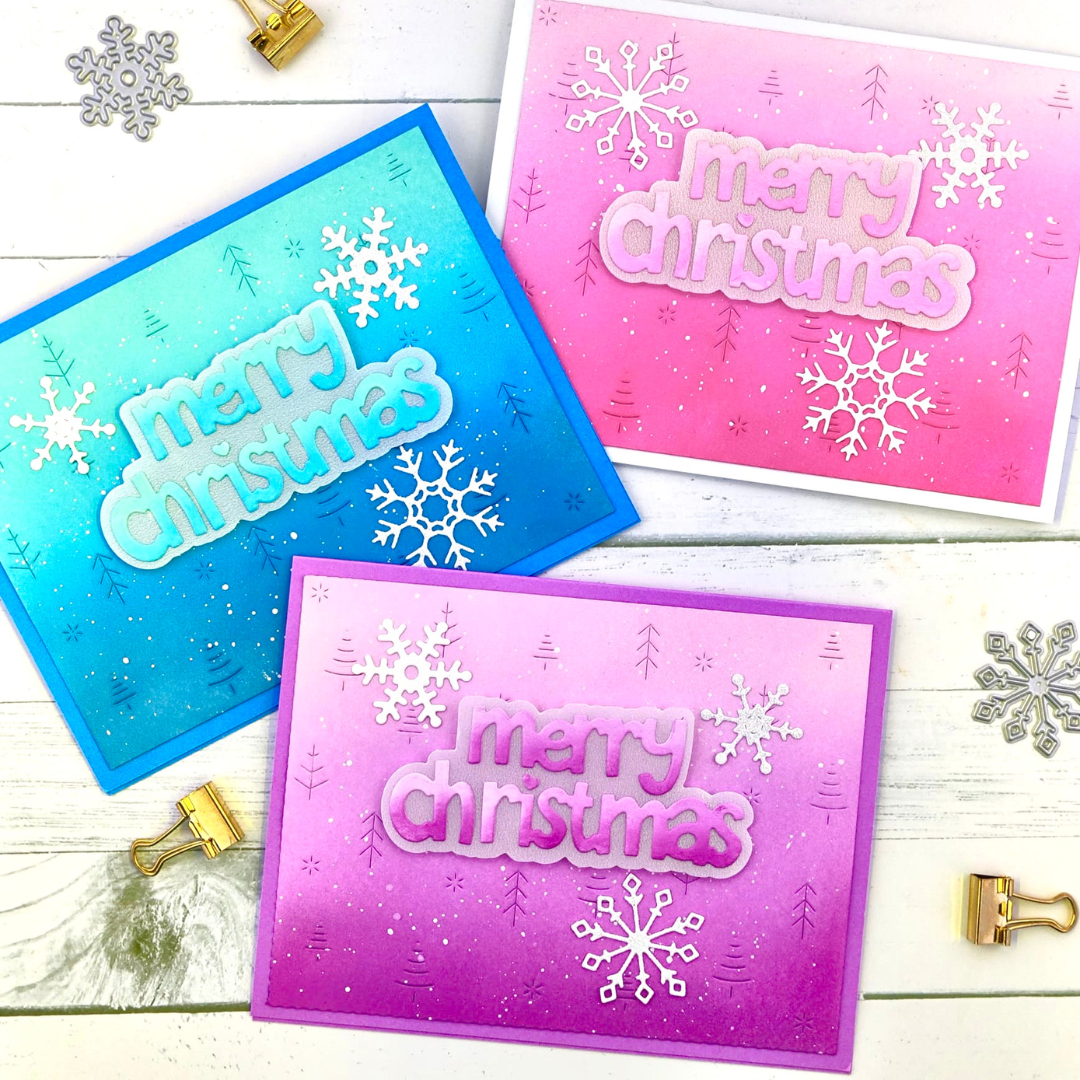
I started by die cutting 3 pieces of the Winter Forest Backdrop. I did this out of Bristol Smooth cardstock, because I wanted to ink blend all 3 panels. This paper is just the best! If you have trouble getting a smooth blend, I really recommend trying this paper.
I wanted a little border all around the panels, so before ink blending, I took my paper trimmer and trimmed off some edges. The stitching details on the backdrop were my guideline. I just trimmed those off.

When I had the exact size of my panels, I started my ink blending. You can find my 3 Distress Oxide combinations below:
- Spun Sugar / Kitsch Flamingo / Picked Raspberry
- Spun Sugar / Milled Lavender / Seedless Preserves
- Salvaged Patina / Mermaid Lagoon / Uncharted Mariner
When I was done with my blending, I splattered on some Copic White (diluted with water). I let this dry completely.

For my sentiment, I die cut the Merry Christmas Jumbo Sentiment 3 times out of Bristol Smooth again. For the shadow die, I used pearlescent vellum. I ink blended my sentiments with the same colors as before (I just chose 2 instead of 3, because it’s not such a large sentiment). I glued the sentiments on its shadow with liquid glue.
I popped the sentiments up with foam squares and adhered them onto my ink blended panels. I do want to mention that I cut some foam squares in half and placed them directly behind the letters of the sentiment, so you couldn’t see those foam strips from the front.

I did want to add some snowflakes as well, so I used the Snazzy Snowflakes for that. I die cut them out of plain white cardstock and some white glitter cardstock as well. I glued down 3 on each panel. You should always use an uneven number. This appears to be more pleasing to the eye.
I hope you like this set of cards. They are super simple to make and ideal if you want to make lots of Christmas cards!
Thank you so much for stopping by. I really appreciate it. Have a great day!
Love, Jarle x
Angela
October 8, 2023 at 10:25 amLove your cards and thank you for tip on the best card for blending. THANK YOU for sponsoring The Cat Lovers Christmas Challenge, 2023