Hot Diggity Dog POP Up with Davina

Hello Crafty Friends! Davina here to share this fun Pop-up interactive slimline card using all Heffy Doodle products. This new release has been so much fun and I have enjoyed playing with all of my goodies so much. I recently acquired the two remaining sets from the release that I did not have before and I couldn’t wait to use them.
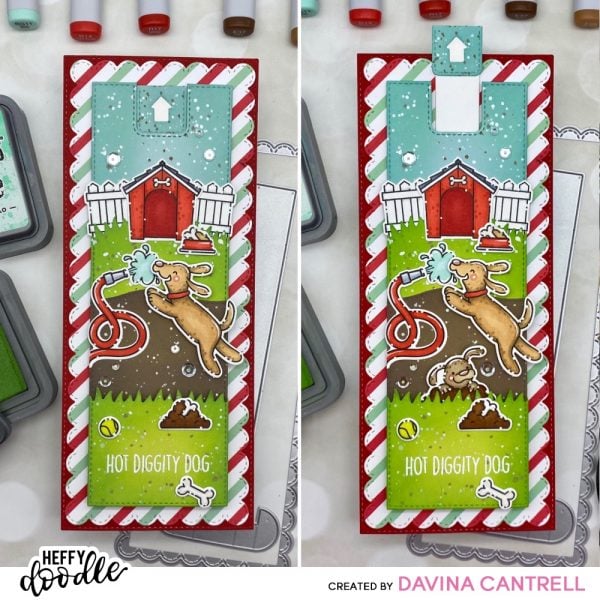
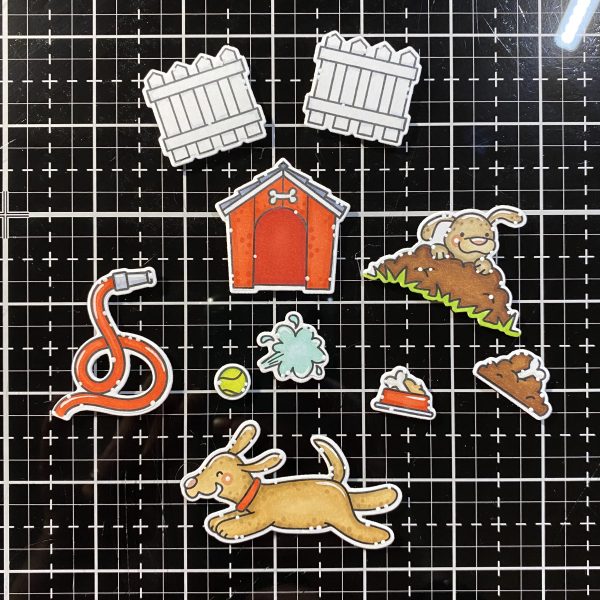
There are two cute dog filled sets this release, and being a passionate dog lover, I wanted to create a playful backyard scene. I used both sets Hot Diggity Dog and Who Let the Dogs Out to create this project. I started by stamping out the images I thought I would need using my stamp platform to get nice solid clear images. Then, I colored the images using a bright red and aqua color scheme to match the striped paper I planned on using. Once colored, I used the coordinating dies to cut out my images before highlighting with small white dots.
Next, I used the fantastic new slimline dies to cut all of my layers out. I feel extra proud because I used all scrap and salvaged paper pieces to make this card. Using the new Slimline Pull Tab dies I cut my patterned paper with the beautiful stitched scallop frame. Then I used the smallest of the Stitched Slimline Trio dies to cut a panel from light blue, lime green, and Kraft cardstock. I trimmed my green panel into two pieces using the Grassy Lass Border Dies , and I cut my Kraft cardstock with one of the new Breaking Waves border dies to make a dirt pile. I scrounged up some strips of paper on my desk, and cut the pull tab pieces (Tab, rectangle tab topper, tab sleeve and circle base) from some white and light blue cardstock.
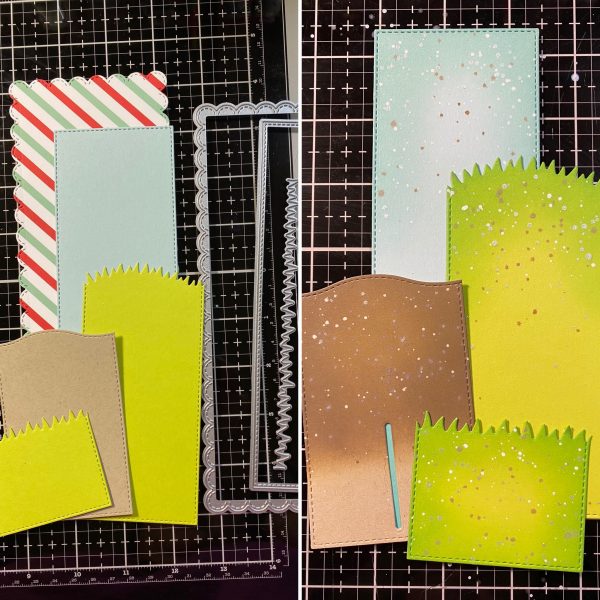
Using Distress Oxide Inks, I gently blended similar colors onto the edges, to give a little dimension to each panel. Then I splattered with brown and white ink, & glittery perfect pearls. Once dry, I used the shortest pull tab slot die to cut a slot from my 3 largest panels. Then I glued my panels together making sure everything was lined up straight. I added my images to the upper portions using a variety of adhesives and foam tape.
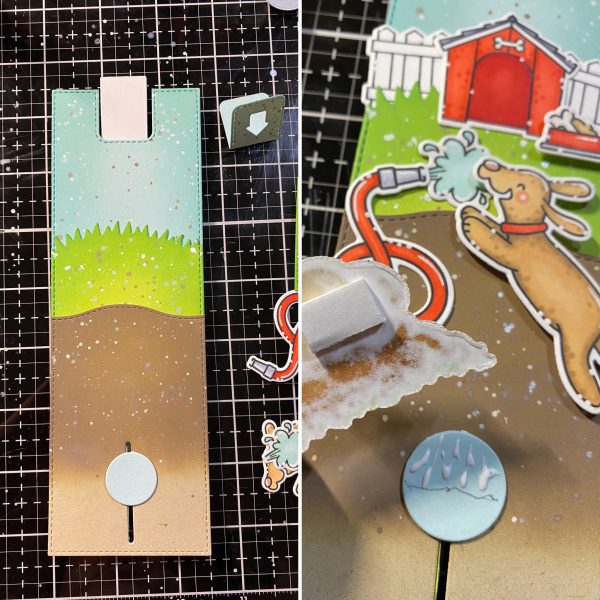
I folded the arms of my pull tab along the score lines, and slipped the half circles through the slot. Next, I folded those half circles open, and carefully adhered the circle base to the top to hold them open making sure the pieces all moved freely. Then, I temporarily placed the shortest grass layer to the bottom, so I could see where to attach my digging puppy. I wanted him to be completely covered so I slipped him behind the grass, carefully removed the grass, and used a pencil to draw a line where the bottom of the image rested on the circle base of the pull tab.
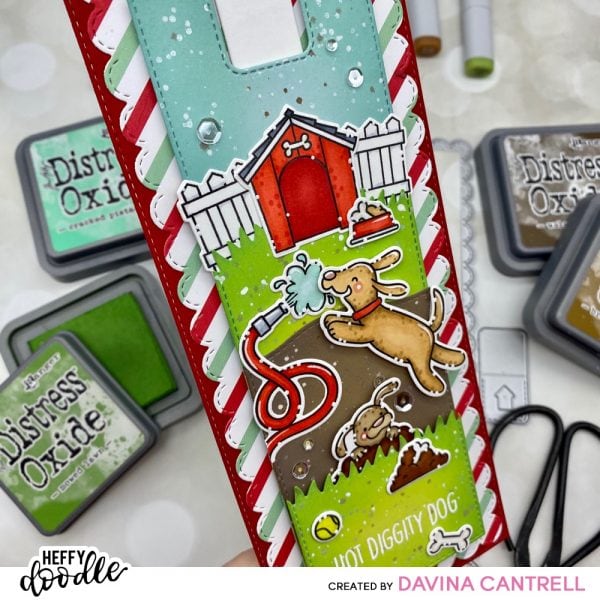
Because the short grass layer will be popped up on foam tape to allow free motion of my puppy, I
applied a square of foam tape to the back of the puppies head so he will appear closer. I left the paper backing on so it will slide smoothly, and glued the die cut image to the circle above my pencil line.
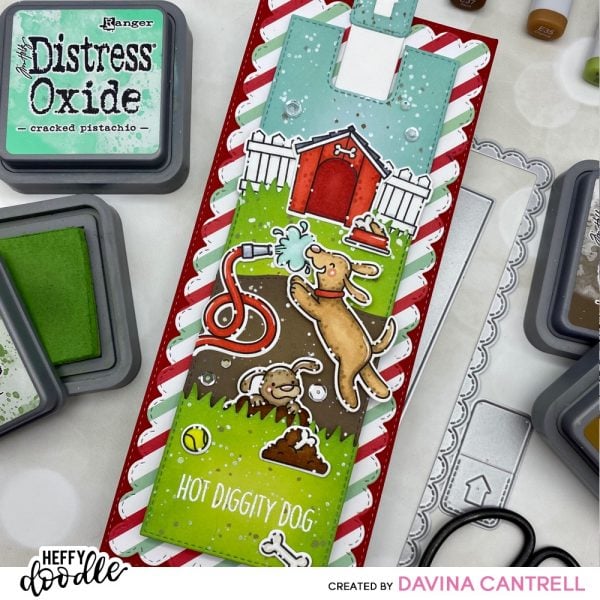
Finally, I heat embossed my sentiment onto the short grass layer, and adhered my images to the scene. I attached the grassy layer using thin 1/4 inch wide foam strips on the sides. The last steps to finishing this off is to apply the decorative pull tab cover to the top making sure it all lines up, and to mount this onto the striped paper using foam tape. Once assembled, I layered this onto some red cardstock And then onto the cardbase using Scor Tape. I’m so in love with the final results and hope you are too.
Thank you for stopping by,
Davina

Sherri
July 18, 2020 at 7:16 pmLove this card!! I can’t wait to use my new Dies but I think I need the new set.