
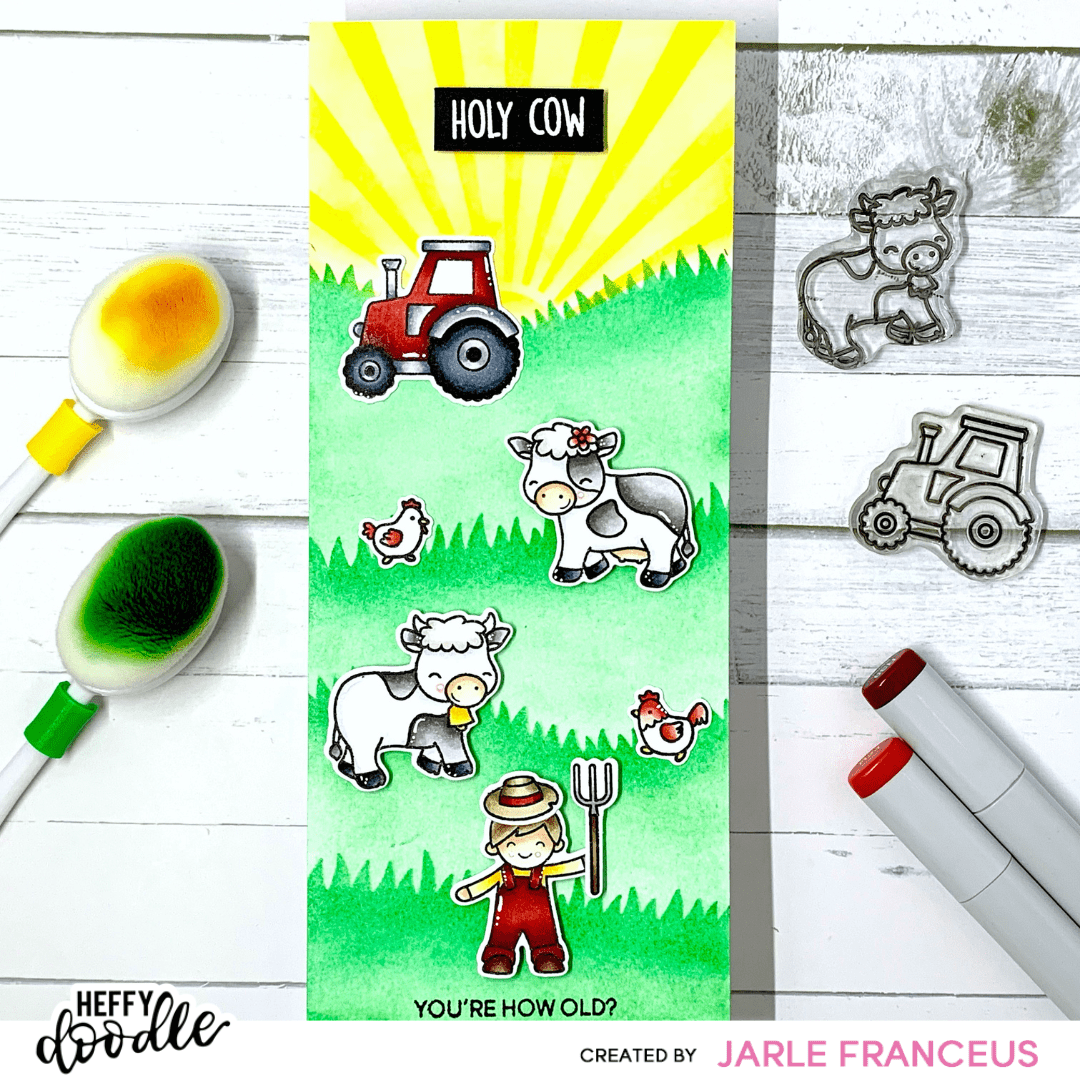
Holy Cow! Fun birthday card feat. Udderly Fabulous

Hi crafty friends!
Jarle here again with a new card for my ‘Sweet Scenes’ series for Heffy Doodle!
I chose to make a slimline card this time. The fun thing about slimlines? They give you lots of room to make your scene!
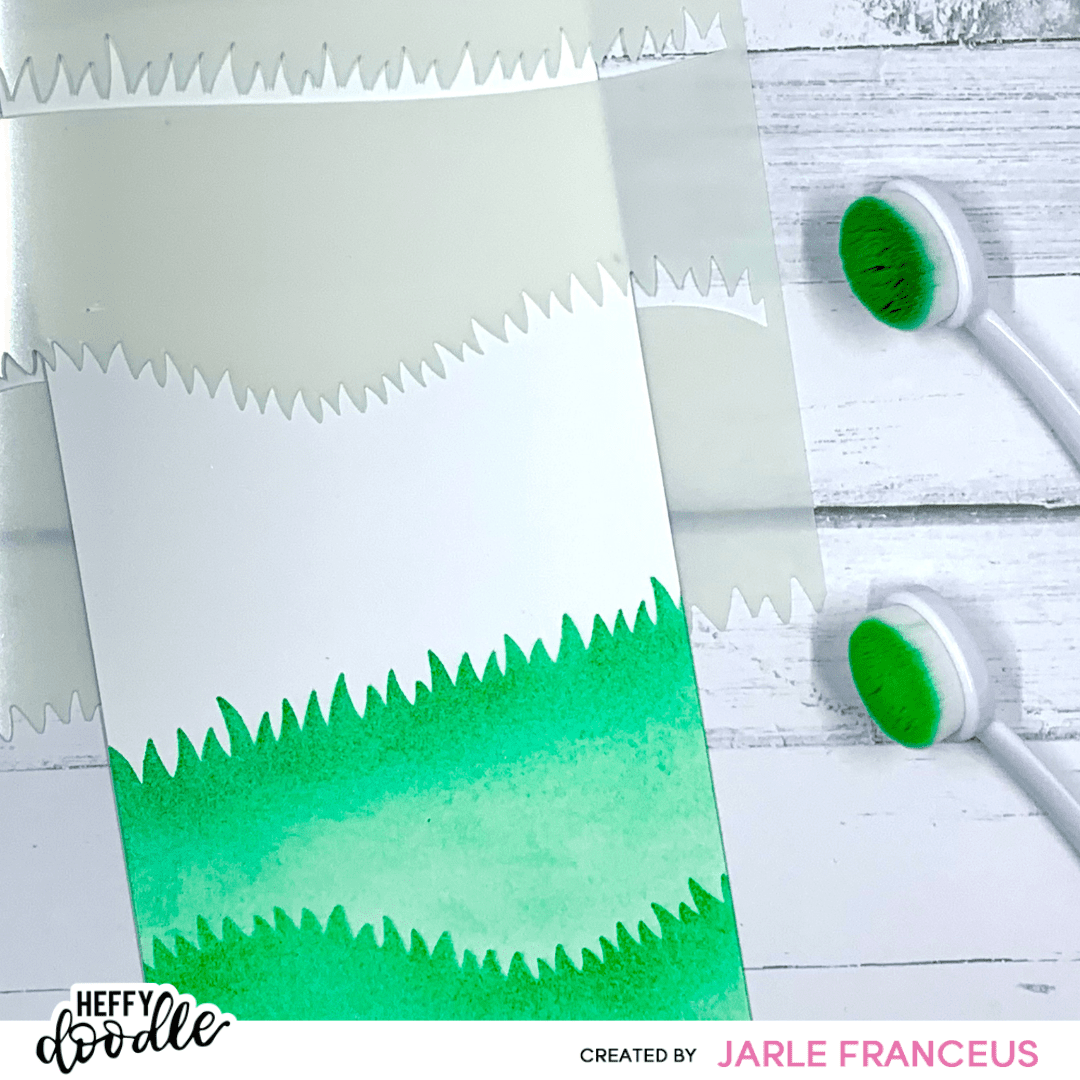
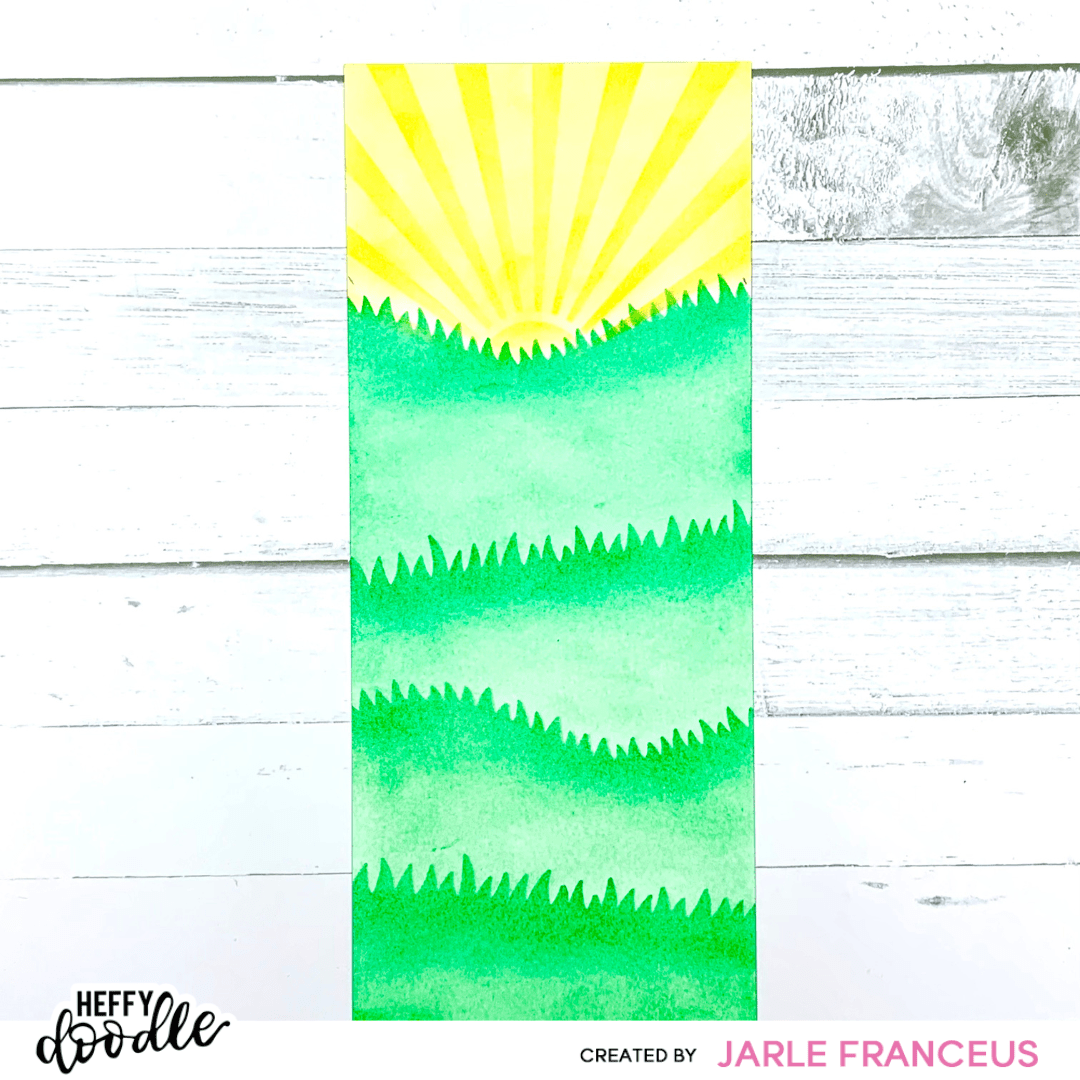
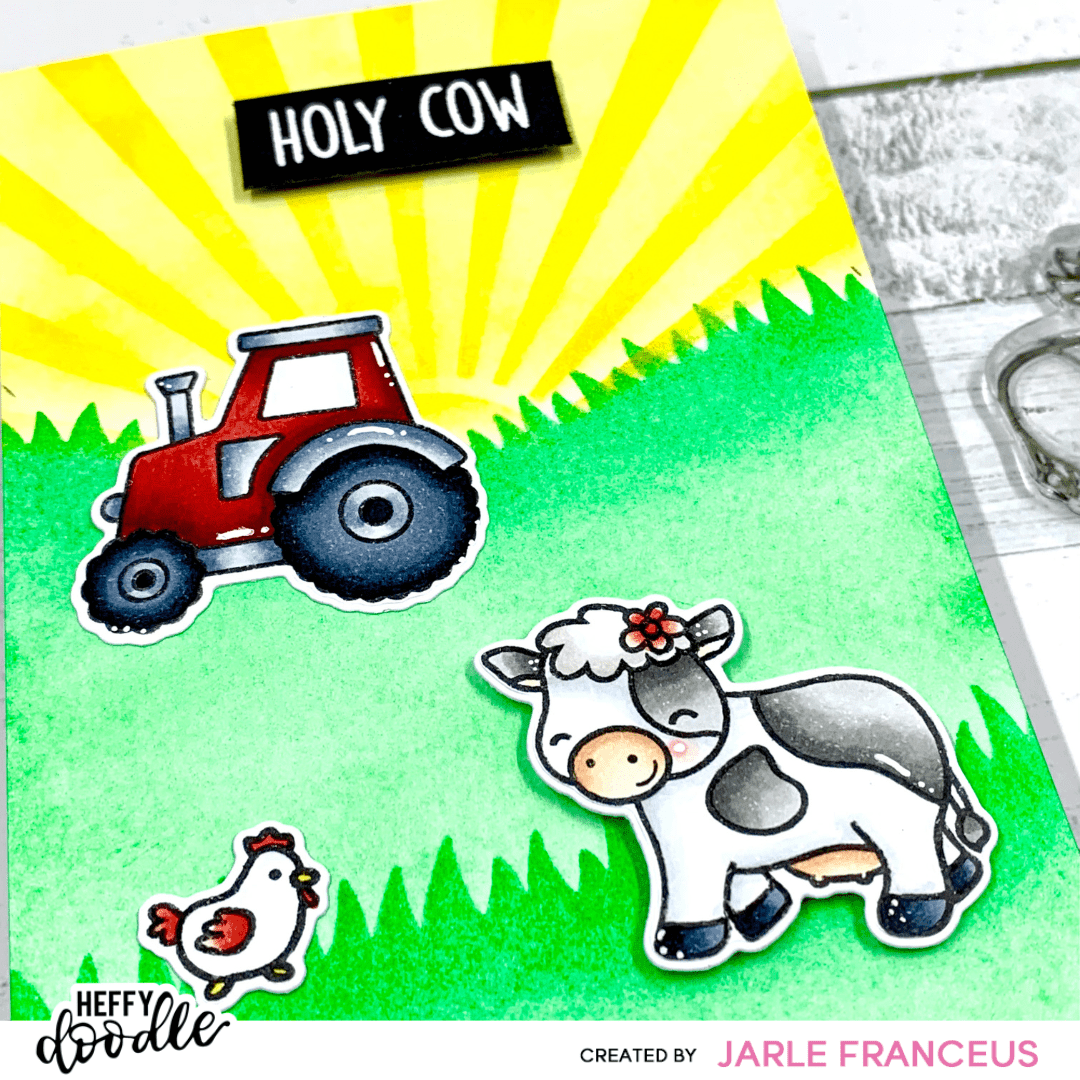
I took a piece of Bristol Smooth cardstock and trimmed it to 3.5 by 8.5 inches. Then I took the Green Fields stencil and stenciled on my grass. I started on the bottom of the panel and worked upwards. You can see the process in the picture below. I started with the light green and just on the edges I went over with a darker green. Adding that bit of variation can make a big difference. I used dye inks from Pinkfresh Studio in the colors Meadow and Emerald City. If I were to do this again, I would use my Oxide inks though. They just blend way better for a whole background and are more pigmented. It saves some time.
For the sky, I decided to use the Simple Sunburst stencil. I started with the lightest Sweet Mustard ink. I went over it with the slightly darker Marigold. I took off my stencil and went in with the Sweet Mustard again over the whole sky.
Time for some stamping! I stamped my images from Farmyard Fun and Udderly Fabulous with my Misti on alcohol marker friendly paper. I used Lawn Fawn Jet Black ink for this.
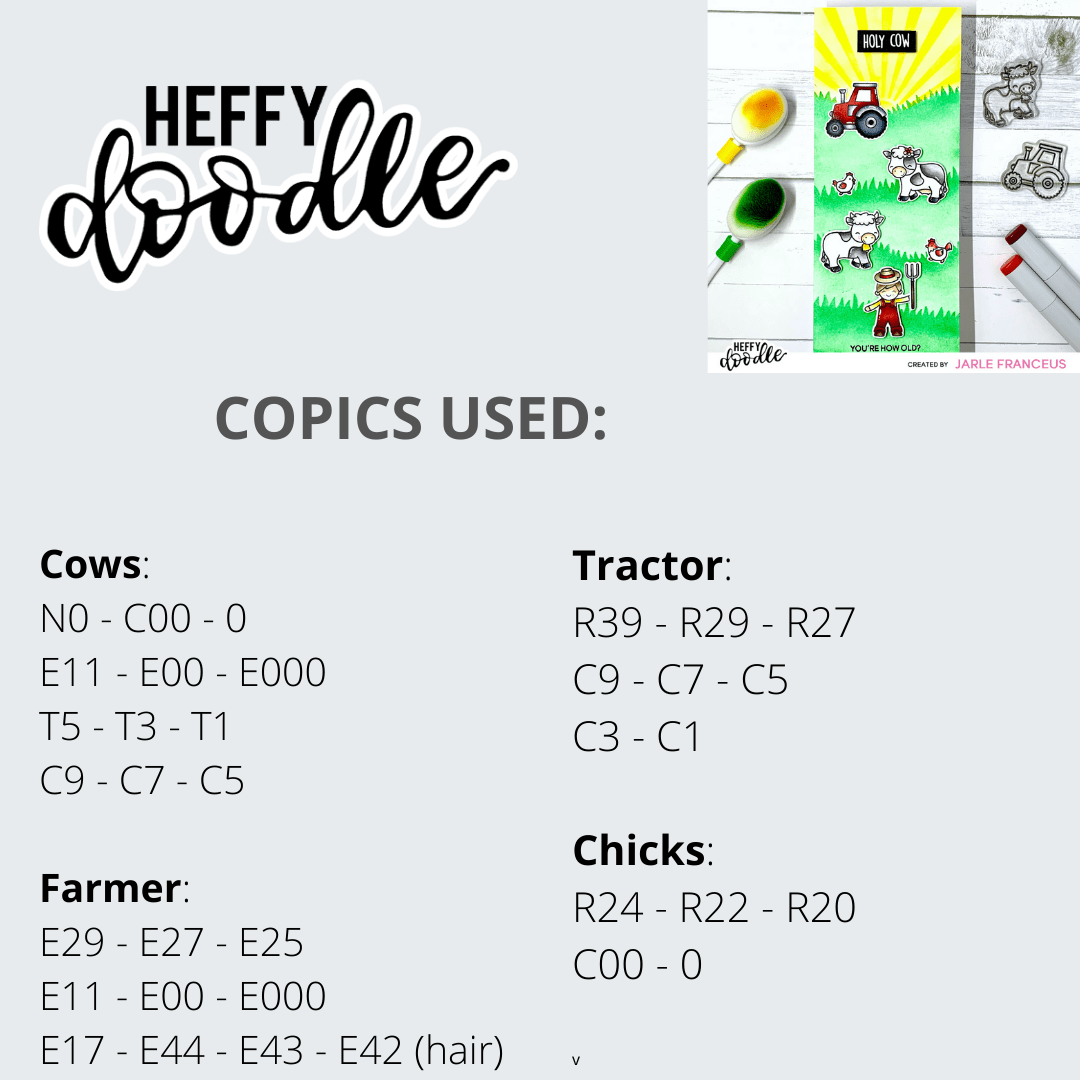
I let my images dry for 5 minutes before I started my coloring. You can find the Copics I used in this graphic below. I also added a few details with a white gel pen.
I used both coordinaties dies to die cut my images. Of course I used my cute mini die cutting machine. You have no idea how much I love it. It is SO timesaving!
Before adhering everything, I placed down my images where I wanted them. I also put down my sentiments so I knew exactly where they had to go. I just had to use the ‘holy cow’ one. It’s so funny!
So the first part I heat embossed in white on black cardstock. The second part was stamped directly on the panel, with Versafine Onyx black ink.
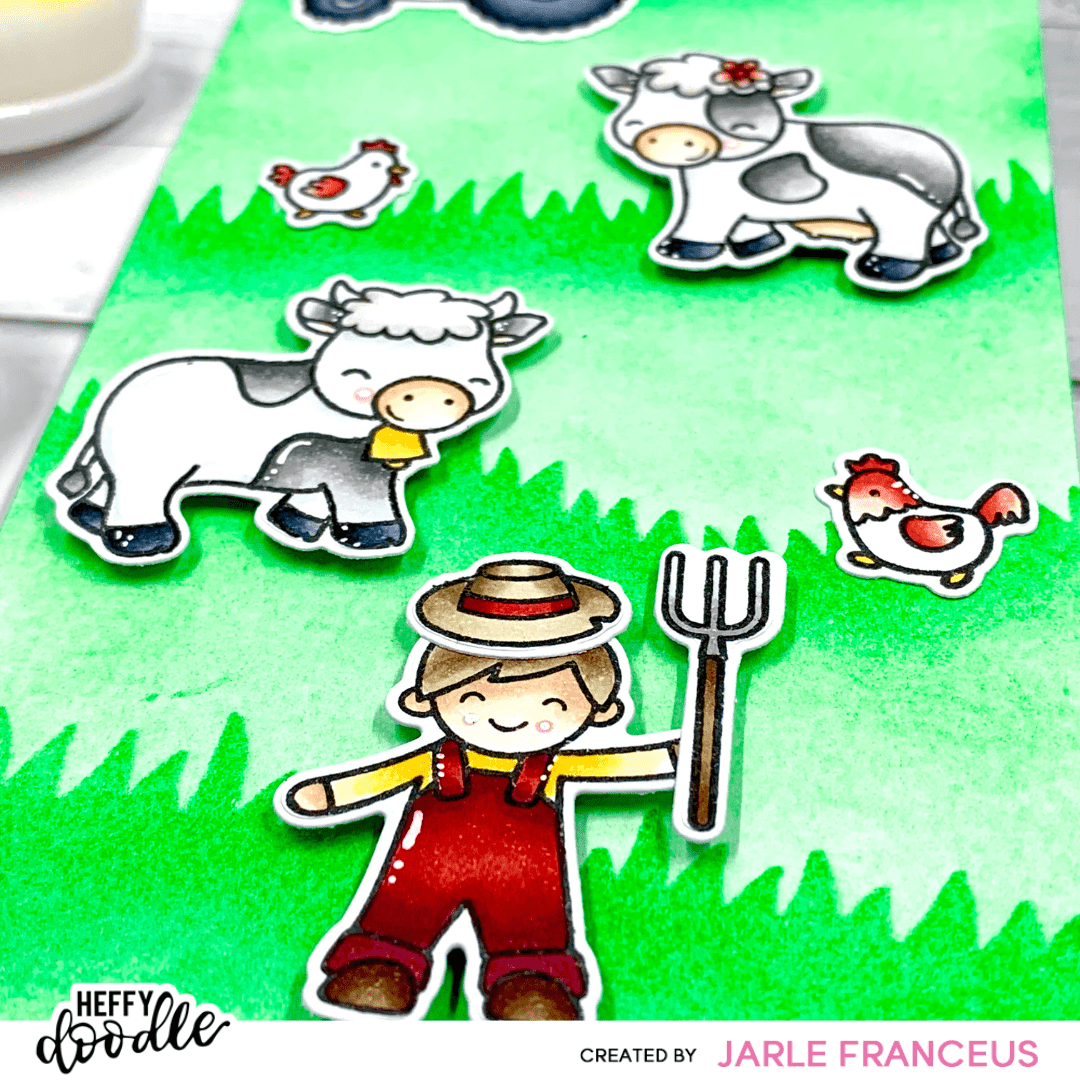
Time to adhere everything. I glued a few ones directly on my slimline and a few other ones were put down with foam tape. This also creates some dimension.
I put my panel on a white cardbase and my card was all done!
I hope you like how it turned out. I also hope it gave you a little bit of inspiration.
Thank you for reading this post. I will be back soon!
Love, Jarle x