
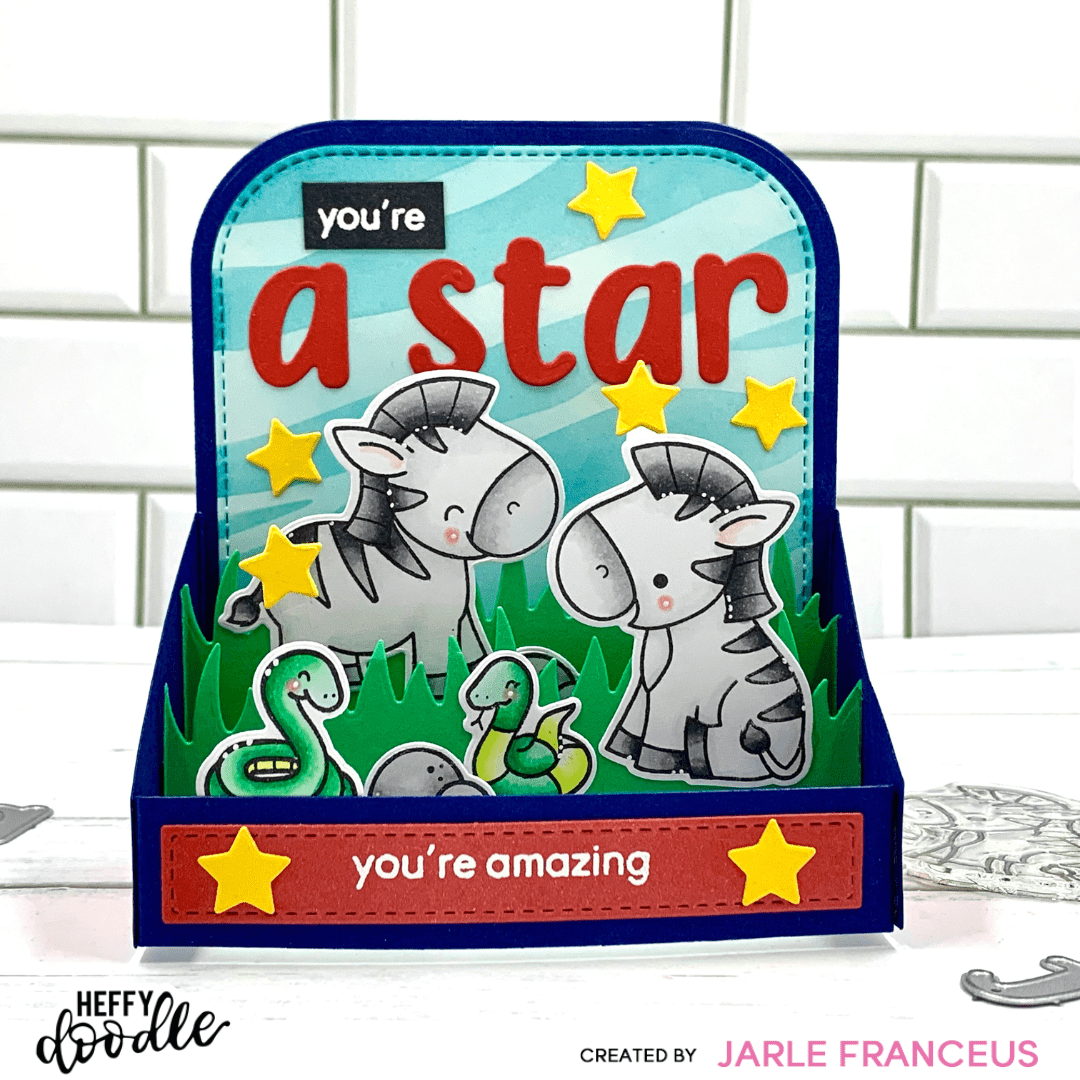
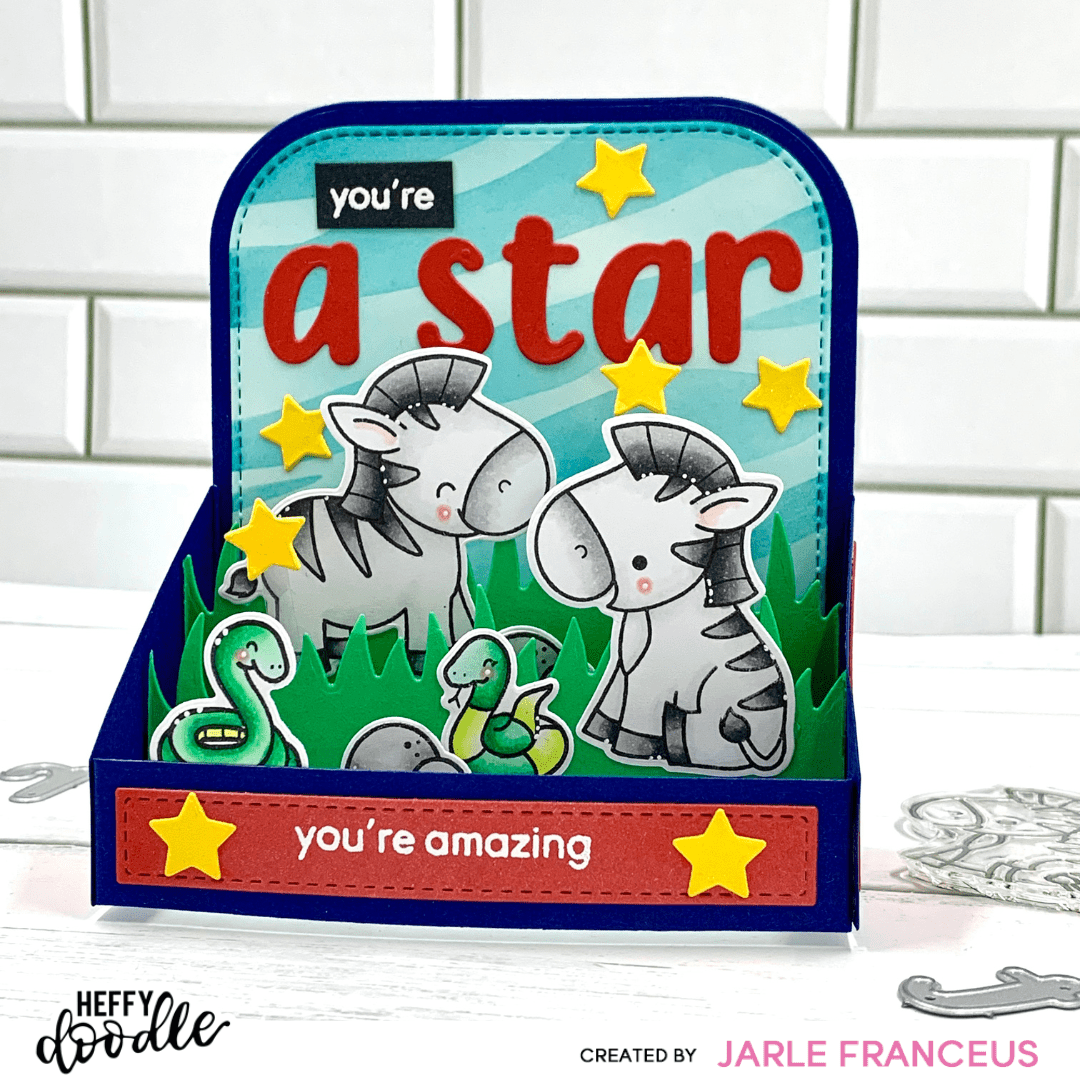
Fun & Happy Box Card

Hi crafty friends!
I’m back with another project for my Sweet Scenes Series for Heffy Doodle. I had SO much fun making this box card! Let me tell you how this card came together.
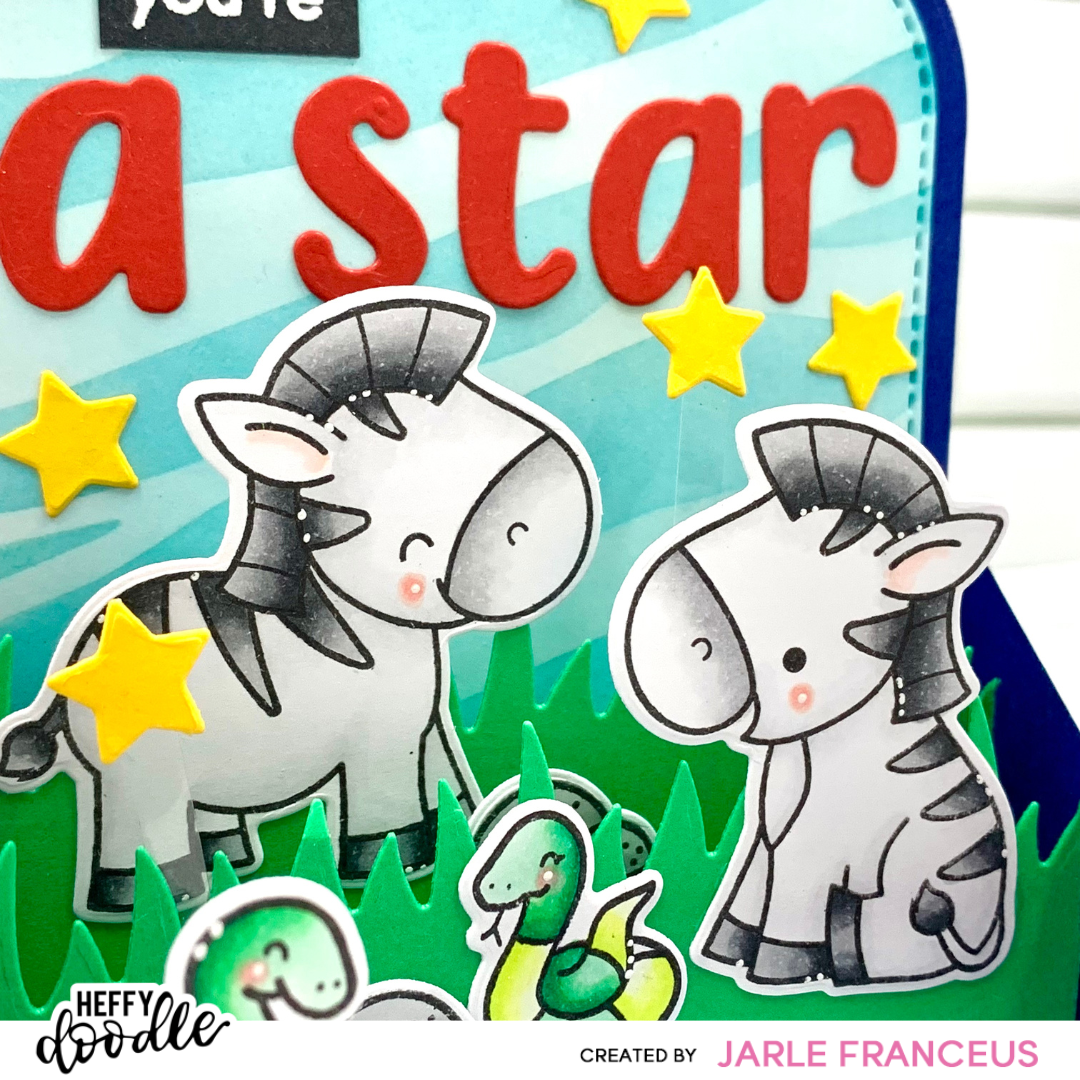
I started by stamping all my images on alcohol marker friendly cardstock with Lawn Fawn Jet Black ink. All the critters come from the new 2×2 Zoo Animals stamp set. The rocks come from the Be Hoppy set. I colored all the cute critters with Copic Markers. Here is a list of the combinations I used:
- Zebras:
- N6 – N4 – N2
- N0 – C00 – 0
- Snakes:
- YG01 – YG00 – YG000
- G17 – G02 – G00
- Rocks: T5 – T3 T1
- Blush: R22 – R30
I added a few details with my white gel pen and die cut them with the coordinating dies and my mini die cutting machine. So, I could put these aside for now and started working on the box.
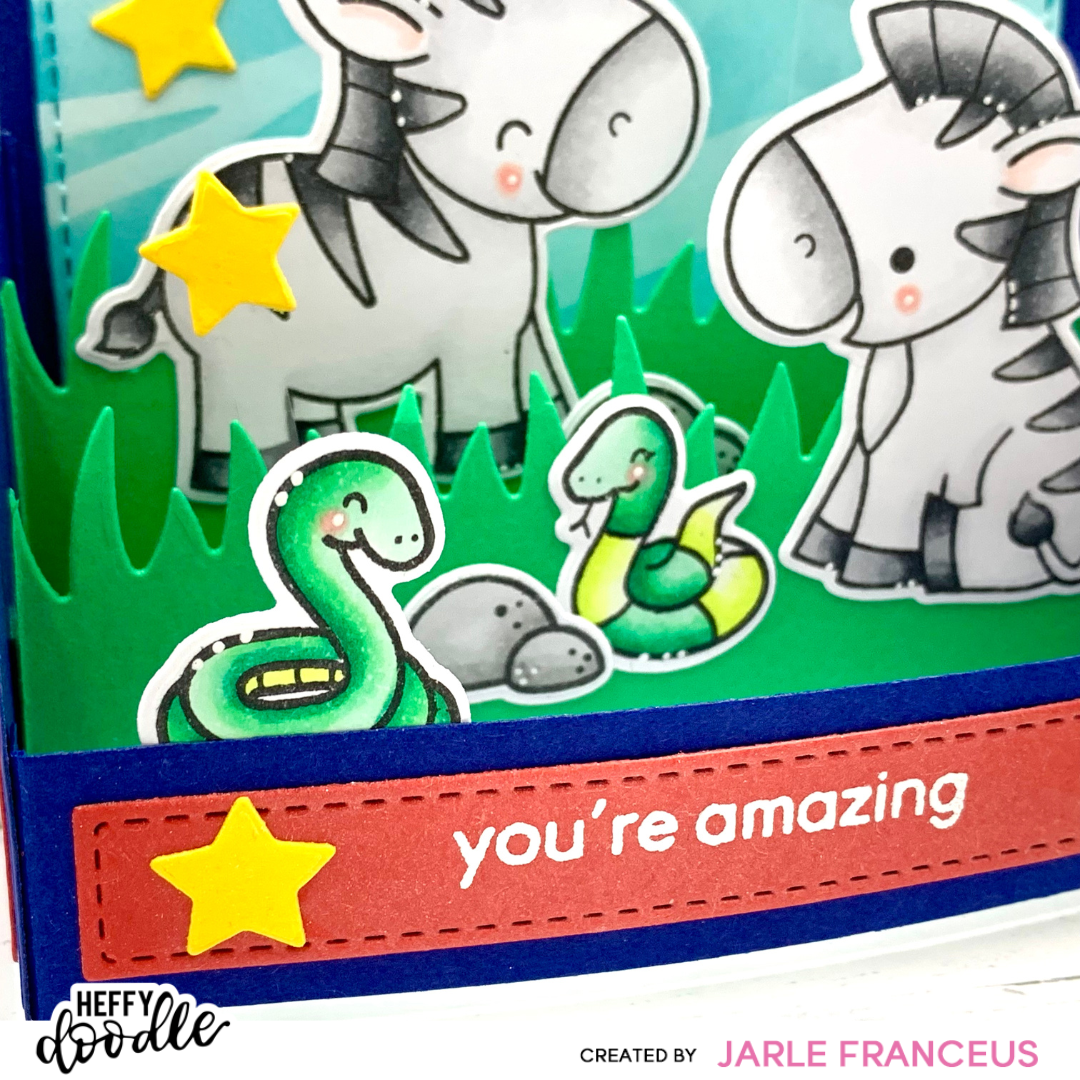
I took the new Brooke’s 3D Box dies and die cut all the pieces out of some different colors cardstock: Huckleberry (blue), Greenbean (green), Cherry on Top (red). For the sky I die cut the ’rounded inside panel’ from the same die set out of Bristol Smooth cardstock. I put the Zebra Stripe stencil on top and ink blended it with Concord&9th Peacock ink.
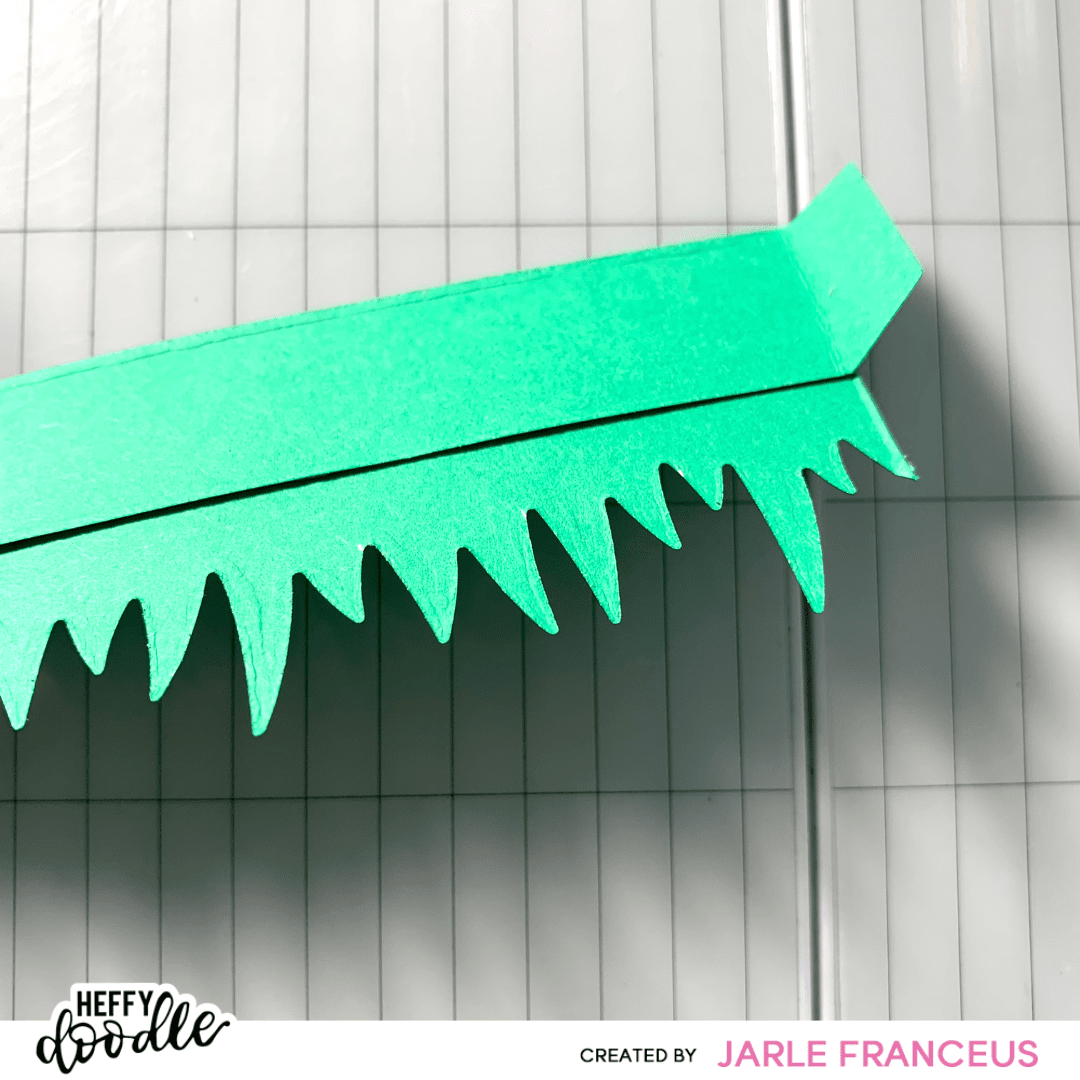
I put all the pieces together with strong Scotch tape. I did add a bit of grass to the small ‘panels’ that go inside of the box. I used the new Freshly Cut Grass dies for this. I die cut 2 of these out of the green cardstock and measured exactly how long they ought to be. Then I could cut it at the exact size with my mini paper trimmer and adhere it on the regular ‘panels’. You can see it in the picture below.
When everything was assembled, I could adhere my images inside the box. I did this with liquid glue so I had time to wiggle things around.
Time to work on the sentiment! I heat embossed the ‘You’re amazing’ from the More Classic Sentiments set. I prepped the small red panel with my anti static powder tool, stamped the sentiment with Versamark ink and sprinkled on some white embossing powder. After that I heat set it with my heat tool and glued the panel to the front of my box.
For the big sentiment, which is the star of the show (pun intended), I die cut the letters from the Moxie Alphabet out of Cherry On Top cardstock. I adhered my letters onto the sky background and heat embossed the ‘you’re’ from the same More Classic Sentiments on Oreo Crush cardstock. I trimmed it down with the mini paper trimmer and put it above the ‘a star’ letters.
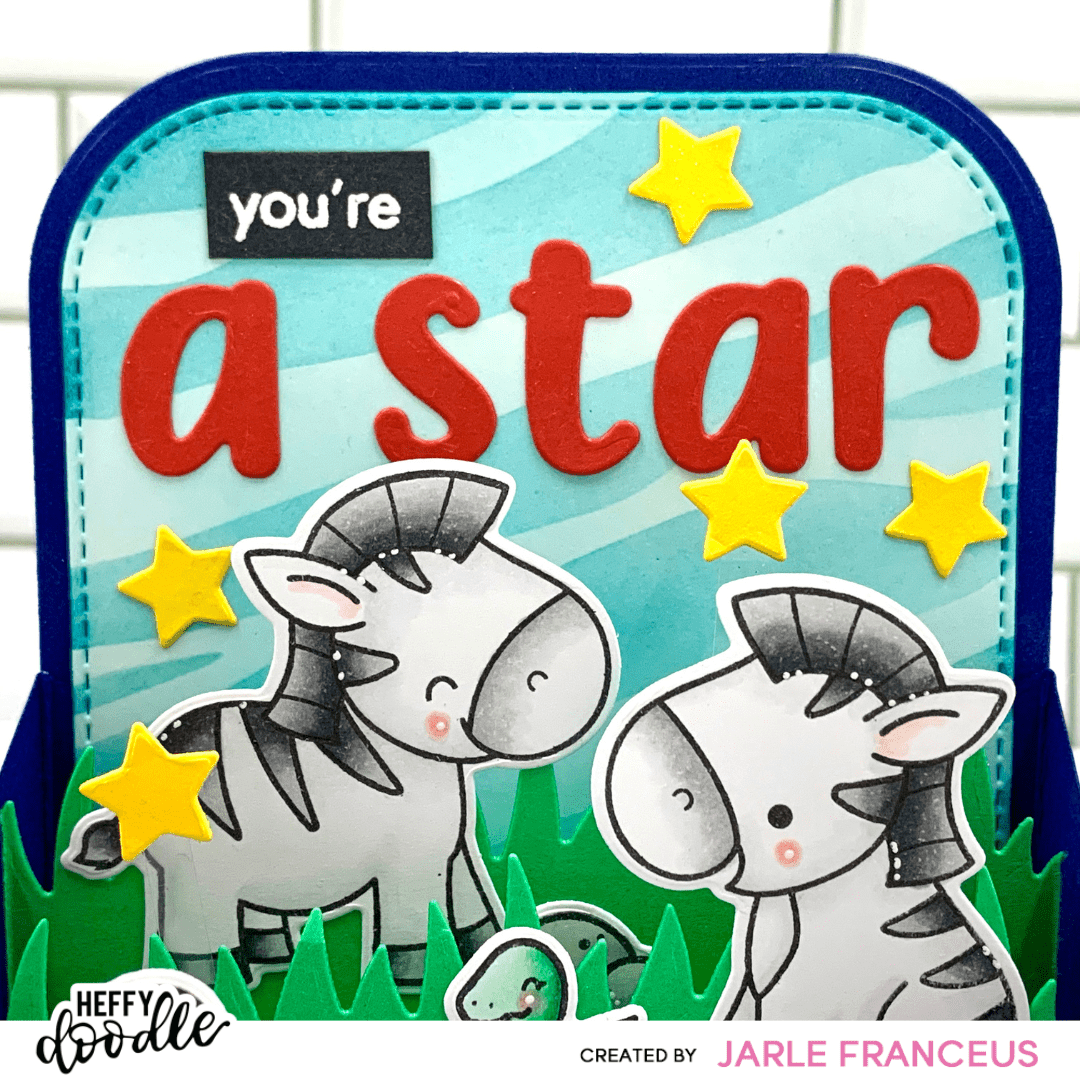
As a finishing touch, I added a few stars into my scene. I intended to use the stars from the 2×2 Zoo Animals stamp set, but I realised I had left over stars from the Carnival Backdrop die, so I used these instead…
I adhered 2 of the stars on tiny slivers of acetate to make it look like they were floating in the scene. Isn’t it amazing? I put a bit of shine onto the stars with my glitter pen, but you can’t really see that in the pictures…
I am SO in love with this card and I had SO much fun making it! It’s SUPER easy to put together.
I hope I gave you a little bit of inspiration to get crafty. Thank you so much for reading. I will be back soon with another card. Have a great weekend!
Love, Jarle x