
Beautiful Ink Blending For A Baby Card
Hi friends!
I am so happy to be back here on the Heffy Doodle blog, showcasing this baby card with some beautiful Distress Oxide colors. I really love this color combo and I hope you’ll try it out!

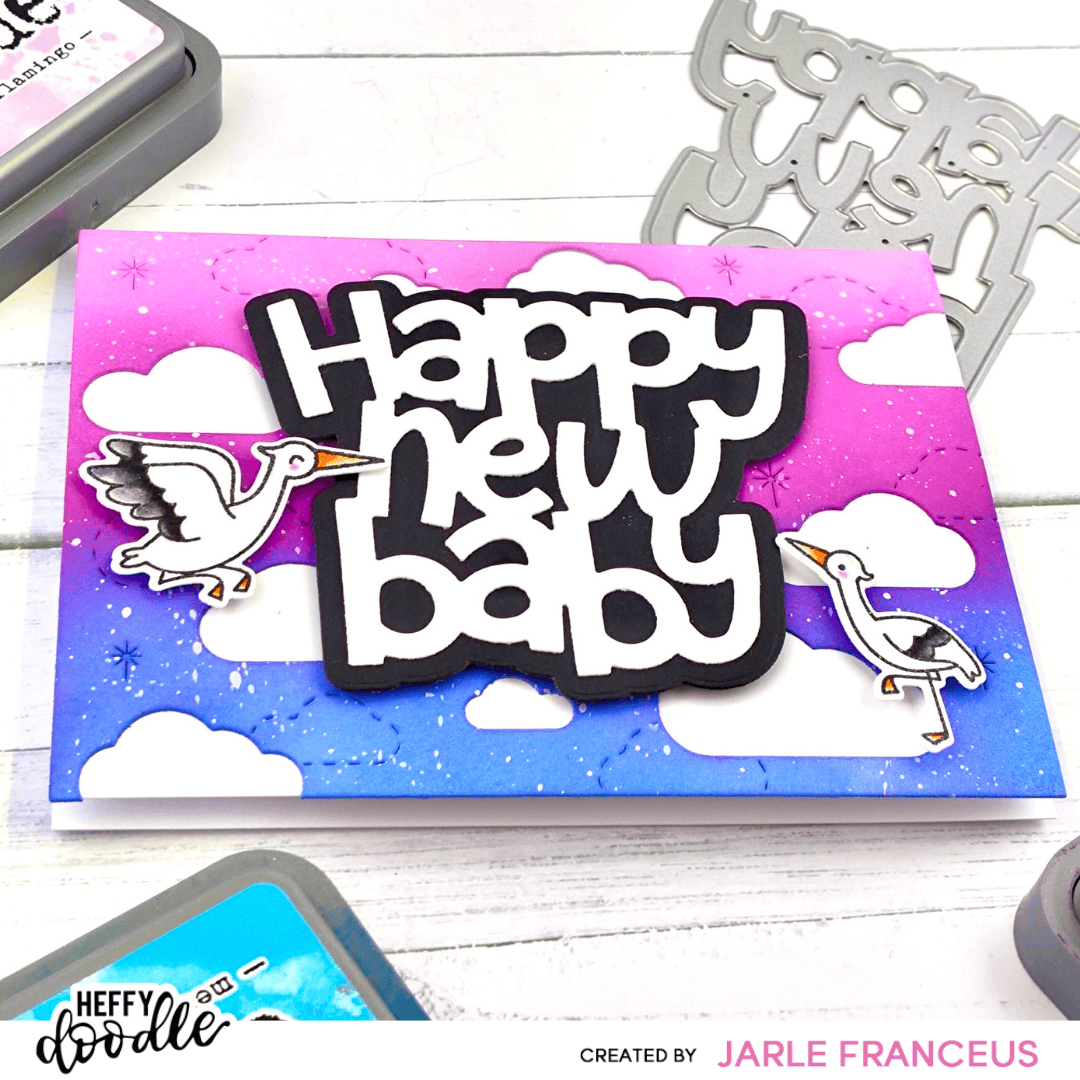
I started by die cutting the Sky High Cloud Backdrop out of some Bristol Smooth cardstock. This is my GO TO cardstock if I want to ink blend my background. I took out my Distress Oxides in the colors Kitsch Flamingo, Seedless Preserves and Mermaid Lagoon.
I started with the Kitsch Flamingo on the top of the panel and worked my way to the Mermaid Lagoon on the bottom. I went over the different colors a few times, to get a smooth blend. If you have trouble ink blending, you should definitely give Oxide inks a go, in combination with the Bristol Smooth paper.
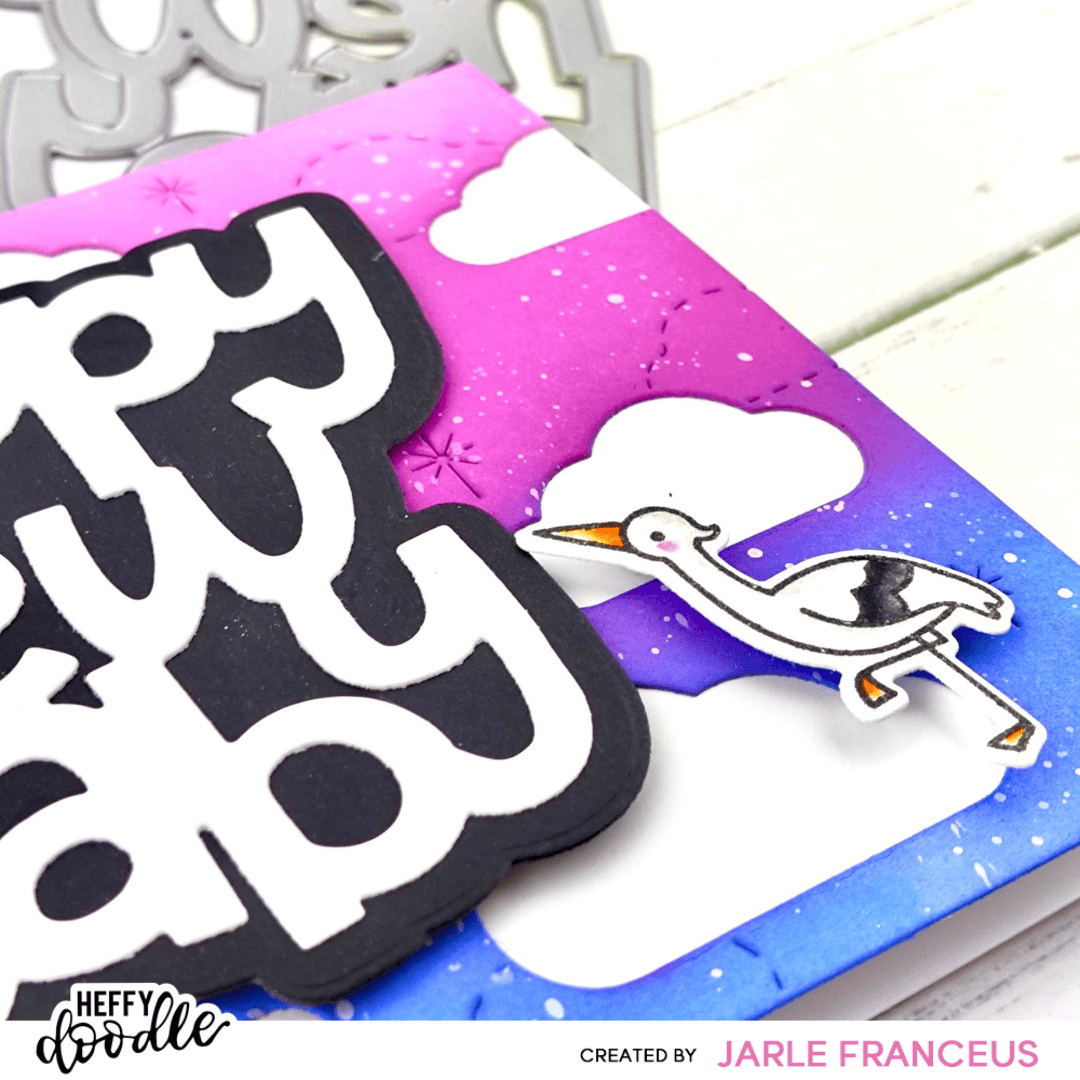
This Sky High Cloud Backdrop is one of my all time favorites. It’s such a beautiful backdrop for all of your scenes. I splattered on some white acrylic paint (Copic White) and set the panel aside to dry.
Then I worked on my sentiment. I die cut the Jumbo Happy New Baby out of plain white cardstock and the shadow out of Oreo Crush cardstock. I adhered these 2 together, using liquid glue.
When my background piece was all dry, I put it down on a white card base. I put some foam tape on the back of the sentiment and adhered it on the ink blended panel. The foam tape gives it a pop of dimension which I really love.
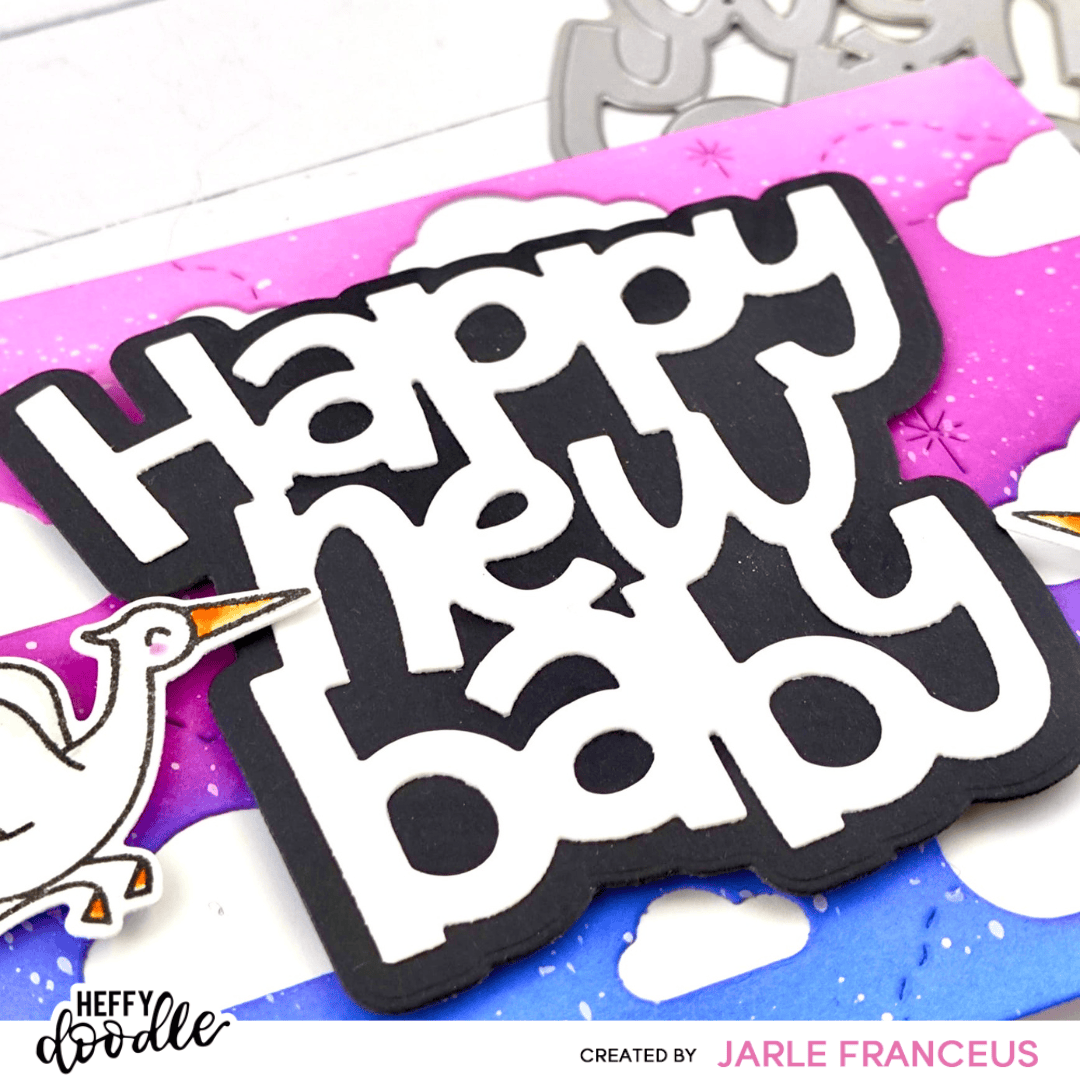
It does need a few cute images at this point, so I took out the Special Delivery stamp set. I stamped 2 storks with Versafine Onyx Black ink on Bristol Smooth cardstock. I colored them with my Zig markers and a blender brush. These are the colors I used:
- Light Gray
- Black / Dark Gray
- Light Carmine (for the blushy cheeks)
I die cut the images with the coordinating dies and the Heffy Doodle Mini Die Cutting Machine. I put some foam tape on the back of the images and adhered them both next to the sentiment.
This finishes off my card. I am super happy with how it turned out and I hope this blog post gave you a little bit of crafty inspiration.
Have a great day!
Love, Jarle x