
A Heartfilled Congratulations

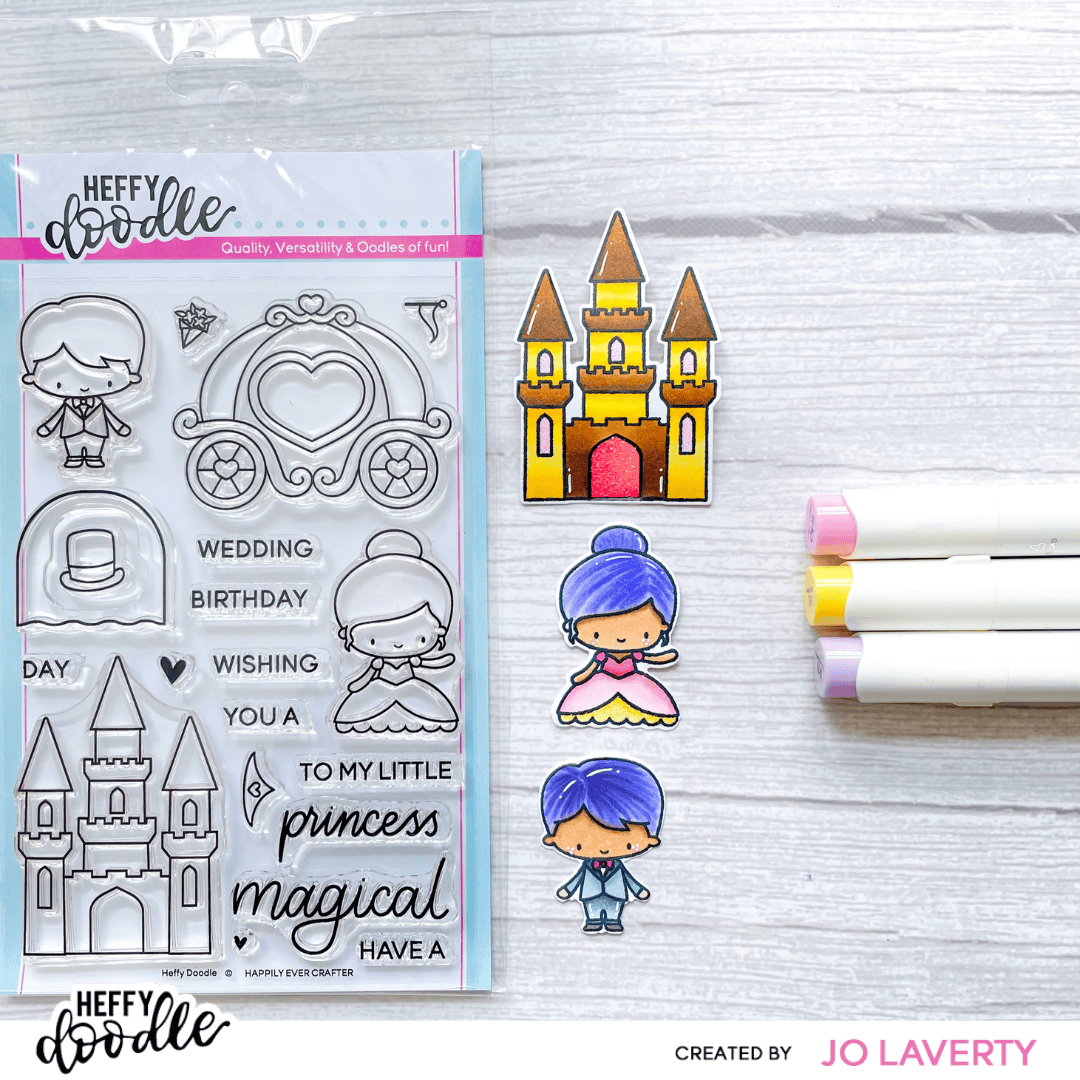
Happy Friday Darlings! It’s Jo Laverty here with another Heffy Doodle creation. Today I am sharing a card I made using the amazing stencils ‘Confetti Hearts‘ and ‘Head in the Clouds‘, paired with the ever so cute ‘Happily Ever Crafter‘ stamp set.
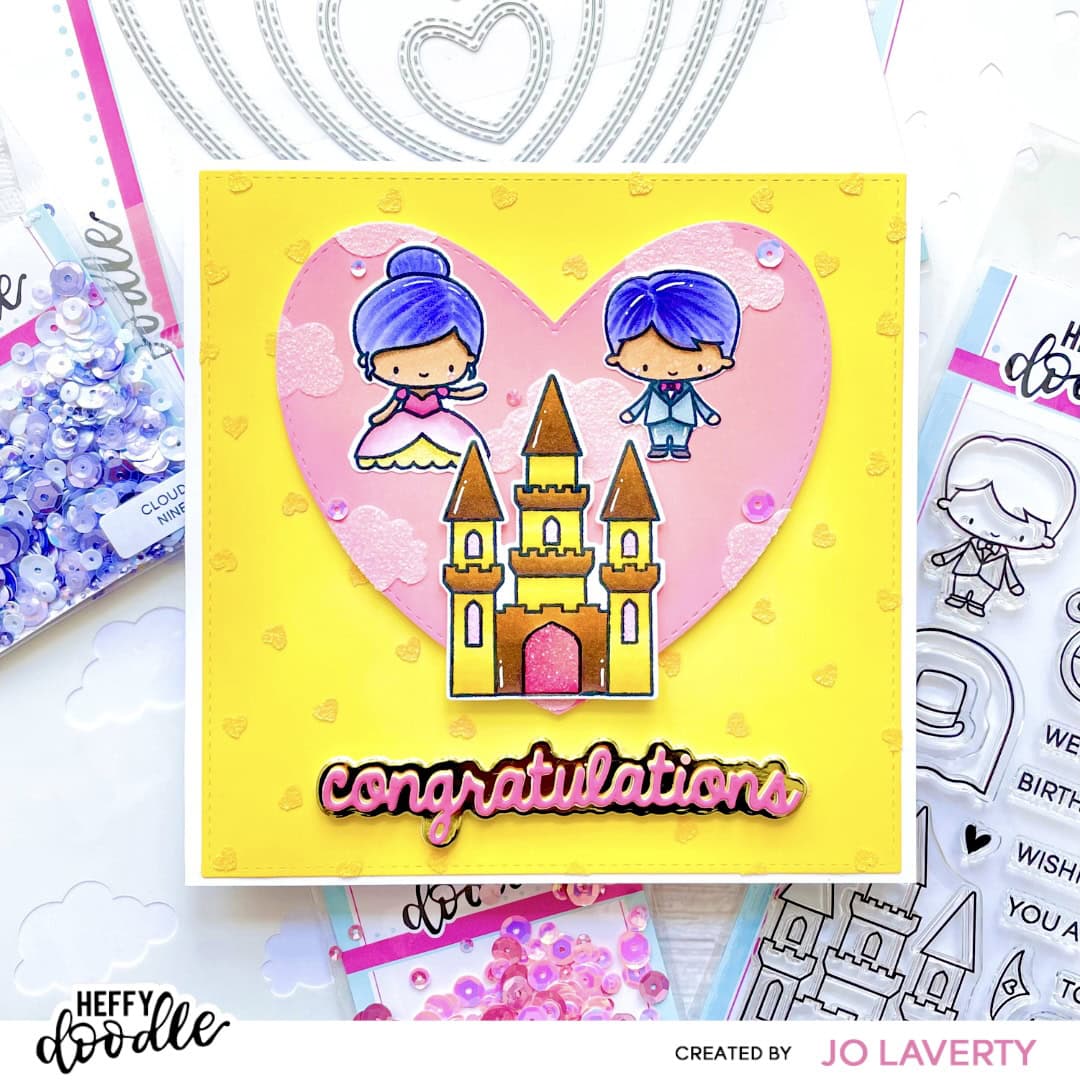
I had fun creating this bright coloured card. If you would like to find out how I made this card, please see below step by step instructions.
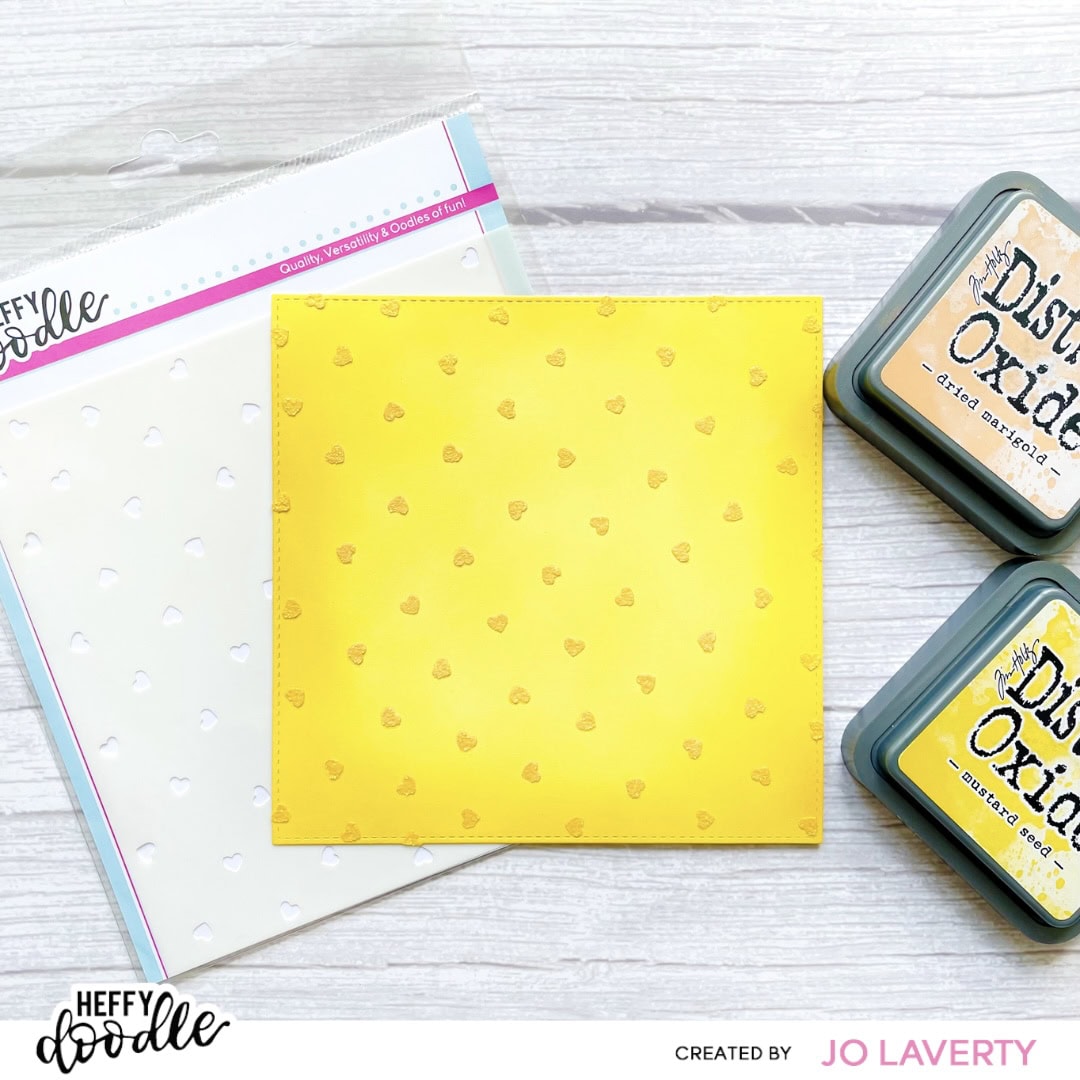
Background
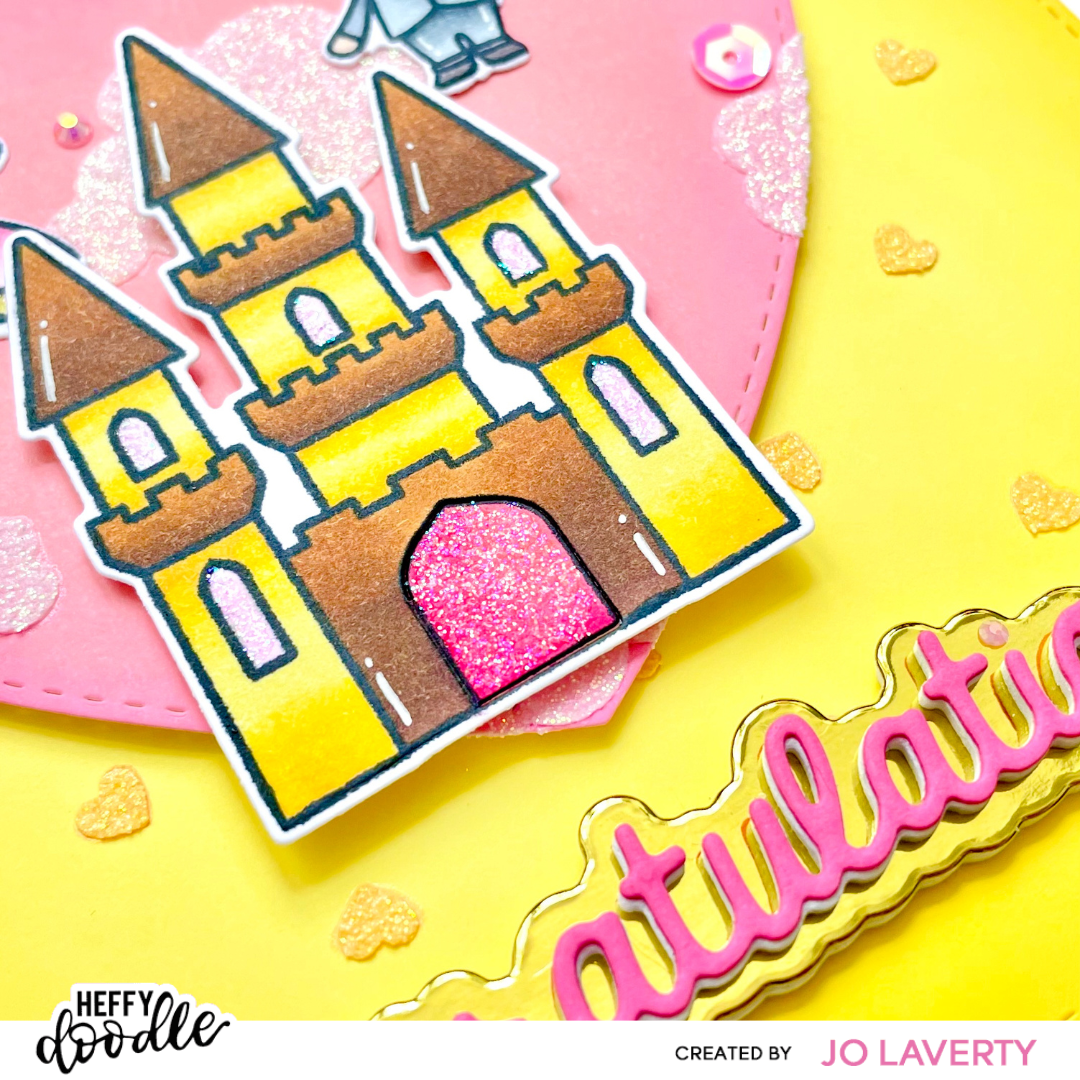
Die cut a sqaure from white cardstock, then ink blend the following Distress Oxides: ‘Squeezed Lemon’ (all over) and ‘Mustard Seed’ (around the edges). Next, take the ‘Confetti Hearts‘ stencil and ink blend ‘Dried Marigold’ over, followed by Nuvo’s ‘Moonstone’ glimmer paste.
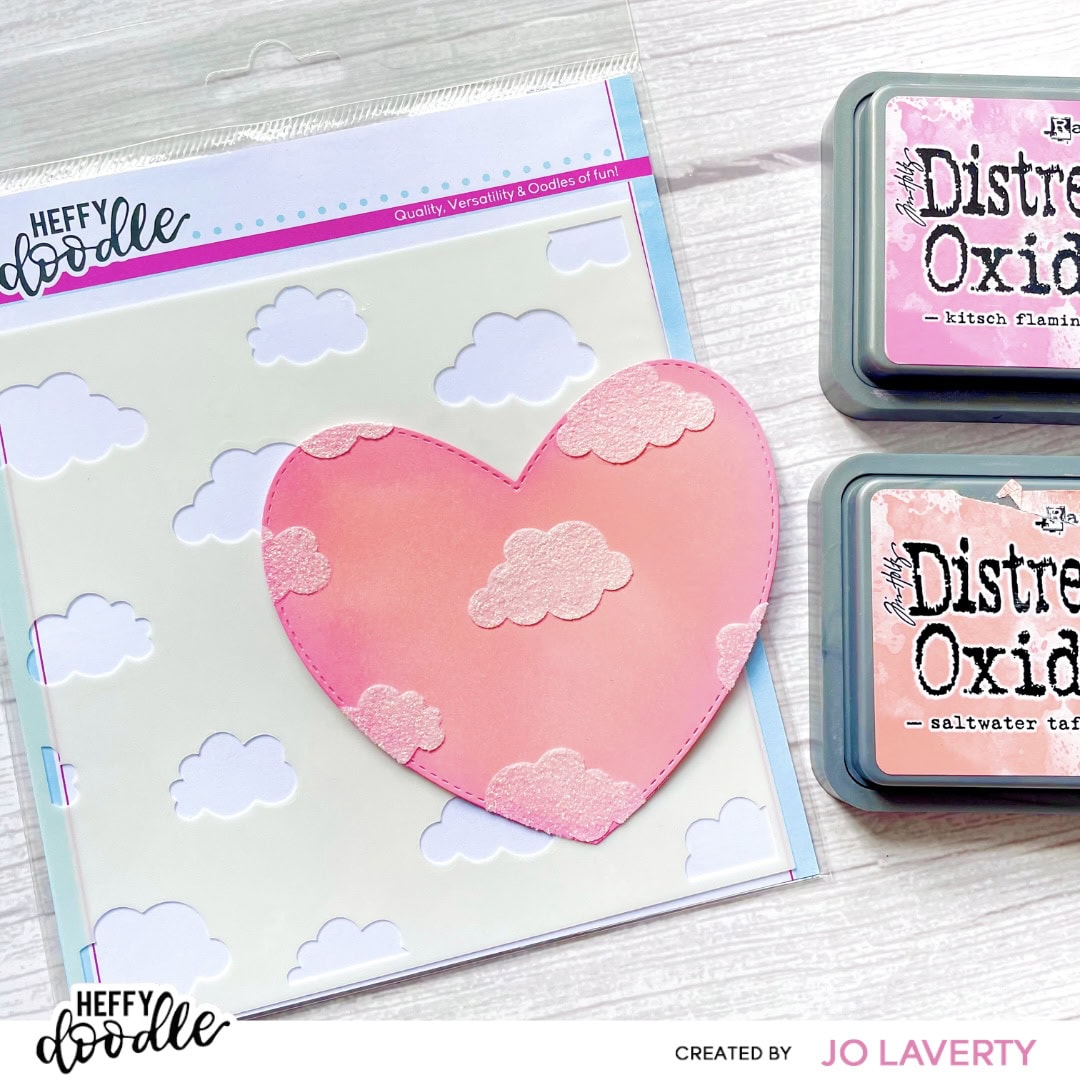
Heart Layer
Taking a medium heart die from the ‘Stitched Hearts‘ die set, and some white cardstock, run both through a die cut machine. Next, ink blend the following Distress Oxides: ‘Saltwater Taffy’ (all over) and ‘Kitsch Flamingo’ (around the edges). Next, take the ‘Head in the Clouds‘ stencil and apply Nuvo’s ‘Moonstone’ glimmer paste.
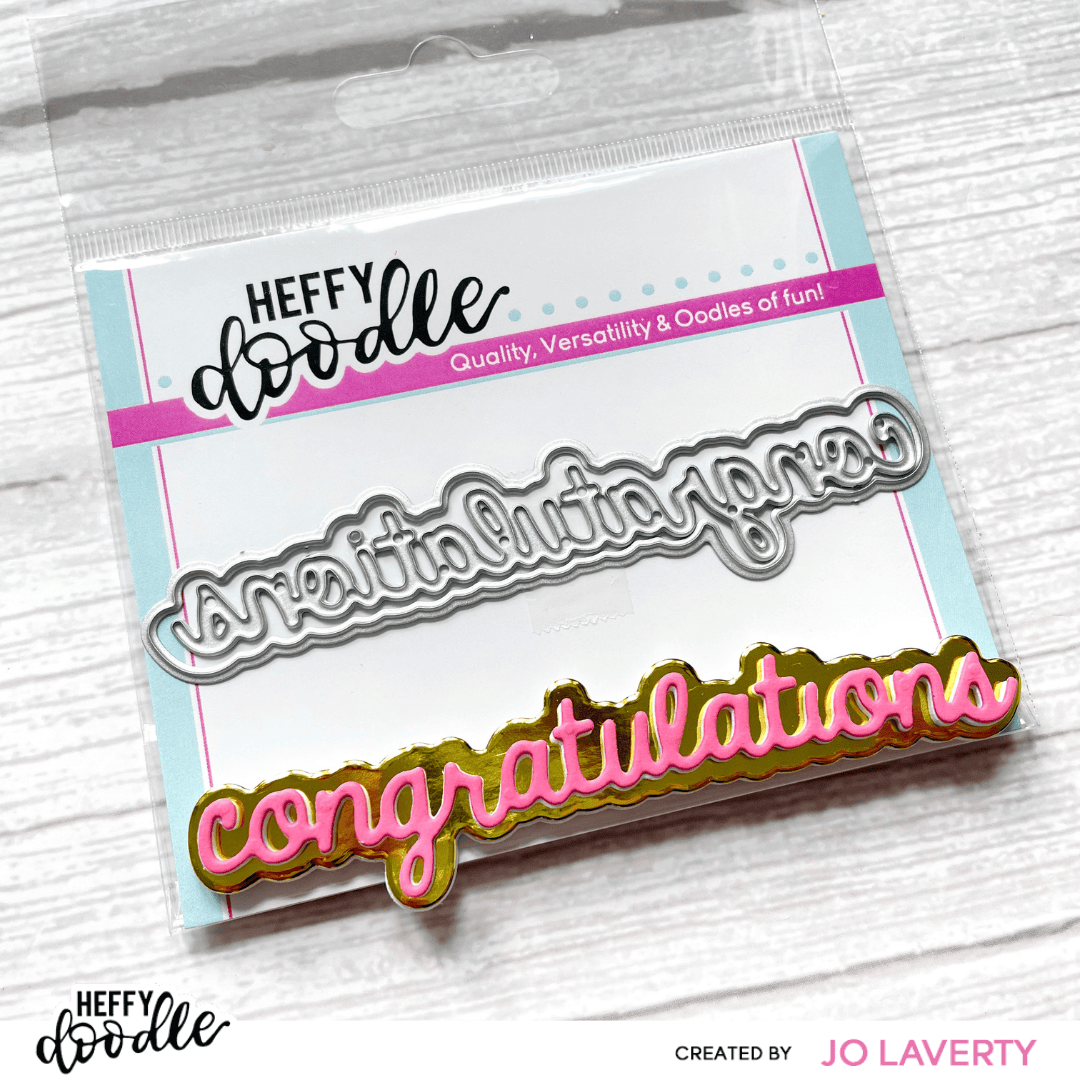
Sentiment
Taking some gold and pink cardstock, and the ‘Congraulations‘ Shadow Heffy Cuts die, run them through a die cut machine. For some extra dimension, also die cut the shadow with some foam paper. Glue everything together.
Images
Stamp and die cut images from the ‘Happily Ever Crafter‘ stamp set. Color in your images (I used Ohuhu alcohol brush markers), and add in some highlights using a white pen. I also decided to add in some glitter elements using an embossing pen and WOW! Embossing’s ‘Halo’ powder.
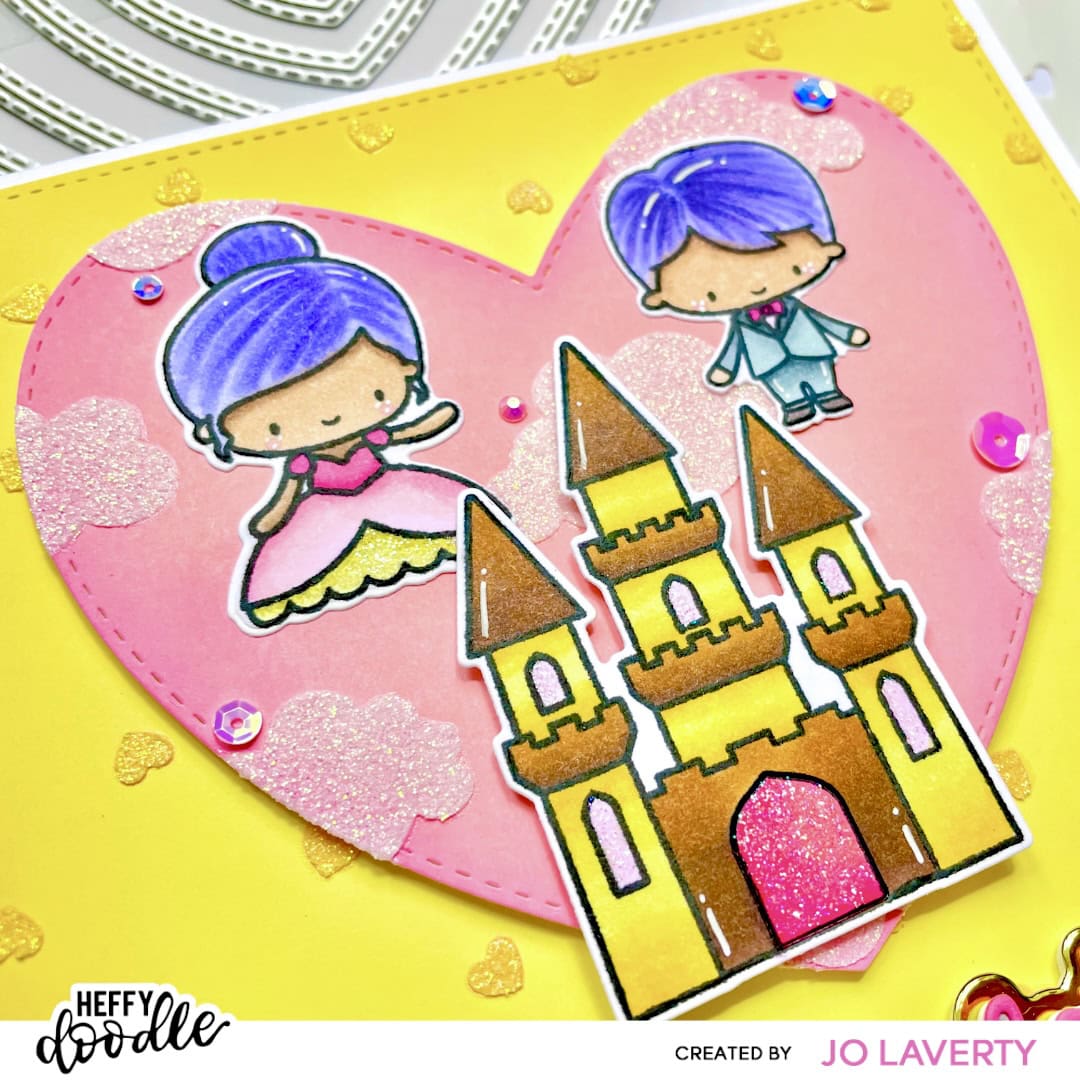
To finish off the card piece everything together using a mixture of foam tape and glue (helps to add dimension), and add some sequins for some extra magical sparkle. I took mine from the ‘Sugar Plum‘ sparkle mix.
I hope you enjoy this card and the step-by-step tutorial. Don’t forget to tag Heffy Doodle in all your HD creations so that we can show them some love. Crafty Hugs, Jo x