One Of A Kind Large Shadow Box

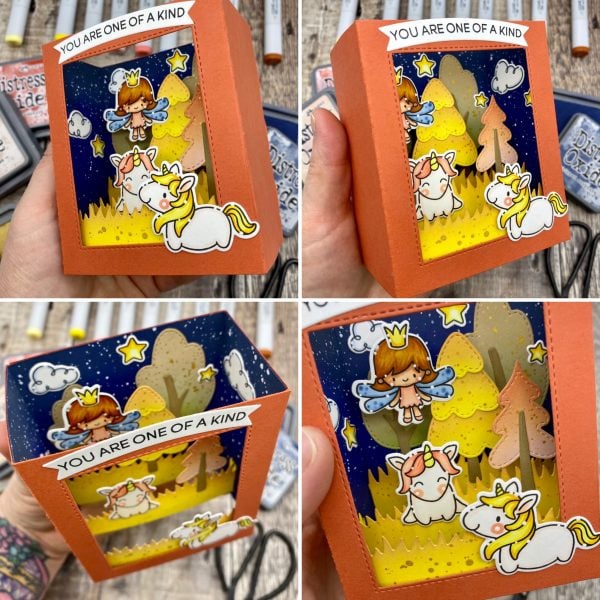
Hey there Crafty Friends! Davina here on the blog with an Interactive design to share with you. I’ve combined multiple stamp and die sets to bring you an evening Fall scene, full of fairies and unicorns. What could be better than that?
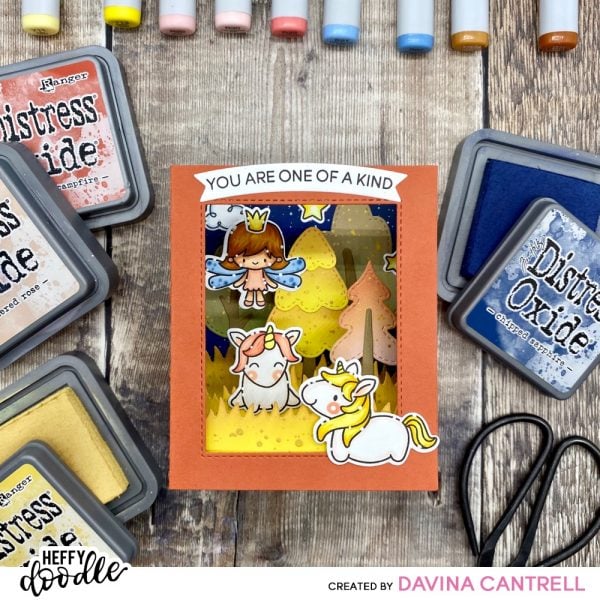
I wanted to share how easy it is to take whimsical out of season stamps, and convert them with intentional color, to extend the usability of your images. I used the typically rainbow hued unicorns from Fluffy Puffy Unicorns, and the sweet little fairy from Absotoothly Awesome, to create this bold Fall scene using colors from the current September BRI Moodboard. I also used several stand alone dies to make this shadow box easy peasy.
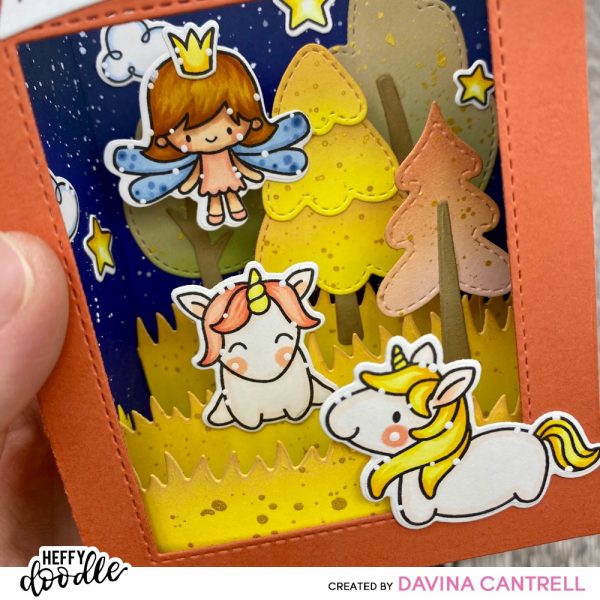
I began by stamping my images onto Alcohol Marker Friendly bright white cardstock (available in the Heffy Doodle shop), and copic colored my images using Blush Pink, Terra Cotta, Gold, and Navy to achieve my desired colored combos. After die cutting my images with the coordinating dies, I added small white dot highlights.
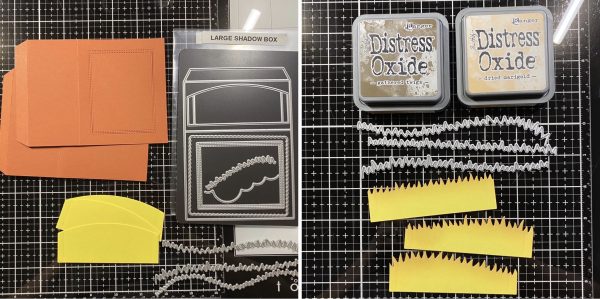
Then, I used the Big Shadow Box die set to create my pop up box. I cut two pieces of terra cotta cardstock using the main die, and from one of the panels I used the double stitched window to cut out the center. From a strip of yellow gold cardstock, I cut out three of the tabbed inserts. I cut the top of each of those inserts with a different grassy layer die from the Grassy Lass Border dies. Using Dried Marigold and Gathered Twigs Distress-oxides I gently inked the edges of all the grass pieces so they would look like fall dried grass. Next, I used the Forest Builder Dies to cut trees from different colored cardstock. I inked the edges of each piece with different combos of Distress Oxide Ink to make each tree look unique and colorful. Once complete I splattered gold watercolor onto all the inked pieces for sparkle and shine.
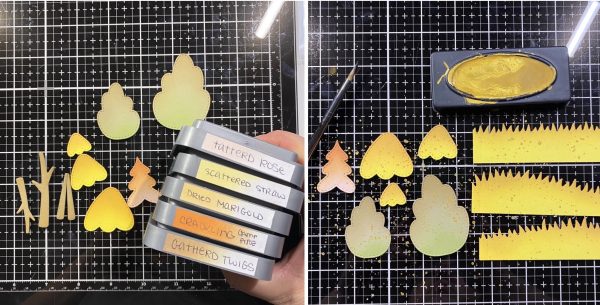
Before assembling, I decided to create an interior panel to line the 3 visible sides. I trimmed a piece of Navy Cardstock to fit inside. The dimensions are 7.5 inches by 4.25. I scored the length 2 inches from each end and used a bone folder to get nice crisp folds. I inked the edges and splattered with white a glittery ink to look like a starry sky. Using liquid glue, I attached the back portion first. Carefully making sure the folds would rest inside the outer folds, I glued each side together.
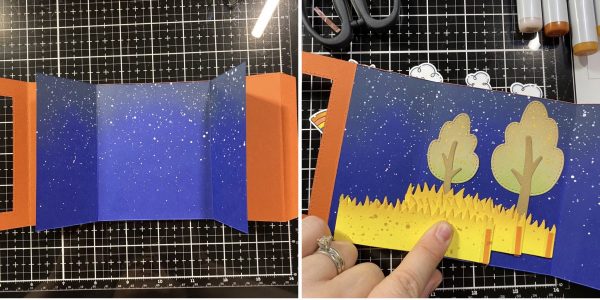
I staggered the height of each of the grassy panels and adhered the left tabs first to the left side. Then holding them open and flat I closed the right side onto them to achieve perfect alignment. Before securing the front closed, I added all of my images and die cuts to the back, sides, and layers. I reserved one unicorn for the front, and added that and the curved sentiment, after adhering the box shut. Not pictured, I layered the scalloped panel and some white cardstock to the back portion, to add a sentiment for the recipient.
Thanks for dropping by,
Davina
