You Are The Coolest with Davina

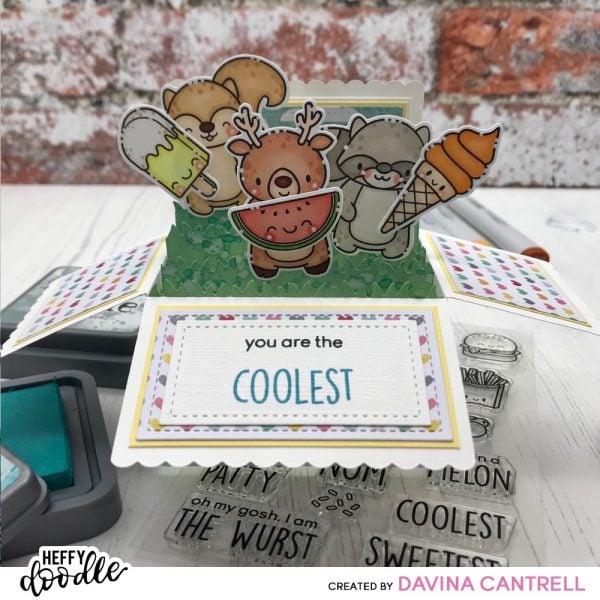
Hello Heffy Doodlers! Davina here on the blog with a fun filled interactive pop up box. I used Heffy Doodle stamps and a ton of patterned paper scraps to create this bright and tasty treat of a card. All of my images come from two Heffy Doodle stamp sets. Treat Yo Self, and More Than S’mores, along with their oordinating dies.
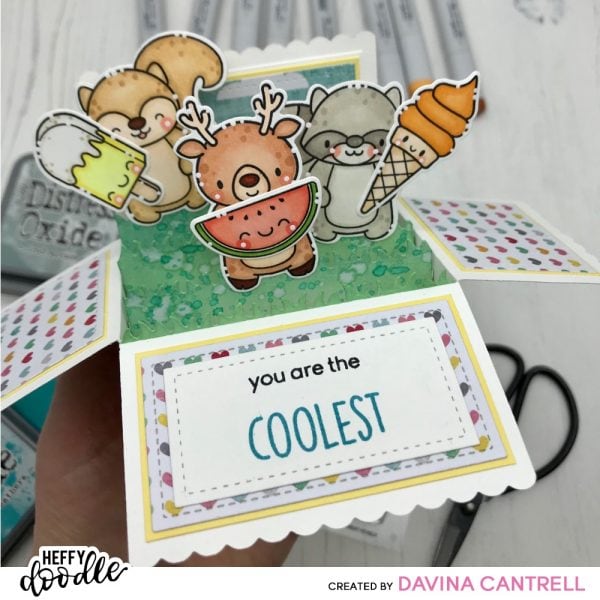
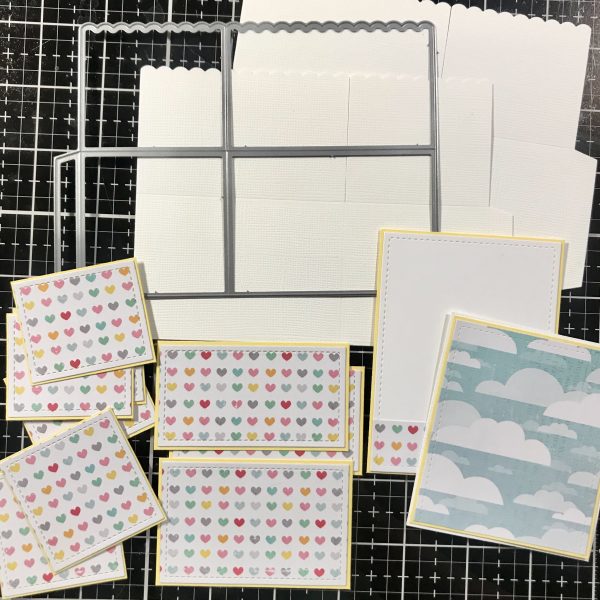
For this Pop up box, I started with the Pop Up Box die from Lawn Fawn. I used the main portion of the die to cut two pieces from textured white cardstock. Next, using the included stitched panels, I cut some heart printed paper to surround the box. I mounted each heart panel onto soft yellow cardstock with just a little bit of a peek a boo layer showing. I also used some scrap paper to create a little panel for the back, and a coordinating cloud print panel for the background.
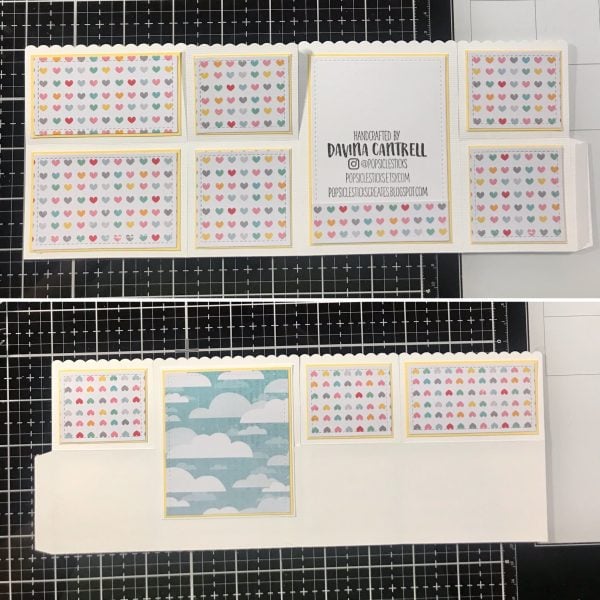
I carefully folded all of the flaps to the box pieces (except the vary back panel. Do not fold it), and pressed with a bone folder. I used super tape from Thermoweb to adhere the box together. I partially connected the die cut box pieces together, using adhesive on only one tab, to create one long piece. I glued down all of my patterned layered panels to the front and backside of the box. Keep in mind you want the tabs to be on the inside of the box, and layer the interior background panel over the top of the tab.
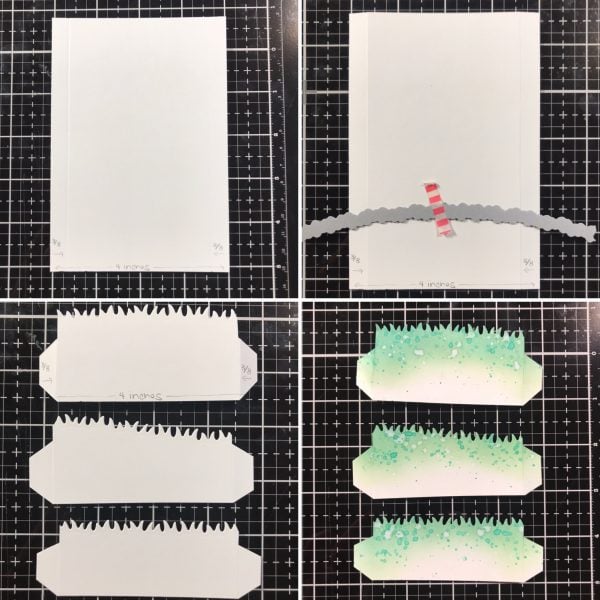
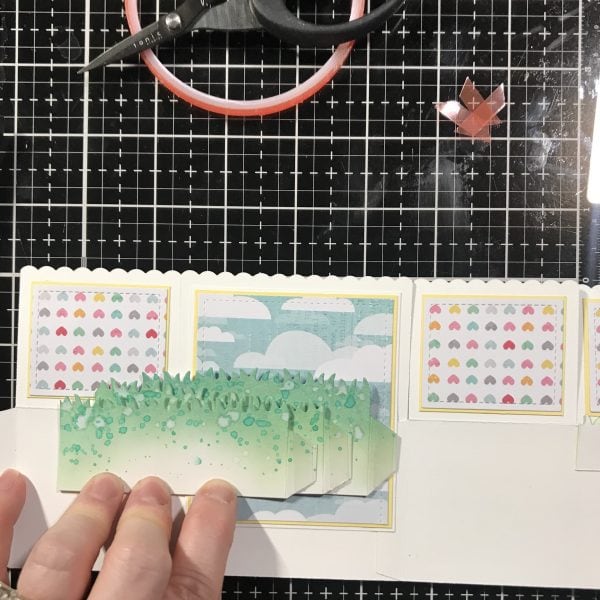
Next, I created my interior layers. I did not use the included dies as they are straight and flat. Since I wanted some grassy hills for my images, I made my own. I cut a piece of 4 x 6 Bristol Smooth Cardstock and scored down the length 3/8 of an inch in, on both sides. Those will be how you attach the flaps inside the box. Then, I used Grassy Lass dies to cut a variety of hills about every 1 1/2 inches. And I cut a straight piece that is only about 1/2 inch high. I trimmed the bottoms straight and inked them lightly with Iced Spruce and Peacock Feathers to match the green hearts from the paper. I splattered them a bit and trimmed some of the grass from the side flaps so that the grass can stand taller than the box rim.
I adhered the grass tabs with Thermoweb super tape onto the box by staggering them a bit, and connecting the left side only first. Then holding them in place, fold the right side over to to the left to perfectly place the tabs. Then I completely trimmed the flaps off of the tiny straight grass piece, and glued to the very front before adhering the second flap to securely close the box. There are so many awesome videos on you tube that show how to easily assemble these boxes. Unfortunately, I am just not super articulate haha.
Once my box was assembled, I folded it flat to each side making sure there were no issues with it closing easily. I put it to the side while I worked on the images. I stamped my images onto bright white Neenah cardstock, then colored them with copic markers. I chose colors that were found in my patterned paper to make sure everything matched well. After die cutting my images I used small white dots to highlight the pieces.
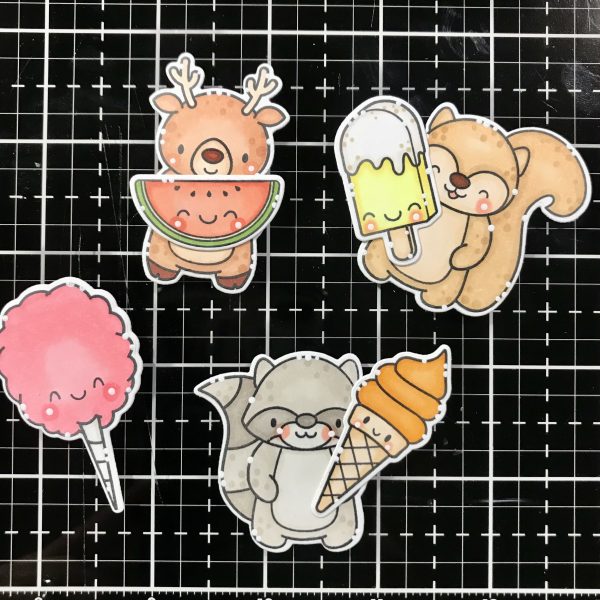
I carefully glued a Cool treat onto each character, then attached a small strip of clear acetate sticking out from the bottom. This strip will help support the characters since they will be floating over the boxes, with only the little feet in front of the grass. Using more Thermoweb super tape, I adhered my characters to the different grass layers making sure they were staggered and visible from the front.
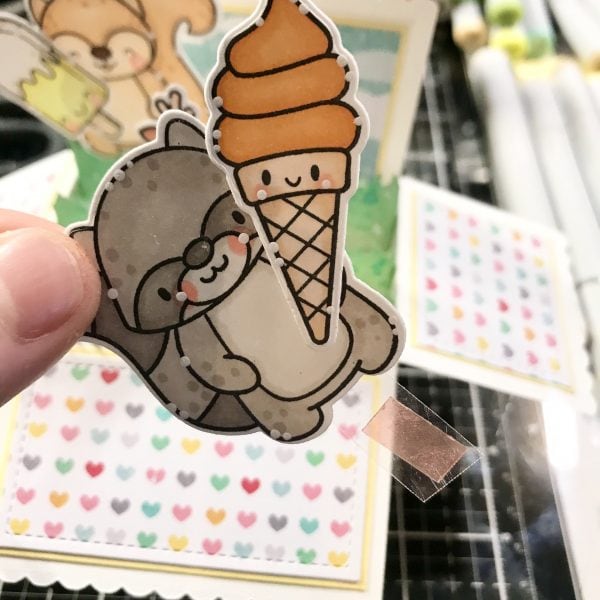
Once everyone was in place, I added a stamped sentiment layer to the very front flap and the cotton candy to the back. It amazes me that these cards can fold flat and into a standard envelope, and my regular cards are bulkier and require extra postage.
 Thank you for dropping by and I hope you have a happy day,
Davina


Ruth
April 23, 2020 at 8:50 pmLove, love, love this card!