Creating Mini Scenes with Laura
Hi everyone! It’s Laura here and I am really excited to be back here on the Heffy Doodle blog with another card in my scene building series!

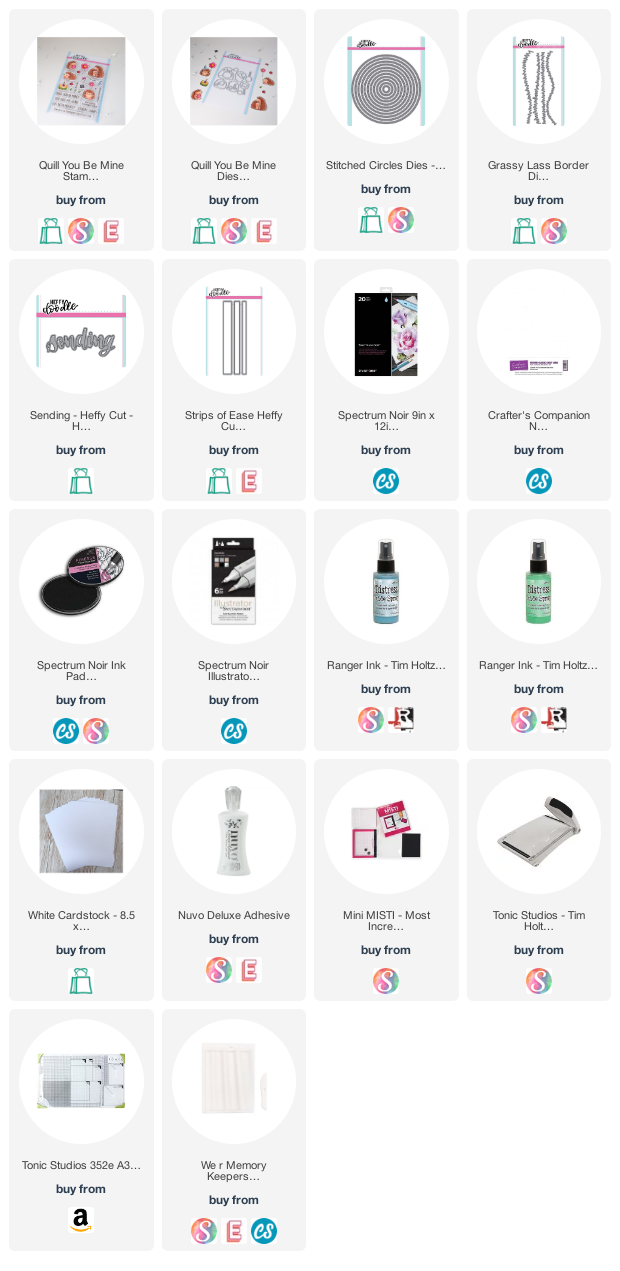
This time, instead of creating a full scene card, I incorporated smaller scenes in my design. Let’s see how!
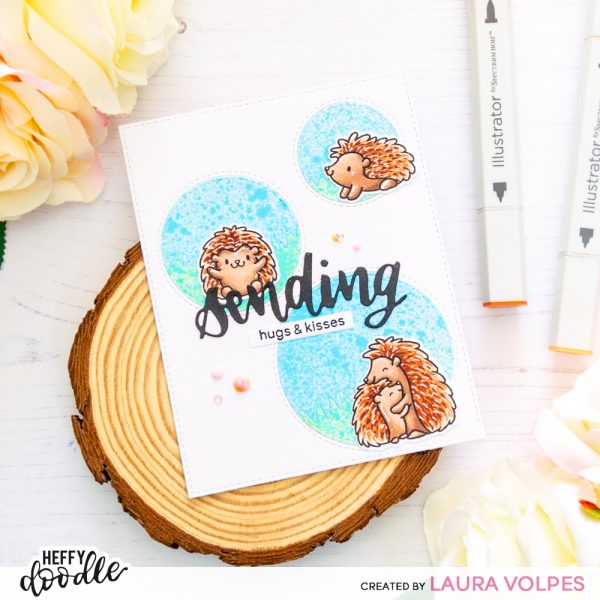
I started with some die cutting on my card base. I used the Imperial Stitched Rectangles and the Stitched Circle Dies and cut some watercolor cardstock by Crafter’s Companion.
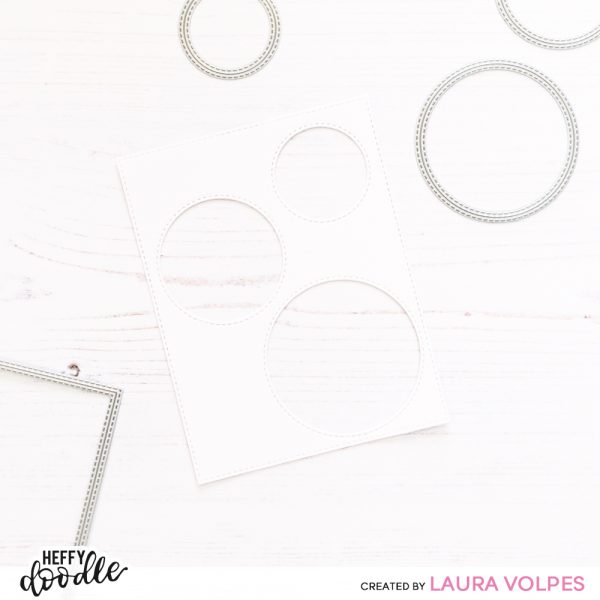
I then used the circular cut outs to create my little scenes. I die cut them with the Grassy Lass dies and super quickly added some color with Distress Oxide Sprays. I used Tumbled Glass on the sky and Cracked Pistachio on the grass.
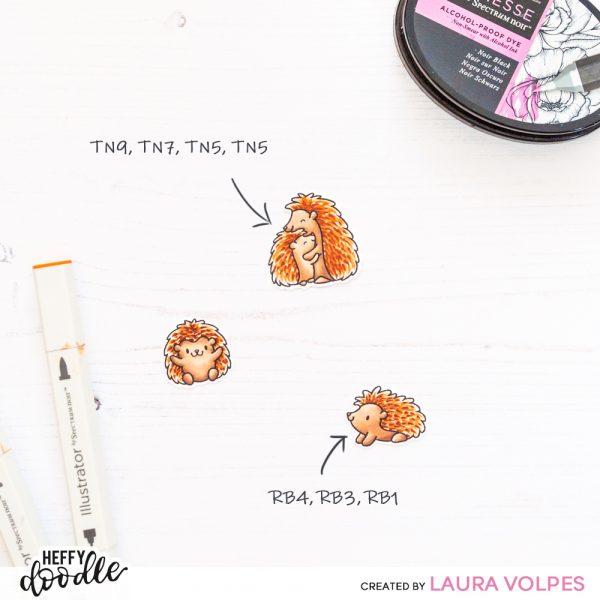
I then moved on and started working on my images. I used the adorable hedgehogs in the Quill You Be Mine stamp set. I stamped them with Spectrum Noir alcohol proof black ink on Neenah Solar White 110lb cardstock and I colored them with my Illustrator markers. You can see which markers I used for the quills and the body in the picture above.
Once the coloring was done, I die cut them with the coordinating dies.
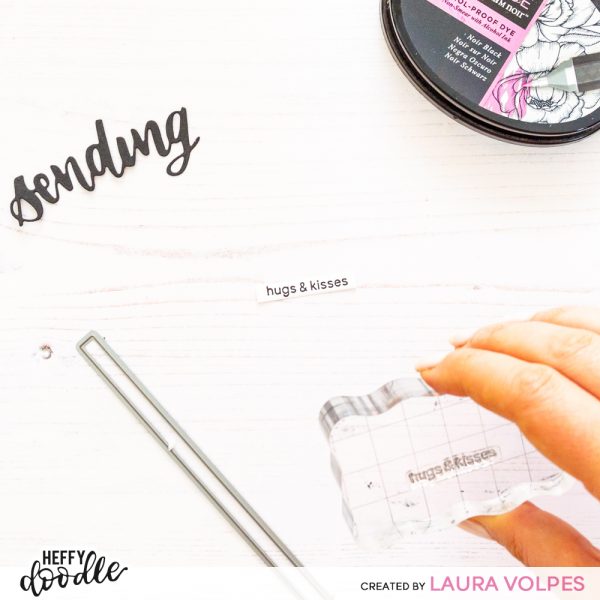
For my sentiment I used the Sending Heffy Cuts and one of the greetings in the Quill You Be Mine stamp set. I also used the Strips of Ease to die cut a banner around the stamped part of the sentiment.
I adhered everything to a card base that I created out of Heffy Doodle heavyweight white cardstock and moved on to the finishing touches.
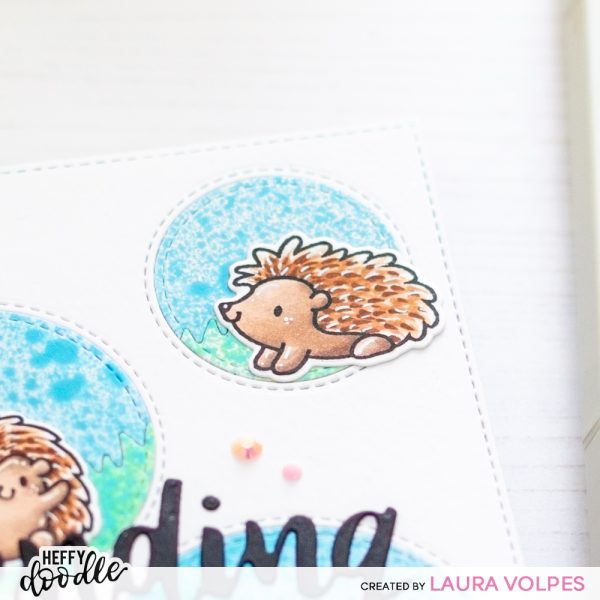
I added some highlights with a white gel pen and decorated the card front with some pink crystals. Notice how we incorporated each little scene, creating an inlaid die cutting effect.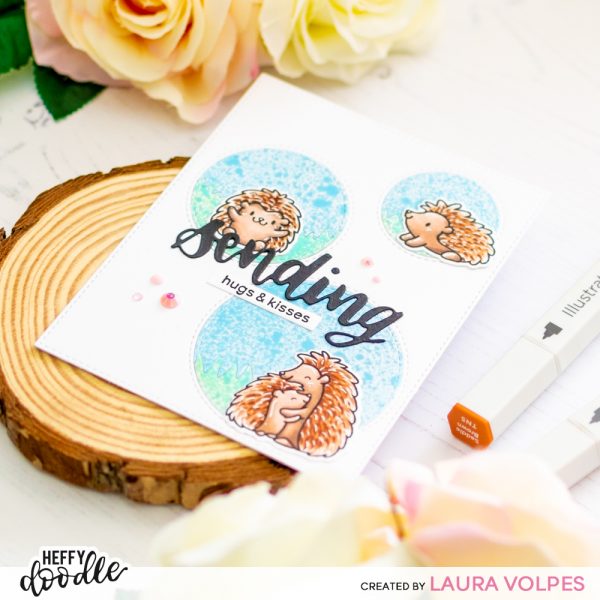
And that’s it for today! I really hope you like the card and found the post inspiring!
Thank you all for stopping by and have a great day!